How to Use Rasberry Pi5: Examples, Pinouts, and Specs
Introduction
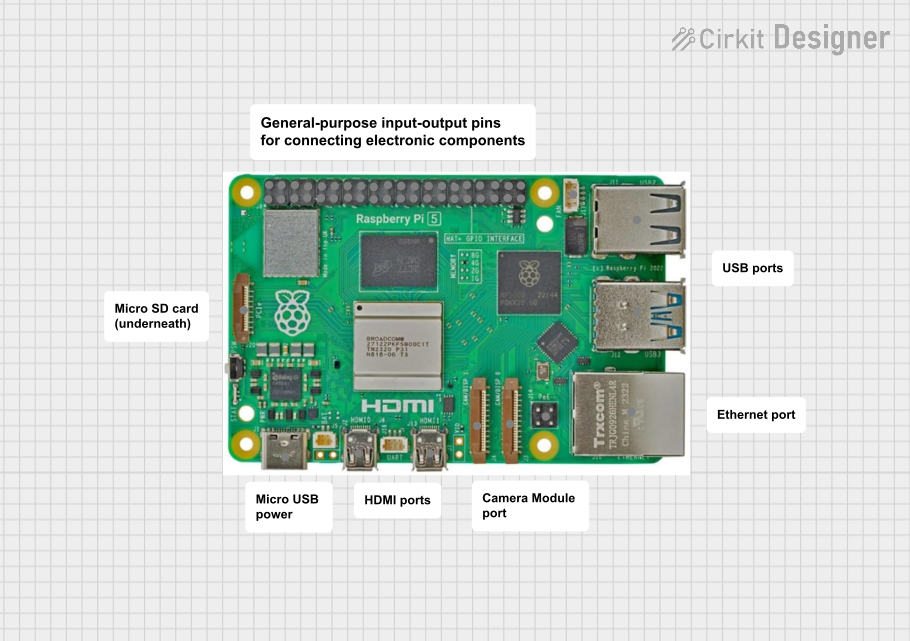
The Raspberry Pi 5 is a compact, affordable single-board computer designed for a wide range of applications. It supports various programming languages, making it an ideal choice for beginners, hobbyists, and professionals alike. With its powerful processing capabilities and versatile GPIO pins, the Raspberry Pi 5 is perfect for projects in electronics, robotics, IoT, and more.
Common applications include:
- Home automation systems
- Media centers and streaming devices
- Robotics and AI projects
- IoT devices and sensors
- Educational tools for learning programming and electronics
Explore Projects Built with Rasberry Pi5

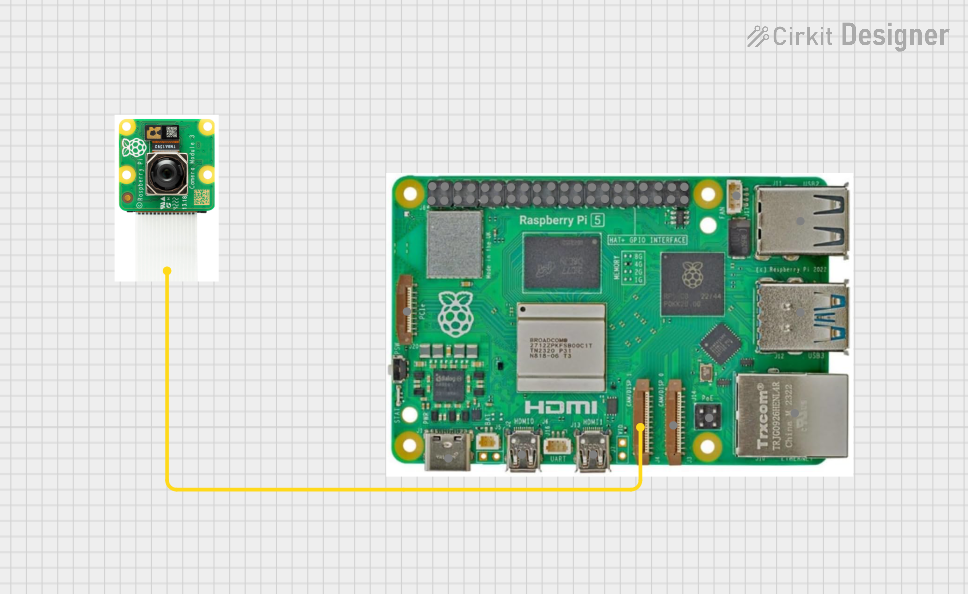
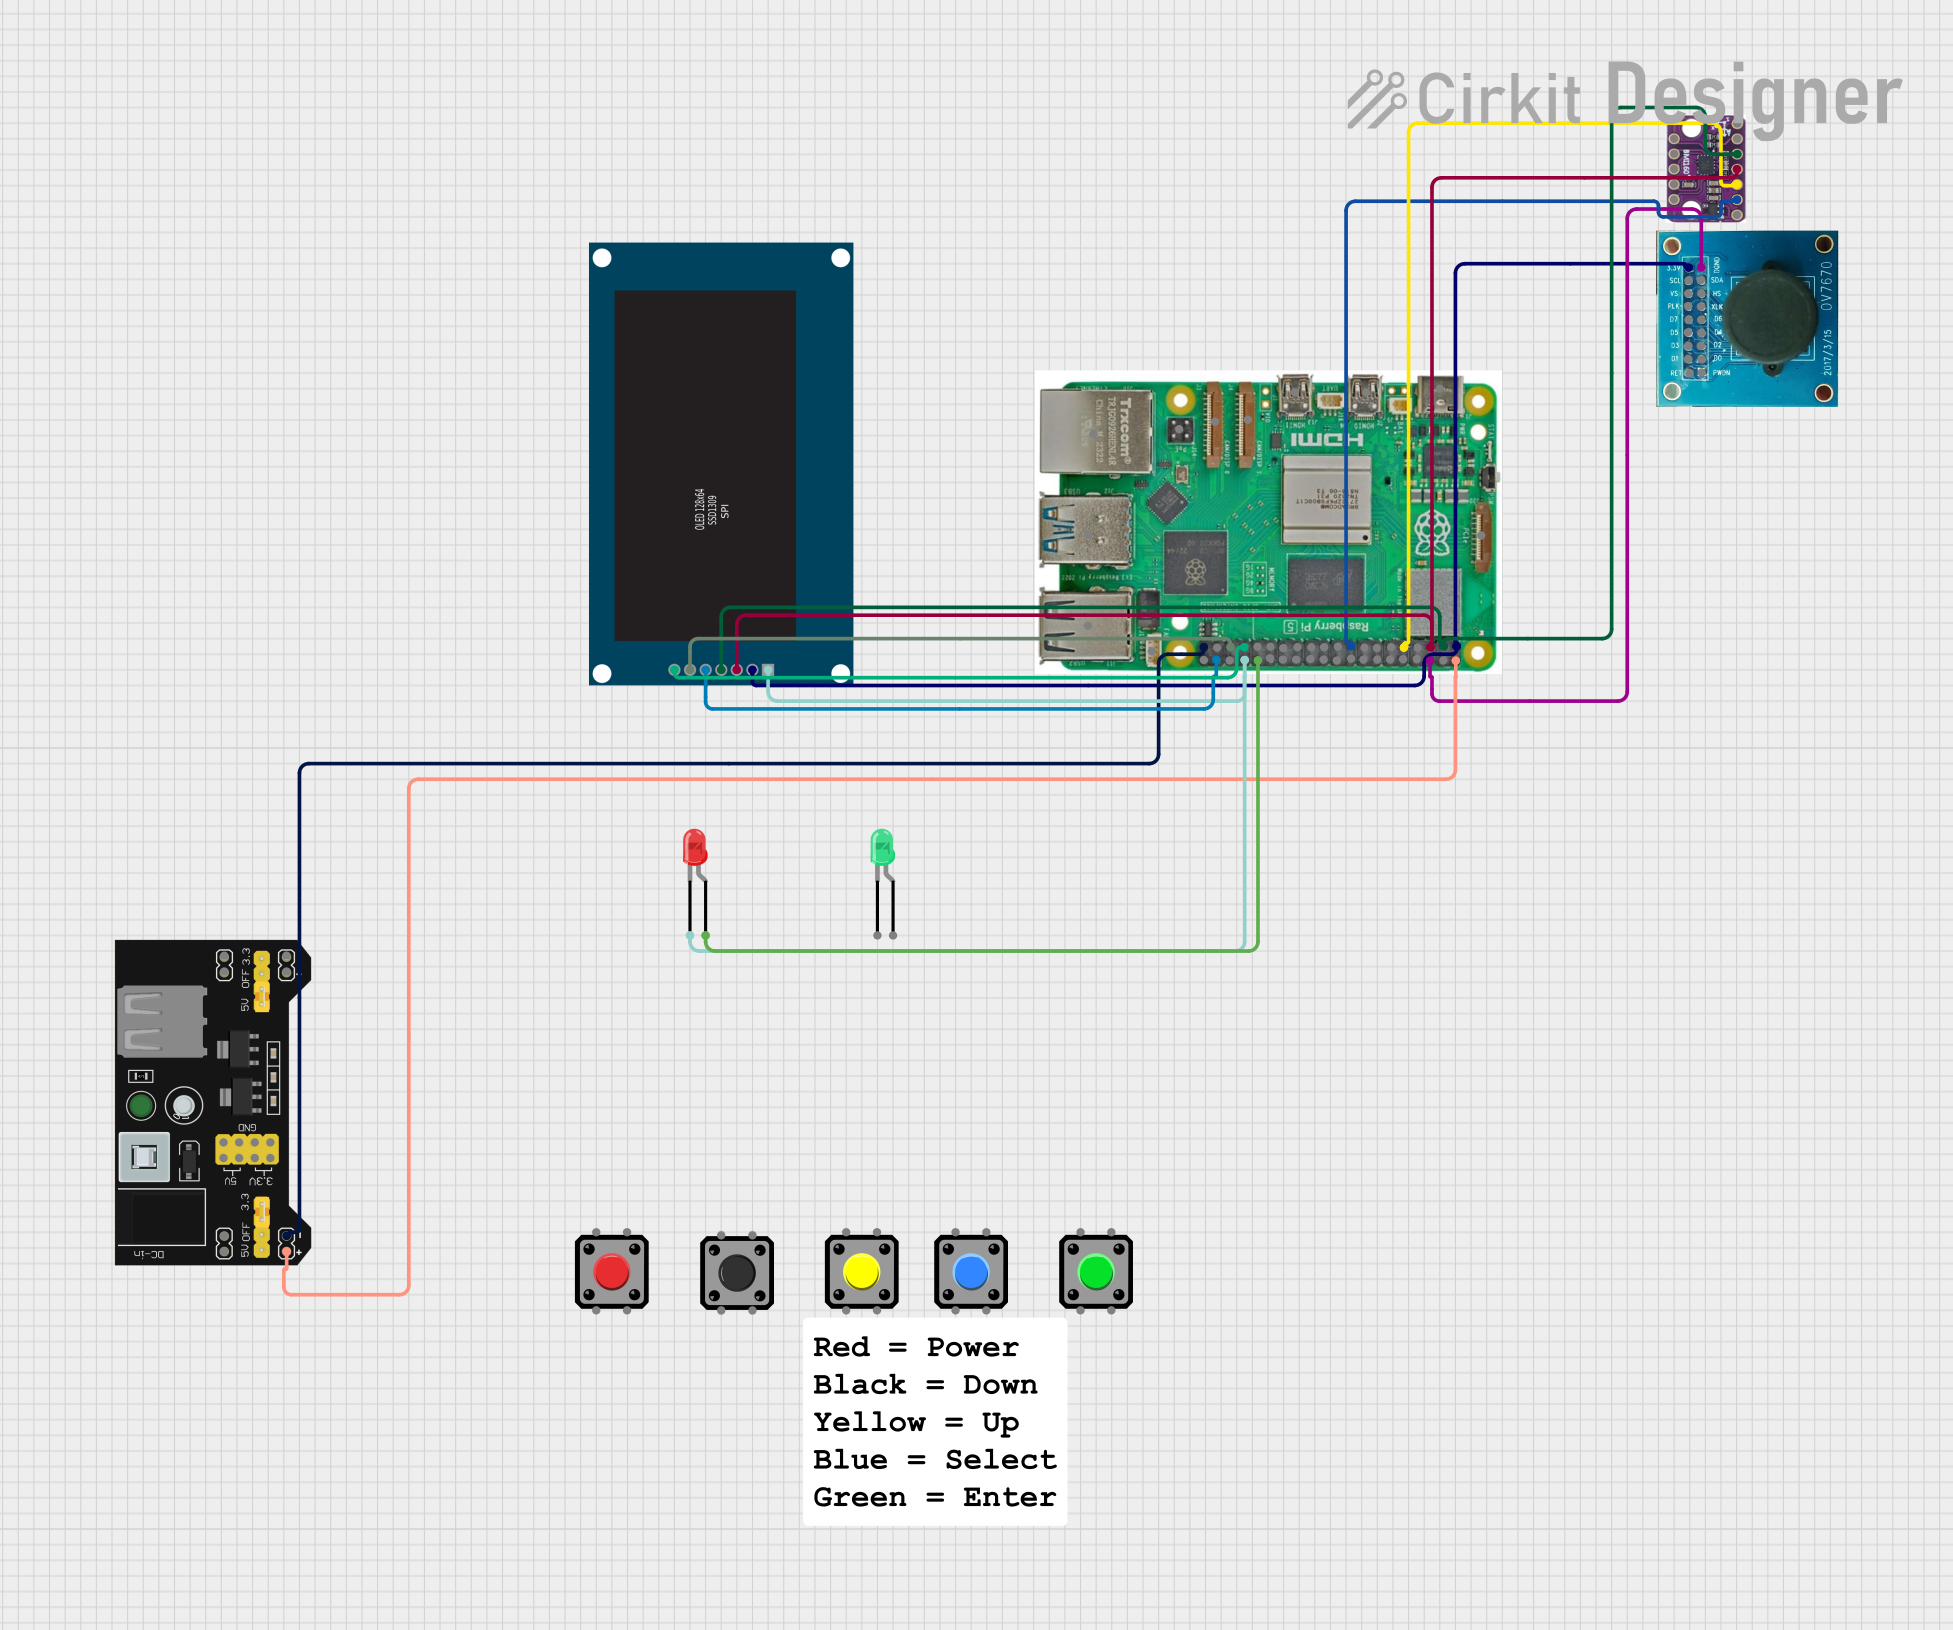
Explore Projects Built with Rasberry Pi5
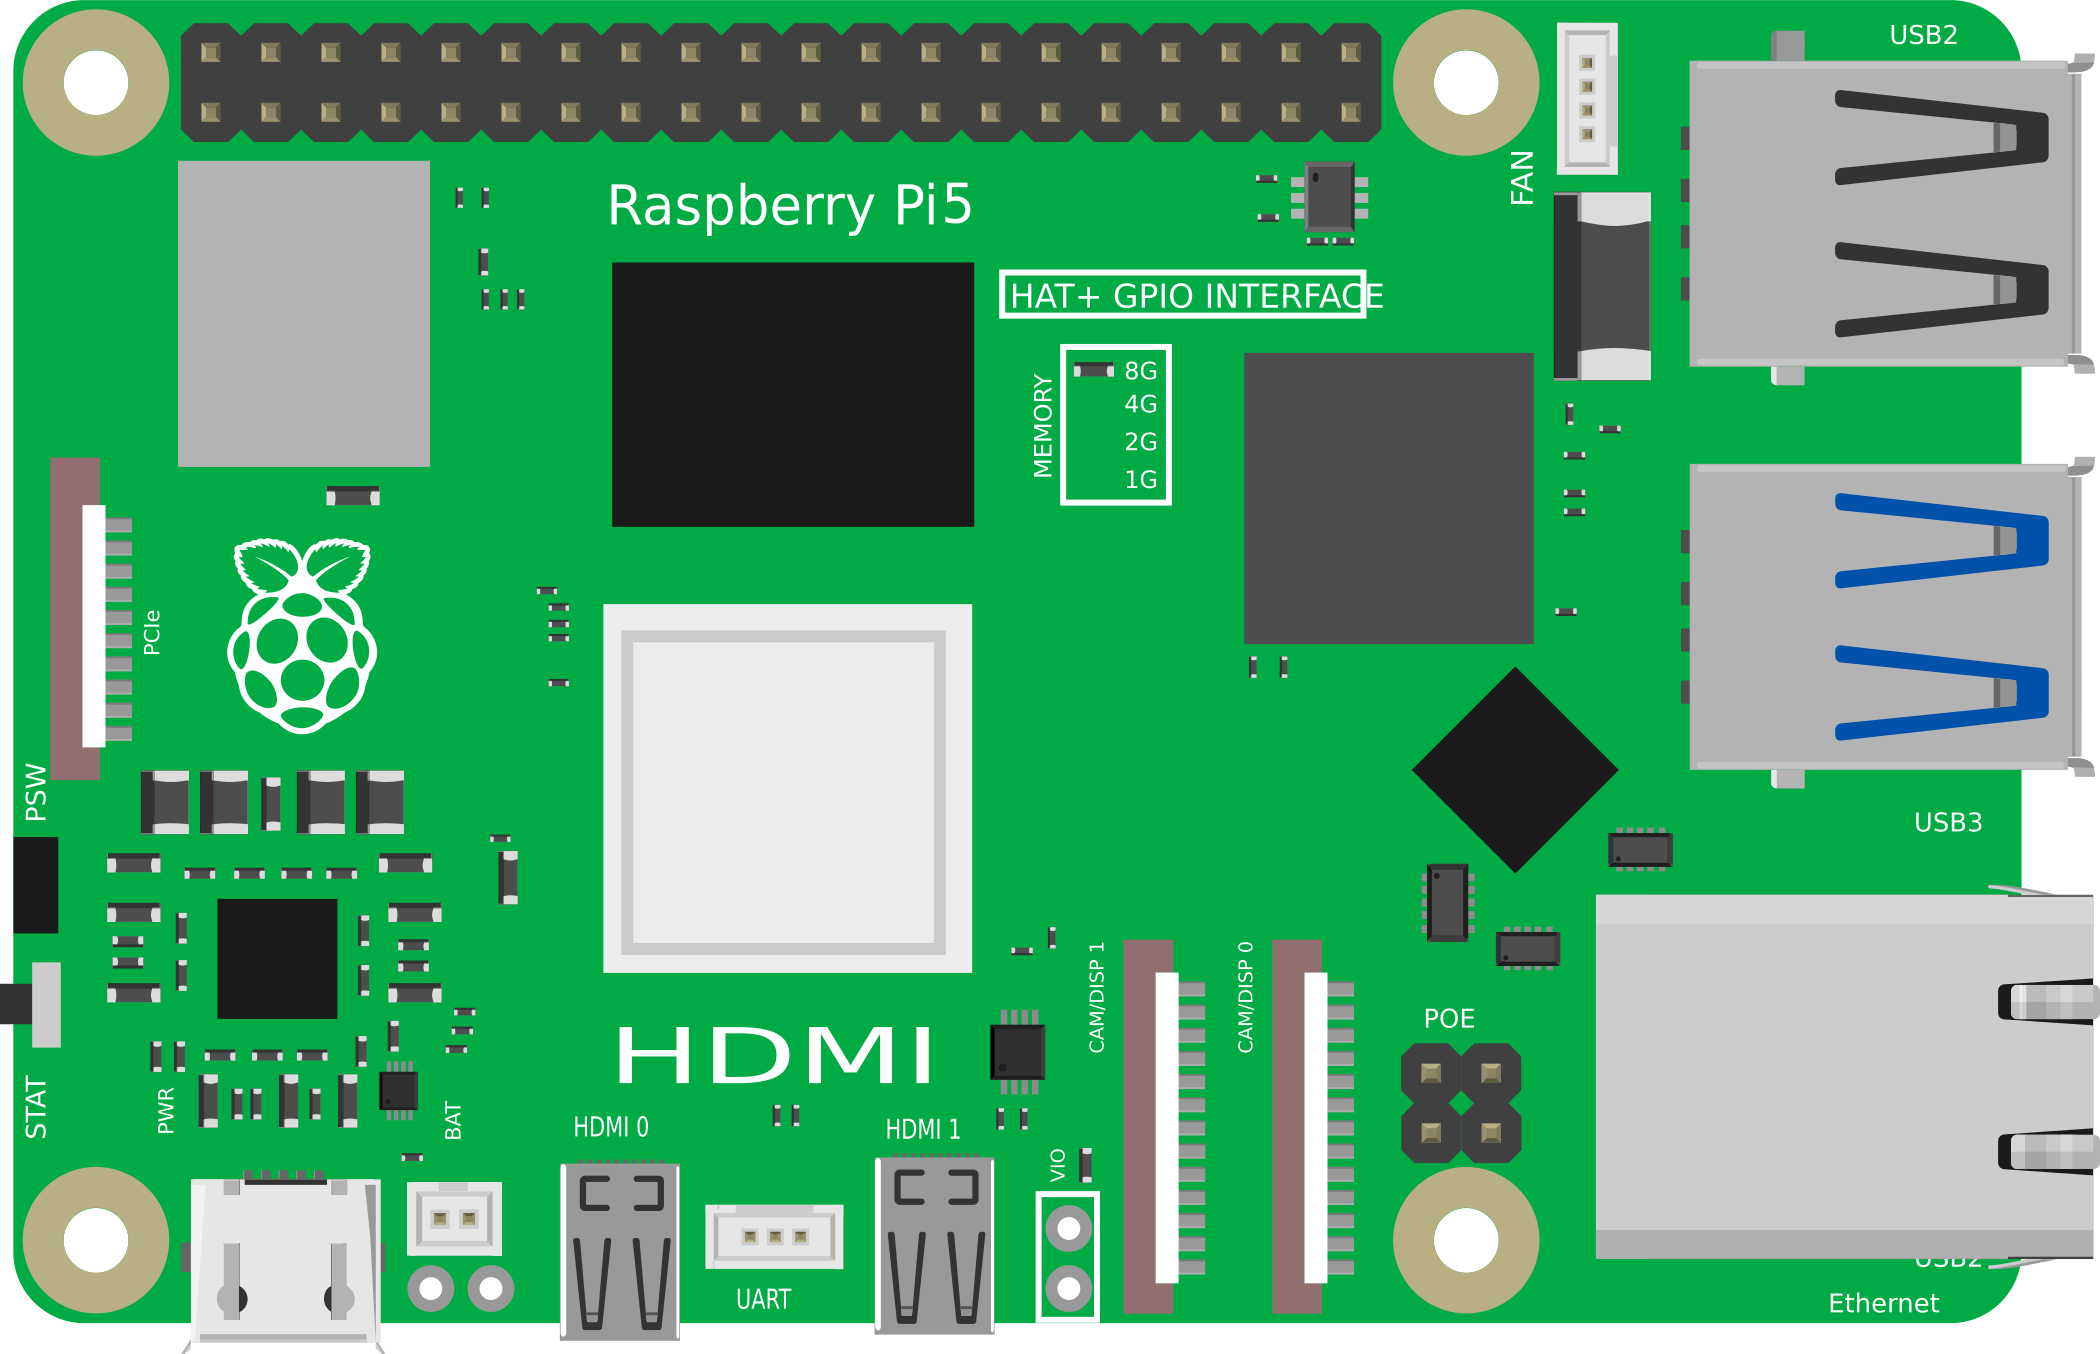
Technical Specifications
The Raspberry Pi 5 offers significant improvements over its predecessors, providing enhanced performance and connectivity options. Below are the key technical details:
General Specifications
| Feature | Specification |
|---|---|
| Processor | Quad-core ARM Cortex-A76 @ 2.4 GHz |
| GPU | VideoCore VII |
| RAM | 4GB or 8GB LPDDR4X |
| Storage | MicroSD card slot, USB 3.0 boot |
| Connectivity | Gigabit Ethernet, Wi-Fi 6, Bluetooth 5.2 |
| USB Ports | 2x USB 3.0, 2x USB 2.0 |
| GPIO Pins | 40-pin header |
| Display Output | 2x micro-HDMI (4K @ 60Hz) |
| Power Supply | USB-C (5V, 5A recommended) |
| Dimensions | 85.6mm x 56.5mm x 17mm |
GPIO Pin Configuration
The Raspberry Pi 5 features a 40-pin GPIO header for interfacing with external components. Below is the pinout:
| Pin Number | Function | Description |
|---|---|---|
| 1 | 3.3V Power | Power supply (3.3V) |
| 2 | 5V Power | Power supply (5V) |
| 3 | GPIO 2 (SDA1) | I2C Data |
| 4 | 5V Power | Power supply (5V) |
| 5 | GPIO 3 (SCL1) | I2C Clock |
| 6 | Ground | Ground |
| 7 | GPIO 4 | General-purpose I/O |
| 8 | GPIO 14 (TXD) | UART Transmit |
| 9 | Ground | Ground |
| 10 | GPIO 15 (RXD) | UART Receive |
| ... | ... | ... |
| 39 | Ground | Ground |
| 40 | GPIO 21 | General-purpose I/O |
For the full GPIO pinout, refer to the official Raspberry Pi documentation.
Usage Instructions
Setting Up the Raspberry Pi 5
- Prepare the MicroSD Card:
- Download the Raspberry Pi OS from the official website.
- Use a tool like Raspberry Pi Imager to flash the OS onto the MicroSD card.
- Connect Peripherals:
- Attach a keyboard, mouse, and monitor via USB and HDMI ports.
- Insert the MicroSD card into the slot.
- Power Up:
- Connect a 5V, 5A USB-C power supply to the Raspberry Pi 5.
- The device will boot into the Raspberry Pi OS.
Using GPIO Pins
The GPIO pins can be used to interface with sensors, LEDs, motors, and other components. Below is an example of controlling an LED using Python:
Import the GPIO library
import RPi.GPIO as GPIO import time
Set up GPIO mode
GPIO.setmode(GPIO.BCM) # Use Broadcom pin numbering GPIO.setwarnings(False)
Define the GPIO pin for the LED
LED_PIN = 18
Set up the LED pin as an output
GPIO.setup(LED_PIN, GPIO.OUT)
Blink the LED
try: while True: GPIO.output(LED_PIN, GPIO.HIGH) # Turn LED on time.sleep(1) # Wait for 1 second GPIO.output(LED_PIN, GPIO.LOW) # Turn LED off time.sleep(1) # Wait for 1 second except KeyboardInterrupt: # Clean up GPIO settings on exit GPIO.cleanup()
Best Practices
- Always use a high-quality power supply to ensure stable operation.
- Avoid connecting components directly to GPIO pins without proper resistors or protection circuits.
- Use a heatsink or fan for cooling during intensive tasks to prevent overheating.
Troubleshooting and FAQs
Common Issues
The Raspberry Pi 5 does not boot:
- Ensure the MicroSD card is properly inserted and contains a valid OS image.
- Check the power supply for sufficient voltage and current.
Wi-Fi or Bluetooth is not working:
- Verify that the correct drivers are installed.
- Ensure the device is within range of the Wi-Fi router or Bluetooth device.
Overheating during operation:
- Attach a heatsink or fan to the Raspberry Pi 5.
- Ensure proper ventilation around the device.
FAQs
Q: Can I power the Raspberry Pi 5 via GPIO pins?
A: Yes, you can power the Raspberry Pi 5 through the 5V and GND GPIO pins, but this is not recommended as it bypasses the onboard power management.
Q: What operating systems are supported?
A: The Raspberry Pi 5 supports Raspberry Pi OS, Ubuntu, and other Linux-based distributions. Some third-party OS options are also available.
Q: Can I use the Raspberry Pi 5 for AI and machine learning?
A: Yes, the Raspberry Pi 5 is powerful enough to run lightweight AI and machine learning models, especially when paired with accelerators like the Coral USB Accelerator.
For additional support, refer to the official Raspberry Pi forums and documentation.