How to Use tp5000 type c: Examples, Pinouts, and Specs
Introduction
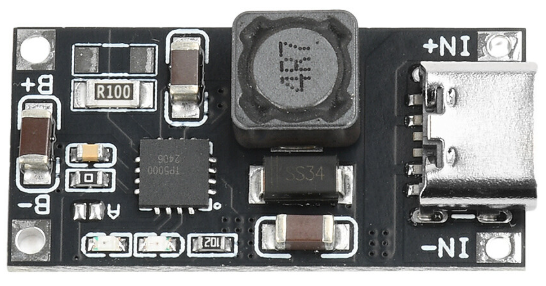
The TP5000 Type C is a high-efficiency power management integrated circuit (IC) designed for charging and power delivery applications. It supports USB Type-C connectivity, making it versatile for modern power input and output requirements. This IC is widely used in lithium-ion battery charging systems, portable devices, and other applications requiring efficient and reliable power management.
Explore Projects Built with tp5000 type c


Explore Projects Built with tp5000 type c
Common Applications
- Lithium-ion and lithium-polymer battery charging
- USB Type-C power delivery systems
- Portable electronics and wearable devices
- Power banks and backup power systems
- IoT devices requiring compact and efficient charging solutions
Technical Specifications
The TP5000 Type C offers robust performance and flexibility for various power management needs. Below are its key technical details:
Key Specifications
| Parameter | Value |
|---|---|
| Input Voltage Range | 4.5V to 9V |
| Charging Current | Up to 2A |
| Battery Voltage Support | 3.6V to 4.2V (single-cell Li-ion) |
| Efficiency | Up to 92% |
| USB Type-C Compatibility | Yes |
| Operating Temperature Range | -40°C to +85°C |
| Package Type | SOP-8 |
Pin Configuration and Descriptions
The TP5000 Type C comes in an SOP-8 package with the following pinout:
| Pin Number | Pin Name | Description |
|---|---|---|
| 1 | VIN | Input voltage pin. Connect to the USB Type-C power source. |
| 2 | GND | Ground pin. Connect to the system ground. |
| 3 | BAT | Battery connection pin. Connect to the positive terminal of the battery. |
| 4 | CHRG | Charging status indicator. Low when charging, high when charging is done. |
| 5 | DONE | Charge completion indicator. High when charging is complete. |
| 6 | ISET | Current setting pin. Connect a resistor to set the charging current. |
| 7 | TEMP | Temperature monitoring pin. Connect to an NTC thermistor for safety. |
| 8 | EN | Enable pin. High to enable charging, low to disable. |
Usage Instructions
The TP5000 Type C is straightforward to use in charging circuits. Below are the steps and considerations for integrating it into your design:
Basic Circuit Setup
- Power Input: Connect the VIN pin to a USB Type-C power source (4.5V to 9V).
- Battery Connection: Connect the BAT pin to the positive terminal of the lithium-ion battery. Ensure the battery voltage is within the supported range (3.6V to 4.2V).
- Grounding: Connect the GND pin to the system ground.
- Current Setting: Use a resistor on the ISET pin to set the desired charging current. Refer to the datasheet for the resistor value calculation.
- Temperature Monitoring: Connect an NTC thermistor to the TEMP pin for battery temperature monitoring. This ensures safe charging.
- Enable Charging: Pull the EN pin high to enable charging. Pull it low to disable charging.
Important Considerations
- Thermal Management: Ensure proper heat dissipation, especially when charging at high currents. Use a heat sink or place the IC on a PCB with good thermal conductivity.
- Battery Protection: Use a protection circuit to prevent overcharging or deep discharge of the battery.
- USB Type-C Compliance: Ensure the power source complies with USB Type-C standards for safe operation.
Example: Using TP5000 Type C with Arduino UNO
The TP5000 Type C can be monitored using an Arduino UNO to check the charging status. Below is an example code snippet:
// TP5000 Type C Charging Status Monitoring with Arduino UNO
// Connect CHRG pin to Arduino pin 2 and DONE pin to Arduino pin 3

#define CHRG_PIN 2  // Pin connected to CHRG (charging status)
#define DONE_PIN 3  // Pin connected to DONE (charge completion)

void setup() {
  pinMode(CHRG_PIN, INPUT);  // Set CHRG pin as input
  pinMode(DONE_PIN, INPUT);  // Set DONE pin as input
  Serial.begin(9600);        // Initialize serial communication
}

void loop() {
  int chargingStatus = digitalRead(CHRG_PIN);  // Read CHRG pin
  int doneStatus = digitalRead(DONE_PIN);      // Read DONE pin

  if (chargingStatus == LOW) {
    Serial.println("Charging in progress...");
  } else if (doneStatus == HIGH) {
    Serial.println("Charging complete!");
  } else {
    Serial.println("No charging activity detected.");
  }

  delay(1000);  // Wait for 1 second before checking again
}
Notes:
- Ensure proper connections between the TP5000 Type C and the Arduino UNO.
- Use pull-up resistors on the CHRG and DONE pins if required.
Troubleshooting and FAQs
Common Issues and Solutions
No Charging Activity
- Cause: Incorrect VIN or BAT connections.
- Solution: Verify the input voltage and battery connections. Ensure the battery voltage is within the supported range.
Overheating
- Cause: High charging current or insufficient heat dissipation.
- Solution: Reduce the charging current by adjusting the ISET resistor. Improve thermal management with a heat sink or better PCB design.
Charging Does Not Complete
- Cause: Faulty battery or incorrect DONE pin connection.
- Solution: Check the battery health and ensure the DONE pin is properly connected.
Temperature Fault
- Cause: NTC thermistor not connected or out of range.
- Solution: Verify the thermistor connection and ensure it matches the recommended specifications.
FAQs
Q: Can the TP5000 Type C charge multiple batteries in series?
A: No, the TP5000 Type C is designed for single-cell lithium-ion or lithium-polymer batteries only.
Q: What happens if the input voltage exceeds 9V?
A: The IC may be damaged. Always ensure the input voltage is within the specified range (4.5V to 9V).
Q: Can I use the TP5000 Type C without a thermistor?
A: While it is possible, it is not recommended. The thermistor ensures safe charging by monitoring the battery temperature.
Q: How do I calculate the ISET resistor value?
A: Refer to the TP5000 datasheet for the formula to calculate the resistor value based on the desired charging current.
This concludes the documentation for the TP5000 Type C. For further details, consult the official datasheet or contact the manufacturer.