Cirkit Designer Logo
Cirkit Designer
Your all-in-one circuit design IDE
Home / 
Component Documentation

How to Use atmega328p xplained mini: Examples, Pinouts, and Specs

Image of atmega328p xplained mini
Cirkit Designer LogoDesign with atmega328p xplained mini in Cirkit Designer

Introduction

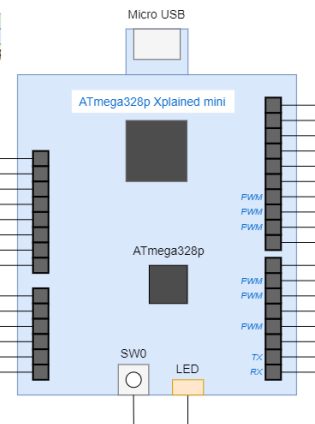
The ATmega328P Xplained Mini is a microcontroller board based on the ATmega328P, which is the same microcontroller found in the popular Arduino Uno. This development board is designed by Microchip and provides a compact and cost-effective solution for prototyping and developing applications with the ATmega328P MCU. It is equipped with essential features such as on-board buttons, LEDs, and various interfaces, making it suitable for a wide range of applications from simple hobbyist projects to more complex embedded systems.

Explore Projects Built with atmega328p xplained mini

Use Cirkit Designer to design, explore, and prototype these projects online. Some projects support real-time simulation. Click "Open Project" to start designing instantly!
ATmega328P-Based Obstacle Avoidance Robot with Bluetooth Interface and Ultrasonic Sensors
Image of carproject_ESE_group_2: A project utilizing atmega328p xplained mini in a practical application
This circuit features an ATmega328P microcontroller interfaced with multiple sensors and actuators. It includes two HC-SR04 ultrasonic distance sensors for measuring distances, a TCRT 5000 IR sensor for detecting reflective surfaces, and an I2C LCD screen for display purposes. The circuit also controls four DC gearmotors through an L298N motor driver, receives commands via an HC-06 Bluetooth module, and is powered by a 12V battery.
Cirkit Designer LogoOpen Project in Cirkit Designer
Battery-Powered Line Following Robot with ATmega328P and L298N Motor Driver
Image of Arduino-Controlled Line Following Robot with Dual DC Motors and L298N Driver: A project utilizing atmega328p xplained mini in a practical application
This circuit is a line-following robot controller. It uses a Nano 3.0 ATmega328P microcontroller to read inputs from a line sensor and control two DC motors via an L298N motor driver. Power is supplied by a 9V battery regulated through an XL4015 DC buck converter.
Cirkit Designer LogoOpen Project in Cirkit Designer
ATmega328P-Based Sensor Hub with OLED Display and LIDAR
Image of TILTPCB: A project utilizing atmega328p xplained mini in a practical application
This circuit features an Mtiny Uno ATmega328P microcontroller as its central processing unit, interfacing with a variety of sensors and peripherals. It includes a 0.96" OLED display and an MPU6050 accelerometer/gyroscope for user interface and motion sensing, respectively. The circuit also integrates a TF LUNA LIDAR for distance measurement, a DHT11 sensor for temperature and humidity readings, and uses a 9V battery with a 7805 voltage regulator for power management. Communication with a computer for programming and data exchange is facilitated by an Adafruit FTDI Friend module.
Cirkit Designer LogoOpen Project in Cirkit Designer
I2C-Controlled OLED Display with External EEPROM and Interactive Pushbuttons
Image of godmode: A project utilizing atmega328p xplained mini in a practical application
This is a microcontroller-based interactive device featuring a Wemos D1 Mini, an OLED display, external EEPROM, and an I/O expander. It includes user input buttons and status LEDs, with potential MIDI interface capabilities.
Cirkit Designer LogoOpen Project in Cirkit Designer

Explore Projects Built with atmega328p xplained mini

Use Cirkit Designer to design, explore, and prototype these projects online. Some projects support real-time simulation. Click "Open Project" to start designing instantly!
Image of carproject_ESE_group_2: A project utilizing atmega328p xplained mini in a practical application
ATmega328P-Based Obstacle Avoidance Robot with Bluetooth Interface and Ultrasonic Sensors
This circuit features an ATmega328P microcontroller interfaced with multiple sensors and actuators. It includes two HC-SR04 ultrasonic distance sensors for measuring distances, a TCRT 5000 IR sensor for detecting reflective surfaces, and an I2C LCD screen for display purposes. The circuit also controls four DC gearmotors through an L298N motor driver, receives commands via an HC-06 Bluetooth module, and is powered by a 12V battery.
Cirkit Designer LogoOpen Project in Cirkit Designer
Image of Arduino-Controlled Line Following Robot with Dual DC Motors and L298N Driver: A project utilizing atmega328p xplained mini in a practical application
Battery-Powered Line Following Robot with ATmega328P and L298N Motor Driver
This circuit is a line-following robot controller. It uses a Nano 3.0 ATmega328P microcontroller to read inputs from a line sensor and control two DC motors via an L298N motor driver. Power is supplied by a 9V battery regulated through an XL4015 DC buck converter.
Cirkit Designer LogoOpen Project in Cirkit Designer
Image of TILTPCB: A project utilizing atmega328p xplained mini in a practical application
ATmega328P-Based Sensor Hub with OLED Display and LIDAR
This circuit features an Mtiny Uno ATmega328P microcontroller as its central processing unit, interfacing with a variety of sensors and peripherals. It includes a 0.96" OLED display and an MPU6050 accelerometer/gyroscope for user interface and motion sensing, respectively. The circuit also integrates a TF LUNA LIDAR for distance measurement, a DHT11 sensor for temperature and humidity readings, and uses a 9V battery with a 7805 voltage regulator for power management. Communication with a computer for programming and data exchange is facilitated by an Adafruit FTDI Friend module.
Cirkit Designer LogoOpen Project in Cirkit Designer
Image of godmode: A project utilizing atmega328p xplained mini in a practical application
I2C-Controlled OLED Display with External EEPROM and Interactive Pushbuttons
This is a microcontroller-based interactive device featuring a Wemos D1 Mini, an OLED display, external EEPROM, and an I/O expander. It includes user input buttons and status LEDs, with potential MIDI interface capabilities.
Cirkit Designer LogoOpen Project in Cirkit Designer

Common Applications and Use Cases

  • DIY electronics projects
  • Educational purposes for learning embedded systems
  • Prototyping IoT devices
  • Building automation and control systems
  • Developing battery-operated devices

Technical Specifications

Key Technical Details

  • Microcontroller: ATmega328P
  • Operating Voltage: 1.8V - 5.5V
  • Clock Speed: Up to 20MHz
  • Flash Memory: 32KB (of which 0.5KB used by bootloader)
  • SRAM: 2KB
  • EEPROM: 1KB
  • I/O Pins: 23 programmable I/O lines
  • Analog Input Pins: 6
  • PWM Output: 6
  • UART: 1
  • SPI: 1
  • I2C: 1
  • External Interrupts: 2

Pin Configuration and Descriptions

Pin Number Pin Name Description
1 PC6 Reset
2 PD0 RXD, UART
3 PD1 TXD, UART
4 PD2 INT0
5 PD3 INT1, PWM
... ... ...
28 PC5 ADC5/SCL

Note: This table is not exhaustive and only includes a selection of pins for illustration.

Usage Instructions

How to Use the Component in a Circuit

  1. Powering the Board: Ensure that the board is powered with a stable voltage source within the operating voltage range (1.8V - 5.5V).
  2. Programming the Board: The ATmega328P Xplained Mini can be programmed via the on-board mini-USB connector using the AVRDUDE tool or through the Arduino IDE with an external programmer.
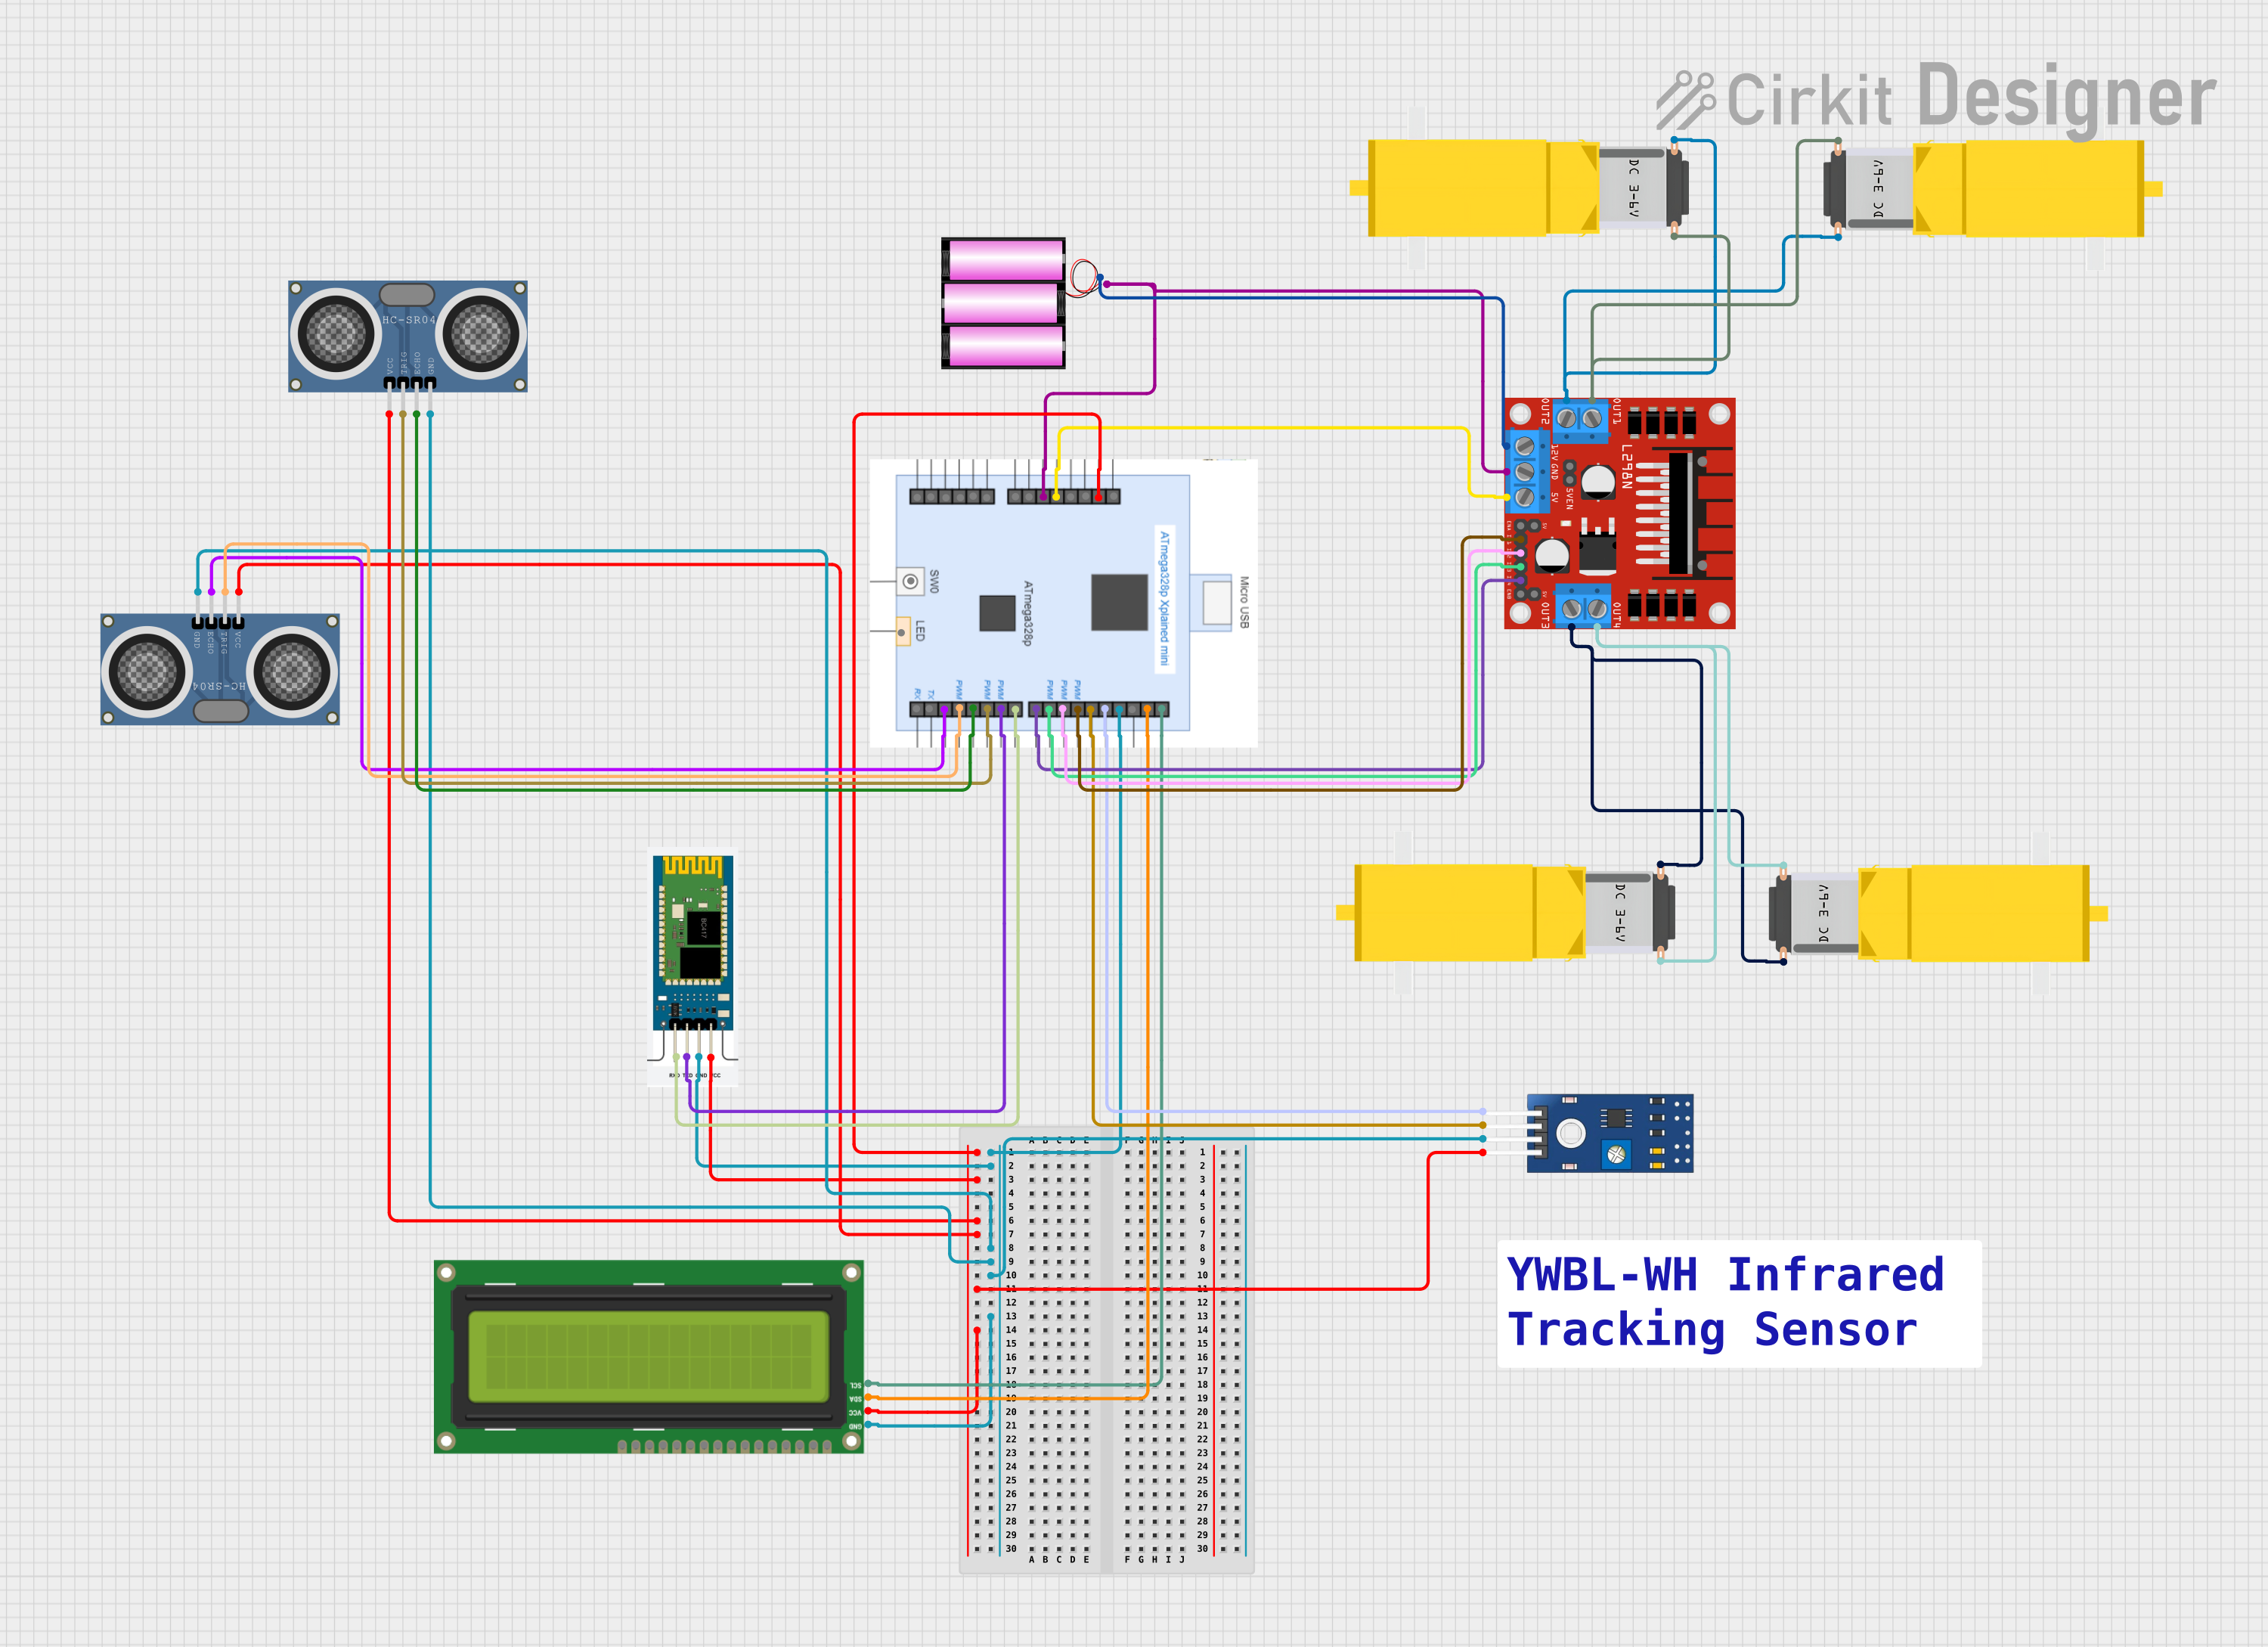
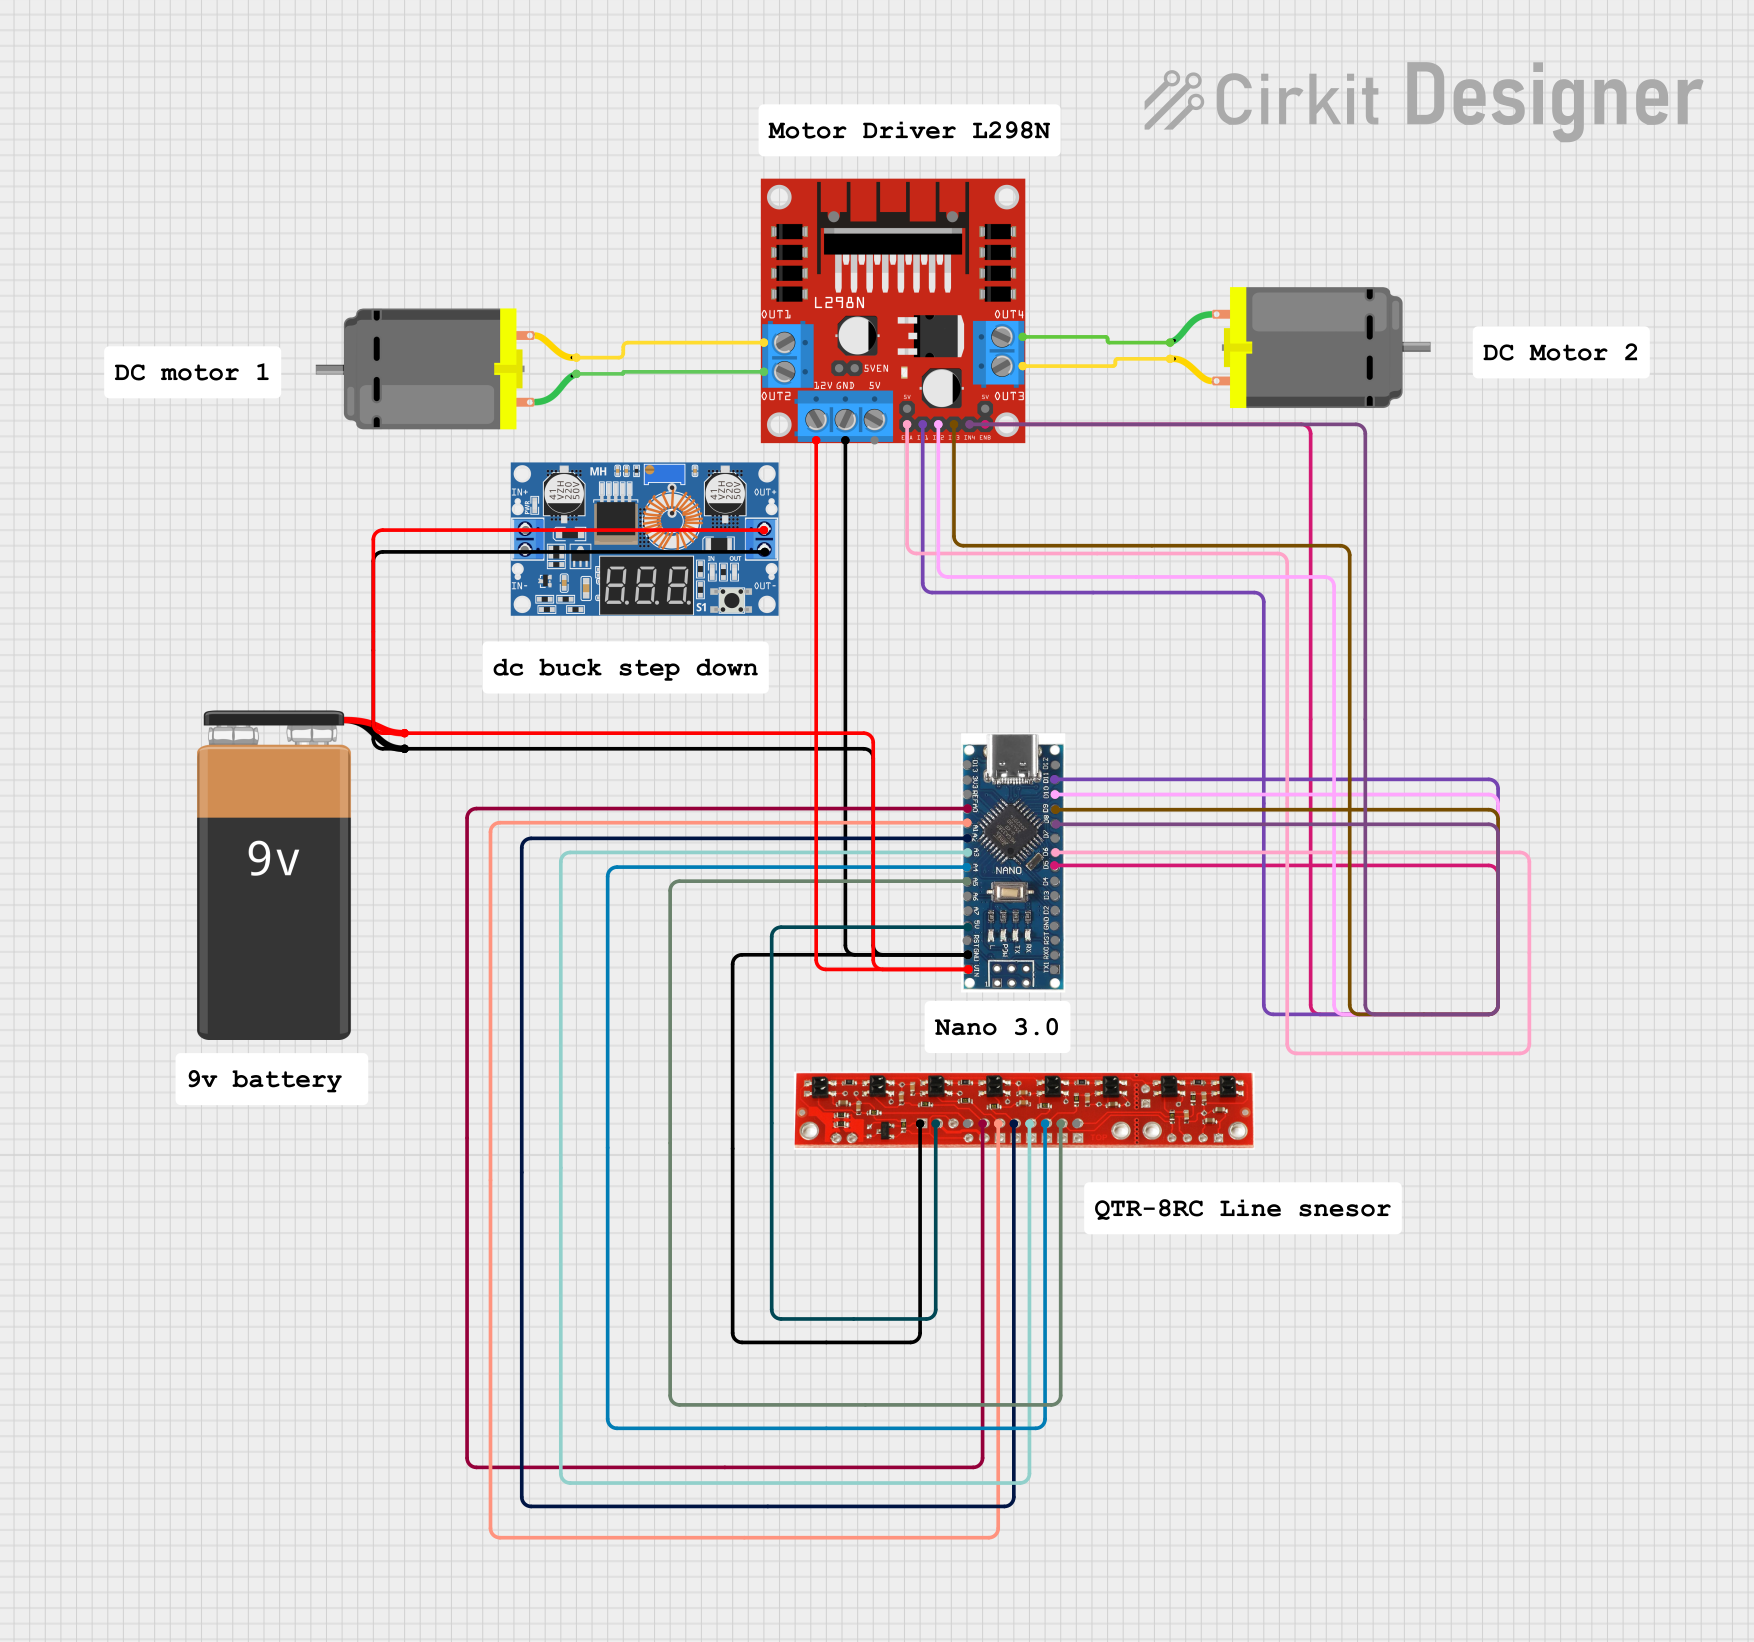
  3. Connecting Peripherals: Utilize the I/O pins to connect sensors, actuators, and other peripherals as required for your application.

Important Considerations and Best Practices

  • Always check the pinout and datasheet before connecting external components to avoid damage.
  • Use current-limiting resistors with LEDs and other sensitive components.
  • When using analog inputs, ensure that the voltage does not exceed the reference voltage.
  • Avoid exposing the board to static electricity or physical stress.

Troubleshooting and FAQs

Common Issues Users Might Face

  • Board not recognized by computer: Ensure that the drivers are installed correctly and the USB cable is functioning.
  • Unable to upload sketches: Check the selected board and port in the Arduino IDE or the configuration in AVRDUDE.
  • Incorrect behavior of peripherals: Verify the connections and ensure that the code corresponds to the correct pins and settings.

Solutions and Tips for Troubleshooting

  • If the board is not recognized, try using a different USB port or cable.
  • Double-check the bootloader and fuse settings if you have trouble uploading sketches.
  • Use a multimeter to check for continuity and correct voltages at various points in the circuit.

Example Code for Arduino UNO

// Blink an LED connected to pin 13 of the ATmega328P Xplained Mini

void setup() {
  // Set pin 13 as an output
  pinMode(13, OUTPUT);
}

void loop() {
  digitalWrite(13, HIGH);   // Turn the LED on
  delay(1000);              // Wait for a second
  digitalWrite(13, LOW);    // Turn the LED off
  delay(1000);              // Wait for a second
}

Note: The above code is written for the Arduino IDE. Ensure that the ATmega328P Xplained Mini is selected as the board, and the correct programmer is chosen before uploading.

Code Comments

  • pinMode(13, OUTPUT); sets pin 13 as an output pin.
  • digitalWrite(13, HIGH); turns the LED on by supplying 5V to pin 13.
  • delay(1000); pauses the program for 1000 milliseconds (1 second).
  • digitalWrite(13, LOW); turns the LED off by setting pin 13 to 0V.

This documentation provides an overview of the ATmega328P Xplained Mini development board, its technical specifications, usage instructions, troubleshooting tips, and a simple example code for getting started. For more detailed information, refer to the official datasheet and user guide provided by Microchip.