Cirkit Designer
Your all-in-one circuit design IDE
Home /
Component Documentation
How to Use ultrasonic sensor: Examples, Pinouts, and Specs
Introduction
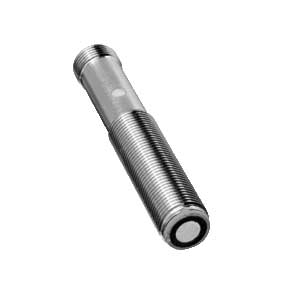
The Omron Ultrasonic Sensor is a device that measures distance by emitting ultrasonic waves and measuring the time it takes for the echo to return. This sensor is widely used in various applications, including robotics, automation, and distance measurement systems. Its ability to provide accurate distance measurements makes it an essential component in many electronic projects.
Explore Projects Built with ultrasonic sensor
Arduino UNO Based Ultrasonic Distance Measurement with HC-SR04 and Bluetooth Communication via HC-05
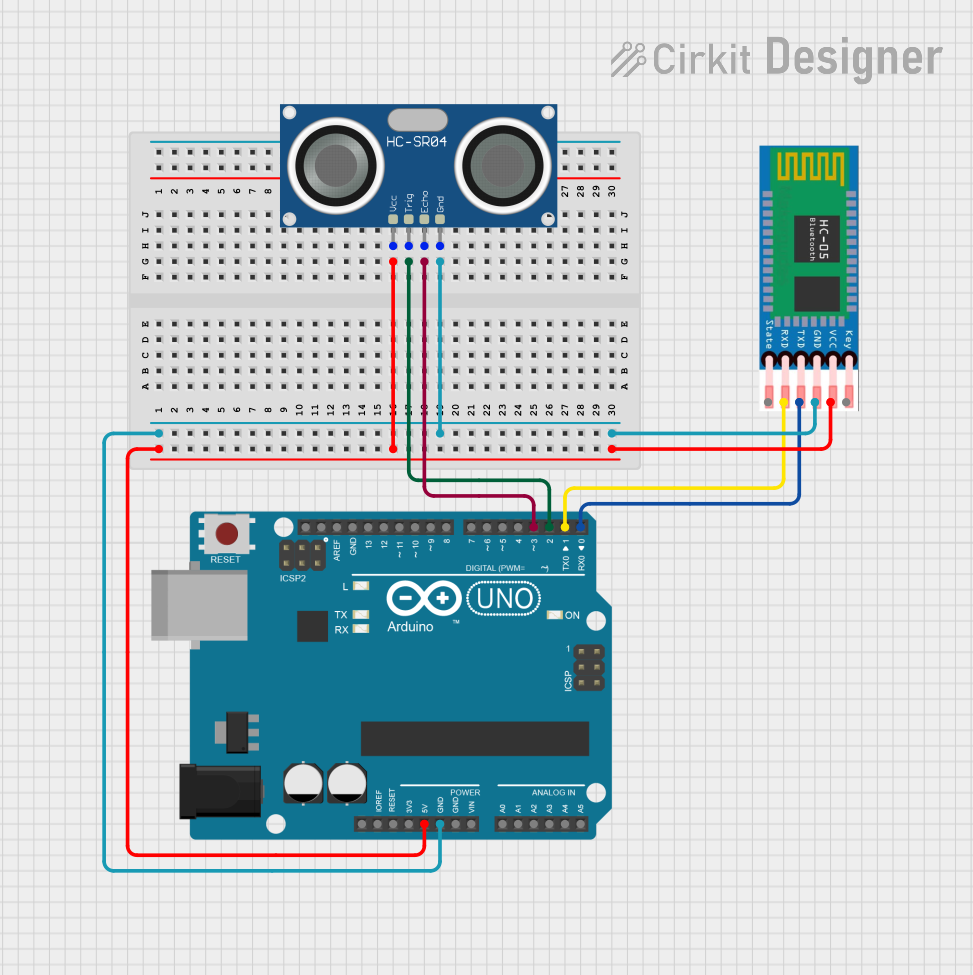
This circuit features an Arduino UNO microcontroller interfaced with an HC-SR04 Ultrasonic Sensor and an HC-05 Bluetooth module. The Arduino is configured to trigger the ultrasonic sensor to measure distance and communicate the data wirelessly via the HC-05 module. Power is supplied to both the sensor and the Bluetooth module from the Arduino's 5V output, and ground connections are shared among all components.
Arduino UNO Based Ultrasonic Radar System with Servo Motor
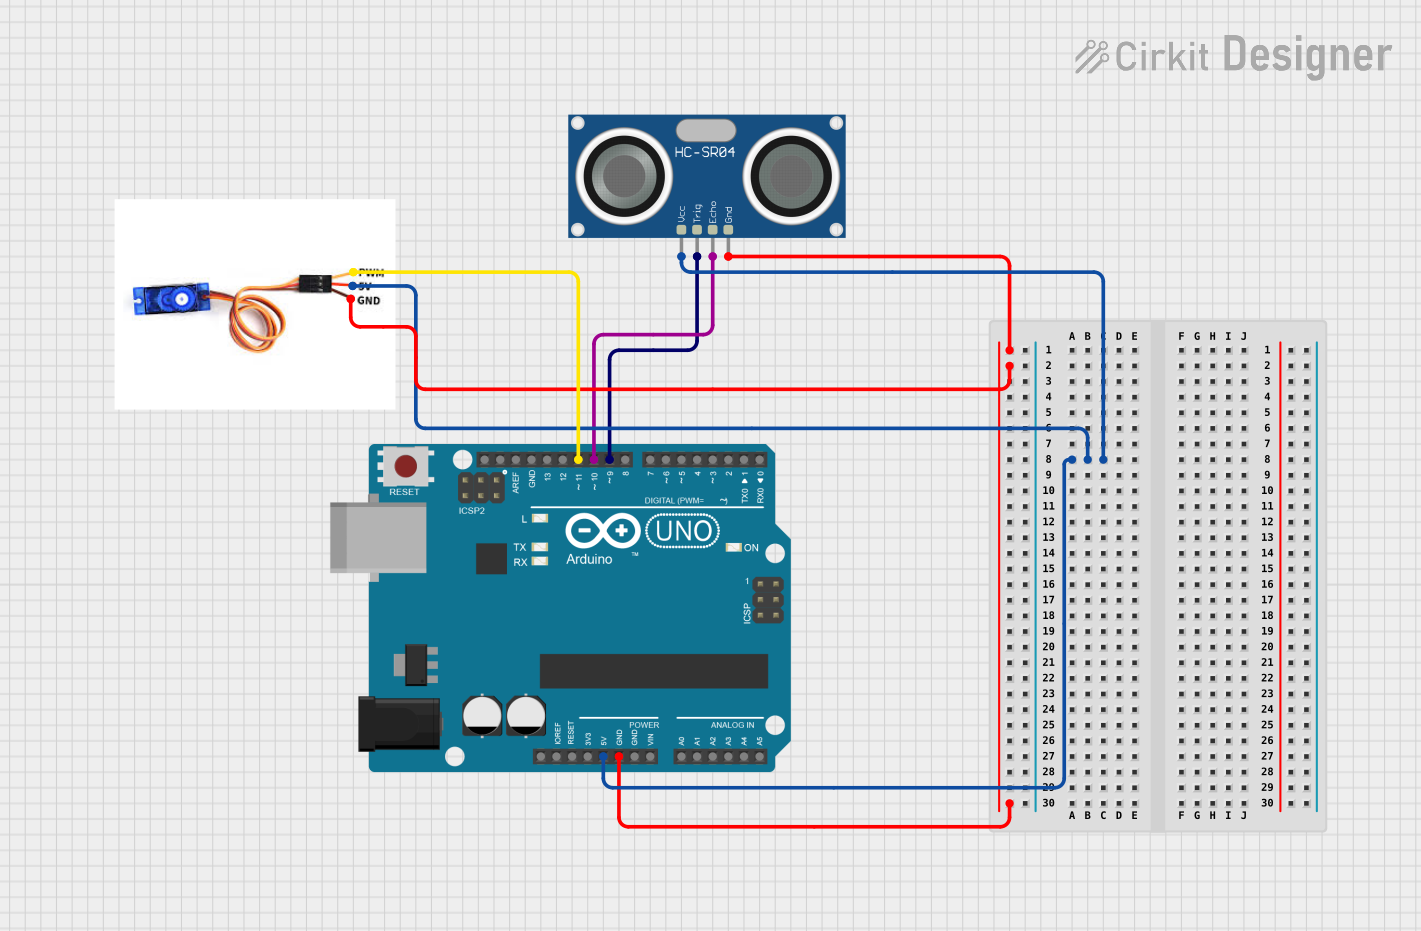
This circuit is designed to function as an ultrasonic radar system, utilizing an Arduino UNO microcontroller, an HC-SR04 ultrasonic sensor, and an SG90 servo motor. The Arduino controls the servo to sweep the ultrasonic sensor through a range of angles, while the sensor measures the distance to any objects in its path. The system outputs the angle and distance measurements to the serial monitor and provides an indication when an obstacle is detected within 20 cm.
Arduino UNO-Based Ultrasonic Distance Measurement with Bluetooth Interface and Visual Feedback

This circuit features an Arduino UNO microcontroller interfaced with an HC-SR04 ultrasonic sensor, a red LED with a series resistor, a buzzer, an I2C LCD 16x2 screen, and an HC-05 Bluetooth module. The ultrasonic sensor is likely used for distance measurement, with the Arduino controlling the LED and buzzer as indicators, displaying information on the LCD screen, and potentially communicating data wirelessly via the HC-05 Bluetooth module. The provided code skeleton suggests that the specific functionalities are yet to be implemented.
Arduino-Controlled Robotic Vehicle with Ultrasonic and IR Sensors
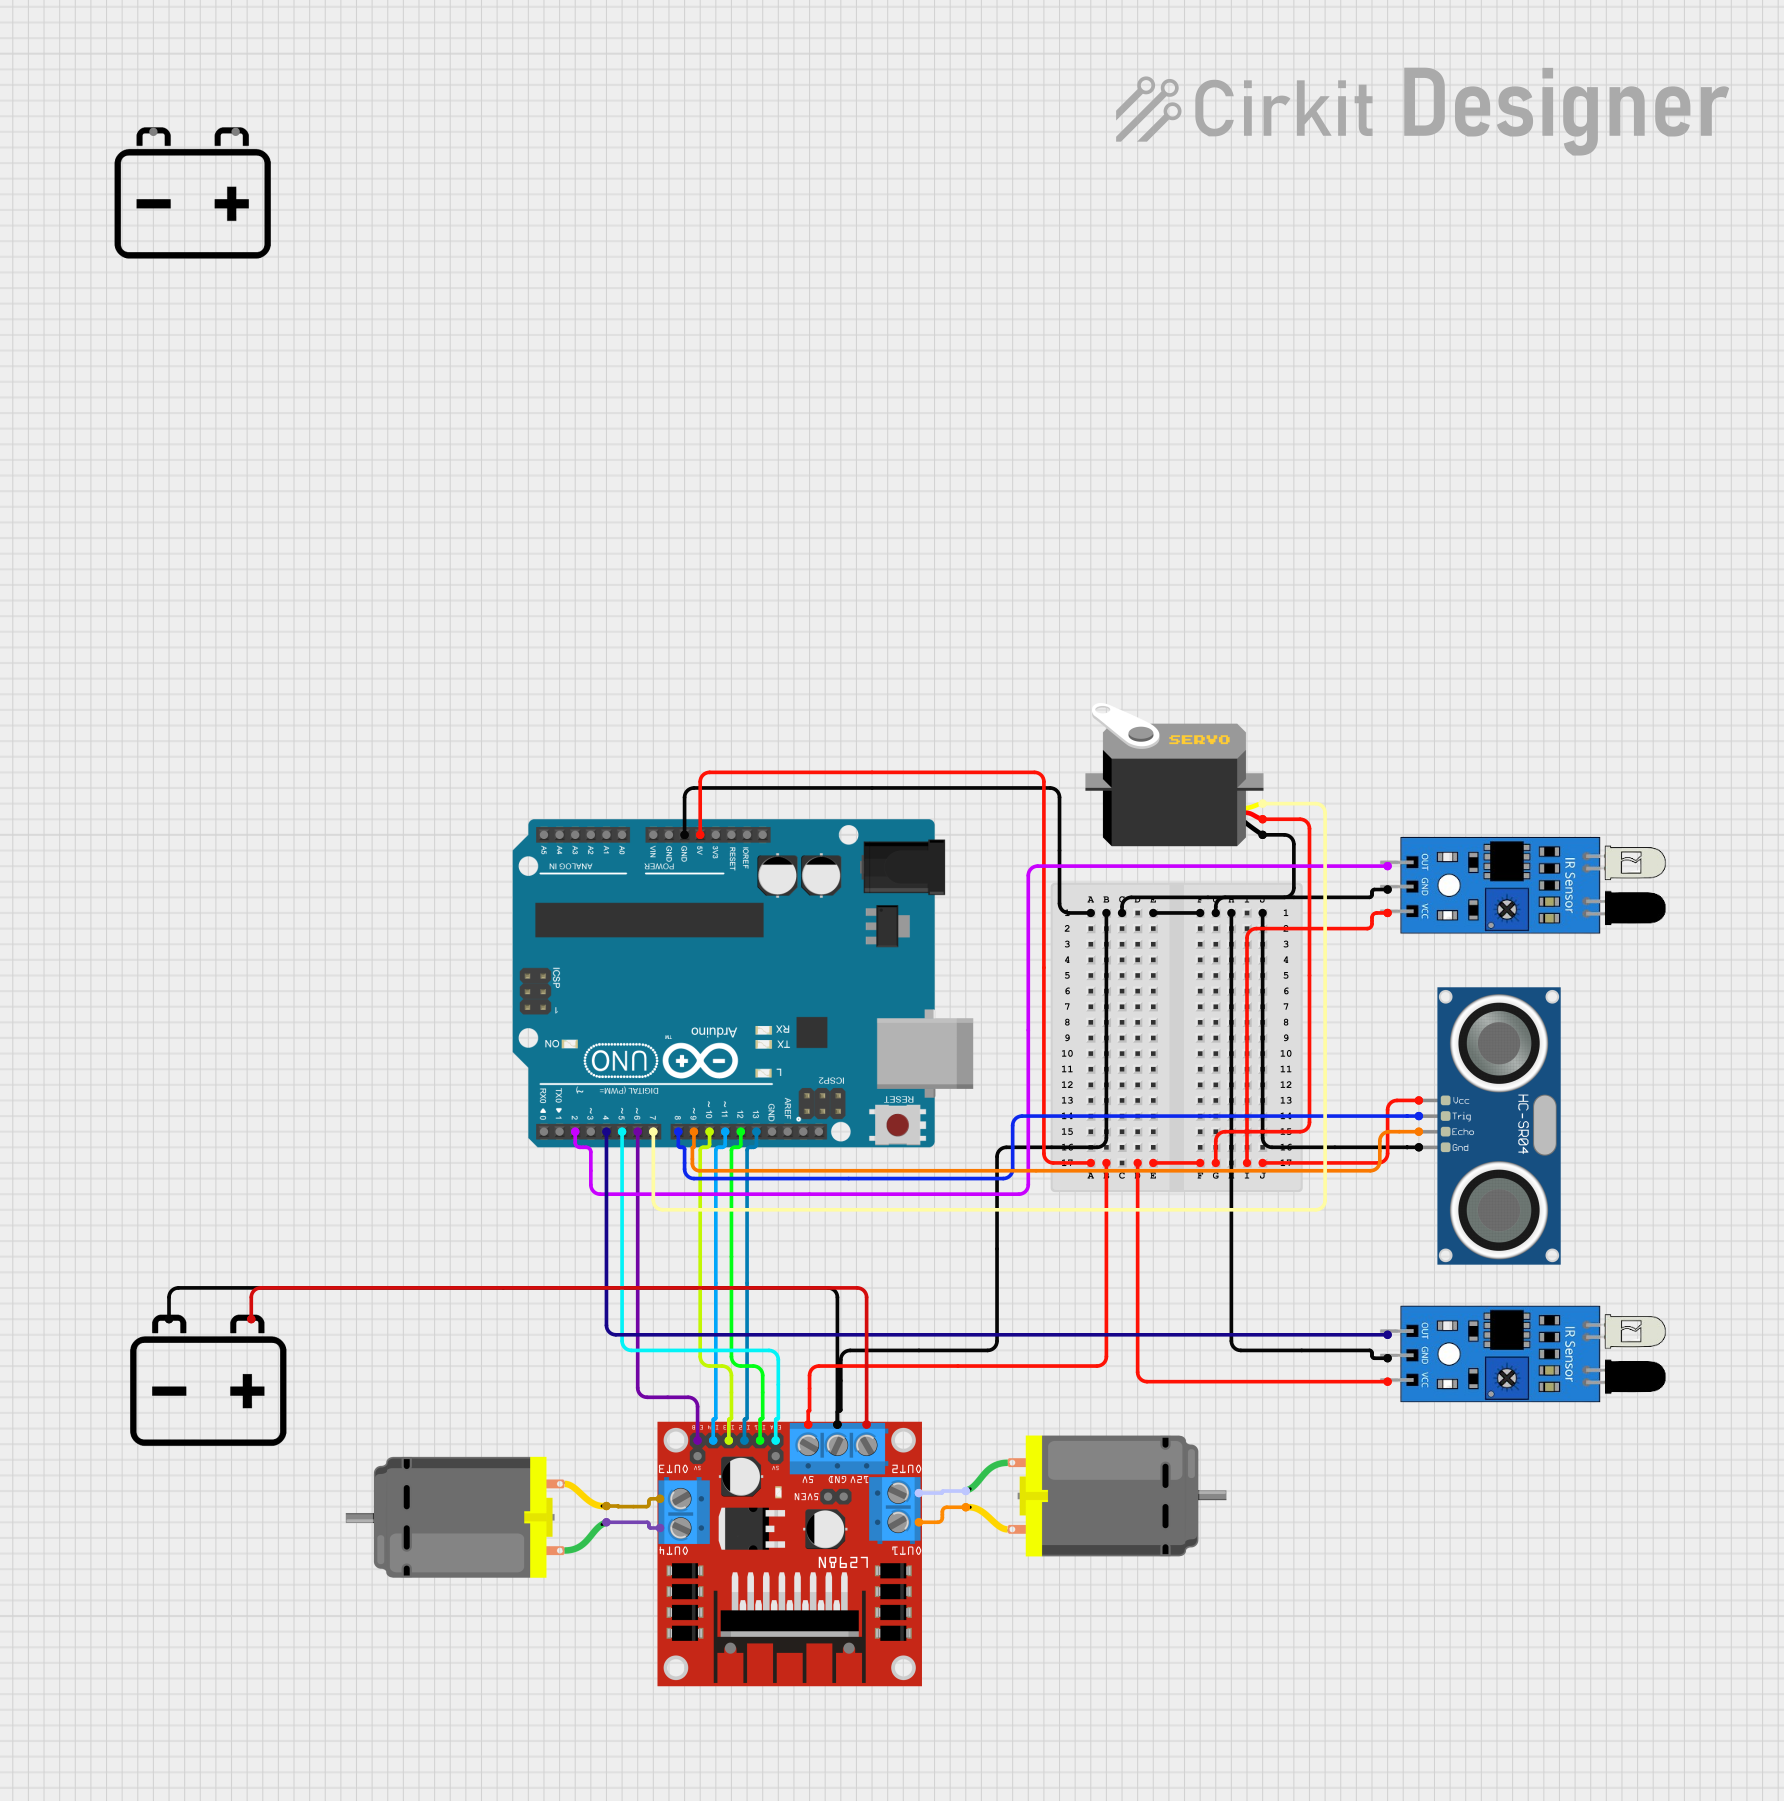
This circuit features an Arduino UNO microcontroller interfaced with an HC-SR04 Ultrasonic Sensor, two IR sensors, a servo motor, two DC motors, and an L298N motor driver. The Arduino controls the motors using the L298N driver, with the ability to move them forward or backward at variable speeds as defined in the embedded code. The ultrasonic sensor is used for distance measurement, the IR sensors likely for obstacle detection, and the servo for precise angular movement, all powered by 12V batteries.
Explore Projects Built with ultrasonic sensor
Arduino UNO Based Ultrasonic Distance Measurement with HC-SR04 and Bluetooth Communication via HC-05
This circuit features an Arduino UNO microcontroller interfaced with an HC-SR04 Ultrasonic Sensor and an HC-05 Bluetooth module. The Arduino is configured to trigger the ultrasonic sensor to measure distance and communicate the data wirelessly via the HC-05 module. Power is supplied to both the sensor and the Bluetooth module from the Arduino's 5V output, and ground connections are shared among all components.
Arduino UNO Based Ultrasonic Radar System with Servo Motor
This circuit is designed to function as an ultrasonic radar system, utilizing an Arduino UNO microcontroller, an HC-SR04 ultrasonic sensor, and an SG90 servo motor. The Arduino controls the servo to sweep the ultrasonic sensor through a range of angles, while the sensor measures the distance to any objects in its path. The system outputs the angle and distance measurements to the serial monitor and provides an indication when an obstacle is detected within 20 cm.
Arduino UNO-Based Ultrasonic Distance Measurement with Bluetooth Interface and Visual Feedback
This circuit features an Arduino UNO microcontroller interfaced with an HC-SR04 ultrasonic sensor, a red LED with a series resistor, a buzzer, an I2C LCD 16x2 screen, and an HC-05 Bluetooth module. The ultrasonic sensor is likely used for distance measurement, with the Arduino controlling the LED and buzzer as indicators, displaying information on the LCD screen, and potentially communicating data wirelessly via the HC-05 Bluetooth module. The provided code skeleton suggests that the specific functionalities are yet to be implemented.
Arduino-Controlled Robotic Vehicle with Ultrasonic and IR Sensors
This circuit features an Arduino UNO microcontroller interfaced with an HC-SR04 Ultrasonic Sensor, two IR sensors, a servo motor, two DC motors, and an L298N motor driver. The Arduino controls the motors using the L298N driver, with the ability to move them forward or backward at variable speeds as defined in the embedded code. The ultrasonic sensor is used for distance measurement, the IR sensors likely for obstacle detection, and the servo for precise angular movement, all powered by 12V batteries.
Common Applications and Use Cases
- Obstacle Detection: Used in robotics to detect obstacles and navigate around them.
- Distance Measurement: Employed in automation systems to measure distances accurately.
- Level Sensing: Utilized in tanks and containers to measure the level of liquids or solids.
- Proximity Sensing: Applied in security systems to detect the presence of objects or people.
Technical Specifications
Key Technical Details
| Parameter | Value |
|---|---|
| Operating Voltage | 5V DC |
| Operating Current | 15mA |
| Measuring Range | 2cm to 400cm |
| Frequency | 40kHz |
| Resolution | 0.3cm |
| Angle of Coverage | 15 degrees |
| Operating Temperature | -15°C to 70°C |
Pin Configuration and Descriptions
| Pin Number | Pin Name | Description |
|---|---|---|
| 1 | VCC | Power supply (5V DC) |
| 2 | Trig | Trigger input (initiates the ultrasonic burst) |
| 3 | Echo | Echo output (receives the reflected signal) |
| 4 | GND | Ground |
Usage Instructions
How to Use the Component in a Circuit
- Power Supply: Connect the VCC pin to a 5V power supply and the GND pin to the ground.
- Trigger Input: Connect the Trig pin to a digital output pin on your microcontroller (e.g., Arduino).
- Echo Output: Connect the Echo pin to a digital input pin on your microcontroller.
Important Considerations and Best Practices
- Stable Power Supply: Ensure a stable 5V power supply to avoid inaccurate measurements.
- Proper Mounting: Mount the sensor in a way that minimizes interference from other objects.
- Avoid Obstacles: Ensure there are no obstacles within the sensor's minimum range (2cm) to avoid false readings.
- Angle of Coverage: Be mindful of the 15-degree angle of coverage to ensure accurate measurements.
Example Code for Arduino UNO
// Define pins for the ultrasonic sensor
const int trigPin = 9;
const int echoPin = 10;

// Define variables for duration and distance
long duration;
int distance;

void setup() {
  // Initialize serial communication at 9600 baud rate
  Serial.begin(9600);

  // Set trigPin as OUTPUT and echoPin as INPUT
  pinMode(trigPin, OUTPUT);
  pinMode(echoPin, INPUT);
}

void loop() {
  // Clear the trigPin by setting it LOW
  digitalWrite(trigPin, LOW);
  delayMicroseconds(2);

  // Set the trigPin HIGH for 10 microseconds to send out the pulse
  digitalWrite(trigPin, HIGH);
  delayMicroseconds(10);
  digitalWrite(trigPin, LOW);

  // Read the echoPin, which returns the time in microseconds
  duration = pulseIn(echoPin, HIGH);

  // Calculate the distance in cm
  distance = duration * 0.034 / 2;

  // Print the distance to the Serial Monitor
  Serial.print("Distance: ");
  Serial.print(distance);
  Serial.println(" cm");

  // Wait for 100 milliseconds before the next loop
  delay(100);
}
Troubleshooting and FAQs
Common Issues Users Might Face
No Output or Incorrect Readings:
- Solution: Check the wiring connections and ensure the sensor is powered correctly. Verify that the Trig and Echo pins are connected to the correct digital pins on the microcontroller.
Fluctuating Readings:
- Solution: Ensure there are no obstacles within the sensor's minimum range. Check for any sources of electrical noise or interference that might affect the sensor's performance.
Sensor Not Responding:
- Solution: Verify that the sensor is receiving a stable 5V power supply. Check the code to ensure the Trig pin is being set HIGH for the correct duration (10 microseconds).
Solutions and Tips for Troubleshooting
- Double-Check Connections: Ensure all connections are secure and correctly placed.
- Use a Stable Power Source: A stable power supply can prevent erratic sensor behavior.
- Test with Known Distances: Use known distances to verify the sensor's accuracy.
- Isolate the Sensor: If possible, isolate the sensor from other electronic components to reduce interference.
By following this documentation, users can effectively integrate the Omron Ultrasonic Sensor into their projects, ensuring accurate and reliable distance measurements.