How to Use Arduino Sensor Shield: Examples, Pinouts, and Specs
Introduction
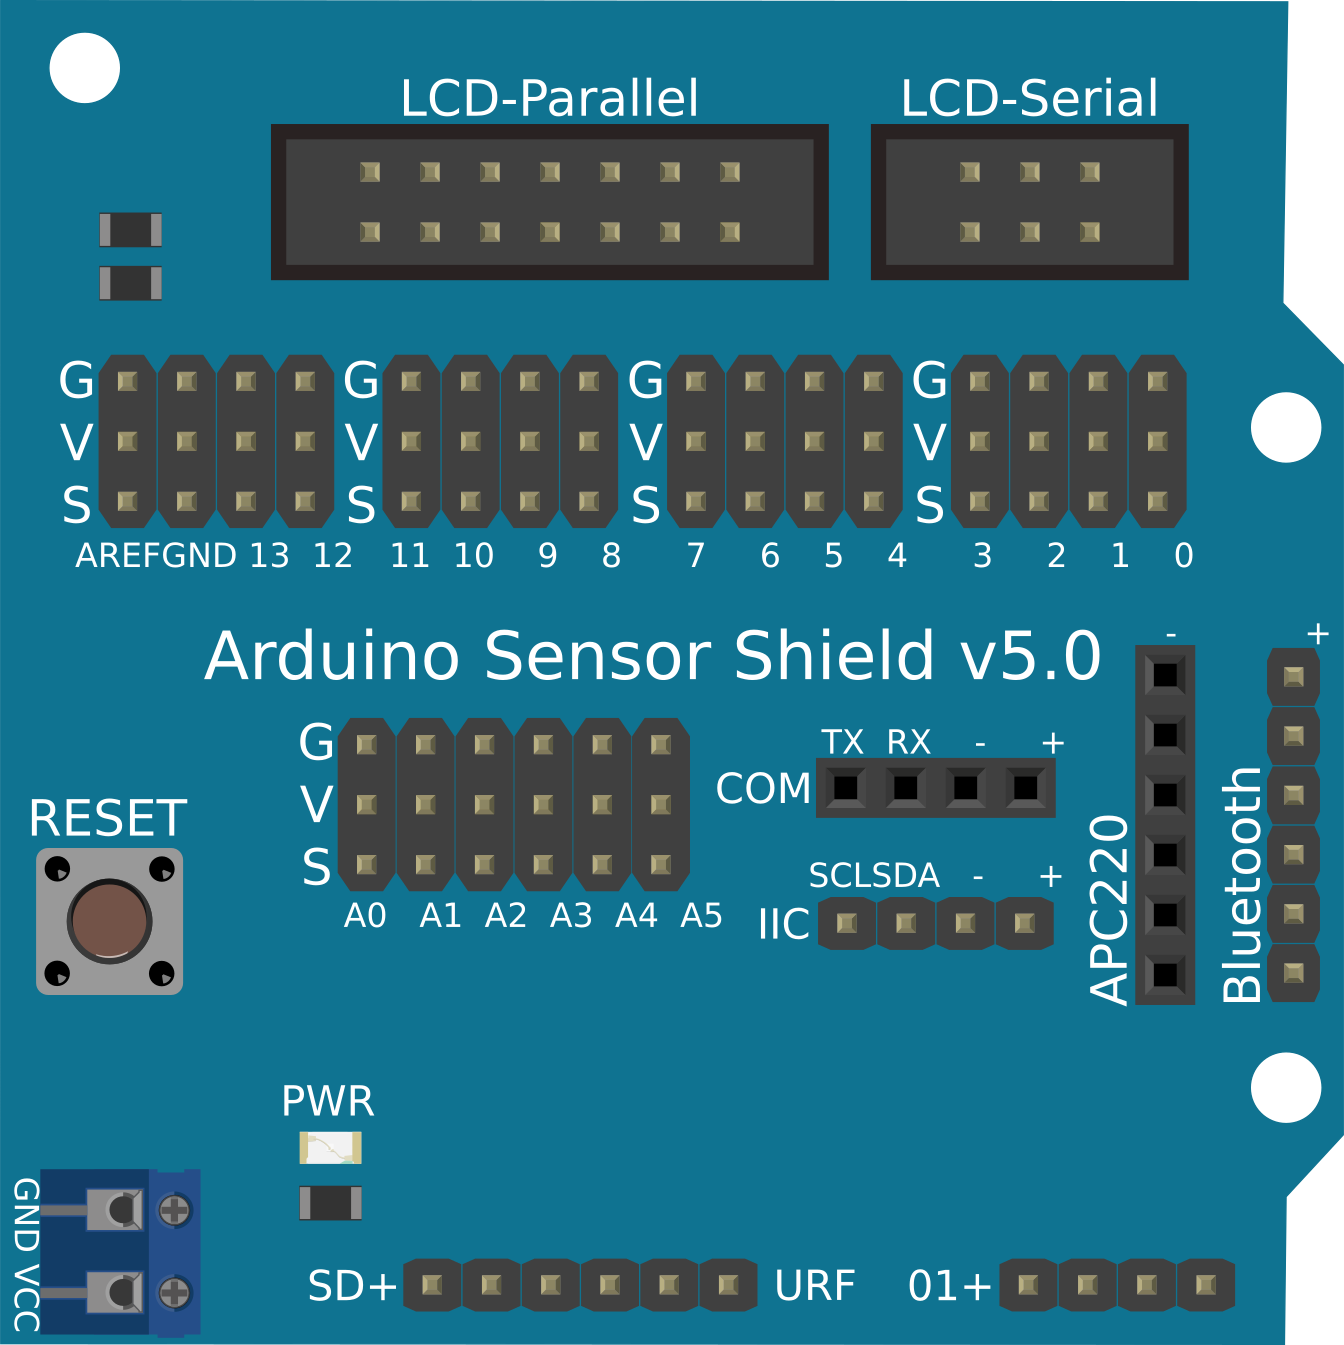
The Arduino Sensor Shield is a versatile expansion board designed to simplify the process of connecting sensors, modules, and other peripherals to an Arduino board. It provides a convenient interface with clearly labeled pins, making it easier to build interactive projects without the need for complex wiring. This shield is compatible with a wide range of Arduino boards, including the Arduino UNO, Mega, and Leonardo.
Explore Projects Built with Arduino Sensor Shield
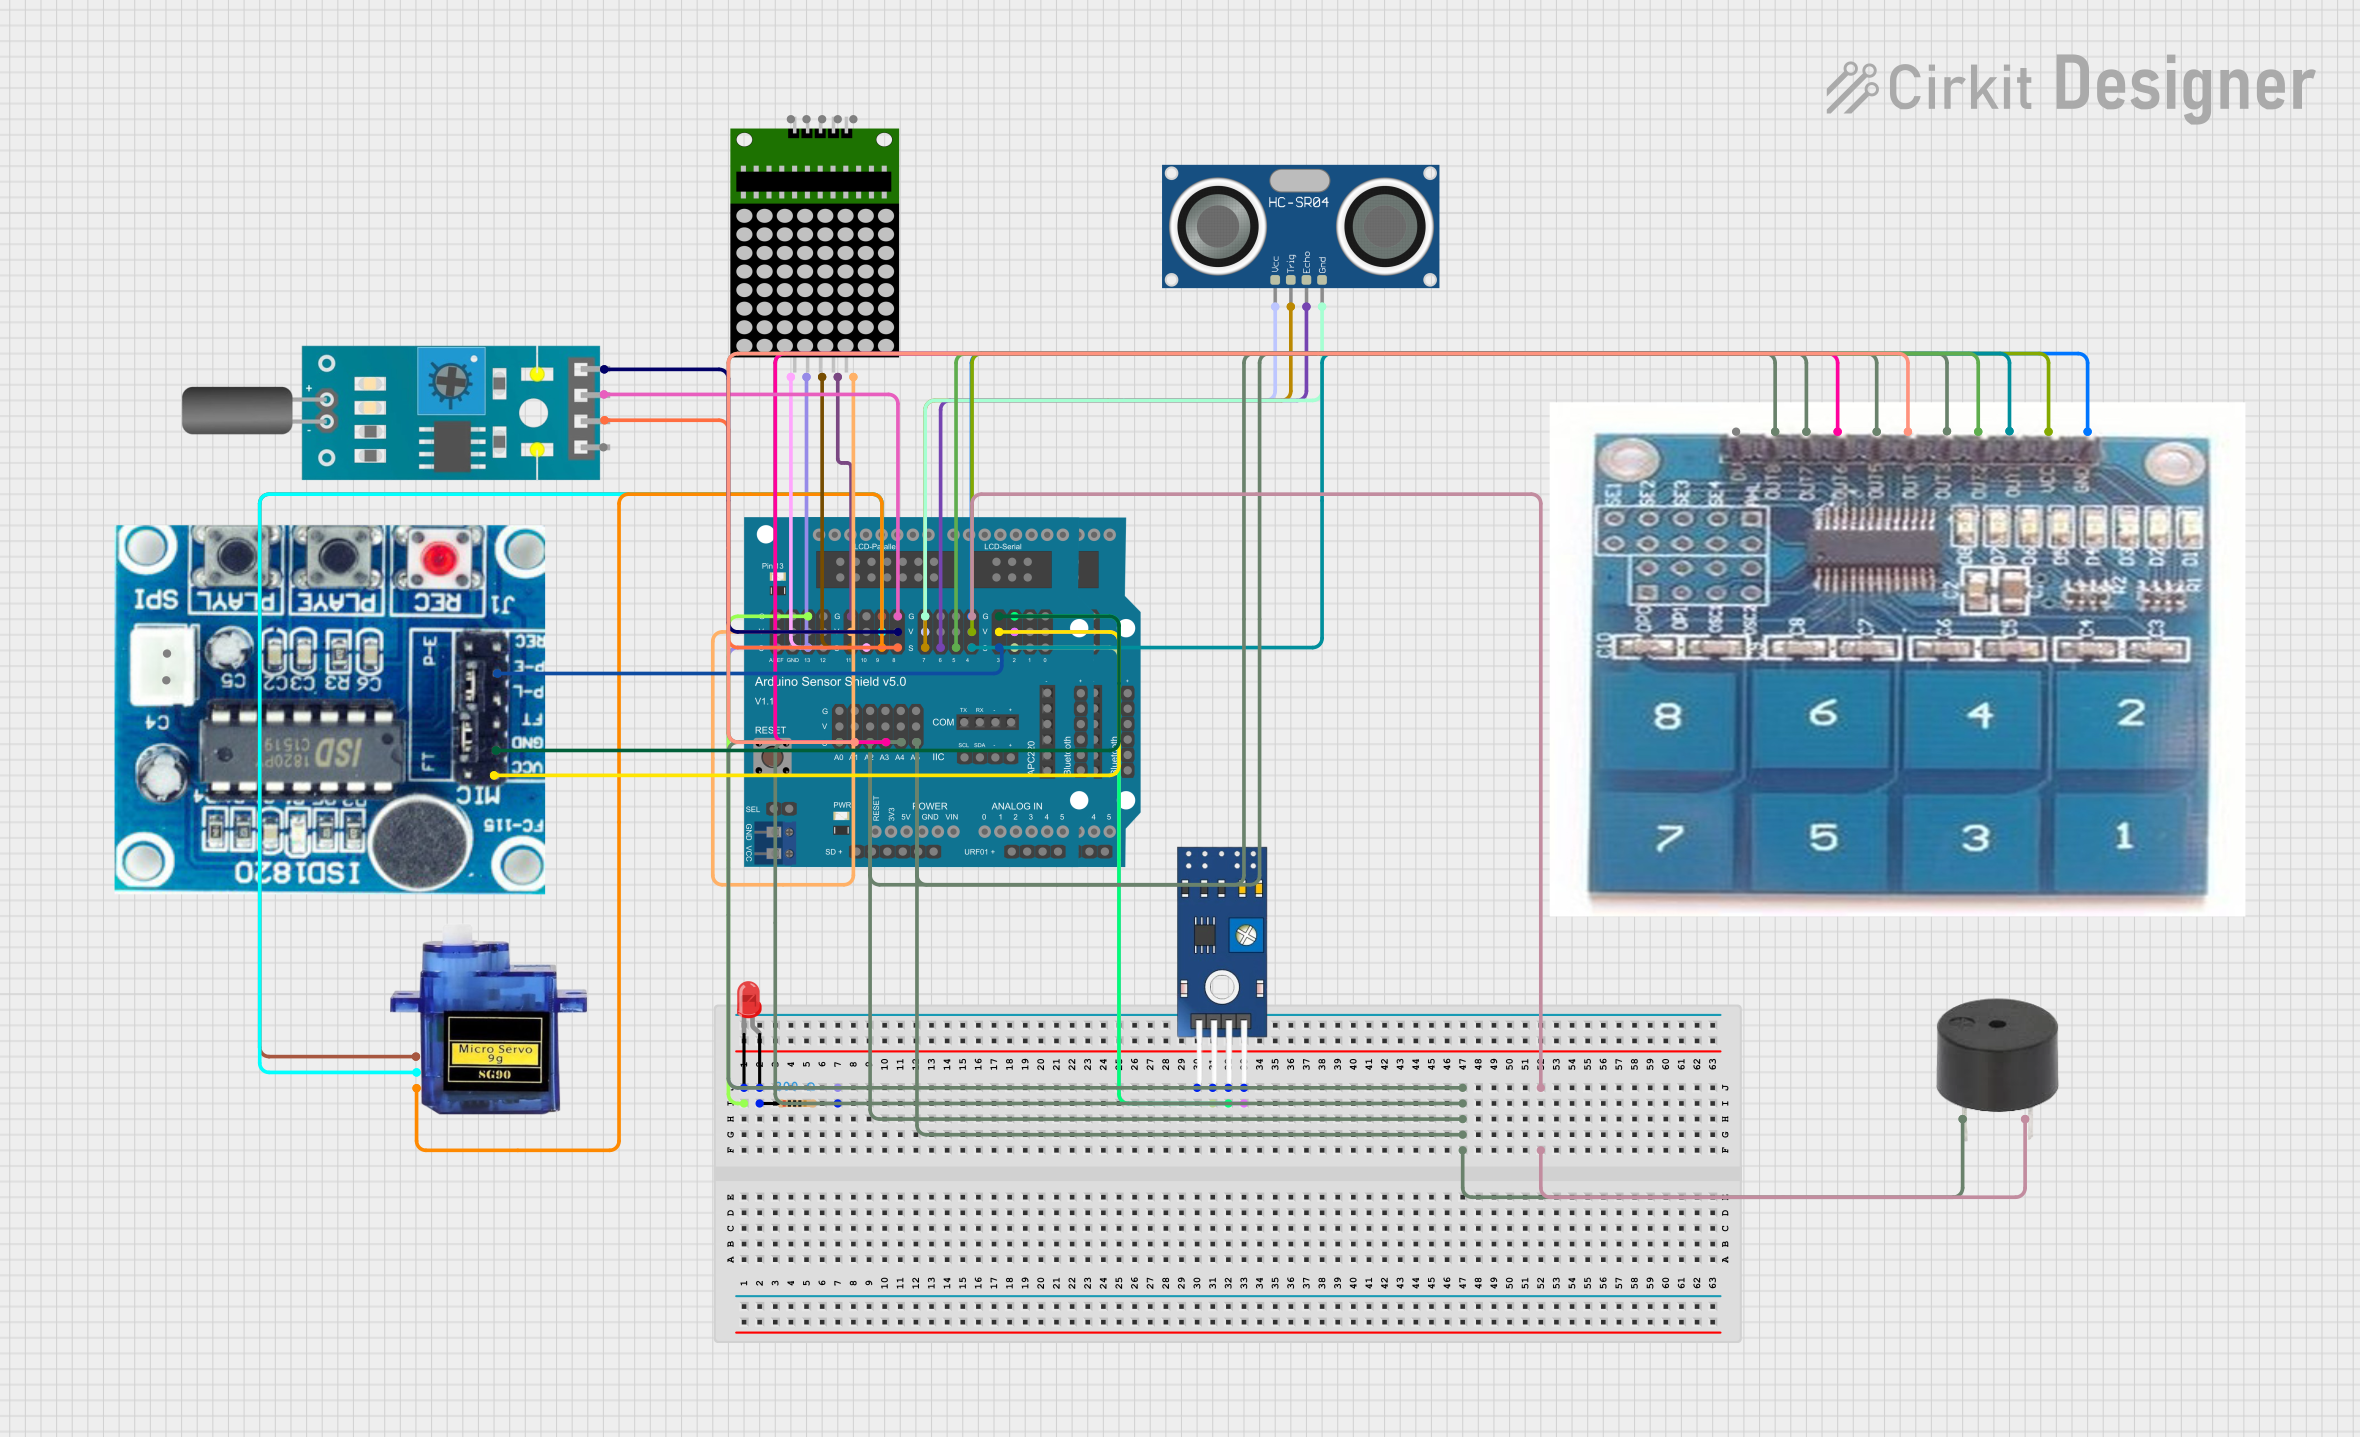
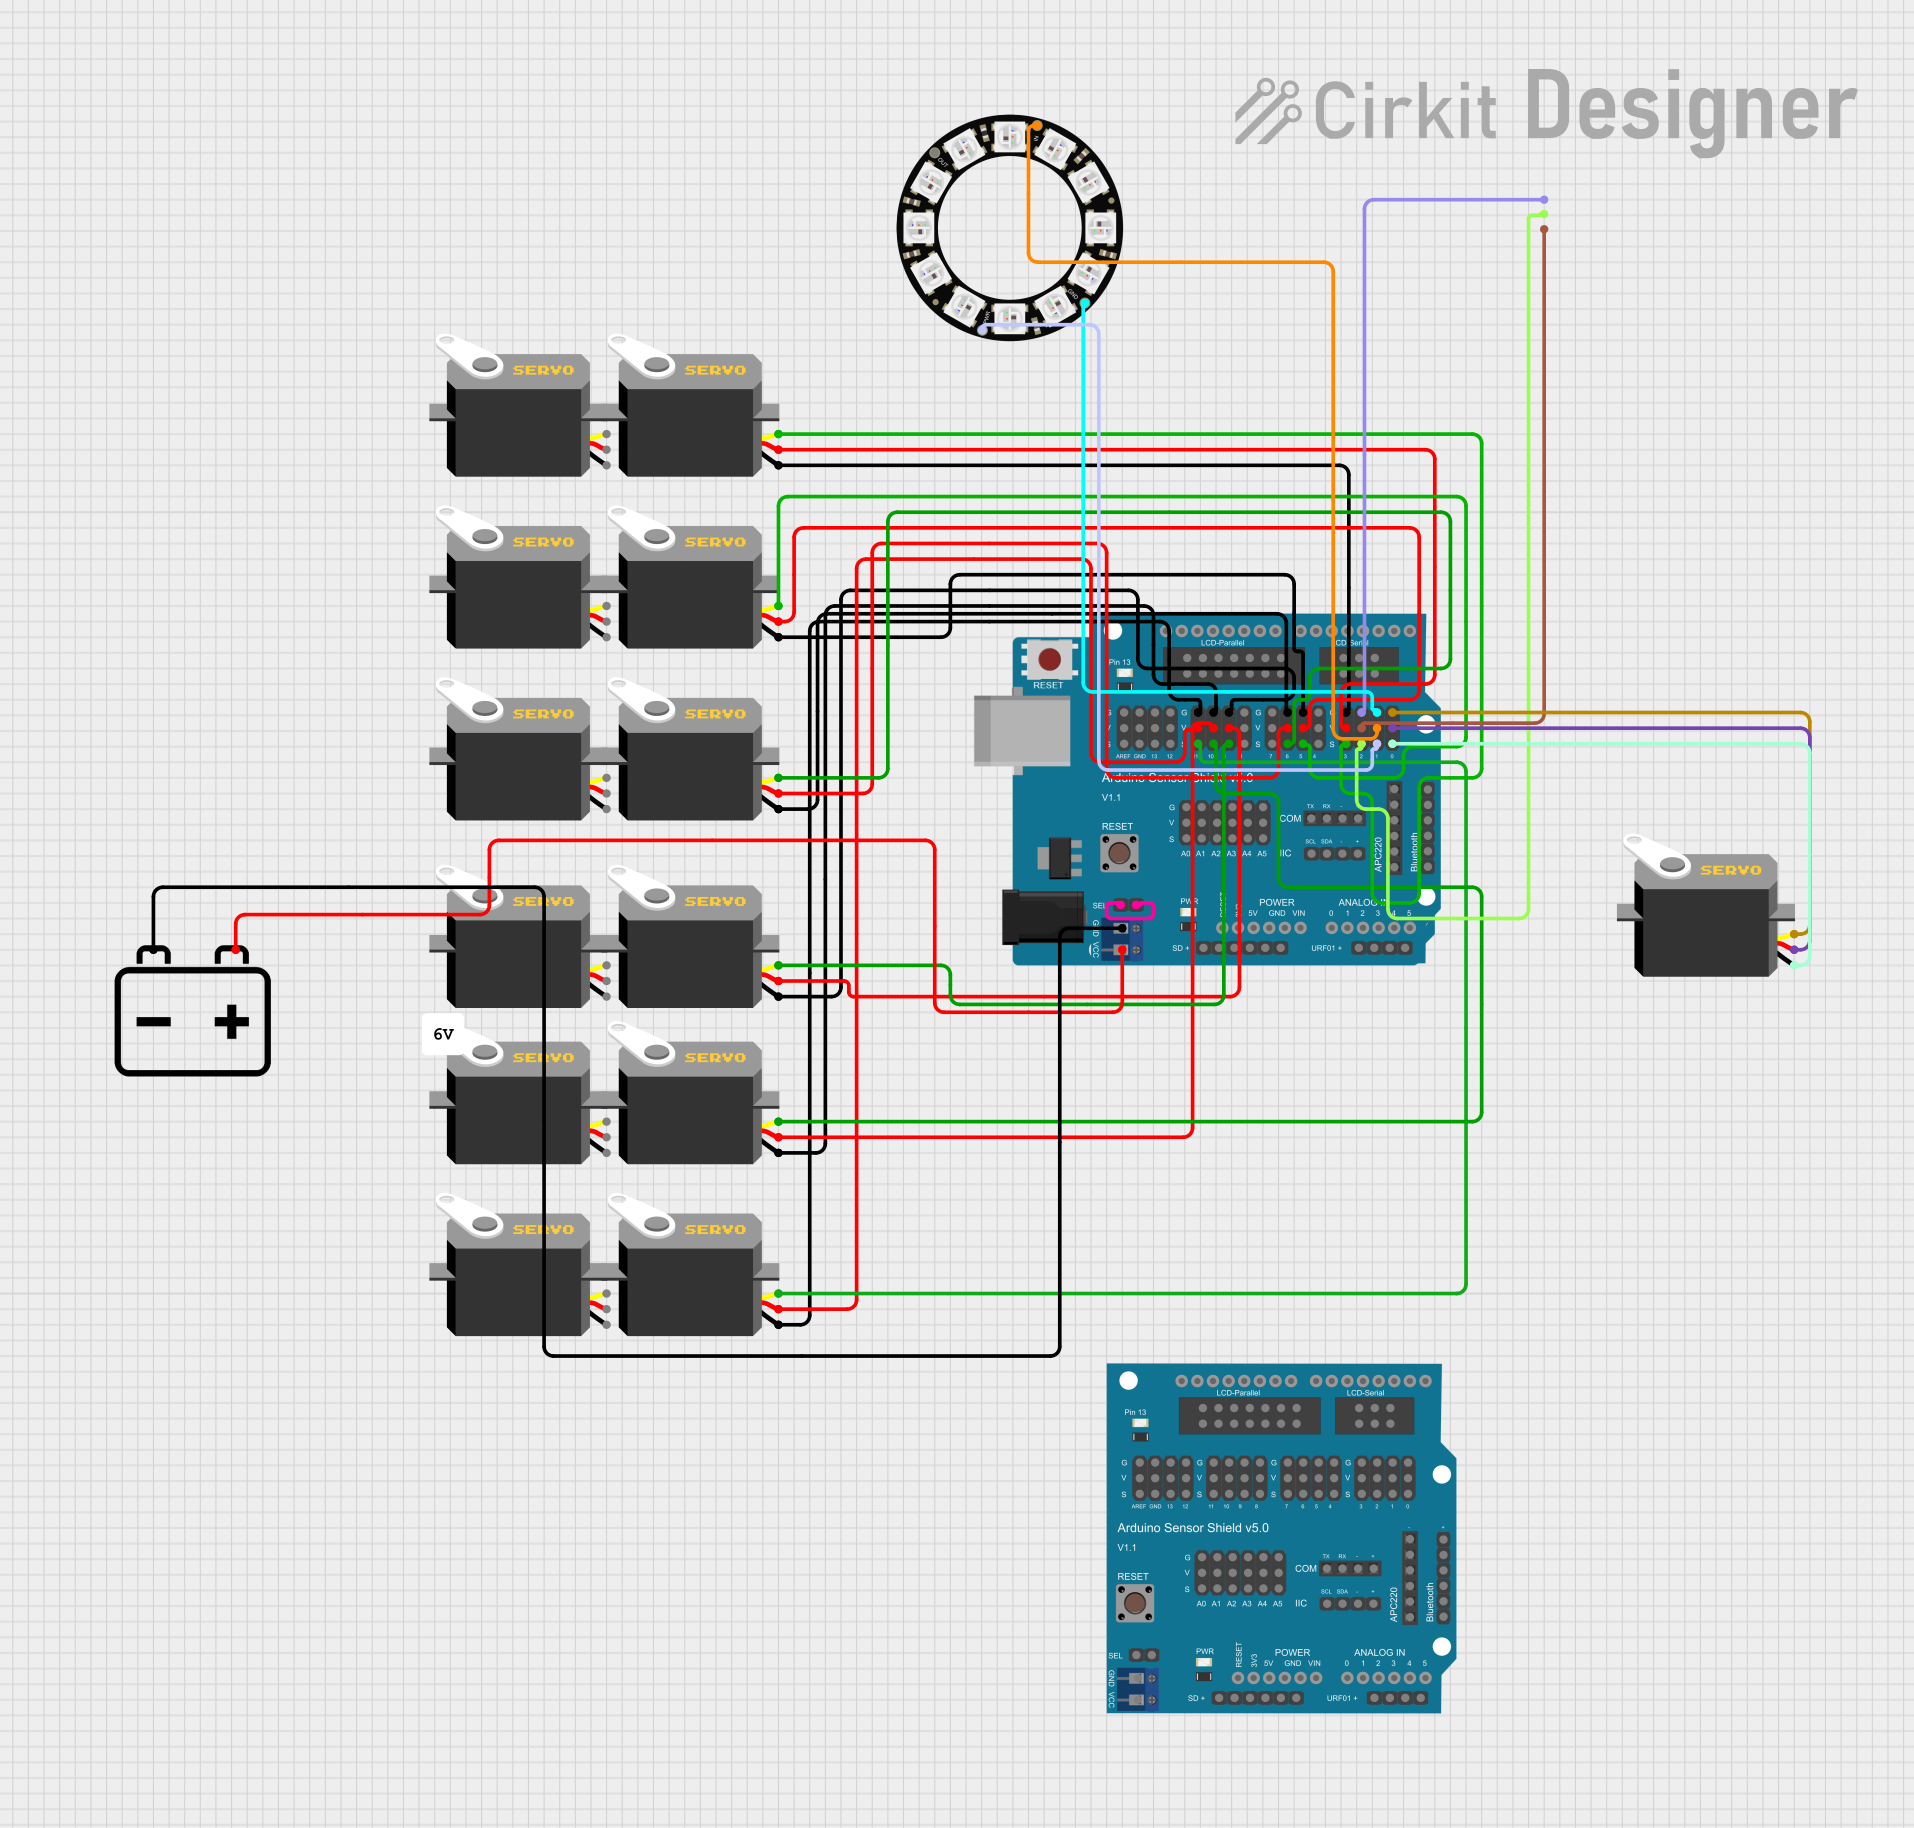


Explore Projects Built with Arduino Sensor Shield
Common Applications and Use Cases
- Prototyping sensor-based projects (e.g., temperature, humidity, motion detection)
- Robotics and automation systems
- IoT (Internet of Things) applications
- Educational projects for learning electronics and programming
- Rapid development of interactive systems
Technical Specifications
The Arduino Sensor Shield provides a variety of connectors and features to enhance the functionality of your Arduino board. Below are the key technical details:
Key Features
- Input Voltage: 5V (powered via the Arduino board)
- Compatibility: Arduino UNO, Mega, Leonardo, and other standard Arduino boards
- Connectors:
- 3-pin headers for sensors (Signal, VCC, GND)
- I2C interface
- UART interface
- Servo motor connectors
- Dimensions: Matches the Arduino UNO form factor
- Operating Temperature: -40°C to 85°C
Pin Configuration and Descriptions
The Arduino Sensor Shield provides a variety of pin headers for easy connections. Below is a table describing the key pin configurations:
| Pin Header | Description |
|---|---|
| Digital Pins (D0-D13) | Standard digital I/O pins for connecting sensors, modules, or actuators. |
| Analog Pins (A0-A5) | Analog input pins for reading sensor data (e.g., temperature, light intensity). |
| I2C (SDA, SCL) | Dedicated pins for I2C communication with compatible devices. |
| UART (TX, RX) | Serial communication pins for connecting modules like Bluetooth or GPS. |
| Servo Headers | 3-pin headers for directly connecting servo motors (Signal, VCC, GND). |
| Power Pins (5V, GND) | Power supply pins for external modules and sensors. |
Usage Instructions
How to Use the Arduino Sensor Shield in a Circuit
Attach the Shield to Your Arduino Board:
- Align the pins of the Sensor Shield with the headers on your Arduino board.
- Gently press the shield onto the Arduino until it is securely connected.
Connect Sensors or Modules:
- Use the 3-pin headers (Signal, VCC, GND) to connect sensors or modules.
- Ensure that the signal pin of the sensor/module matches the "S" pin on the shield.
Power the System:
- Power the Arduino board via USB or an external power source. The shield will draw power from the Arduino.
Write and Upload Code:
- Write a program in the Arduino IDE to interact with the connected sensors or modules.
- Upload the code to the Arduino board.
Important Considerations and Best Practices
- Check Voltage Compatibility: Ensure that the connected sensors or modules operate at 5V to avoid damage.
- Avoid Overloading: Do not connect too many high-power devices to the shield, as it may exceed the Arduino's current limits.
- Secure Connections: Use jumper wires or connectors that fit snugly to prevent loose connections.
- Use External Power for Servos: If using multiple servo motors, consider powering them with an external power source to avoid overloading the Arduino.
Example Code for Connecting a Temperature Sensor (e.g., LM35)
// Example code for reading temperature data from an LM35 sensor
// connected to the Arduino Sensor Shield on analog pin A0.

const int sensorPin = A0; // Define the analog pin connected to the LM35
float temperature;       // Variable to store the temperature value

void setup() {
  Serial.begin(9600); // Initialize serial communication at 9600 baud
}

void loop() {
  int sensorValue = analogRead(sensorPin); // Read the analog value from the sensor
  temperature = (sensorValue * 5.0 / 1023.0) * 100.0;
  // Convert the analog value to temperature in Celsius
  // 5.0 is the reference voltage, 1023 is the ADC resolution, and
  // LM35 outputs 10mV per degree Celsius.

  Serial.print("Temperature: ");
  Serial.print(temperature); // Print the temperature value to the Serial Monitor
  Serial.println(" °C");

  delay(1000); // Wait for 1 second before the next reading
}
Troubleshooting and FAQs
Common Issues and Solutions
Issue: Sensors or modules are not working.
- Solution: Double-check the connections to ensure the signal, VCC, and GND pins are correctly aligned. Verify that the sensor/module is compatible with 5V.
Issue: Arduino board is not powering the shield.
- Solution: Ensure the Arduino is properly powered via USB or an external power source. Check for loose connections between the shield and the Arduino.
Issue: Servo motors are not responding.
- Solution: Use an external power source for the servo motors if multiple servos are connected. Verify that the signal pin is correctly connected.
Issue: I2C devices are not communicating.
- Solution: Confirm that the SDA and SCL pins on the shield are connected to the correct pins on the Arduino. Check the I2C address of the device and ensure it matches the code.
FAQs
Q: Can I use the Sensor Shield with an Arduino Mega?
A: Yes, the Sensor Shield is compatible with the Arduino Mega. However, ensure that the pin mappings match the Mega's layout.Q: Can I connect 3.3V sensors to the shield?
A: The Sensor Shield is designed for 5V sensors. If you need to use 3.3V sensors, use a level shifter or voltage divider to avoid damage.Q: How many sensors can I connect at once?
A: The number of sensors depends on the available digital and analog pins on your Arduino board. For example, the Arduino UNO has 14 digital pins and 6 analog pins.Q: Do I need additional libraries to use the shield?
A: No additional libraries are required for the shield itself. However, some sensors or modules may require specific libraries.
By following this documentation, you can effectively use the Arduino Sensor Shield to build a wide range of interactive projects.