How to Use 5x Jumper Wire Connector (Female): Examples, Pinouts, and Specs
Introduction
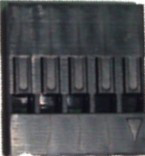
The 5x Jumper Wire Connector (Female) is a set of five female jumper wires designed for making temporary and reliable connections in electronic circuits. These connectors are widely used in prototyping and testing environments, allowing users to quickly connect components on a breadboard or interface with other devices and modules. Their flexibility and reusability make them an essential tool for hobbyists, students, and professionals working on electronic projects.
Explore Projects Built with 5x Jumper Wire Connector (Female)


Explore Projects Built with 5x Jumper Wire Connector (Female)
Common Applications and Use Cases
- Connecting components on a breadboard for prototyping.
- Interfacing sensors, modules, or microcontrollers.
- Extending connections between devices in a circuit.
- Temporary wiring for testing and debugging circuits.
Technical Specifications
The following table outlines the key technical details of the 5x Jumper Wire Connector (Female):
| Parameter | Specification |
|---|---|
| Connector Type | Female |
| Number of Wires | 5 |
| Wire Length | Typically 10 cm (varies by manufacturer) |
| Wire Gauge | 28 AWG |
| Insulation Material | PVC |
| Maximum Voltage Rating | 300V |
| Maximum Current Rating | 1A |
| Operating Temperature | -20°C to 80°C |
Pin Configuration and Descriptions
Each jumper wire in the set has a single female connector on one end. The other end may also have a female connector or a different type of connector (e.g., male pin or bare wire), depending on the specific product variant. Below is a general description:
| Pin | Description |
|---|---|
| 1 | Female connector for signal/power |
| 2 | Female connector for signal/power |
| 3 | Female connector for signal/power |
| 4 | Female connector for signal/power |
| 5 | Female connector for signal/power |
Usage Instructions
How to Use the Component in a Circuit
- Identify the Connection Points: Determine the pins or terminals on the components you want to connect.
- Insert the Female Connectors: Plug the female connectors onto the male pins of the components or breadboard headers.
- Route the Wires: Arrange the wires neatly to avoid tangling or short circuits.
- Verify Connections: Double-check that the connections are secure and match your circuit diagram.
Important Considerations and Best Practices
- Avoid Excessive Bending: Repeated bending of the wires near the connectors can cause damage or breakage.
- Check Voltage and Current Ratings: Ensure the voltage and current in your circuit do not exceed the connector's maximum ratings (300V and 1A).
- Use with Breadboards: These connectors are ideal for breadboards with standard 2.54mm (0.1 inch) pin spacing.
- Polarity Awareness: If connecting power lines, ensure correct polarity to avoid damaging components.
Example: Connecting to an Arduino UNO
The 5x Jumper Wire Connector (Female) can be used to connect sensors or modules to an Arduino UNO. Below is an example of connecting a DHT11 temperature and humidity sensor:
Circuit Connections
- Jumper Wire 1: Connect the sensor's VCC pin to the Arduino's 5V pin.
- Jumper Wire 2: Connect the sensor's GND pin to the Arduino's GND pin.
- Jumper Wire 3: Connect the sensor's DATA pin to Arduino digital pin 2.
Arduino Code Example
#include <DHT.h>

// Define the DHT sensor type and pin
#define DHTPIN 2      // Pin connected to the DATA pin of the DHT11 sensor
#define DHTTYPE DHT11 // DHT11 sensor type

DHT dht(DHTPIN, DHTTYPE);

void setup() {
  Serial.begin(9600); // Initialize serial communication
  dht.begin();        // Initialize the DHT sensor
  Serial.println("DHT11 Sensor Test");
}

void loop() {
  delay(2000); // Wait 2 seconds between readings

  // Read temperature and humidity
  float humidity = dht.readHumidity();
  float temperature = dht.readTemperature();

  // Check if readings are valid
  if (isnan(humidity) || isnan(temperature)) {
    Serial.println("Failed to read from DHT sensor!");
    return;
  }

  // Print the results to the Serial Monitor
  Serial.print("Humidity: ");
  Serial.print(humidity);
  Serial.print(" %\t");
  Serial.print("Temperature: ");
  Serial.print(temperature);
  Serial.println(" °C");
}
Troubleshooting and FAQs
Common Issues Users Might Face
Loose Connections: The female connectors may not fit tightly on some pins.
- Solution: Ensure the pins are clean and of standard size (2.54mm). If the fit is still loose, consider using connectors with a tighter grip.
Wire Breakage: Frequent bending or pulling can damage the wires.
- Solution: Handle the wires gently and avoid sharp bends near the connectors.
Intermittent Connections: Poor contact can cause intermittent signals.
- Solution: Check for dirt or oxidation on the pins and clean them if necessary.
Exceeding Voltage/Current Ratings: Using the connectors in high-power circuits can cause overheating or failure.
- Solution: Always verify that your circuit operates within the connector's voltage and current limits.
FAQs
Q: Can I use these connectors for high-frequency signals?
A: These connectors are suitable for low-frequency signals and power connections. For high-frequency applications, consider using shielded cables or connectors designed for RF signals.
Q: Are these connectors reusable?
A: Yes, the 5x Jumper Wire Connectors (Female) are reusable and designed for multiple insertions and removals.
Q: Can I connect these directly to male header pins on a PCB?
A: Yes, these connectors are compatible with standard 2.54mm male header pins commonly found on PCBs and breadboards.