How to Use H743-SLIM V3: Examples, Pinouts, and Specs
Introduction
The H743-SLIM V3 is a compact, high-performance flight controller designed by MATEKSYS for use in various unmanned aerial vehicles (UAVs), including drones and RC aircraft. It is based on the STM32H743 microcontroller, which provides a balance of processing power and energy efficiency, making it suitable for applications where space and power are at a premium.
Explore Projects Built with H743-SLIM V3


Explore Projects Built with H743-SLIM V3
Common Applications and Use Cases
- Multirotor and fixed-wing UAVs
- Autonomous vehicles
- Robotics
- High-performance DIY electronics projects
Technical Specifications
Key Technical Details
- MCU: STM32H743VIT6, 480MHz, 1MB RAM, 2MB Flash
- IMU: 2x ICM20602, up to 32KHz
- Baro: BMP280 (I2C)
- OSD: AT7456E
- Blackbox: MicroSD card slot
- VCP & 6x UARTs, 1x Softserial_Tx option
- 12x PWM outputs (Dshot capable)
- 1x I2C
- 4x ADC (VBAT, Current, RSSI, AirSpeed)
- 3x LEDs for FC STATUS (Blue, Green) and 3.3V indicator(Red)
- Voltage Ratings: 6
36V (28S LiPo) - BEC: 5V 2A cont. (Max.3A)
- Dimensions: 36x36mm
- Mounting: 30.5x30.5mm, Φ3mm
- Weight: 7g
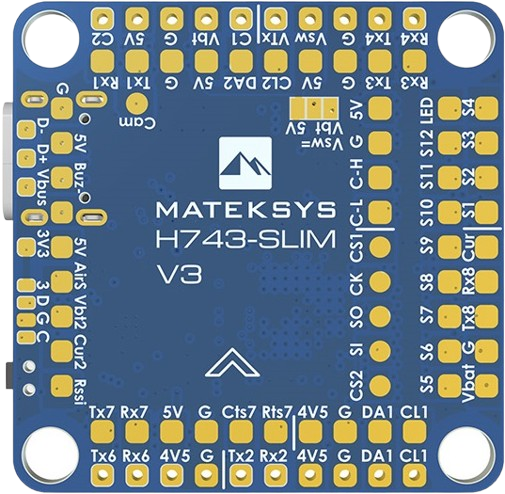
Pin Configuration and Descriptions
| Pin | Function | Description |
|---|---|---|
| 1-4 | Motor Outputs | PWM outputs for ESCs or Servos |
| 5-6 | UART1 | Serial communication ports |
| 7 | I2C | For external sensors |
| 8 | USB VCP | For firmware flashing and debugging |
| 9 | MicroSD | For blackbox logging |
| 10 | ADC1-4 | Analog inputs for voltage and current sensing |
| 11 | LED | Status indicators |
| 12 | BEC 5V | Power output for peripherals |
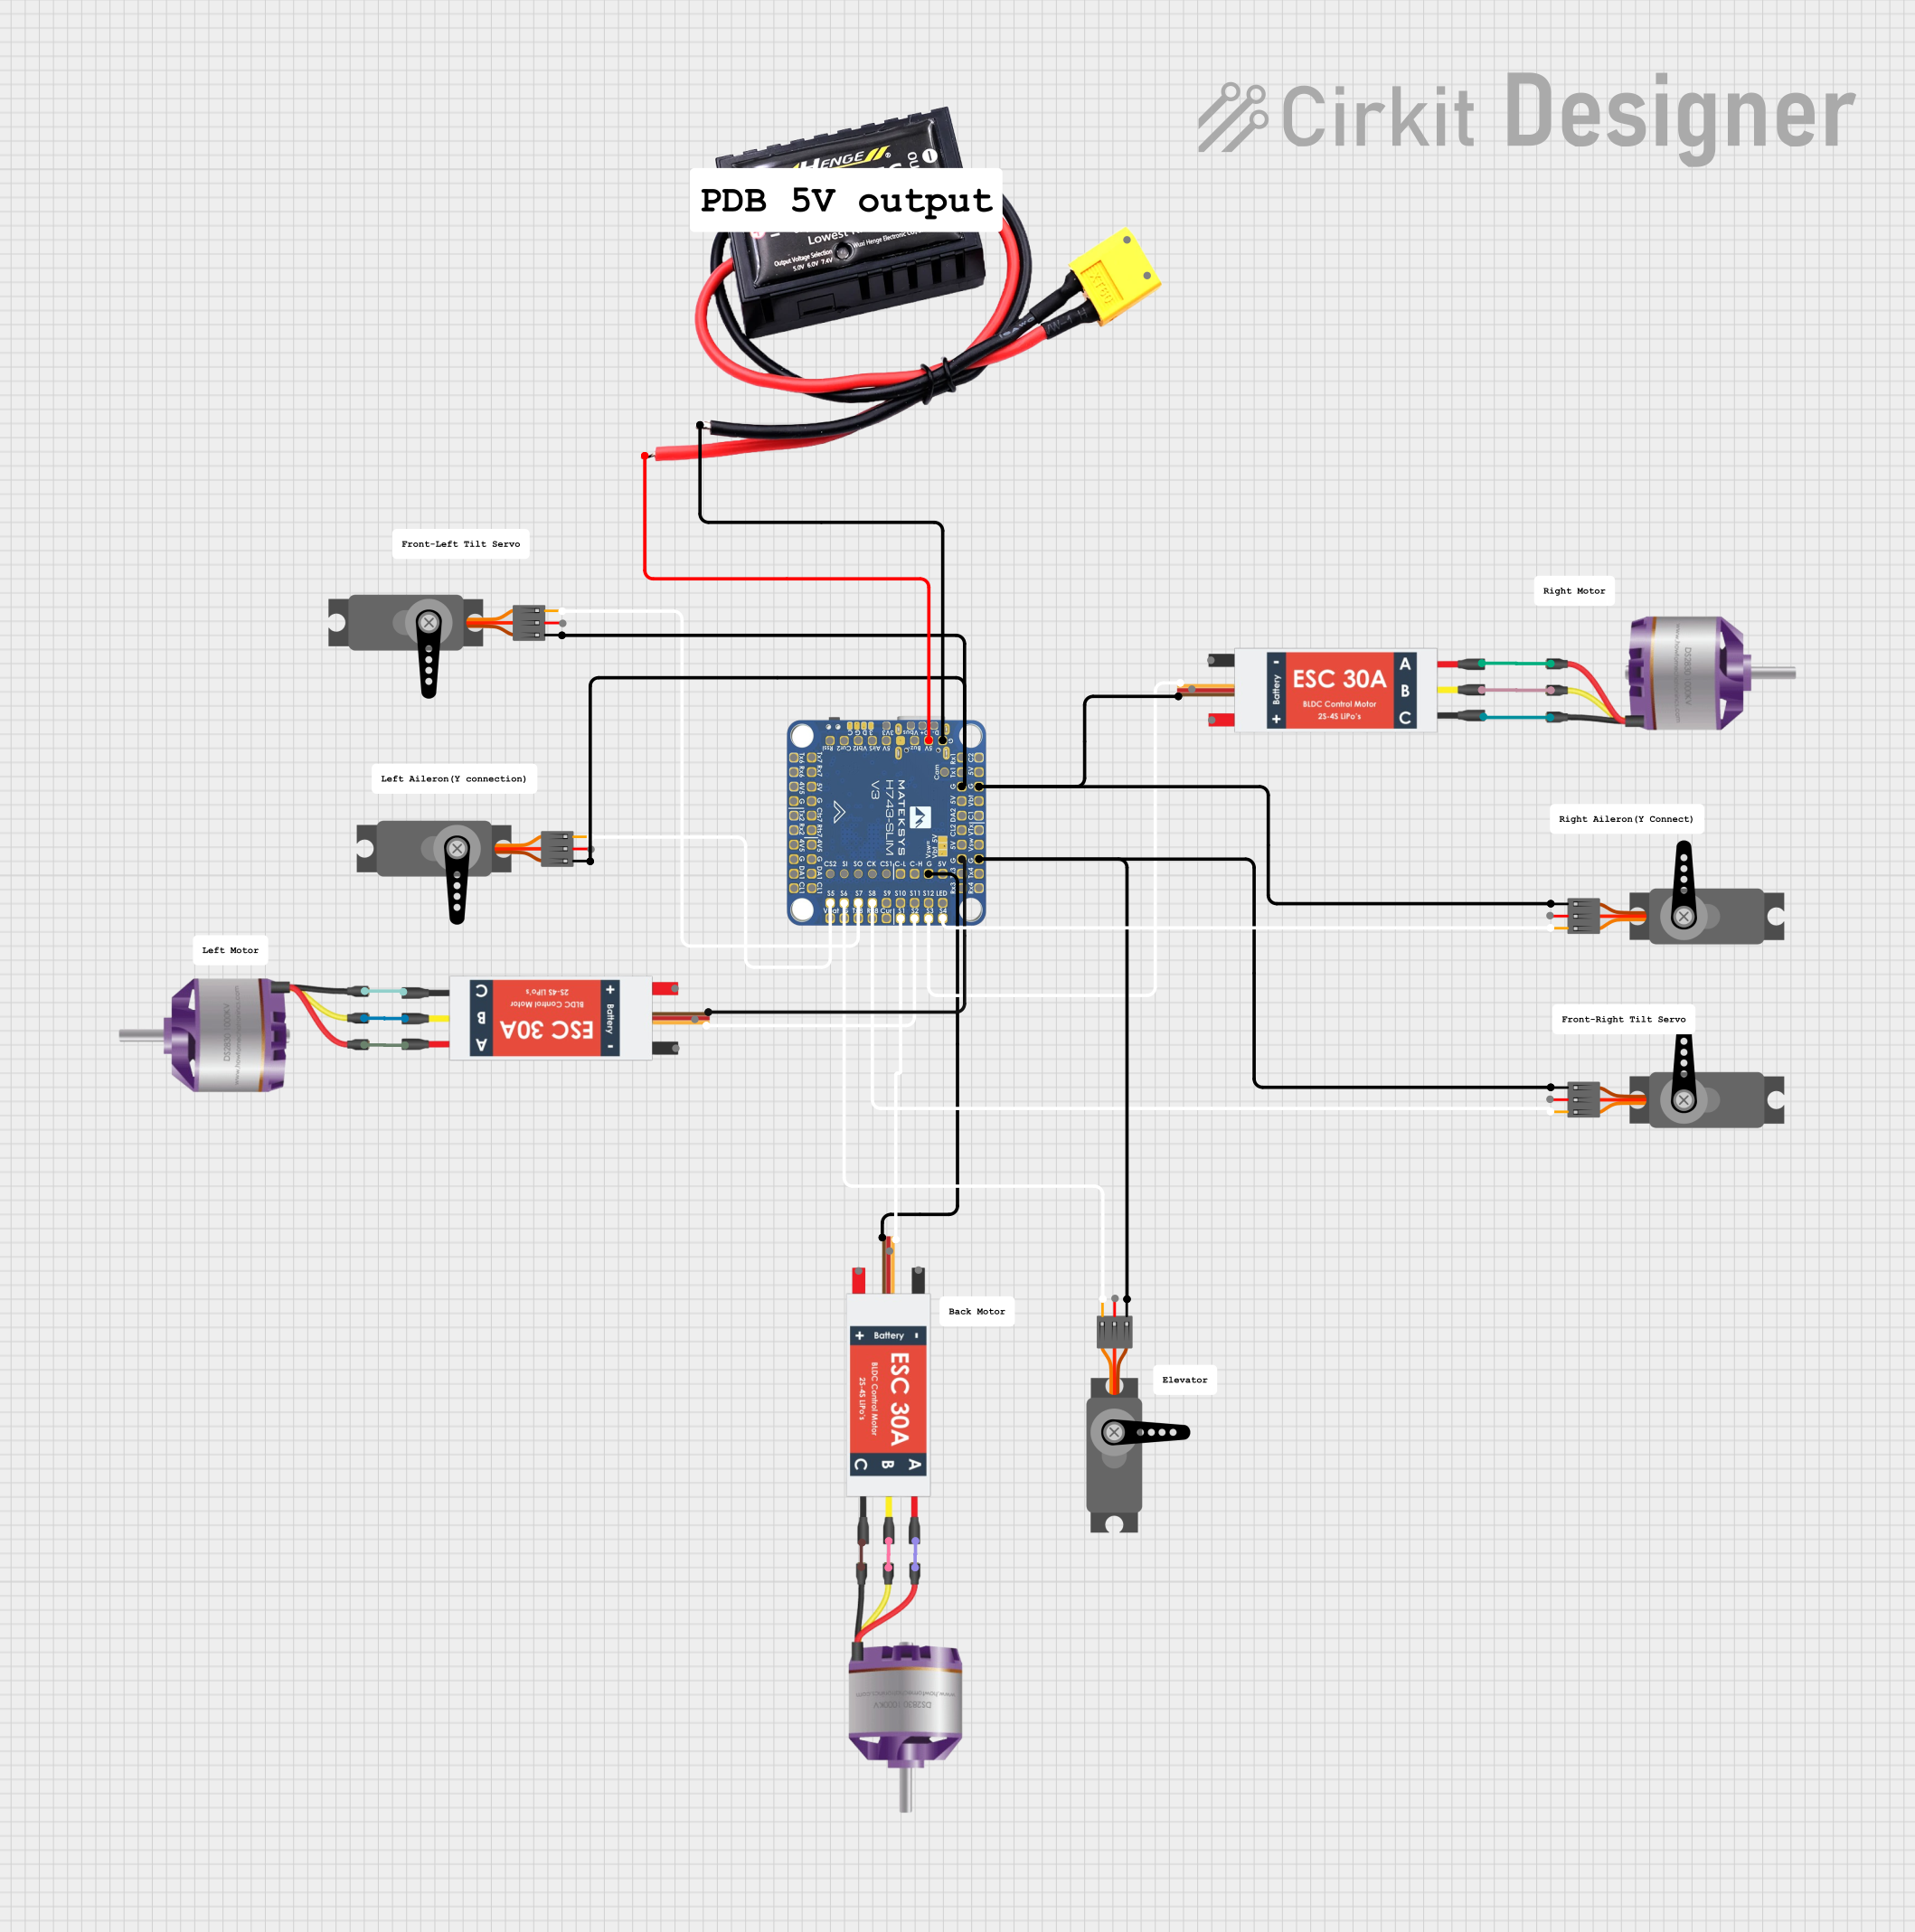
Usage Instructions
How to Use the Component in a Circuit
- Powering the Board: Connect a 2-8S LiPo battery to the board. Ensure the voltage is within the specified range.
- Connecting Motors and Servos: Attach motors or servos to the PWM outputs, ensuring correct polarity.
- Serial Devices: Connect devices like GPS, telemetry, or receivers to the UART ports as needed.
- Sensors: Attach I2C compatible sensors to the I2C port.
- Firmware Flashing: Use the USB VCP for initial firmware flashing and subsequent updates.
- Blackbox Logging: Insert a MicroSD card into the slot for flight data logging.
Important Considerations and Best Practices
- Always verify connections before powering up to prevent damage.
- Use a clean and well-organized wiring layout to minimize electromagnetic interference.
- Update to the latest firmware for optimal performance.
- Configure the board using appropriate software, such as Betaflight or INAV, depending on your application.
Troubleshooting and FAQs
Common Issues
- Board not powering up: Check battery voltage and connections.
- Motors not spinning: Verify motor wiring and ESC calibration.
- No response from servos: Check PWM signal and power supply to the servos.
- Inaccurate sensor readings: Calibrate sensors through the configuration software.
Solutions and Tips for Troubleshooting
- Ensure that all solder joints are secure and free of shorts.
- If a component is not functioning, try isolating it and testing with a multimeter.
- Consult the MATEKSYS forums and community for support specific to the H743-SLIM V3.
FAQs
Q: Can I use this board for a fixed-wing aircraft? A: Yes, the H743-SLIM V3 is suitable for both multirotor and fixed-wing applications.
Q: What software should I use for configuring the H743-SLIM V3? A: You can use Betaflight, INAV, or any other compatible flight control software.
Q: How do I update the firmware on the H743-SLIM V3? A: Firmware can be updated via the USB VCP using the DFU mode. Follow the instructions provided by the firmware's documentation.
Q: Is the board compatible with ArduPilot? A: Yes, the H743-SLIM V3 is compatible with ArduPilot. Make sure to use the correct target when flashing the firmware.
For any further assistance, please refer to the MATEKSYS website or contact their support team.
Please note that this documentation is a general guide and may not cover all aspects of the H743-SLIM V3. Always refer to the latest resources provided by MATEKSYS for the most accurate and up-to-date information.