
How to Use Adafruit LTC4311 I2C Extender: Examples, Pinouts, and Specs
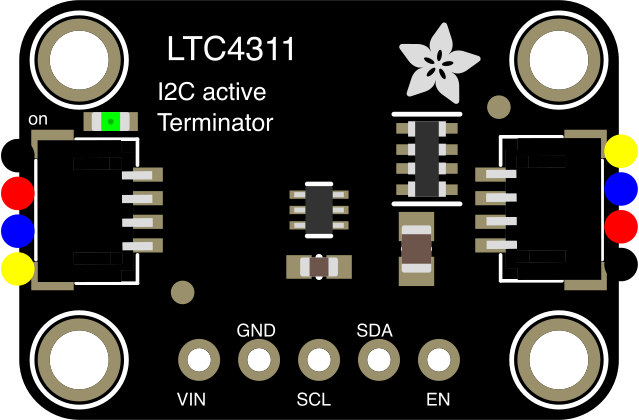
 Design with Adafruit LTC4311 I2C Extender in Cirkit Designer
Introduction
The Adafruit LTC4311 is an I2C bus extender designed to improve signal integrity and enable longer distances between I2C devices. It works by actively boosting the I2C signals, reducing signal degradation over extended cable lengths. This makes it an excellent choice for applications where I2C devices are distributed across a large area or connected via long cables.
Explore Projects Built with Adafruit LTC4311 I2C Extender
 Open Project in Cirkit Designer
 Open Project in Cirkit Designer
 Open Project in Cirkit Designer
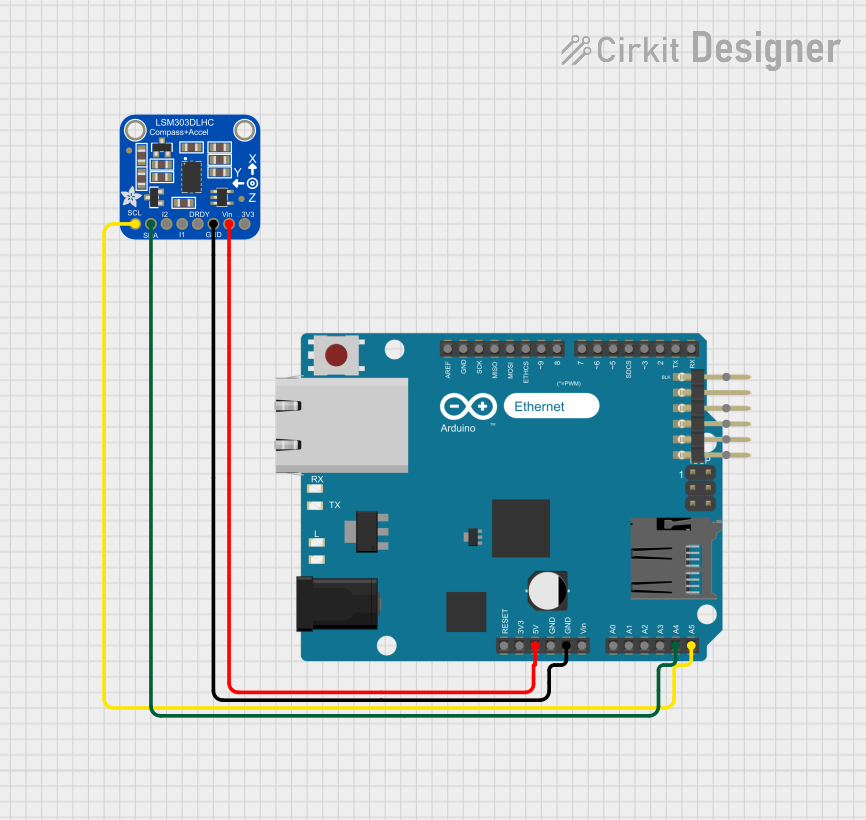 Open Project in Cirkit Designer
Explore Projects Built with Adafruit LTC4311 I2C Extender
Open Project in Cirkit DesignerOpen Project in Cirkit DesignerOpen Project in Cirkit DesignerOpen Project in Cirkit DesignerCommon Applications and Use Cases
- Extending I2C communication over long distances (e.g., 10+ meters)
- Connecting multiple I2C devices in distributed systems
- Industrial automation and sensor networks
- Robotics and remote sensing applications
- Projects requiring reliable I2C communication in noisy environments
Technical Specifications
The Adafruit LTC4311 is a compact and efficient solution for extending I2C communication. Below are its key technical specifications:
| Parameter | Value |
|---|---|
| Operating Voltage | 2.9V to 5.5V |
| I2C Speed Support | Standard (100 kHz) and Fast (400 kHz) |
| Maximum Bus Capacitance | Up to 4000 pF |
| Operating Temperature Range | -40°C to +85°C |
| Dimensions | 20mm x 18mm x 2mm |
| Current Consumption | ~1 mA |
Pin Configuration and Descriptions
The Adafruit LTC4311 has a simple pinout for easy integration into your circuit. Below is the pin configuration:
| Pin | Name | Description |
|---|---|---|
| 1 | VIN | Power input (2.9V to 5.5V). Connect to your system's power supply. |
| 2 | GND | Ground. Connect to the ground of your system. |
| 3 | SDA_IN | I2C data input. Connect to the SDA line of the I2C master or upstream device. |
| 4 | SCL_IN | I2C clock input. Connect to the SCL line of the I2C master or upstream device. |
| 5 | SDA_OUT | I2C data output. Connect to the SDA line of the I2C slave or downstream device. |
| 6 | SCL_OUT | I2C clock output. Connect to the SCL line of the I2C slave or downstream device. |
Usage Instructions
How to Use the Adafruit LTC4311 in a Circuit
- Power the LTC4311: Connect the
VINpin to a power supply (2.9V to 5.5V) and theGNDpin to the ground of your system. - Connect the I2C Lines:
- Attach the
SDA_INandSCL_INpins to the I2C master or upstream device. - Attach the
SDA_OUTandSCL_OUTpins to the I2C slave or downstream device.
- Attach the
- Pull-Up Resistors: Ensure that appropriate pull-up resistors are present on the I2C lines. The LTC4311 does not include internal pull-ups, so external resistors are required.
- Cable Selection: Use high-quality twisted-pair or shielded cables for long-distance connections to minimize noise and signal degradation.
Important Considerations and Best Practices
- Power Supply Stability: Ensure a stable power supply to avoid communication errors.
- Pull-Up Resistor Values: Use pull-up resistors with values between 1 kΩ and 10 kΩ, depending on the bus capacitance and speed.
- Cable Length: While the LTC4311 extends the I2C range, extremely long cables may still introduce delays or noise. Test your setup to ensure reliable communication.
- I2C Address Conflicts: If multiple LTC4311 modules are used, ensure that no address conflicts occur among connected I2C devices.
Example: Using the LTC4311 with an Arduino UNO
Below is an example of how to use the Adafruit LTC4311 to extend I2C communication between an Arduino UNO and a remote I2C sensor:
Circuit Diagram
- Connect the
VINpin of the LTC4311 to the 5V pin of the Arduino. - Connect the
GNDpin of the LTC4311 to the GND pin of the Arduino. - Connect the
SDA_INandSCL_INpins of the LTC4311 to the Arduino'sA4(SDA) andA5(SCL) pins, respectively. - Connect the
SDA_OUTandSCL_OUTpins of the LTC4311 to the remote I2C sensor's SDA and SCL lines.
Arduino Code Example
#include <Wire.h>

// I2C address of the remote sensor (replace with your sensor's address)
#define SENSOR_ADDRESS 0x40

void setup() {
  Wire.begin(); // Initialize I2C communication
  Serial.begin(9600); // Start serial communication for debugging

  // Test communication with the sensor
  Wire.beginTransmission(SENSOR_ADDRESS);
  if (Wire.endTransmission() == 0) {
    Serial.println("Sensor detected successfully!");
  } else {
    Serial.println("Failed to detect sensor. Check connections.");
  }
}

void loop() {
  // Example: Read data from the sensor
  Wire.requestFrom(SENSOR_ADDRESS, 2); // Request 2 bytes from the sensor
  if (Wire.available() == 2) {
    int data = Wire.read() << 8 | Wire.read(); // Combine two bytes into one value
    Serial.print("Sensor Data: ");
    Serial.println(data);
  } else {
    Serial.println("Failed to read data from sensor.");
  }

  delay(1000); // Wait 1 second before the next read
}
Troubleshooting and FAQs
Common Issues and Solutions
No Communication Between Devices:
- Verify that the
VINandGNDpins are properly connected. - Check the pull-up resistors on the I2C lines. Ensure they are within the recommended range.
- Confirm that the I2C addresses of all devices are unique.
- Verify that the
Signal Degradation Over Long Cables:
- Use shielded or twisted-pair cables to reduce noise.
- Ensure that the cable length does not exceed the practical limits of the LTC4311.
Intermittent Communication Errors:
- Check for loose connections or unstable power supply.
- Reduce the I2C speed if operating at the Fast (400 kHz) mode.
Device Not Detected:
- Double-check the wiring and ensure the SDA and SCL lines are correctly connected.
- Use a logic analyzer or oscilloscope to verify the I2C signals.
FAQs
Q: Can the LTC4311 work with 3.3V systems?
A: Yes, the LTC4311 supports operating voltages from 2.9V to 5.5V, making it compatible with both 3.3V and 5V systems.
Q: Do I need to add pull-up resistors if my microcontroller already has them?
A: If your microcontroller includes internal pull-ups, you may not need additional resistors. However, ensure the total pull-up resistance is appropriate for your bus capacitance.
Q: How far can I extend the I2C bus with the LTC4311?
A: The exact distance depends on factors like cable quality, speed, and noise. In ideal conditions, distances of 10 meters or more are achievable.
Q: Can I use multiple LTC4311 modules in the same system?
A: Yes, you can use multiple LTC4311 modules to extend different segments of the I2C bus. Ensure proper wiring and avoid address conflicts among connected devices.