How to Use IR Blaster: Examples, Pinouts, and Specs
Introduction
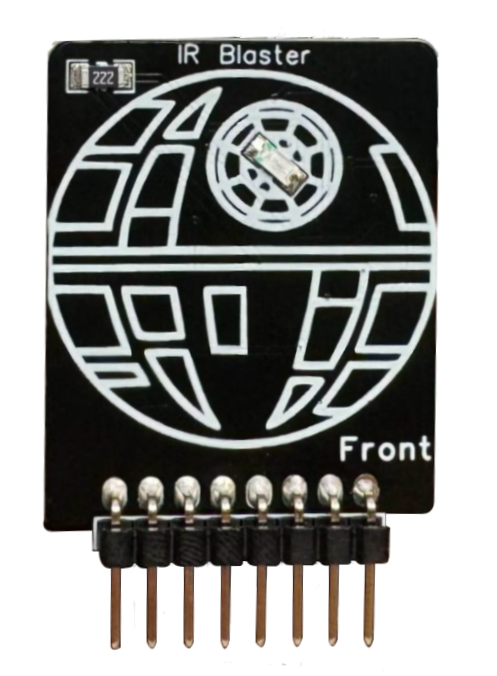
The IR Blaster by Rabbit Labs is a compact and versatile device designed to emit infrared (IR) signals, enabling remote control of electronic appliances such as televisions, air conditioners, and other IR-compatible devices. By mimicking the signals sent by traditional remote controls, the IR Blaster allows users to integrate and automate control of multiple devices in smart home systems or custom projects.
Explore Projects Built with IR Blaster

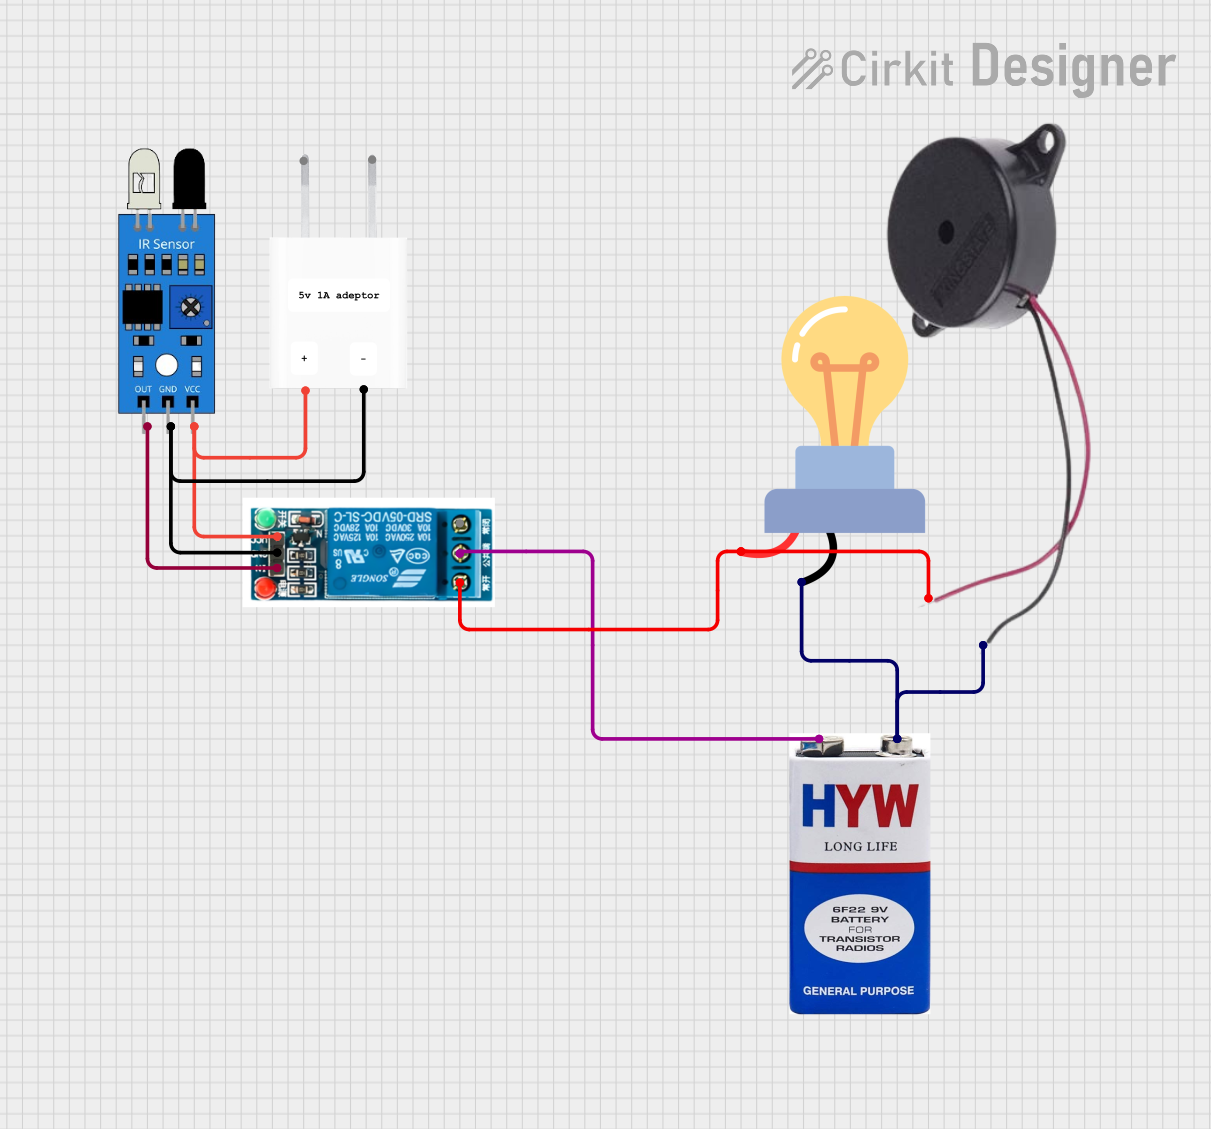
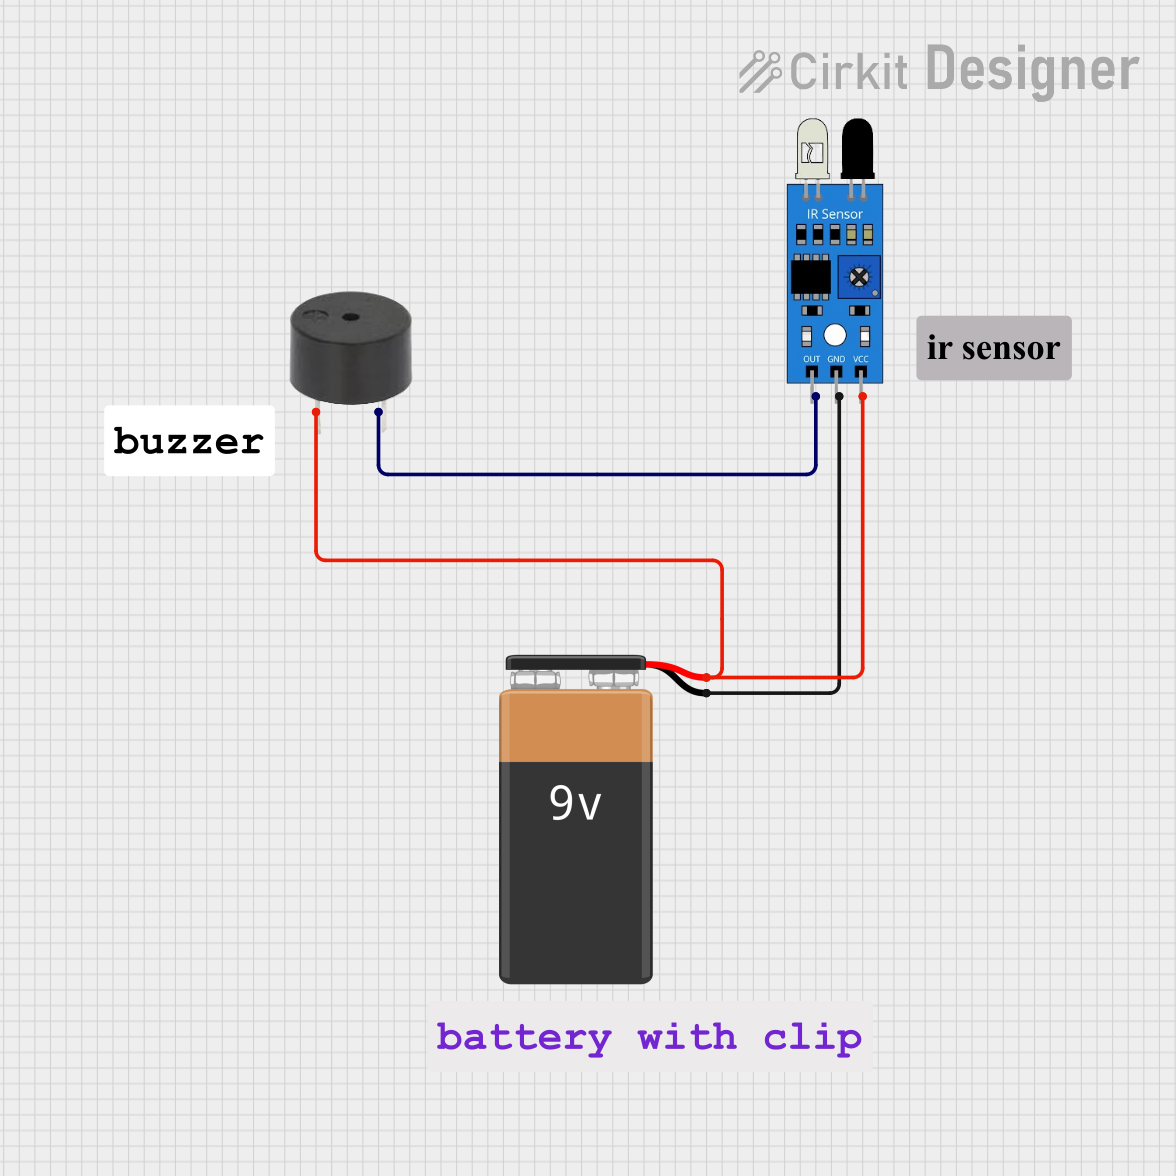
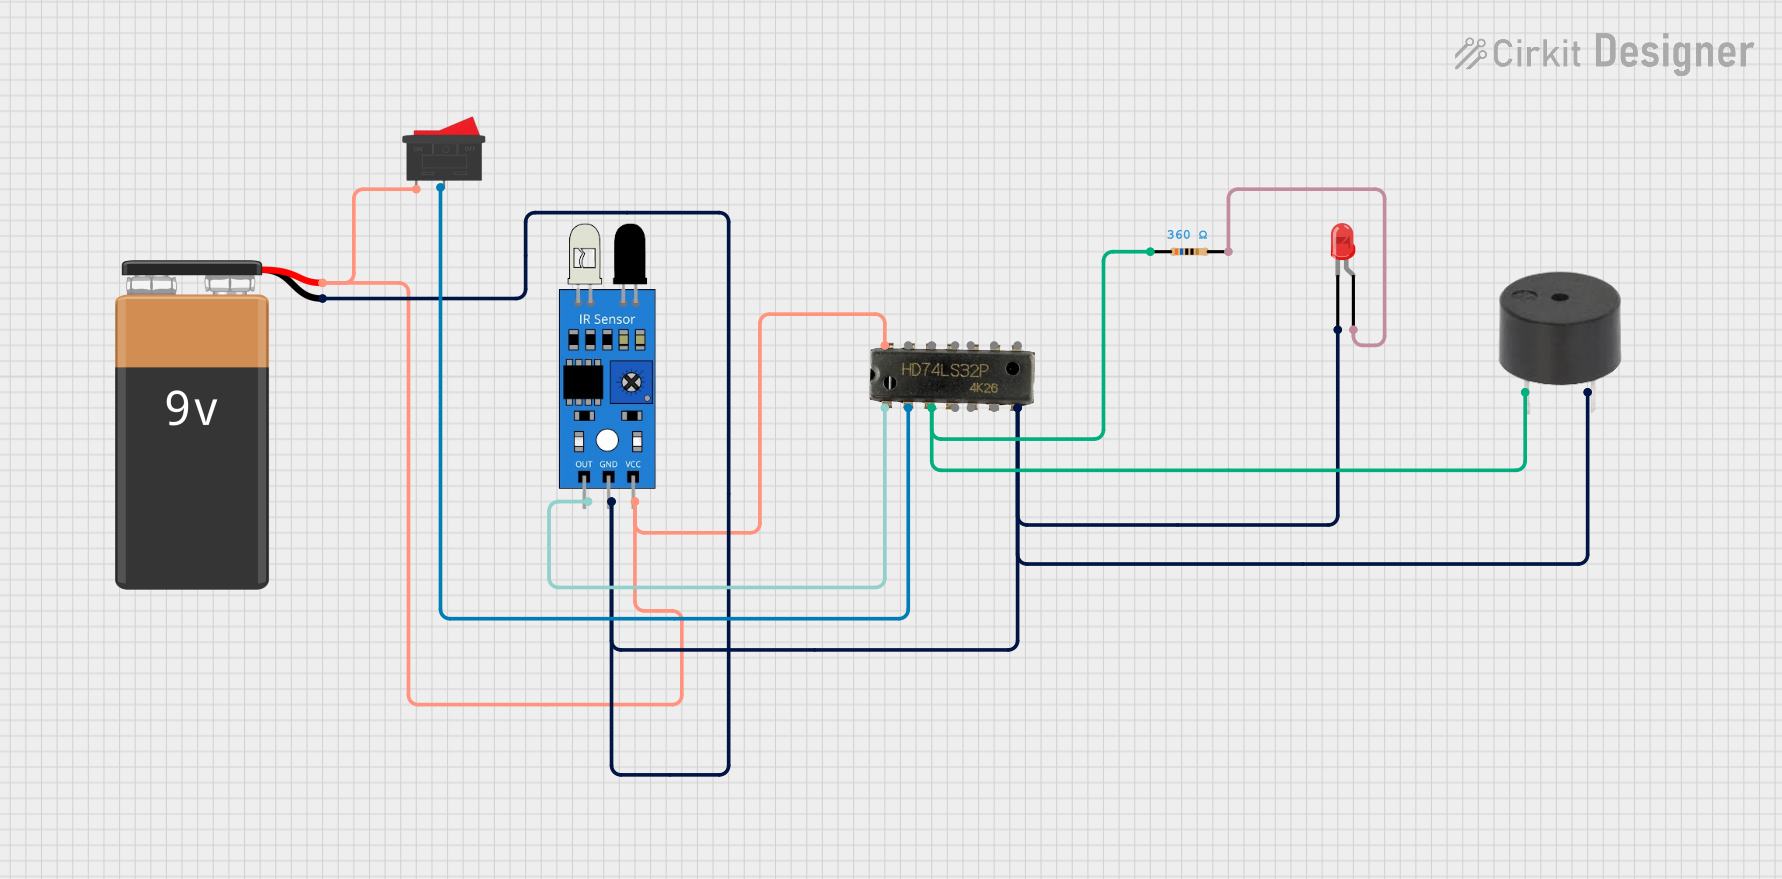
Explore Projects Built with IR Blaster
Common Applications and Use Cases
- Home Automation: Control appliances like TVs, set-top boxes, and air conditioners via smart home systems.
- DIY Projects: Build custom remote controls or integrate IR functionality into Arduino or Raspberry Pi projects.
- Universal Remote Control: Replace multiple remotes with a single IR Blaster for convenience.
- Testing and Debugging: Simulate IR signals for testing IR receivers in electronic devices.
Technical Specifications
The following table outlines the key technical details of the Rabbit Labs IR Blaster:
| Parameter | Specification |
|---|---|
| Operating Voltage | 3.3V to 5V |
| Operating Current | 20mA (typical) |
| IR Wavelength | 940nm |
| Transmission Range | Up to 10 meters (line of sight) |
| Modulation Frequency | 38kHz (standard for most devices) |
| Dimensions | 25mm x 15mm x 10mm |
| Connector Type | 3-pin header (VCC, GND, Signal) |
Pin Configuration and Descriptions
The IR Blaster has a 3-pin header for easy integration into circuits. The pinout is as follows:
| Pin | Name | Description |
|---|---|---|
| 1 | VCC | Power supply input (3.3V to 5V) |
| 2 | GND | Ground connection |
| 3 | Signal | Input pin for modulated IR signal (connect to MCU) |
Usage Instructions
How to Use the IR Blaster in a Circuit
- Power the IR Blaster: Connect the VCC pin to a 3.3V or 5V power source and the GND pin to the ground of your circuit.
- Signal Input: Connect the Signal pin to a microcontroller (e.g., Arduino) capable of generating a modulated 38kHz signal.
- Positioning: Ensure the IR LED is pointed toward the target device for optimal signal transmission.
- Programming: Use an appropriate library or code to generate the required IR signal for the target device.
Important Considerations and Best Practices
- Power Supply: Ensure a stable power supply to avoid signal distortion.
- Line of Sight: The IR Blaster requires a clear line of sight to the target device for reliable operation.
- Signal Modulation: Most devices use a 38kHz carrier frequency. Verify the frequency requirements of your target device.
- Heat Management: Avoid continuous operation for extended periods to prevent overheating of the IR LED.
Example: Using the IR Blaster with an Arduino UNO
Below is an example of how to use the IR Blaster with an Arduino UNO to send an IR signal:
#include <IRremote.h> // Include the IRremote library for IR signal generation

const int IR_PIN = 3; // Define the pin connected to the IR Blaster's Signal pin

IRsend irsend; // Create an IRsend object

void setup() {
  irsend.begin(); // Initialize the IRsend object
}

void loop() {
  // Send a sample IR code (e.g., NEC protocol, 32-bit code)
  irsend.sendNEC(0x20DF10EF, 32);
  // 0x20DF10EF is a sample IR code; replace it with your device's code
  delay(2000); // Wait for 2 seconds before sending the next signal
}
Note: Install the
IRremotelibrary in the Arduino IDE before uploading the code.
You can find the library in the Arduino Library Manager.
Troubleshooting and FAQs
Common Issues and Solutions
The target device does not respond to the IR Blaster.
- Solution: Ensure the IR Blaster is pointed directly at the device and within the specified range (10 meters).
- Solution: Verify that the correct IR code and modulation frequency (38kHz) are being used.
The IR Blaster overheats during operation.
- Solution: Avoid sending continuous signals for long durations. Use delays between transmissions.
The IR signal is weak or inconsistent.
- Solution: Check the power supply voltage and ensure it is within the 3.3V to 5V range.
- Solution: Inspect the connections for loose wires or poor soldering.
The IR Blaster does not emit any signal.
- Solution: Verify that the Signal pin is receiving a modulated signal from the microcontroller.
- Solution: Test the IR LED using a smartphone camera (most cameras can detect IR light).
FAQs
Can the IR Blaster control multiple devices?
Yes, as long as the correct IR codes for each device are programmed into the microcontroller.What is the maximum range of the IR Blaster?
The IR Blaster has a maximum range of 10 meters in a clear line of sight.Can I use the IR Blaster with a Raspberry Pi?
Yes, the IR Blaster can be used with a Raspberry Pi. Use an appropriate library, such aslirc, to generate IR signals.Does the IR Blaster support all IR protocols?
The IR Blaster supports most standard IR protocols, including NEC, Sony, and RC5, as long as the microcontroller generates the correct signal.
By following this documentation, you can effectively integrate the Rabbit Labs IR Blaster into your projects and control a wide range of IR-compatible devices.