How to Use USB Type A to Type B: Examples, Pinouts, and Specs

Introduction
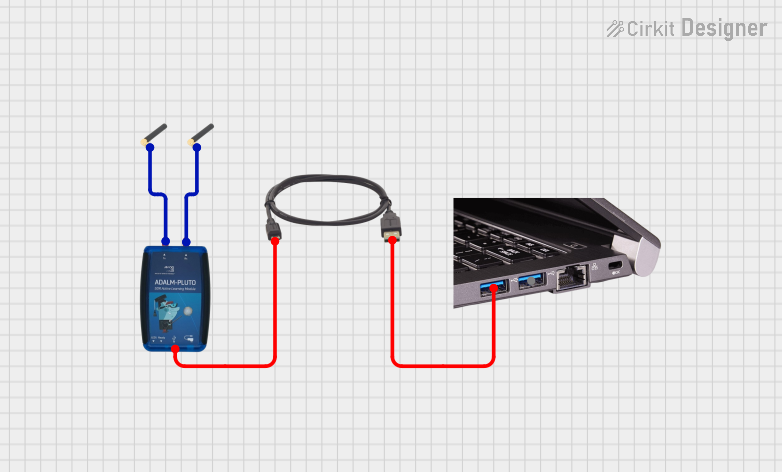
The USB Type A to Type B cable is a widely used connector designed to link devices with USB Type A ports, such as computers, to devices with USB Type B ports, commonly found in peripherals like printers, scanners, and some external hard drives. This cable facilitates both data transfer and power supply, making it an essential component in many electronic setups.
Explore Projects Built with USB Type A to Type B


Explore Projects Built with USB Type A to Type B
Common Applications and Use Cases
- Connecting printers, scanners, and other peripherals to computers.
- Powering and communicating with USB Type B devices.
- Used in hobbyist projects involving microcontrollers or development boards with USB Type B ports.
- Facilitating firmware updates or diagnostics for devices with USB Type B interfaces.
Technical Specifications
The USB Type A to Type B cable adheres to USB standards, ensuring reliable performance for data and power transmission.
Key Technical Details
- Connector Types: USB Type A (male) to USB Type B (male)
- Data Transfer Rate: Up to 480 Mbps (USB 2.0 standard)
- Power Supply: Up to 5V, 500mA (USB 2.0 standard)
- Cable Length: Typically ranges from 1 meter to 5 meters
- Compatibility: Backward compatible with USB 1.1 and forward compatible with USB 3.0 (at USB 2.0 speeds)
Pin Configuration and Descriptions
USB Type A Connector
| Pin Number | Name | Description |
|---|---|---|
| 1 | VBUS | +5V Power Supply |
| 2 | D- | Data Line (negative) |
| 3 | D+ | Data Line (positive) |
| 4 | GND | Ground |
USB Type B Connector
| Pin Number | Name | Description |
|---|---|---|
| 1 | VBUS | +5V Power Supply |
| 2 | D- | Data Line (negative) |
| 3 | D+ | Data Line (positive) |
| 4 | GND | Ground |
Usage Instructions
How to Use the USB Type A to Type B Cable
- Identify the Ports: Locate the USB Type A port on your computer and the USB Type B port on your peripheral device.
- Connect the Cable: Insert the Type A connector into the computer's USB port and the Type B connector into the device's USB port.
- Power On the Devices: Ensure both the computer and the peripheral device are powered on. The connection should be automatically recognized.
- Install Drivers (if necessary): Some devices may require specific drivers to function correctly. Follow the manufacturer's instructions to install them.
Important Considerations and Best Practices
- Cable Length: Avoid using excessively long cables to minimize signal degradation and power loss.
- USB Standards: Ensure the cable matches the USB standard required by your device (e.g., USB 2.0 or USB 3.0).
- Secure Connections: Make sure the connectors are firmly inserted to prevent intermittent connections.
- Avoid Excessive Bending: Do not bend the cable sharply, as this can damage the internal wiring.
Example: Connecting to an Arduino UNO
The Arduino UNO features a USB Type B port for programming and power. Below is an example of how to use the USB Type A to Type B cable with an Arduino UNO.
- Connect the Type B end of the cable to the Arduino UNO.
- Connect the Type A end to your computer's USB port.
- Open the Arduino IDE on your computer and select the correct port under Tools > Port.
- Upload the following example code to blink an LED:
// This example code blinks the onboard LED on the Arduino UNO
// The LED is connected to pin 13 on the board

void setup() {
  pinMode(13, OUTPUT); // Set pin 13 as an output
}

void loop() {
  digitalWrite(13, HIGH); // Turn the LED on
  delay(1000);            // Wait for 1 second
  digitalWrite(13, LOW);  // Turn the LED off
  delay(1000);            // Wait for 1 second
}
Troubleshooting and FAQs
Common Issues and Solutions
Device Not Recognized:
- Ensure the cable is securely connected to both devices.
- Check if the device requires specific drivers and install them.
- Try using a different USB port on your computer.
No Power to the Device:
- Verify that the computer's USB port is functional.
- Check the cable for physical damage or wear.
Slow Data Transfer:
- Ensure the cable meets the required USB standard (e.g., USB 2.0 for 480 Mbps).
- Avoid using USB hubs that may limit data transfer speeds.
Intermittent Connection:
- Inspect the connectors for dirt or damage.
- Replace the cable if it shows signs of wear or fraying.
FAQs
Q: Can I use this cable with USB 3.0 devices?
A: Yes, the cable is backward and forward compatible, but it will operate at USB 2.0 speeds.
Q: What is the maximum length for this cable?
A: For USB 2.0, the maximum recommended length is 5 meters to maintain signal integrity.
Q: Can this cable charge devices?
A: Yes, it can supply up to 5V and 500mA, suitable for low-power devices.
Q: Is this cable suitable for audio interfaces?
A: Yes, many audio interfaces use USB Type B ports, and this cable is commonly used for such applications.