How to Use 2.8" TFT LCD Shield: Examples, Pinouts, and Specs
Introduction
The 2.8" TFT LCD Shield is a thin-film transistor liquid crystal display designed to provide a vibrant graphical interface for microcontroller projects. Manufactured by Arduino, this shield is compatible with the Arduino UNO (Part ID: UNO) and other similar microcontroller boards. It features a 2.8-inch color display with touch functionality, making it ideal for projects requiring user interaction or data visualization.
Explore Projects Built with 2.8" TFT LCD Shield


Explore Projects Built with 2.8" TFT LCD Shield
Common Applications and Use Cases
- Graphical user interfaces (GUIs) for embedded systems
- Real-time data visualization (e.g., sensor readings, graphs)
- Touchscreen-based control panels
- Educational and prototyping projects
- Interactive IoT devices
Technical Specifications
The following table outlines the key technical details of the 2.8" TFT LCD Shield:
| Specification | Details |
|---|---|
| Display Type | TFT LCD |
| Screen Size | 2.8 inches |
| Resolution | 240 x 320 pixels |
| Color Depth | 65,536 colors (16-bit) |
| Touchscreen Type | Resistive |
| Operating Voltage | 5V (powered via Arduino UNO) |
| Communication Interface | SPI |
| Backlight | LED |
| Dimensions | 76.9mm x 53.4mm x 12mm |
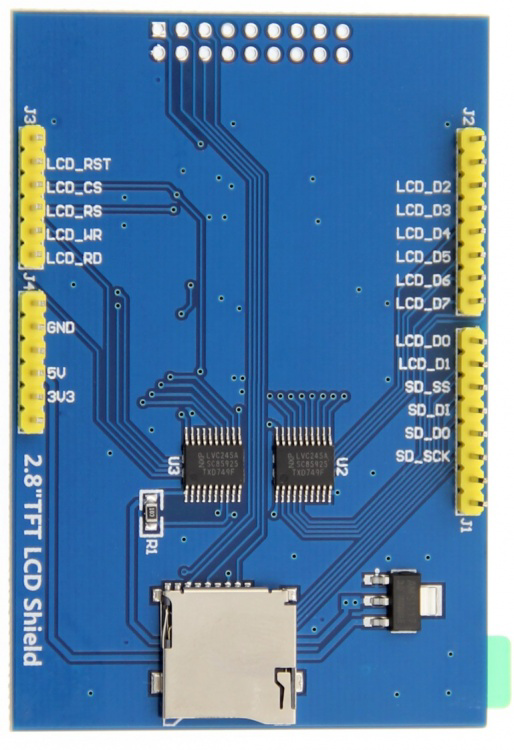
Pin Configuration and Descriptions
The 2.8" TFT LCD Shield connects directly to the Arduino UNO via its pin headers. Below is the pin configuration:
| Pin | Description |
|---|---|
| D0-D7 | Data pins for the display |
| CS | Chip Select for SPI communication |
| RS/DC | Register Select/Data Command pin |
| WR | Write signal for data transfer |
| RD | Read signal for data transfer |
| RESET | Resets the display |
| T_IRQ | Touchscreen interrupt pin |
| T_CS | Chip Select for touchscreen SPI communication |
| T_CLK | Clock signal for touchscreen SPI |
| T_DIN | Data input for touchscreen SPI |
| T_DO | Data output for touchscreen SPI |
| 5V | Power supply (5V from Arduino UNO) |
| GND | Ground |
Usage Instructions
How to Use the 2.8" TFT LCD Shield in a Circuit
- Mount the Shield: Align the shield's pin headers with the Arduino UNO's headers and gently press it into place.
- Install Required Libraries: Download and install the following libraries in the Arduino IDE:
Adafruit_GFX(for graphics rendering)Adafruit_TFTLCD(for controlling the display)TouchScreen(for touchscreen functionality)
- Connect the Shield: Ensure the shield is securely connected to the Arduino UNO.
- Upload Code: Write or upload a sketch to control the display and touchscreen.
Example Code
Below is an example sketch to display text and detect touch input:
#include <Adafruit_GFX.h>       // Graphics library
#include <Adafruit_TFTLCD.h>    // TFT LCD library
#include <TouchScreen.h>        // Touchscreen library

// Define pins for the touchscreen
#define YP A3  // Must be an analog pin, used for Y+
#define XM A2  // Must be an analog pin, used for X-
#define YM 9   // Can be a digital pin, used for Y-
#define XP 8   // Can be a digital pin, used for X+

// Calibration values for the touchscreen
#define TS_MINX 150
#define TS_MAXX 920
#define TS_MINY 120
#define TS_MAXY 940

// Screen dimensions
#define LCD_WIDTH  240
#define LCD_HEIGHT 320

// Create display and touchscreen objects
Adafruit_TFTLCD tft(A3, A2, A1, A0, A4); // Pins for the TFT LCD
TouchScreen ts = TouchScreen(XP, YP, XM, YM, 300); // Touchscreen object

void setup() {
  tft.begin(0x9341); // Initialize the display with the driver ID
  tft.setRotation(1); // Set screen orientation
  tft.fillScreen(0xFFFF); // Fill screen with white
  tft.setTextColor(0x0000); // Set text color to black
  tft.setTextSize(2); // Set text size
  tft.setCursor(10, 10); // Set cursor position
  tft.println("Hello, TFT LCD!"); // Display text
}

void loop() {
  // Check for touch input
  TSPoint p = ts.getPoint();
  if (p.z > ts.pressureThreshhold) { // If screen is touched
    // Map touch coordinates to screen dimensions
    int x = map(p.x, TS_MINX, TS_MAXX, 0, LCD_WIDTH);
    int y = map(p.y, TS_MINY, TS_MAXY, 0, LCD_HEIGHT);
    tft.fillCircle(x, y, 3, 0xF800); // Draw a red dot at the touch point
  }
}
Important Considerations and Best Practices
- Power Supply: Ensure the Arduino UNO is powered via USB or an external power source to provide sufficient current for the shield.
- Library Compatibility: Use the latest versions of the required libraries to avoid compatibility issues.
- Touchscreen Calibration: Adjust the
TS_MINX,TS_MAXX,TS_MINY, andTS_MAXYvalues in the code to match your specific shield.
Troubleshooting and FAQs
Common Issues and Solutions
Display Not Turning On:
- Ensure the shield is properly seated on the Arduino UNO.
- Verify that the Arduino UNO is powered.
Touchscreen Not Responding:
- Check the touchscreen pin connections in the code.
- Recalibrate the touchscreen by adjusting the calibration values.
Distorted or No Graphics:
- Confirm the correct driver ID is passed to
tft.begin(). - Ensure the
Adafruit_GFXandAdafruit_TFTLCDlibraries are installed and up to date.
- Confirm the correct driver ID is passed to
FAQs
Q: Can this shield be used with boards other than the Arduino UNO?
A: Yes, it can be used with other Arduino boards that have the same pinout, such as the Arduino Mega. However, additional configuration may be required.
Q: How do I display images on the screen?
A: You can use the Adafruit_GFX library to load and display bitmap images. Refer to the library documentation for details.
Q: Is the touchscreen multitouch capable?
A: No, the touchscreen is resistive and supports single-touch input only.
By following this documentation, you can effectively integrate the 2.8" TFT LCD Shield into your projects and troubleshoot common issues.