Cirkit Designer Logo
Cirkit Designer
Your all-in-one circuit design IDE
Home / 
Component Documentation

How to Use Adafruit FeatherWing Doubler: Examples, Pinouts, and Specs

Image of Adafruit FeatherWing Doubler
Cirkit Designer LogoDesign with Adafruit FeatherWing Doubler in Cirkit Designer

Introduction

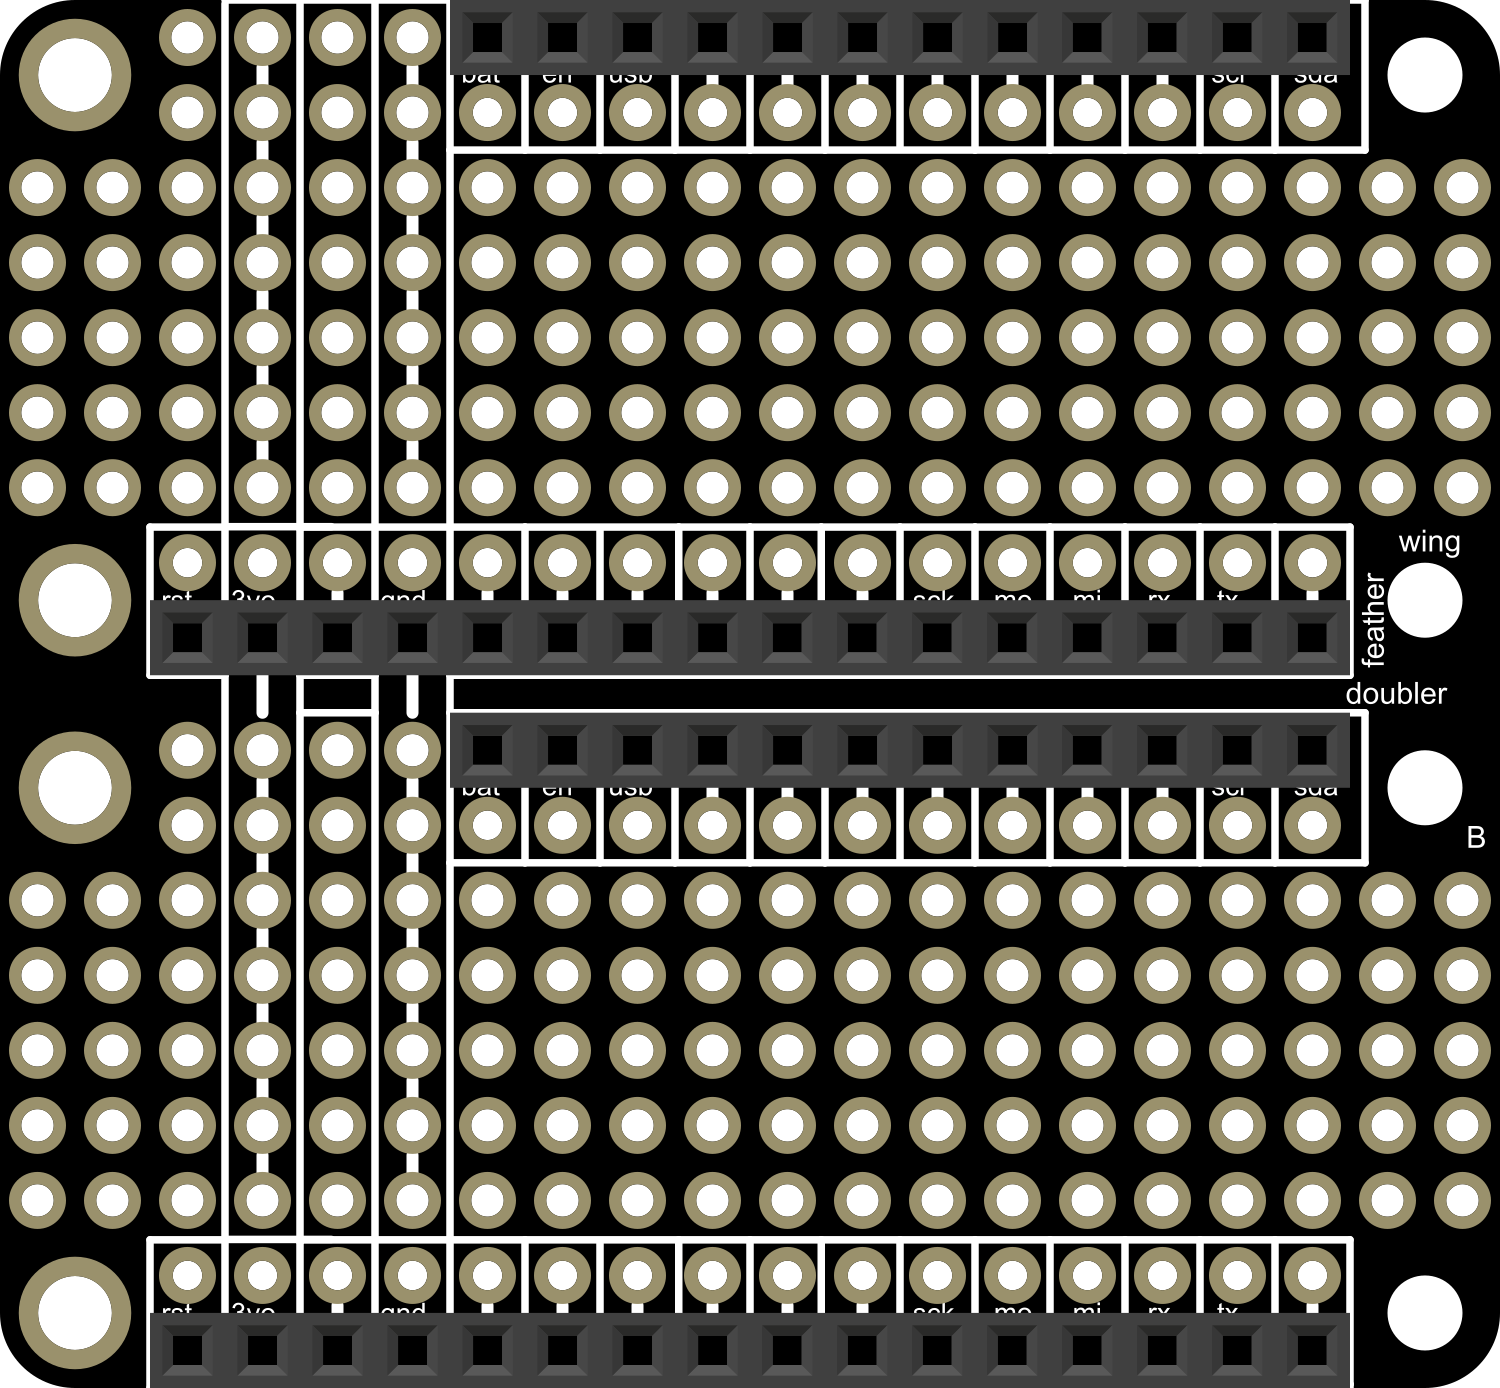
The Adafruit FeatherWing Doubler is an innovative prototyping add-on designed to complement the Adafruit Feather ecosystem. This board effectively doubles the available prototyping area and provides additional access to the GPIO pins of a Feather board. It is ideal for hobbyists, engineers, and makers who require more space for components or need to connect multiple FeatherWings together.

Explore Projects Built with Adafruit FeatherWing Doubler

Use Cirkit Designer to design, explore, and prototype these projects online. Some projects support real-time simulation. Click "Open Project" to start designing instantly!
ESP32-Based Vibration Feedback System with Quad Alphanumeric Display and ADXL343 Accelerometer
Image of EC444 - Quest 3: A project utilizing Adafruit FeatherWing Doubler in a practical application
This circuit features an Adafruit HUZZAH32 ESP32 Feather board as the central microcontroller, which is connected to an Adafruit Quad AlphaNumeric Featherwing display and an Adafruit ADXL343 accelerometer via I2C communication (SCL and SDA lines). The ESP32 controls a vibration motor connected to one of its GPIO pins (A5_IO4) and shares a common power supply (3.3V) and ground (GND) with the other components. The purpose of this circuit is likely to read acceleration data, display information on the alphanumeric display, and provide haptic feedback through the vibration motor.
Cirkit Designer LogoOpen Project in Cirkit Designer
Multi-Sensor Health Monitoring System with Adafruit Feather M0 Adalogger
Image of health tracker: A project utilizing Adafruit FeatherWing Doubler in a practical application
This circuit is designed to interface multiple sensors with an Adafruit Feather M0 Adalogger microcontroller for data logging purposes. The sensors include a MAX30205 temperature sensor, a body dehydration sensor, a MAX30102 pulse oximeter, an Adafruit LSM6DSOX 6-axis accelerometer and gyroscope, and an Adafruit BME680 environmental sensor. All sensors are connected to the microcontroller via an I2C bus, sharing the SDA and SCL lines for communication.
Cirkit Designer LogoOpen Project in Cirkit Designer
Arduino UNO and OLED FeatherWing Display: Battery-Powered Hello World Project
Image of ARDUINO_SSD1306: A project utilizing Adafruit FeatherWing Doubler in a practical application
This circuit consists of an Arduino UNO connected to an Adafruit OLED FeatherWing display via I2C communication (SDA and SCL lines). The Arduino is powered through a Vcc source and provides 3.3V and GND connections to the OLED display. The Arduino runs a program to display 'Hello, World!' on the OLED screen.
Cirkit Designer LogoOpen Project in Cirkit Designer
Touch-Sensitive Interface with Adafruit MPR121 and Feather 32u4 Bluefruit
Image of MPR121: A project utilizing Adafruit FeatherWing Doubler in a practical application
This circuit integrates an Adafruit MPR121 capacitive touch sensor with an Adafruit Feather 32u4 Bluefruit microcontroller. The MPR121 is powered by the Feather and communicates via I2C (SCL and SDA) to detect touch inputs, which can be processed or transmitted wirelessly by the Feather.
Cirkit Designer LogoOpen Project in Cirkit Designer

Explore Projects Built with Adafruit FeatherWing Doubler

Use Cirkit Designer to design, explore, and prototype these projects online. Some projects support real-time simulation. Click "Open Project" to start designing instantly!
Image of EC444 - Quest 3: A project utilizing Adafruit FeatherWing Doubler in a practical application
ESP32-Based Vibration Feedback System with Quad Alphanumeric Display and ADXL343 Accelerometer
This circuit features an Adafruit HUZZAH32 ESP32 Feather board as the central microcontroller, which is connected to an Adafruit Quad AlphaNumeric Featherwing display and an Adafruit ADXL343 accelerometer via I2C communication (SCL and SDA lines). The ESP32 controls a vibration motor connected to one of its GPIO pins (A5_IO4) and shares a common power supply (3.3V) and ground (GND) with the other components. The purpose of this circuit is likely to read acceleration data, display information on the alphanumeric display, and provide haptic feedback through the vibration motor.
Cirkit Designer LogoOpen Project in Cirkit Designer
Image of health tracker: A project utilizing Adafruit FeatherWing Doubler in a practical application
Multi-Sensor Health Monitoring System with Adafruit Feather M0 Adalogger
This circuit is designed to interface multiple sensors with an Adafruit Feather M0 Adalogger microcontroller for data logging purposes. The sensors include a MAX30205 temperature sensor, a body dehydration sensor, a MAX30102 pulse oximeter, an Adafruit LSM6DSOX 6-axis accelerometer and gyroscope, and an Adafruit BME680 environmental sensor. All sensors are connected to the microcontroller via an I2C bus, sharing the SDA and SCL lines for communication.
Cirkit Designer LogoOpen Project in Cirkit Designer
Image of ARDUINO_SSD1306: A project utilizing Adafruit FeatherWing Doubler in a practical application
Arduino UNO and OLED FeatherWing Display: Battery-Powered Hello World Project
This circuit consists of an Arduino UNO connected to an Adafruit OLED FeatherWing display via I2C communication (SDA and SCL lines). The Arduino is powered through a Vcc source and provides 3.3V and GND connections to the OLED display. The Arduino runs a program to display 'Hello, World!' on the OLED screen.
Cirkit Designer LogoOpen Project in Cirkit Designer
Image of MPR121: A project utilizing Adafruit FeatherWing Doubler in a practical application
Touch-Sensitive Interface with Adafruit MPR121 and Feather 32u4 Bluefruit
This circuit integrates an Adafruit MPR121 capacitive touch sensor with an Adafruit Feather 32u4 Bluefruit microcontroller. The MPR121 is powered by the Feather and communicates via I2C (SCL and SDA) to detect touch inputs, which can be processed or transmitted wirelessly by the Feather.
Cirkit Designer LogoOpen Project in Cirkit Designer

Common Applications and Use Cases

  • Expanding the number of FeatherWings that can be connected to a single Feather board.
  • Providing a larger breadboard-like area for prototyping custom circuits.
  • Facilitating the creation of more complex projects by offering additional GPIO access.

Technical Specifications

Key Technical Details

  • Dimensions: 50.8mm x 22.9mm x 1.6mm / 2" x 0.9" x 0.06"
  • Weight: 4.2g / 0.15oz
  • Compatibility: Works with all Feather boards

Pin Configuration and Descriptions

Pin Number Description
GND Ground
3V 3.3V Supply from Feather
BAT Battery Voltage (if available)
USB USB Voltage (if available)
A0-D13 Analog and Digital Pin Breakout
SCK, MISO, MOSI SPI Pin Breakout
SDA, SCL I2C Pin Breakout
TX, RX UART Pin Breakout

Usage Instructions

How to Use the Component in a Circuit

  1. Mounting the Feather Board:

    • Align the headers of your Feather board with the female headers on the FeatherWing Doubler.
    • Press down gently to ensure a secure connection.
  2. Connecting Additional FeatherWings:

    • Use the pass-through headers to stack another FeatherWing on top of the Doubler.
    • Ensure that the pins are aligned correctly to avoid damaging the boards.
  3. Prototyping:

    • Use the prototyping area to add components or build custom circuits.
    • The grid of 0.1" spaced holes is compatible with most through-hole components and male/female headers.

Important Considerations and Best Practices

  • Power Supply: Ensure that the power requirements of all connected boards and components do not exceed the power capabilities of the Feather board.
  • Pin Usage: Be mindful of pin conflicts when stacking multiple FeatherWings. Consult the documentation for each board to avoid issues.
  • Firmware Updates: When using the Doubler with development boards that support firmware updates, ensure that the connections do not interfere with the update process.

Troubleshooting and FAQs

Common Issues

  • Loose Connections: If your circuit is not working as expected, check all connections for a secure fit.
  • Power Issues: Verify that the power supply is adequate for all connected components.
  • Pin Conflicts: If multiple boards are not working together, ensure there are no pin conflicts.

Solutions and Tips for Troubleshooting

  • Re-seat Connections: Disconnect and reconnect the Feather board and any FeatherWings to ensure a good connection.
  • Check Compatibility: Make sure that all FeatherWings are compatible with each other and with the Feather board in use.
  • Review Documentation: Refer to the documentation for each individual FeatherWing for specific troubleshooting steps.

FAQs

Q: Can I use the FeatherWing Doubler with any Feather board? A: Yes, the Doubler is designed to be compatible with all Feather boards.

Q: How many FeatherWings can I connect with the Doubler? A: The Doubler allows you to connect one additional FeatherWing directly. However, with stacking headers, you can add more.

Q: Does the Doubler come with headers pre-soldered? A: Headers are usually not pre-soldered, giving you the flexibility to choose the best configuration for your project.

Example Code for Arduino UNO

The FeatherWing Doubler is not directly used with an Arduino UNO, as it is designed for the Adafruit Feather series. However, if you are using a Feather compatible with Arduino IDE, you can use the standard GPIO functions to interact with the pins.

// Example code to blink an LED connected to pin 13 on the Doubler
void setup() {
  pinMode(13, OUTPUT); // Set pin 13 as an output
}

void loop() {
  digitalWrite(13, HIGH); // Turn the LED on
  delay(1000);           // Wait for a second
  digitalWrite(13, LOW);  // Turn the LED off
  delay(1000);           // Wait for a second
}

Remember to adjust the pin numbers and functionality according to the specific Feather board and the peripherals you are using. Always consult the Feather board's documentation for the correct usage of GPIO pins.