How to Use Hobby Gearmotor with 48:1 gearbox: Examples, Pinouts, and Specs
Introduction
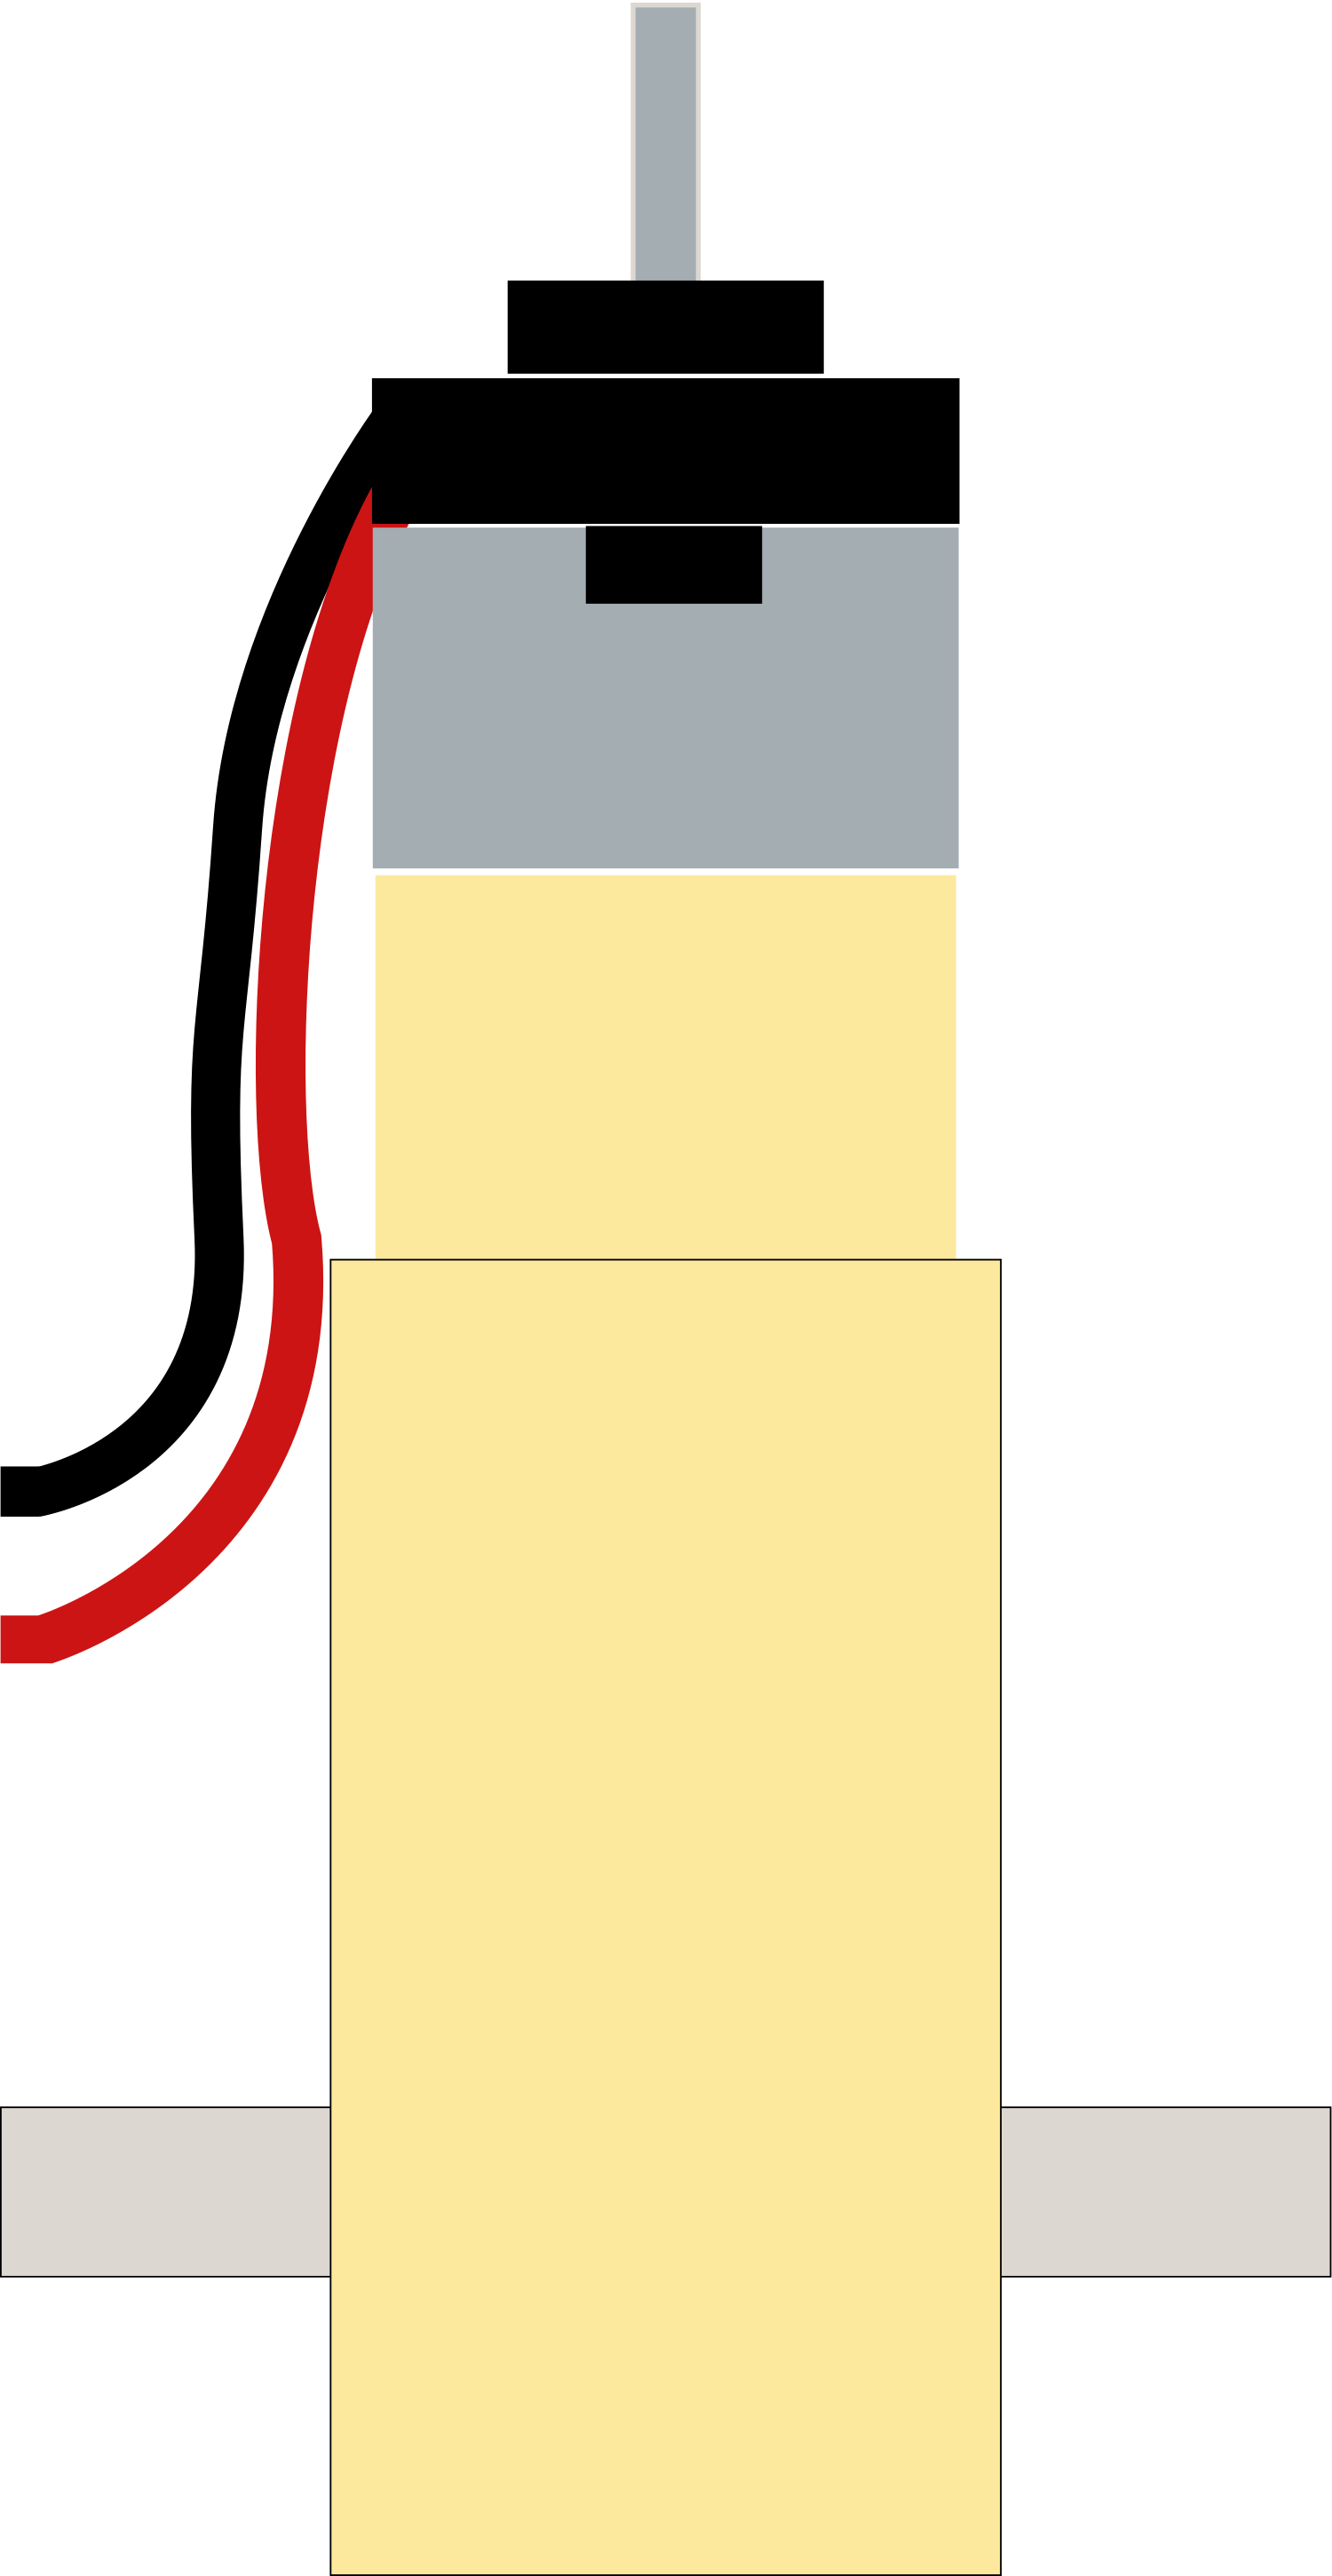
The Hobby Gearmotor with a 48:1 gearbox is a small, efficient, and reliable DC motor that is ideal for hobbyists and professionals alike. It is designed to provide high torque at low speeds, which is perfect for robotics, automated projects, and any application where precise motion control is required.
Explore Projects Built with Hobby Gearmotor with 48:1 gearbox
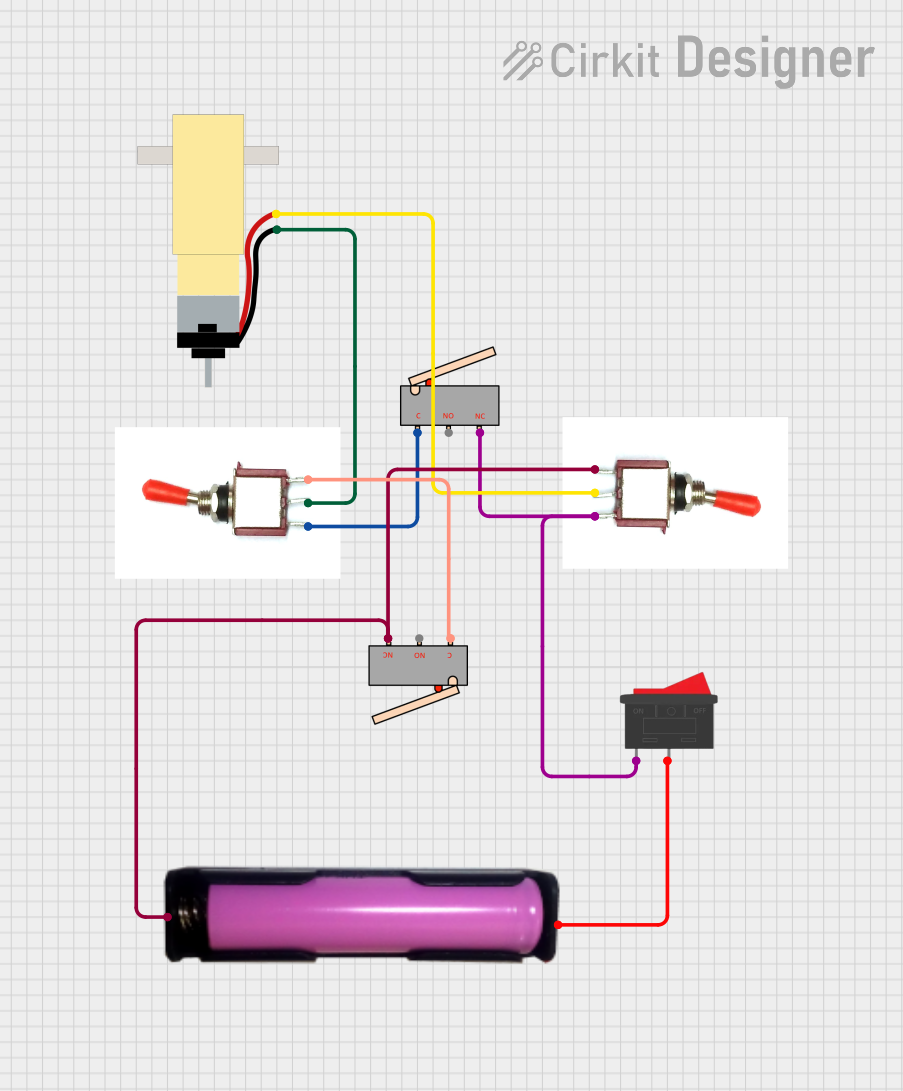

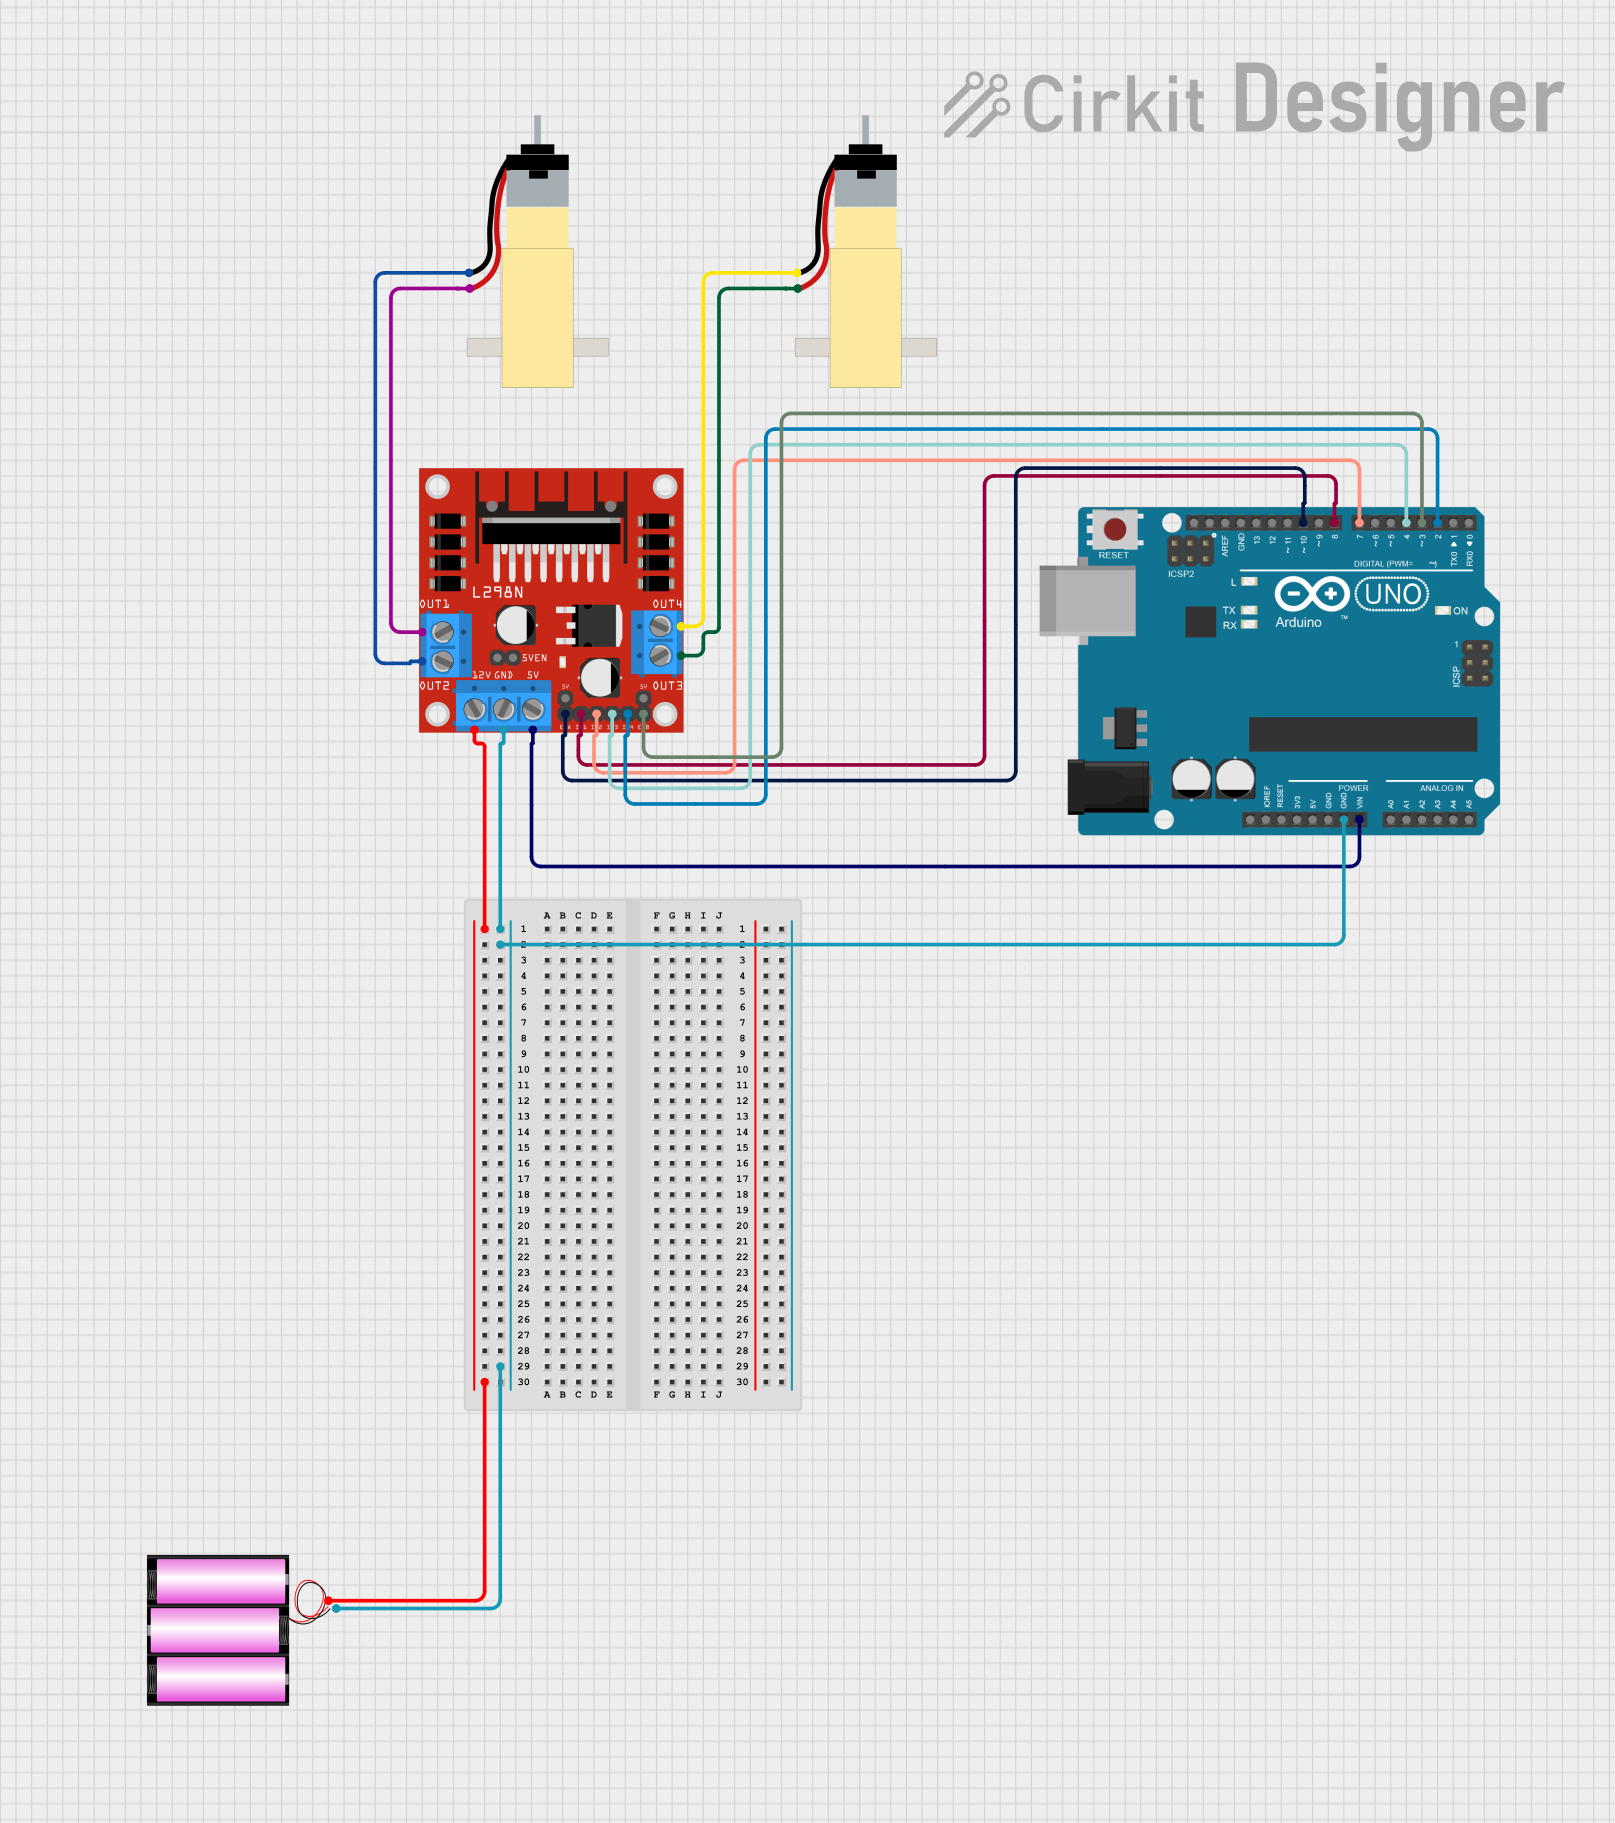
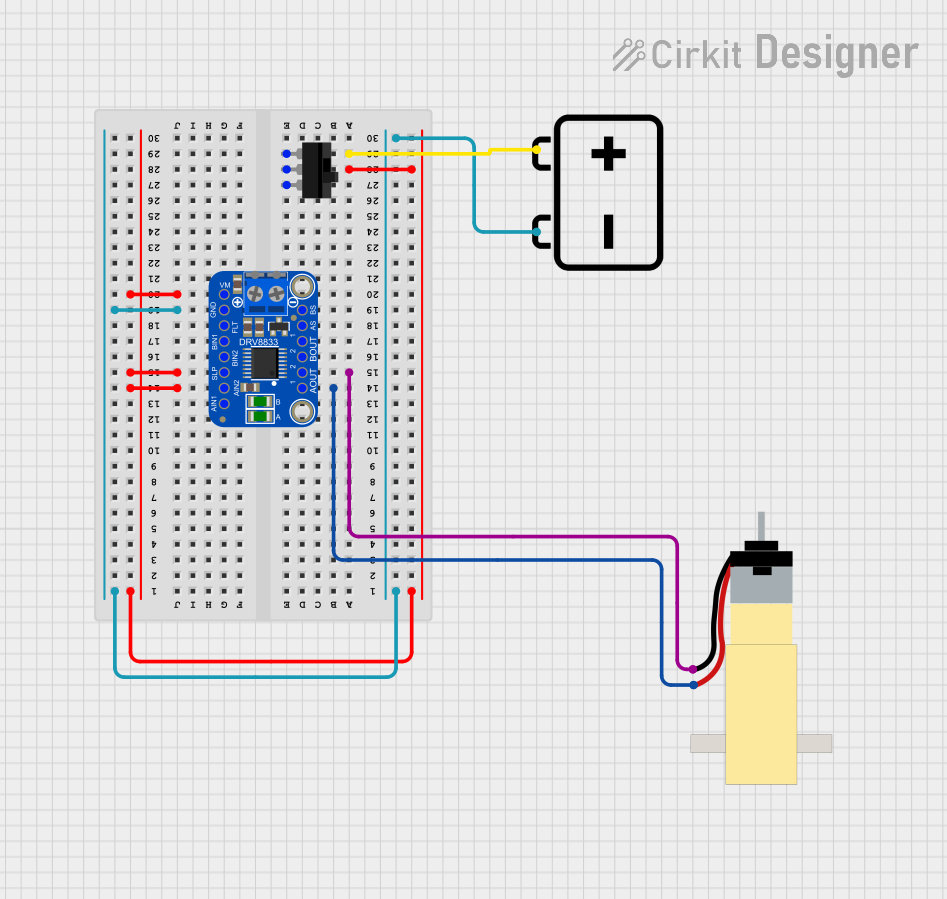
Explore Projects Built with Hobby Gearmotor with 48:1 gearbox
Common Applications and Use Cases
- Robotics: driving wheels or tracks
- Automated machinery: conveyor belts, feeders
- Art installations: kinetic sculptures
- Educational projects: teaching principles of mechanics and electronics
Technical Specifications
Key Technical Details
- Voltage: 3V to 12V DC
- No-Load Speed: Approximately 125 RPM at 6V
- Stall Torque: Approximately 2 kg-cm at 6V
- Gear Ratio: 48:1
- Current: 70 mA no-load, up to 800 mA stall at 6V
Pin Configuration and Descriptions
| Pin Number | Description | Notes |
|---|---|---|
| 1 | Motor + (Vcc) | Connect to positive power supply |
| 2 | Motor - (GND) | Connect to ground |
Usage Instructions
How to Use the Component in a Circuit
- Power Supply: Connect the motor's positive terminal to a suitable power supply (3V to 12V) and the negative terminal to the ground.
- Control: To control the motor's direction and speed, use a motor driver compatible with the voltage and current specifications of the motor.
- Mounting: Secure the motor to your project using the mounting holes provided on the gearbox.
Important Considerations and Best Practices
- Voltage Range: Do not exceed the recommended voltage range as it may damage the motor.
- Current Limitations: Ensure that your power supply and motor driver can handle the stall current of the motor.
- Heat Dissipation: Under high loads, the motor may generate heat. Allow for adequate ventilation.
- Load: Avoid placing excessive loads on the motor shaft, which may lead to premature wear or damage.
Example Code for Arduino UNO
#include <Arduino.h>

// Define motor control pins
const int motorPin1 = 3; // Motor pin connected to Arduino's pin 3 (PWM)
const int motorPin2 = 4; // Motor pin connected to Arduino's pin 4

void setup() {
  // Set motor control pins as outputs
  pinMode(motorPin1, OUTPUT);
  pinMode(motorPin2, OUTPUT);
}

void loop() {
  // Spin motor clockwise
  analogWrite(motorPin1, 128); // Set speed (0-255)
  digitalWrite(motorPin2, LOW);
  delay(2000); // Run for 2 seconds

  // Stop motor
  digitalWrite(motorPin1, LOW);
  digitalWrite(motorPin2, LOW);
  delay(1000); // Stop for 1 second

  // Spin motor counterclockwise
  digitalWrite(motorPin1, LOW);
  analogWrite(motorPin2, 128); // Set speed (0-255)
  delay(2000); // Run for 2 seconds

  // Stop motor
  digitalWrite(motorPin1, LOW);
  digitalWrite(motorPin2, LOW);
  delay(1000); // Stop for 1 second
}
Troubleshooting and FAQs
Common Issues
- Motor not spinning: Check power supply connections and ensure the voltage is within the specified range.
- Motor stalling: Reduce the load or check if the power supply can handle the stall current.
- Overheating: Ensure the motor is not under excessive load and has proper ventilation.
Solutions and Tips for Troubleshooting
- Check Connections: Loose connections can cause intermittent or no operation.
- Power Supply: Verify that the power supply is capable of delivering sufficient current.
- Motor Driver: Use a motor driver that matches the motor's requirements and protects against overcurrent conditions.
FAQs
Q: Can I run the motor directly from an Arduino pin? A: No, the Arduino pin cannot supply enough current. Use a motor driver.
Q: What is the maximum load I can put on the motor shaft? A: The maximum load depends on the torque rating. Exceeding 2 kg-cm at 6V may cause damage.
Q: How can I reverse the motor's direction? A: Reverse the polarity of the motor's power connections, or use an H-bridge motor driver.
Q: Can I use PWM to control the motor speed? A: Yes, PWM can be used to control the speed effectively.
Q: How do I mount the motor to my project? A: Use the mounting holes on the gearbox to secure the motor with screws.