How to Use ili9341 tft display: Examples, Pinouts, and Specs
Introduction
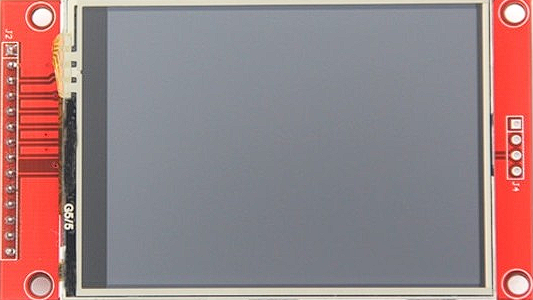
The ILI9341 TFT display is a versatile and widely-used display module commonly used in electronic projects. It features a high-resolution color screen and can display graphics and text with great clarity. This display is often found in embedded systems, touch screen interfaces, and other applications where a colorful and interactive user interface is required.
Explore Projects Built with ili9341 tft display


Explore Projects Built with ili9341 tft display
Common Applications and Use Cases
- Handheld instruments
- Touch screen devices
- Graphical user interfaces for embedded systems
- Digital clocks and watches
- Gaming devices and calculators
Technical Specifications
Key Technical Details
- Display Size: 2.4 inches
- Resolution: 240x320 pixels
- Interface: SPI (Serial Peripheral Interface)
- Color Depth: 262K/65K
- Operating Voltage: 2.5V to 3.3V
- Logic Level Voltage: 3.3V (5V tolerant with level shifter)
- Operating Temperature: -40°C to 85°C
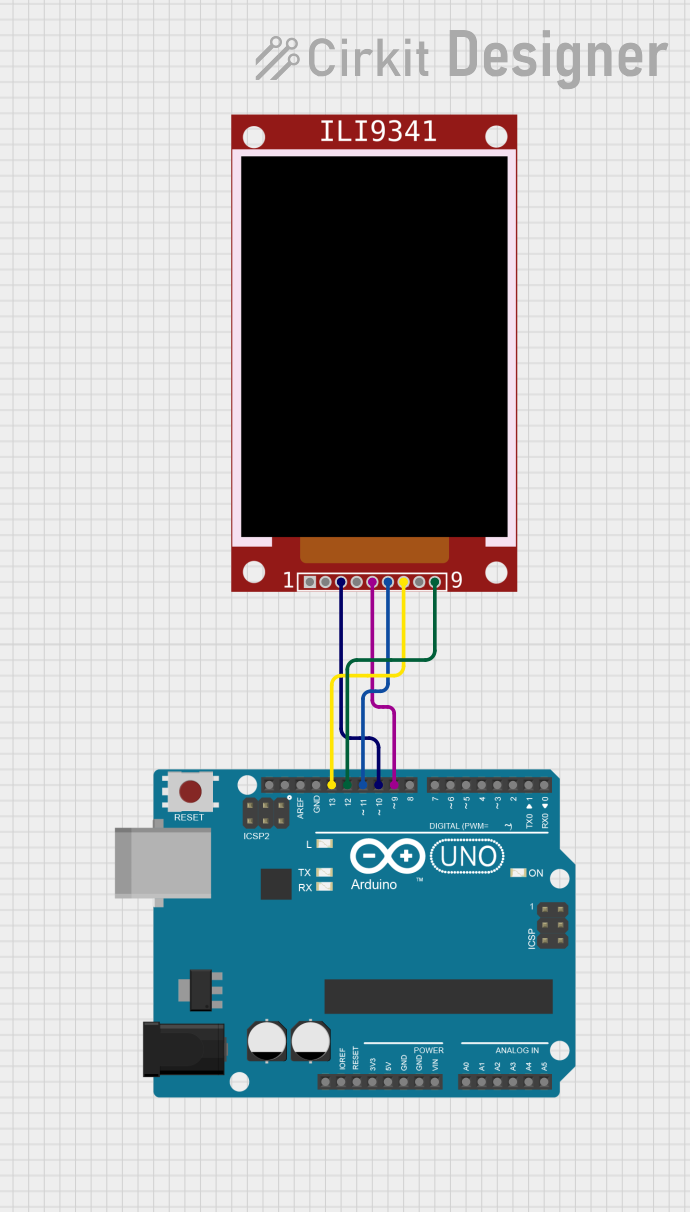
Pin Configuration and Descriptions
| Pin Number | Pin Name | Description |
|---|---|---|
| 1 | GND | Ground |
| 2 | VCC | Power supply (2.5V to 3.3V) |
| 3 | CS | Chip Select for SPI |
| 4 | RESET | Reset pin (active low) |
| 5 | D/C | Data/Command control pin |
| 6 | MOSI | Master Out Slave In for SPI |
| 7 | SCK | Serial Clock for SPI |
| 8 | LED | Backlight control (anode) |
| 9 | MISO | Master In Slave Out for SPI (optional) |
Usage Instructions
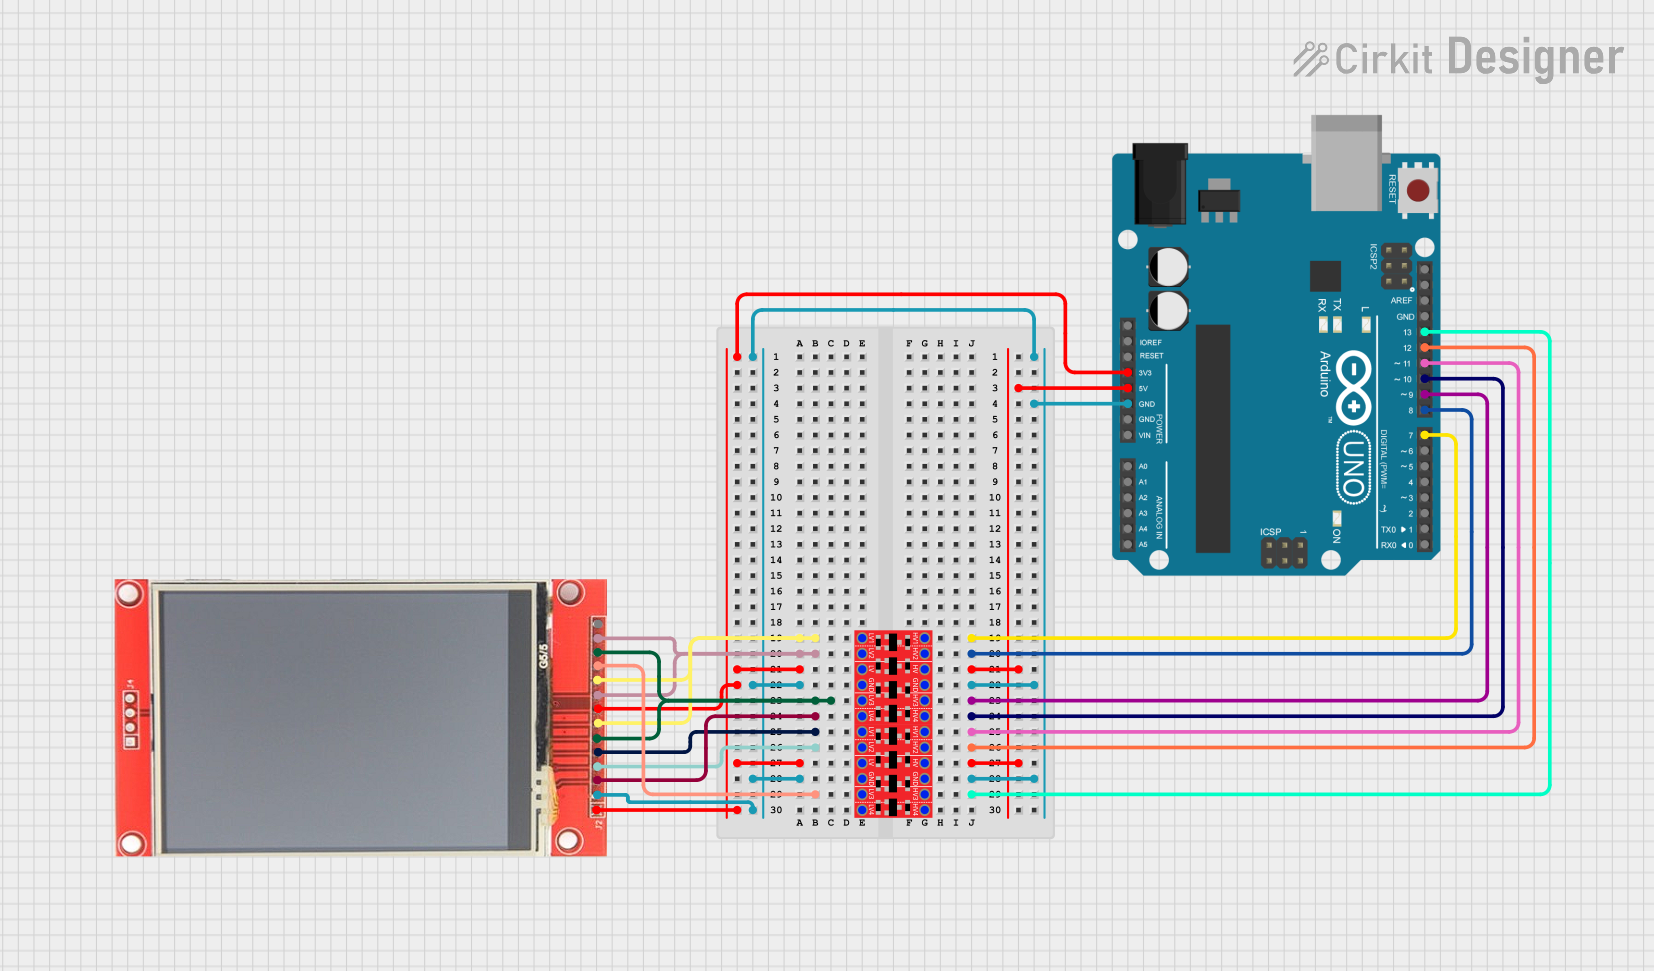
How to Use the Component in a Circuit
- Power Connections: Connect VCC to a 3.3V power supply and GND to the ground.
- SPI Connections: Connect SCK to the SPI clock, MOSI to SPI Master Out, and MISO to SPI Master In if bidirectional communication is required.
- Control Pins: Connect CS to the chip select, D/C to the data/command control, and RESET to the reset circuitry (can be connected to a digital pin for software control).
- Backlight: Connect LED to a PWM-capable pin for backlight control or directly to 3.3V for constant backlight.
Important Considerations and Best Practices
- Always ensure that the power supply is within the specified range to prevent damage.
- Use a level shifter if you are interfacing with a 5V microcontroller like Arduino UNO.
- For better performance, use hardware SPI rather than software SPI.
- Avoid exposing the display to direct sunlight or high temperatures to prevent damage.
Example Code for Arduino UNO
#include <SPI.h>
#include <Adafruit_GFX.h>
#include <Adafruit_ILI9341.h>

// Pin configuration for the ILI9341
#define TFT_CS     10
#define TFT_RST    9
#define TFT_DC     8

// Initialize Adafruit ILI9341
Adafruit_ILI9341 tft = Adafruit_ILI9341(TFT_CS, TFT_DC, TFT_RST);

void setup() {
  // Initialize the display
  tft.begin();

  // Set the rotation of the screen as needed
  tft.setRotation(1);

  // Fill the screen with black color
  tft.fillScreen(ILI9341_BLACK);
}

void loop() {
  // Example: Draw a red rectangle
  tft.fillRect(50, 50, 100, 100, ILI9341_RED);

  // Example: Draw text
  tft.setCursor(60, 60);
  tft.setTextColor(ILI9341_WHITE);
  tft.setTextSize(1);
  tft.print("Hello World!");
}
Troubleshooting and FAQs
Common Issues Users Might Face
- Display not powering on: Check the power connections and ensure the voltage is within the specified range.
- No display or white screen: Ensure that the SPI connections are correct and the CS, RESET, and D/C pins are connected properly.
- Flickering display: Check the LED backlight connections and ensure a stable power supply.
Solutions and Tips for Troubleshooting
- Double-check wiring against the pin configuration table.
- Use serial print statements to debug and verify that the microcontroller is communicating with the display.
- Reset the display using the RESET pin if the display is not responding correctly.
FAQs
Q: Can I use the ILI9341 with a 5V microcontroller? A: Yes, but you will need to use a level shifter to convert the 5V signals to 3.3V to avoid damaging the display.
Q: How can I control the brightness of the display? A: You can control the brightness by applying a PWM signal to the LED pin.
Q: What library should I use with an Arduino? A: The Adafruit_ILI9341 library is commonly used and provides a wide range of functions for controlling the display.
Q: Can I use the display without the MISO pin connected? A: Yes, if you only need to send data to the display and not read back, you can leave MISO disconnected.