Cirkit Designer Logo
Cirkit Designer
Your all-in-one circuit design IDE
Home / 
Component Documentation

How to Use Tube Laser Module: Examples, Pinouts, and Specs

Image of Tube Laser Module
Cirkit Designer LogoDesign with Tube Laser Module in Cirkit Designer

Introduction

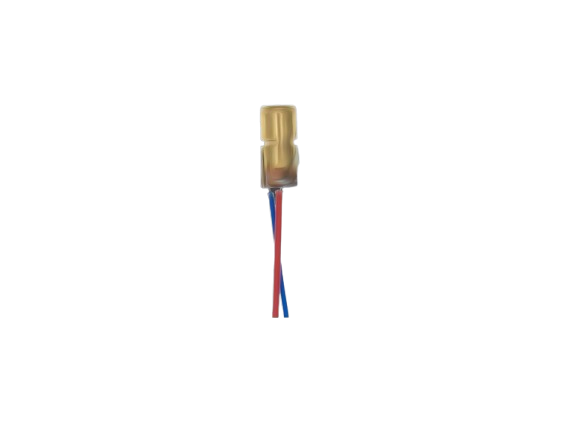
The Tube Laser Module by Laser (Part ID: Red Laser) is a versatile device designed to generate a focused beam of light. This module is commonly used in applications such as cutting, engraving, and other precision tasks across various industries. Its ability to produce a highly concentrated beam makes it ideal for tasks requiring high accuracy and fine detail.

Explore Projects Built with Tube Laser Module

Use Cirkit Designer to design, explore, and prototype these projects online. Some projects support real-time simulation. Click "Open Project" to start designing instantly!
Arduino UNO Laser Tripwire Security System with GSM Alert
Image of Laser home security system: A project utilizing Tube Laser Module in a practical application
This circuit is a laser tripwire security system using an Arduino UNO. When the laser beam is interrupted, the system triggers a buzzer, lights up an LED, and sends an alert via a SIM800L GSM module. The system also includes an LDR module to detect the laser beam and two LEDs to indicate the system status.
Cirkit Designer LogoOpen Project in Cirkit Designer
Battery-Powered Laser Emitter with Solar Charging and LED Indicator
Image of rx: A project utilizing Tube Laser Module in a practical application
This circuit is a solar-powered laser emitter system with an LED indicator. The solar panel charges a 18650 battery via a TP4056 charging module, and a push button controls the activation of the laser emitter and the LED through a MOSFET switch.
Cirkit Designer LogoOpen Project in Cirkit Designer
Arduino Uno R3-Based Security System with Laser Tripwire, GSM Notification, and Motion Detection
Image of SECURITY SYSTEM: A project utilizing Tube Laser Module in a practical application
This circuit features an Arduino Uno R3 as the central controller, interfaced with a KY-008 Laser Emitter, an LDR module, a buzzer, a Sim800l GSM module, and an MPU-6050 accelerometer/gyroscope. The Arduino controls the laser emitter and buzzer, reads analog values from the LDR, communicates with the Sim800l via serial (RX/TX), and interfaces with the MPU-6050 over I2C (SCL/SDA). The circuit is likely designed for sensing light intensity, motion detection, and communication via GSM, with the capability to emit laser light and sound alerts.
Cirkit Designer LogoOpen Project in Cirkit Designer
Arduino Mega 2560 Laser Emitter and SD Card Data Logger
Image of ARDUINO TX: A project utilizing Tube Laser Module in a practical application
This circuit features an Arduino Mega 2560 microcontroller interfaced with an SD SDHC card module and a KY-008 Laser Emitter. The Arduino controls the laser emitter via a digital pin and communicates with the SD card module using SPI protocol for data storage and retrieval.
Cirkit Designer LogoOpen Project in Cirkit Designer

Explore Projects Built with Tube Laser Module

Use Cirkit Designer to design, explore, and prototype these projects online. Some projects support real-time simulation. Click "Open Project" to start designing instantly!
Image of Laser home security system: A project utilizing Tube Laser Module in a practical application
Arduino UNO Laser Tripwire Security System with GSM Alert
This circuit is a laser tripwire security system using an Arduino UNO. When the laser beam is interrupted, the system triggers a buzzer, lights up an LED, and sends an alert via a SIM800L GSM module. The system also includes an LDR module to detect the laser beam and two LEDs to indicate the system status.
Cirkit Designer LogoOpen Project in Cirkit Designer
Image of rx: A project utilizing Tube Laser Module in a practical application
Battery-Powered Laser Emitter with Solar Charging and LED Indicator
This circuit is a solar-powered laser emitter system with an LED indicator. The solar panel charges a 18650 battery via a TP4056 charging module, and a push button controls the activation of the laser emitter and the LED through a MOSFET switch.
Cirkit Designer LogoOpen Project in Cirkit Designer
Image of SECURITY SYSTEM: A project utilizing Tube Laser Module in a practical application
Arduino Uno R3-Based Security System with Laser Tripwire, GSM Notification, and Motion Detection
This circuit features an Arduino Uno R3 as the central controller, interfaced with a KY-008 Laser Emitter, an LDR module, a buzzer, a Sim800l GSM module, and an MPU-6050 accelerometer/gyroscope. The Arduino controls the laser emitter and buzzer, reads analog values from the LDR, communicates with the Sim800l via serial (RX/TX), and interfaces with the MPU-6050 over I2C (SCL/SDA). The circuit is likely designed for sensing light intensity, motion detection, and communication via GSM, with the capability to emit laser light and sound alerts.
Cirkit Designer LogoOpen Project in Cirkit Designer
Image of ARDUINO TX: A project utilizing Tube Laser Module in a practical application
Arduino Mega 2560 Laser Emitter and SD Card Data Logger
This circuit features an Arduino Mega 2560 microcontroller interfaced with an SD SDHC card module and a KY-008 Laser Emitter. The Arduino controls the laser emitter via a digital pin and communicates with the SD card module using SPI protocol for data storage and retrieval.
Cirkit Designer LogoOpen Project in Cirkit Designer

Technical Specifications

Key Technical Details

Parameter Value
Operating Voltage 5V DC
Operating Current 40mA
Output Power <5mW
Wavelength 650nm (Red)
Beam Diameter <5mm
Focus Adjustable Yes
Operating Temperature -10°C to +40°C
Storage Temperature -40°C to +80°C

Pin Configuration and Descriptions

Pin Number Pin Name Description
1 VCC Power supply (5V DC)
2 GND Ground
3 PWM Pulse Width Modulation input

Usage Instructions

How to Use the Component in a Circuit

  1. Power Supply Connection: Connect the VCC pin to a 5V DC power supply and the GND pin to the ground of your circuit.
  2. PWM Control: The PWM pin can be connected to a microcontroller (e.g., Arduino UNO) to control the intensity of the laser beam. By varying the duty cycle of the PWM signal, you can adjust the brightness of the laser.

Important Considerations and Best Practices

  • Safety First: Always wear appropriate eye protection when operating the laser module to prevent eye damage.
  • Heat Management: Ensure proper heat dissipation to avoid overheating the module. Use heat sinks or cooling fans if necessary.
  • Stable Power Supply: Use a stable and regulated power supply to prevent voltage fluctuations that could damage the module.
  • Focus Adjustment: Adjust the focus of the laser beam according to your application requirements for optimal performance.

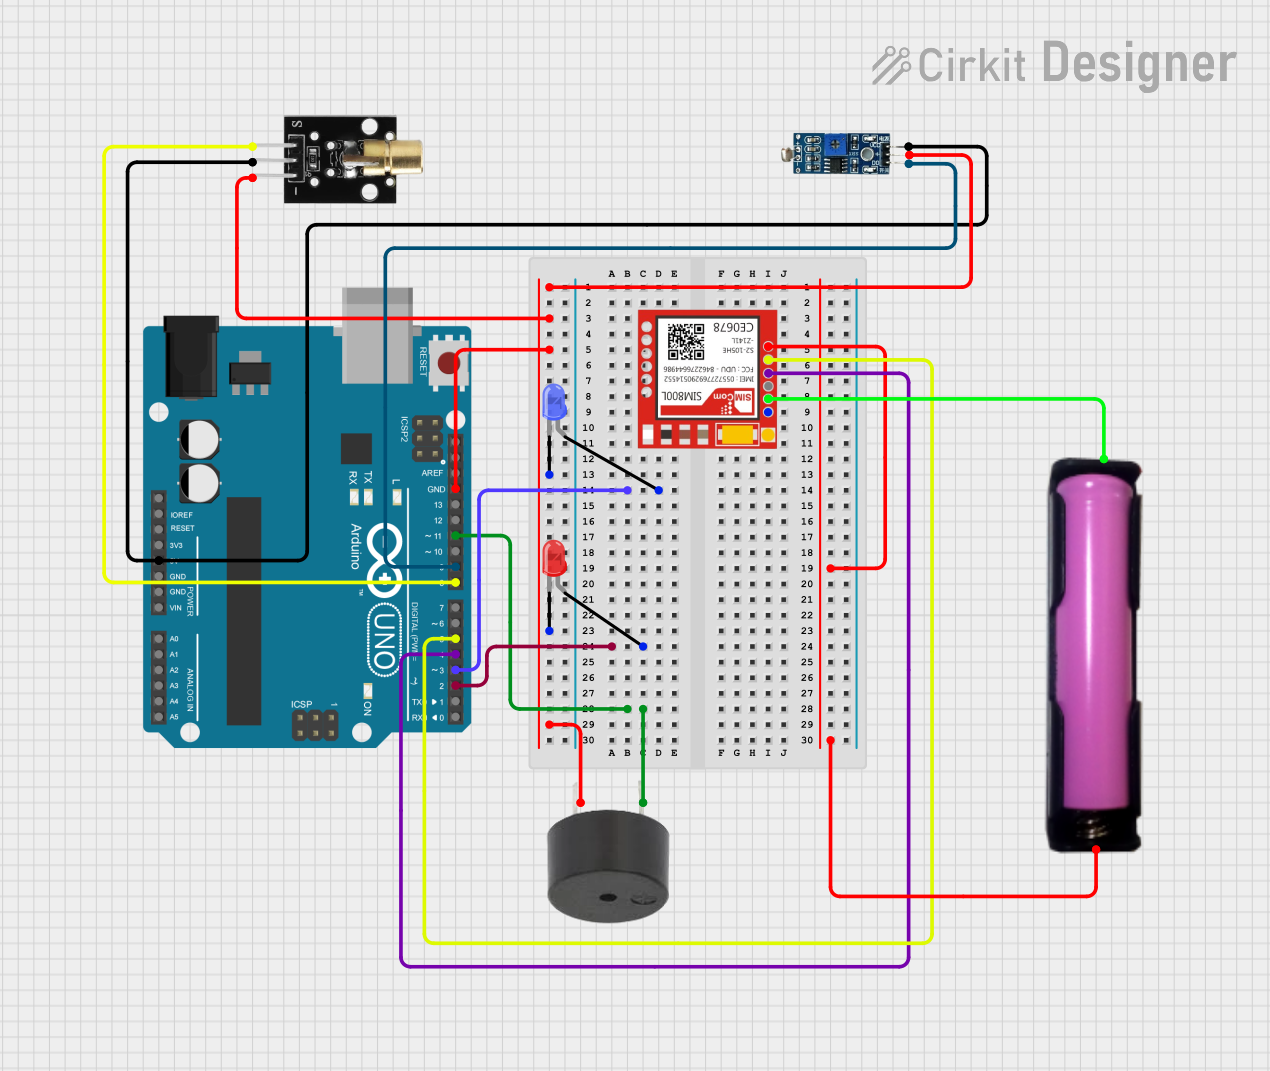
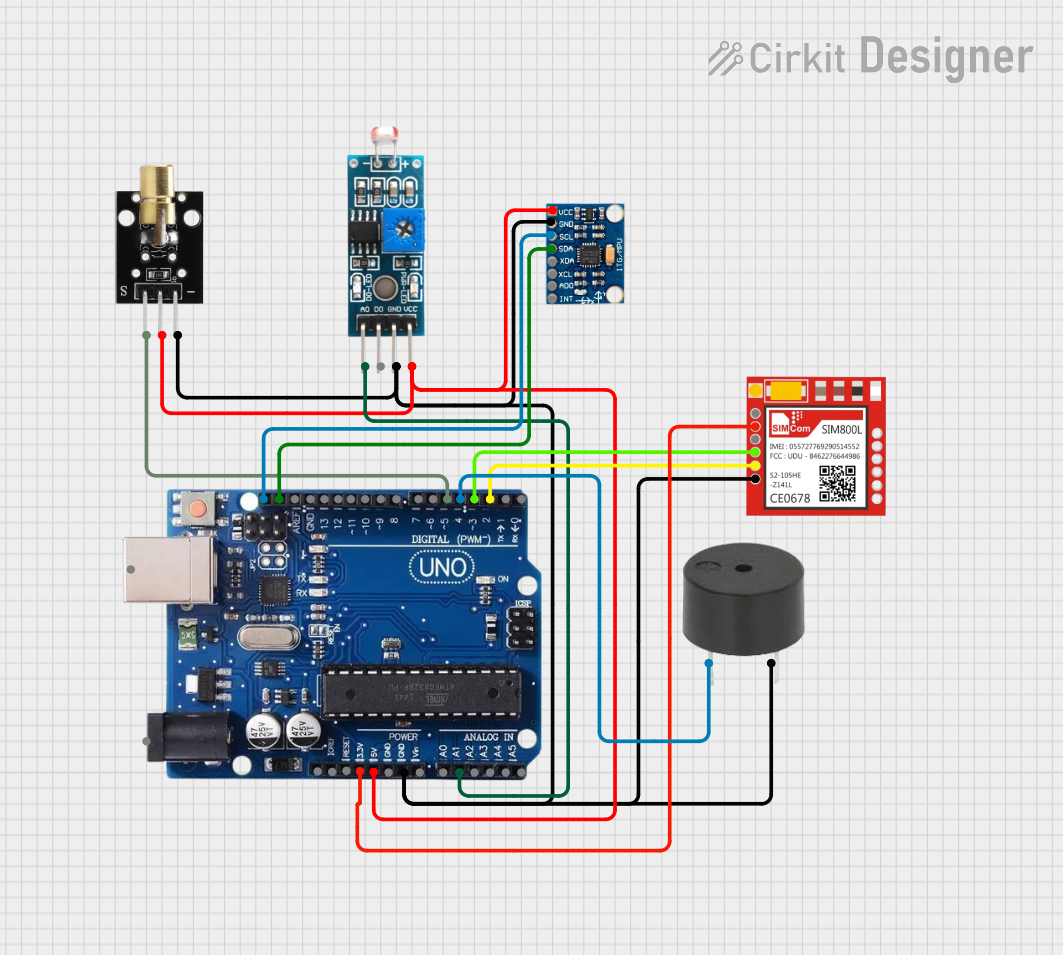
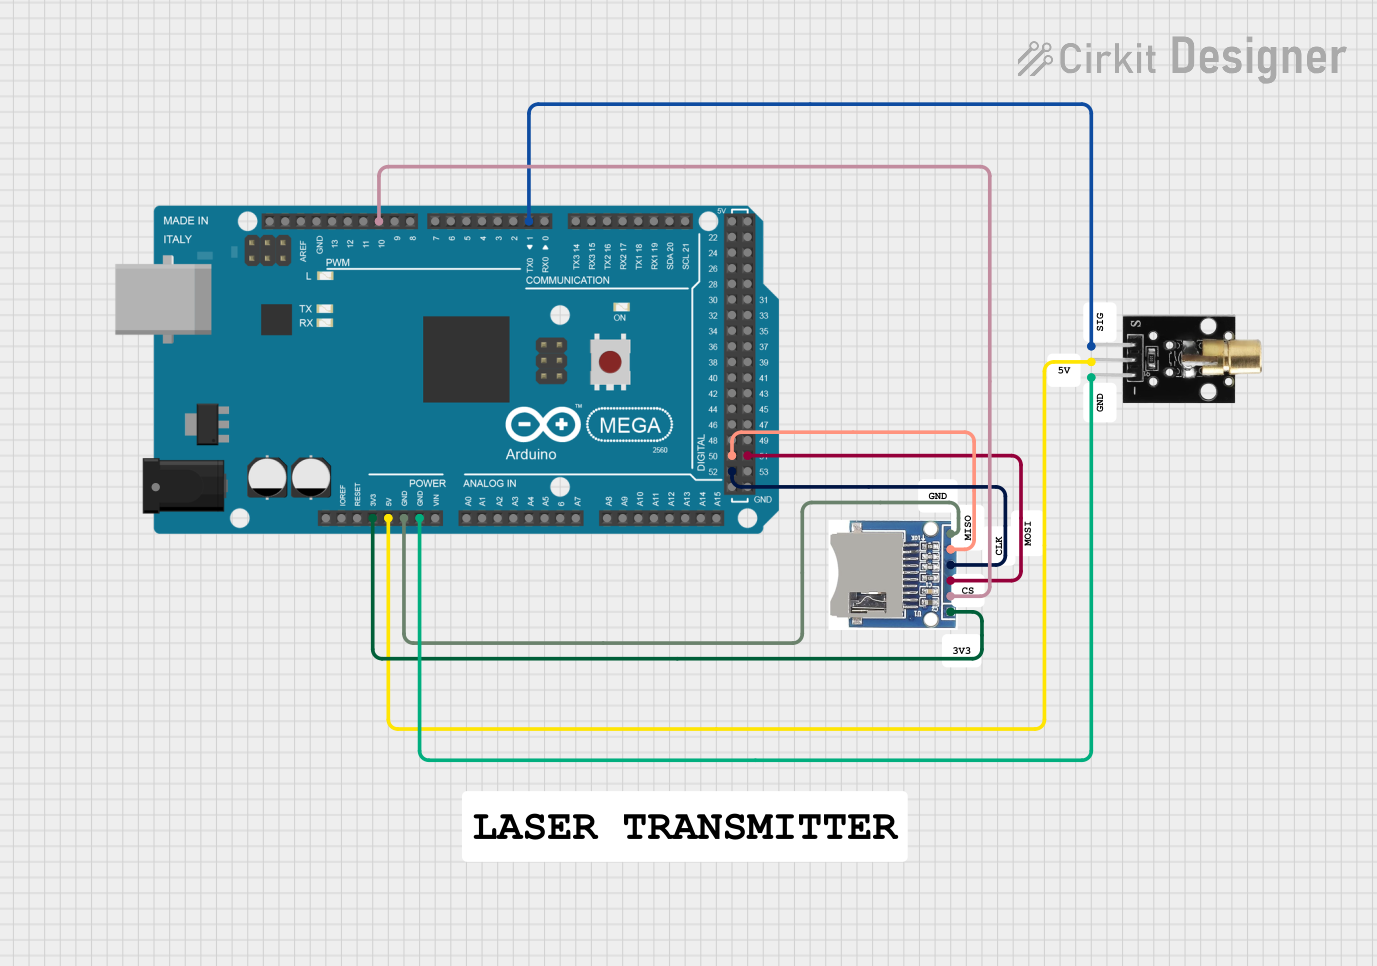
Example Circuit with Arduino UNO

/*
 * Example code to control the Tube Laser Module with an Arduino UNO.
 * This code uses PWM to adjust the laser intensity.
 */

const int laserPin = 9; // PWM pin connected to the laser module

void setup() {
  pinMode(laserPin, OUTPUT); // Set the laser pin as an output
}

void loop() {
  // Gradually increase the laser intensity
  for (int i = 0; i <= 255; i++) {
    analogWrite(laserPin, i); // Write PWM value to the laser pin
    delay(10); // Wait for 10 milliseconds
  }

  // Gradually decrease the laser intensity
  for (int i = 255; i >= 0; i--) {
    analogWrite(laserPin, i); // Write PWM value to the laser pin
    delay(10); // Wait for 10 milliseconds
  }
}

Troubleshooting and FAQs

Common Issues Users Might Face

  1. Laser Not Turning On:

    • Solution: Check the power supply connections. Ensure that the VCC and GND pins are properly connected to a 5V DC power source.
  2. Laser Beam is Weak:

    • Solution: Verify the PWM signal from the microcontroller. Ensure that the duty cycle is set correctly to achieve the desired intensity.
  3. Overheating:

    • Solution: Ensure proper ventilation and cooling. Use heat sinks or cooling fans to dissipate heat effectively.
  4. Focus Issues:

    • Solution: Adjust the focus ring on the laser module to achieve a sharp and precise beam.

FAQs

Q1: Can I use a power supply higher than 5V?

  • A1: No, using a power supply higher than 5V can damage the laser module. Always use a regulated 5V DC power supply.

Q2: Is the laser module safe for continuous operation?

  • A2: Yes, the laser module is designed for continuous operation, provided that proper cooling measures are in place to prevent overheating.

Q3: Can I control the laser module with a different microcontroller?

  • A3: Yes, you can control the laser module with any microcontroller that supports PWM output.

Q4: How do I clean the laser lens?

  • A4: Use a soft, lint-free cloth and a small amount of lens cleaning solution to gently clean the laser lens. Avoid using abrasive materials.

By following this documentation, users can effectively utilize the Tube Laser Module in their projects, ensuring optimal performance and longevity of the component.