How to Use MLX90614: Examples, Pinouts, and Specs
Introduction
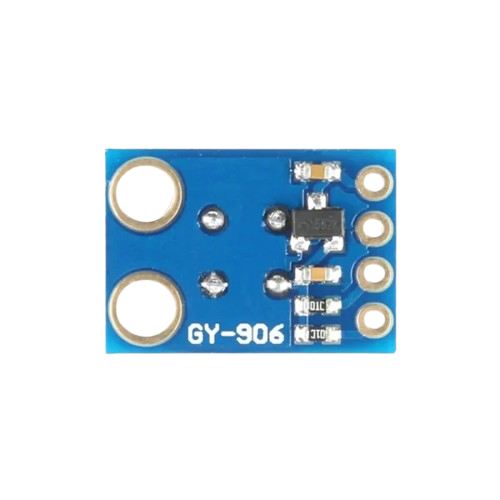
The MLX90614 is a sophisticated infrared thermometer sensor designed for non-contact temperature measurements. It integrates a sensor and a custom signal conditioning ASIC in a single package, providing a digital output directly proportional to the object temperature. This sensor is commonly used in a variety of applications, including medical equipment, industrial temperature control, and environmental monitoring.
Explore Projects Built with MLX90614
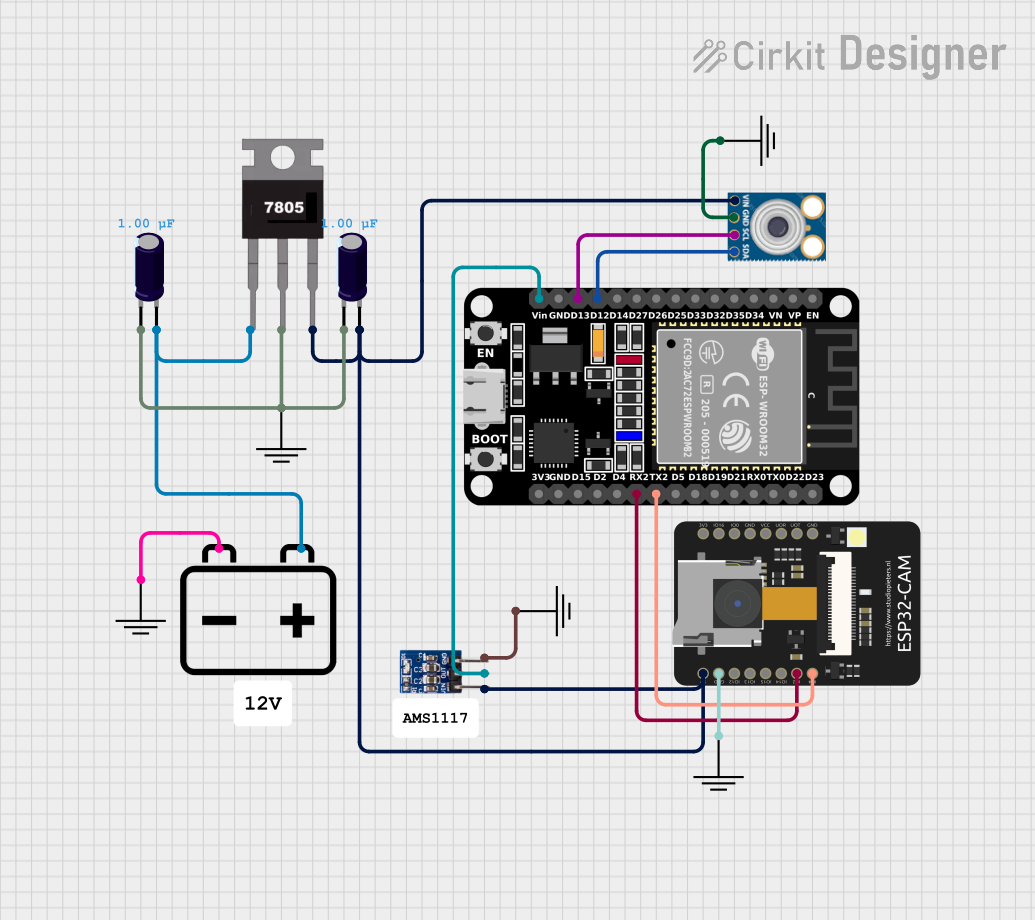
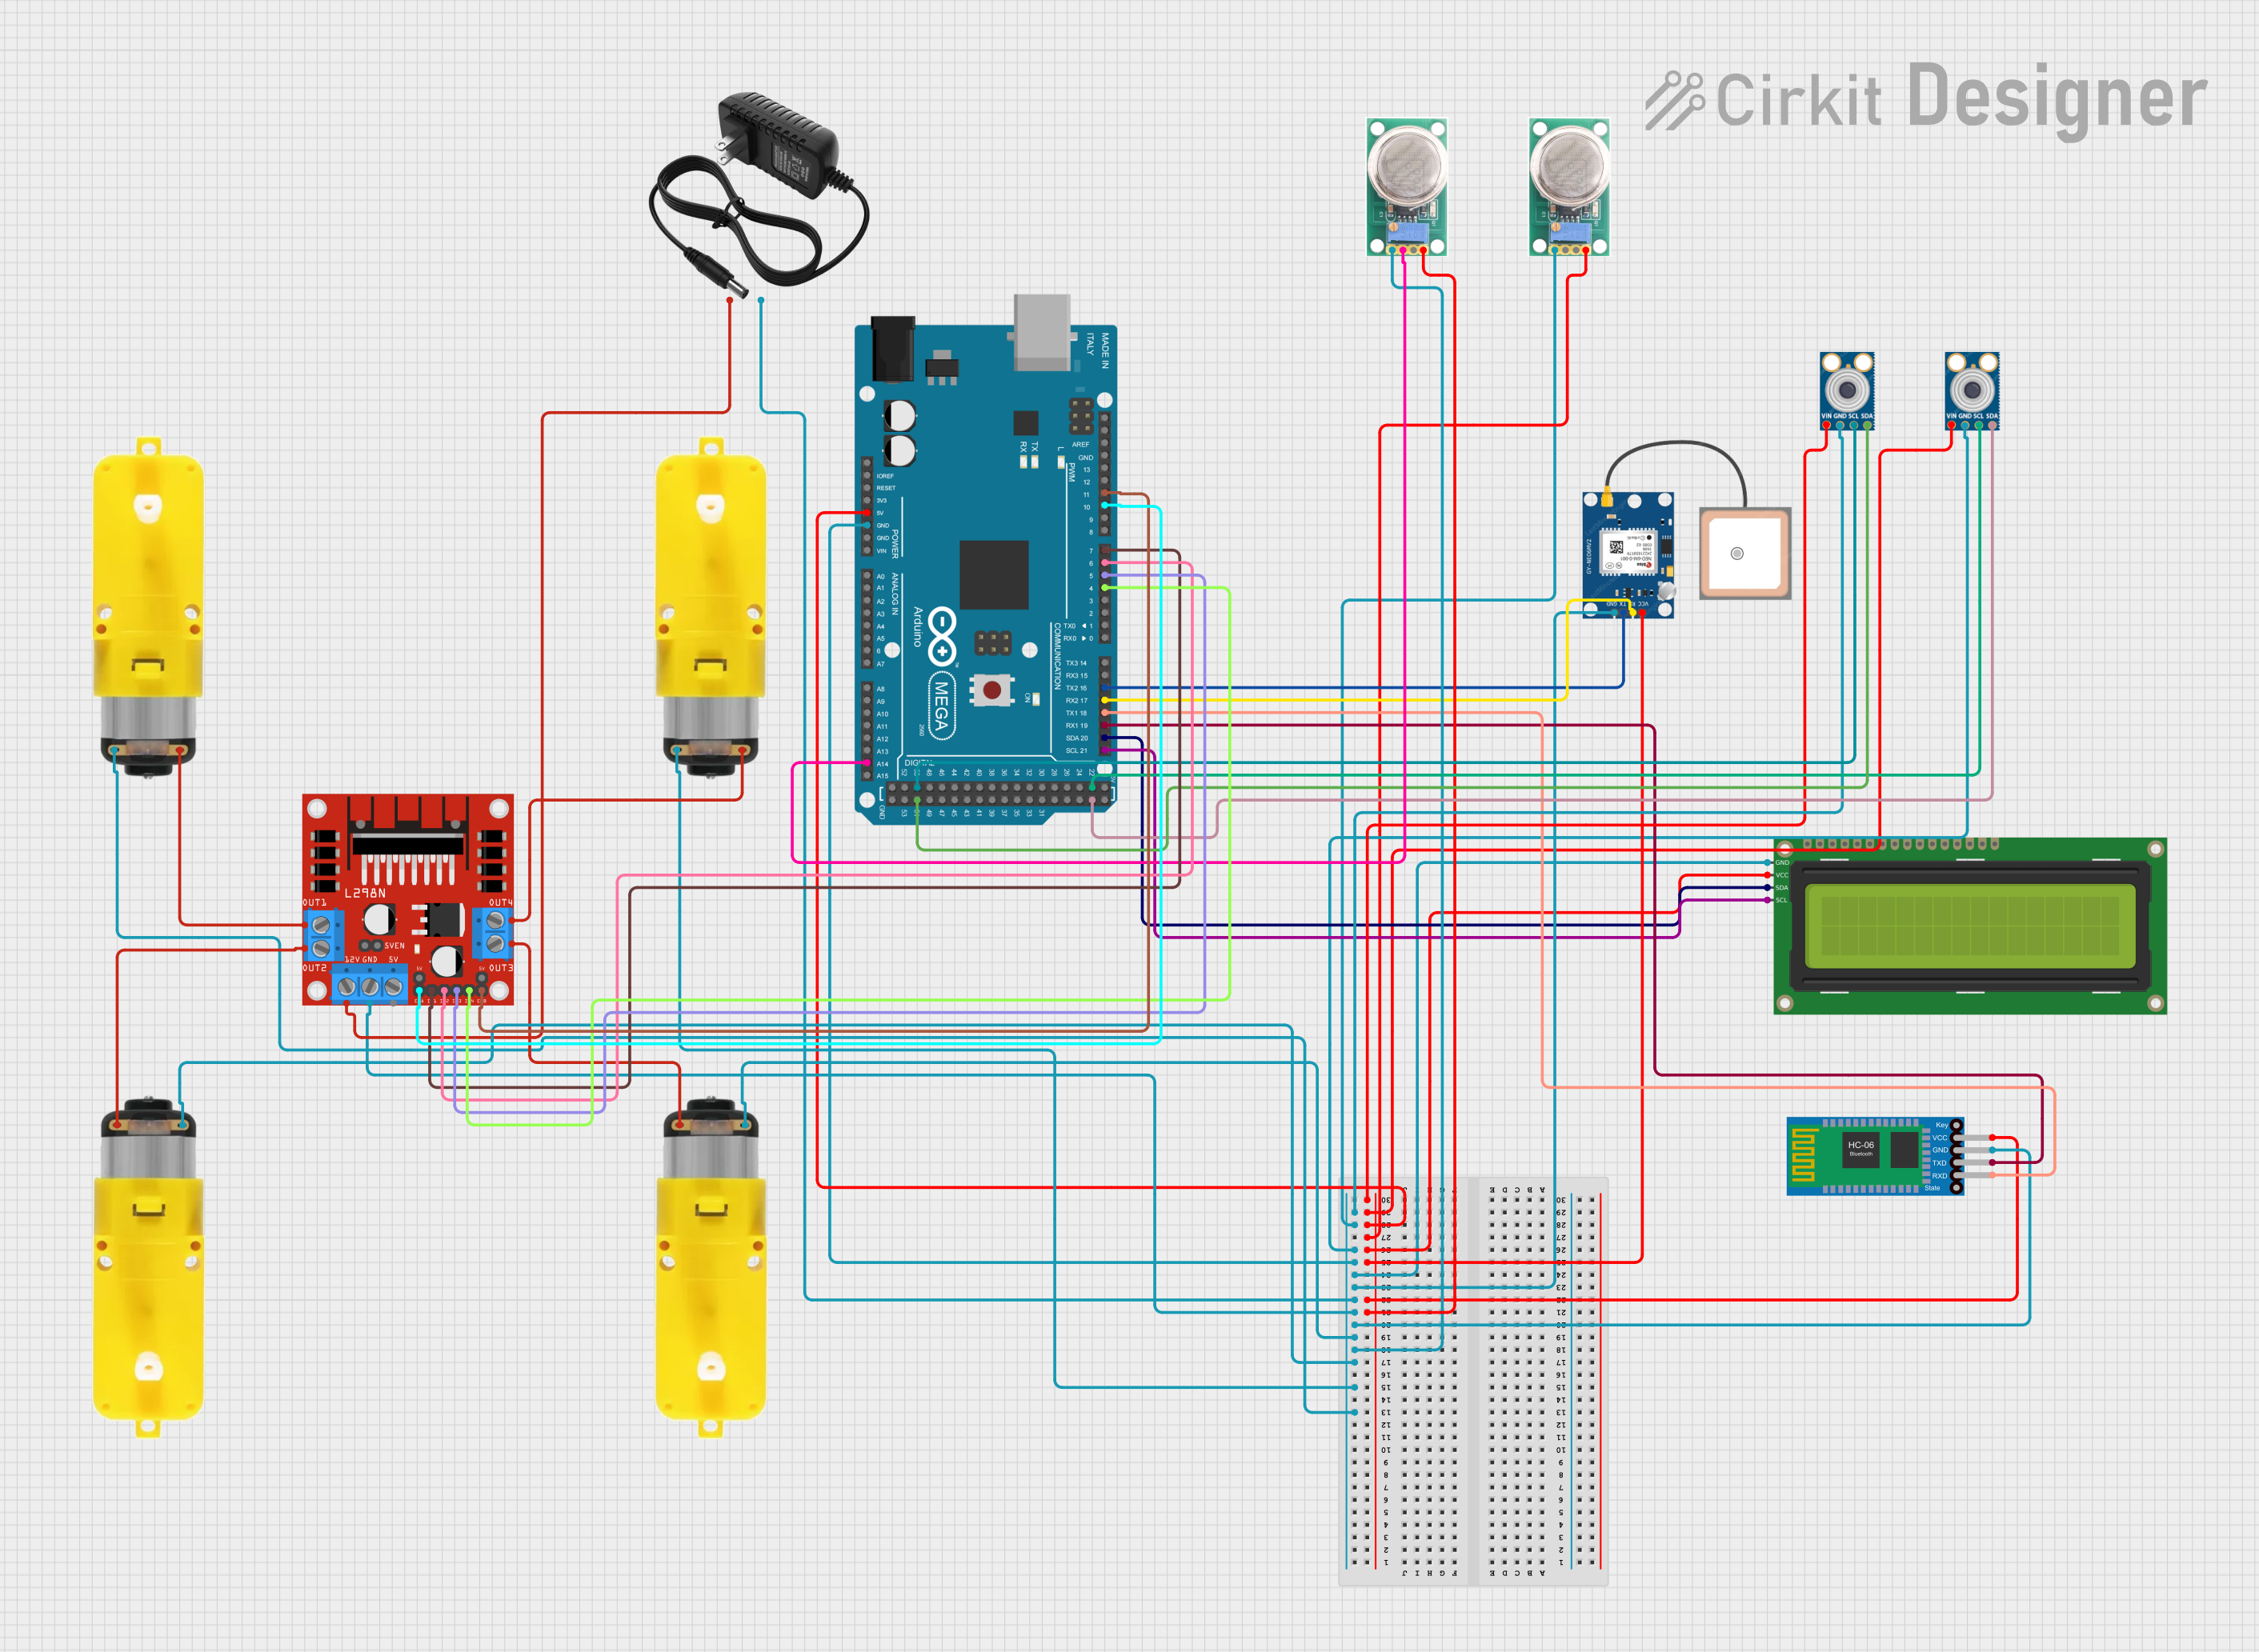
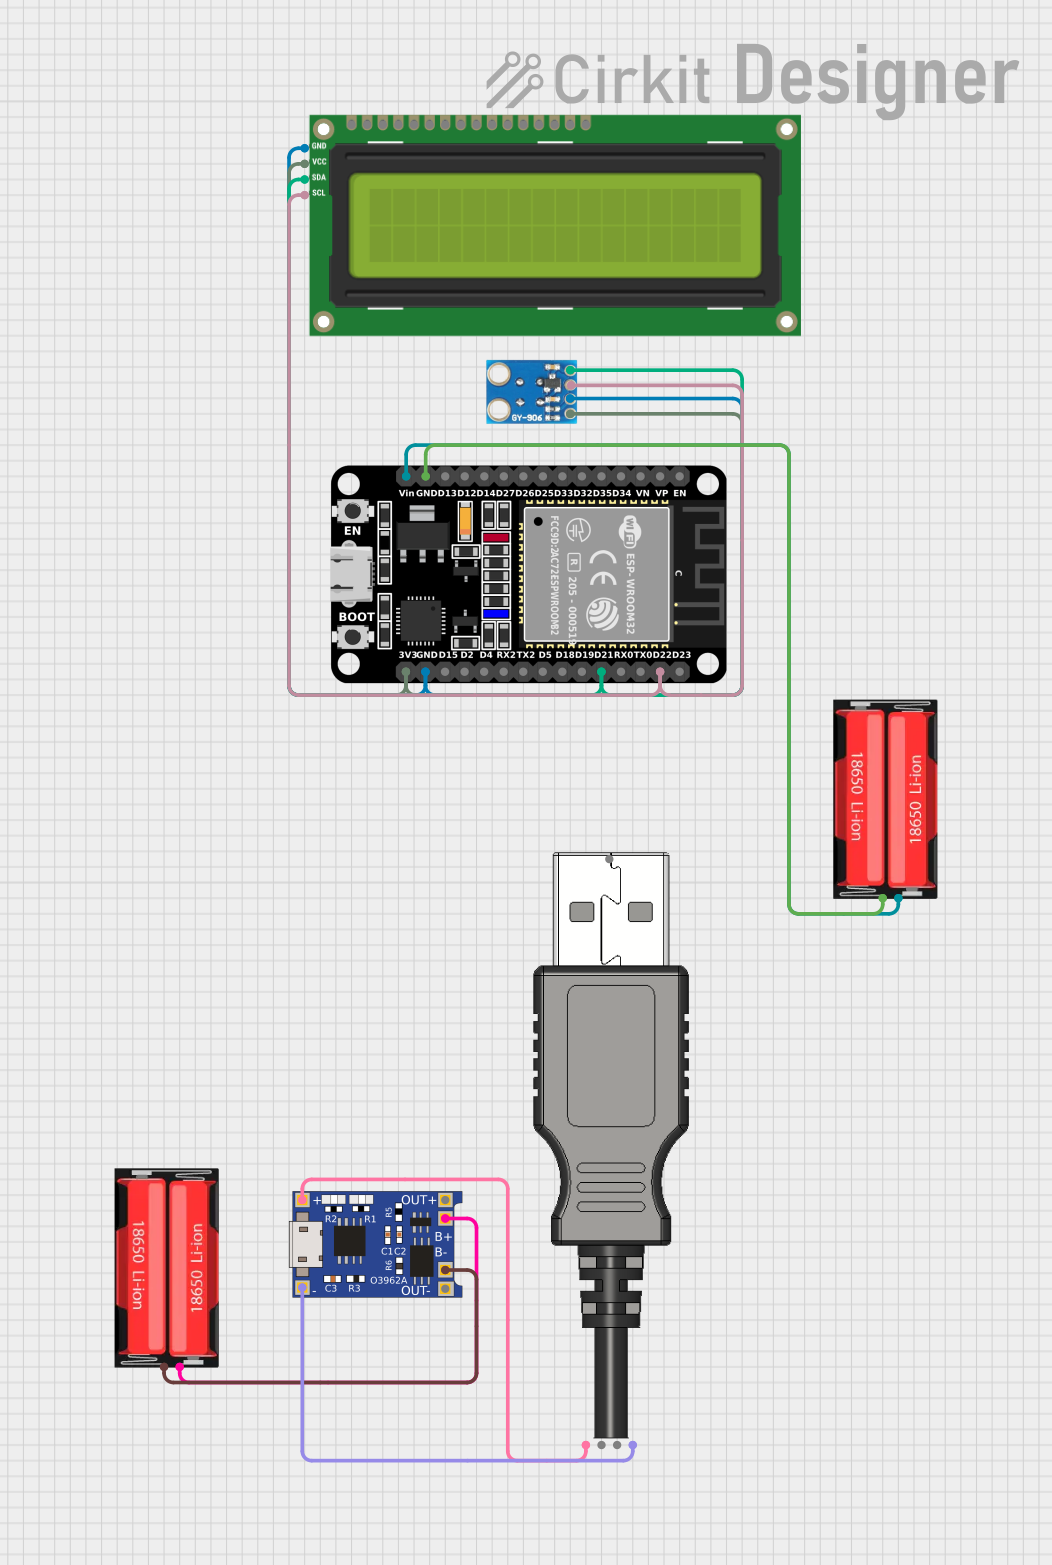
Explore Projects Built with MLX90614
Common Applications and Use Cases
- Medical thermometers (ear and forehead thermometers)
- Industrial systems (temperature monitoring of machinery)
- Automotive (cabin temperature control, engine monitoring)
- Consumer electronics (smart home temperature management)
- Food safety (monitoring temperature during processing and storage)
Technical Specifications
Key Technical Details
- Operating Voltage: 3.3V to 5V
- Measurement Range: -70°C to +380°C for object temperature
- Resolution: 0.02°C
- Accuracy: ±0.5°C for object temperature (0°C to 50°C)
- Field of View: 35° to 75° (depends on version)
- Interface: I2C (up to 100kHz)
- Power Consumption: 1.5mA (typical use)
Pin Configuration and Descriptions
| Pin Number | Name | Description |
|---|---|---|
| 1 | VDD | Power supply (3.3V to 5V) |
| 2 | SDA | I2C Data Line |
| 3 | SCL | I2C Clock Line |
| 4 | GND | Ground |
Usage Instructions
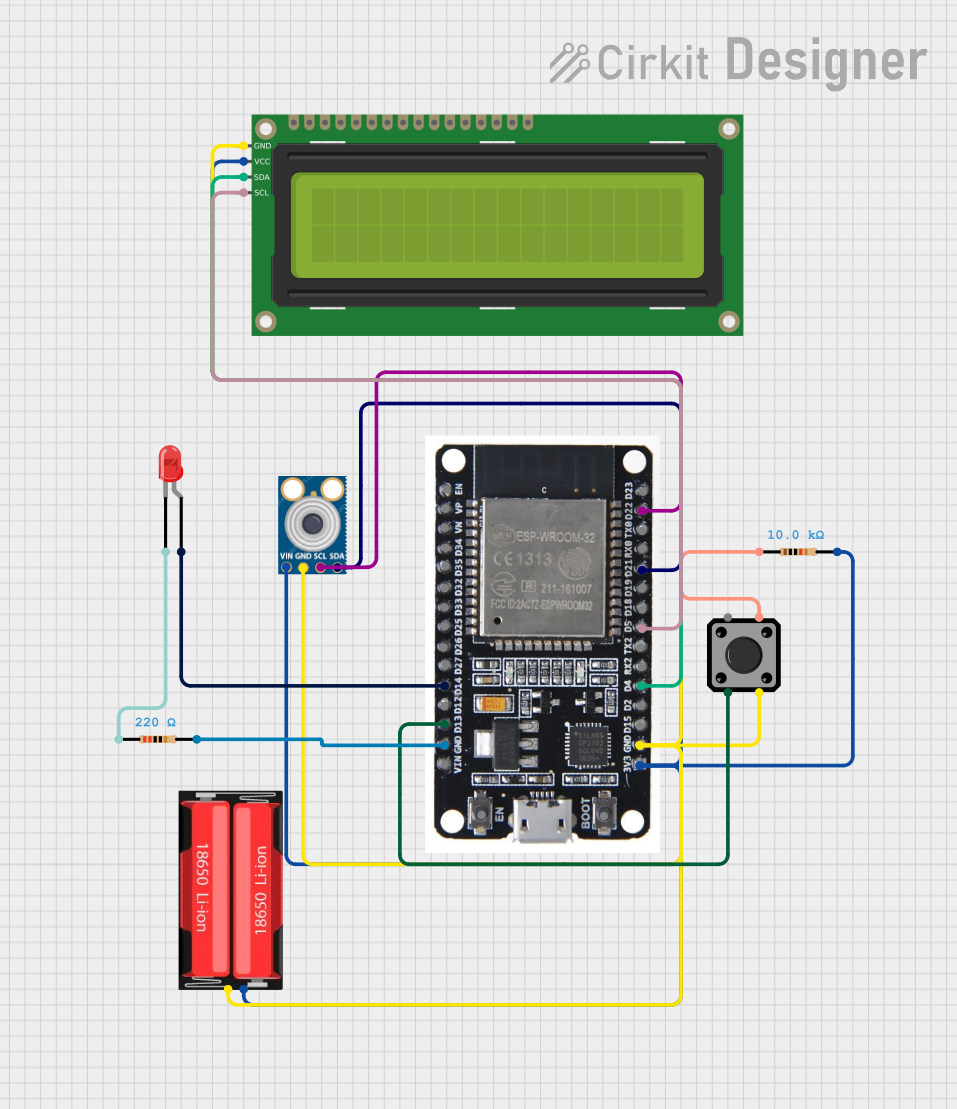
How to Use the Component in a Circuit
- Power Supply: Connect the VDD pin to a 3.3V or 5V power supply, and the GND pin to the ground.
- I2C Connection: Connect the SDA and SCL pins to the corresponding I2C data and clock lines on your microcontroller.
- Pull-up Resistors: Attach pull-up resistors (typically 4.7kΩ) to the SDA and SCL lines if your microcontroller does not have built-in pull-ups.
Important Considerations and Best Practices
- Ensure that the power supply is stable and within the specified voltage range.
- Avoid physical obstructions in front of the sensor's field of view to ensure accurate measurements.
- Be aware of the sensor's field of view and ensure that the target is within this area.
- Allow the sensor to reach thermal equilibrium with its environment for accurate readings.
- Use proper ESD precautions when handling the MLX90614 to prevent damage.
Example Code for Arduino UNO
#include <Wire.h>
#include <Adafruit_MLX90614.h>

Adafruit_MLX90614 mlx = Adafruit_MLX90614();

void setup() {
  Serial.begin(9600);
  mlx.begin();
}

void loop() {
  Serial.print("Ambient = "); Serial.print(mlx.readAmbientTempC());
  Serial.print("*C\tObject = "); Serial.print(mlx.readObjectTempC()); Serial.println("*C");
  delay(500);
}
Code Comments
#include <Wire.h>: Includes the I2C library for communication.#include <Adafruit_MLX90614.h>: Includes the library for the MLX90614 sensor.Adafruit_MLX90614 mlx: Creates an instance of the MLX90614 class.Serial.begin(9600): Initializes serial communication at 9600 baud rate.mlx.begin(): Initializes the sensor.mlx.readAmbientTempC(): Reads the ambient temperature in Celsius.mlx.readObjectTempC(): Reads the object temperature in Celsius.delay(500): Pauses the loop for 500 milliseconds.
Troubleshooting and FAQs
Common Issues Users Might Face
- Inaccurate Temperature Readings: Ensure there are no obstructions in front of the sensor and that the target is within the sensor's field of view.
- No Data on I2C: Check the wiring, ensure pull-up resistors are in place, and verify that the correct I2C address is being used.
- Sensor Not Responding: Make sure the sensor is properly powered and that the I2C lines are connected correctly.
Solutions and Tips for Troubleshooting
- Check Connections: Verify all connections are secure and correct.
- Use Example Code: Start with example code to ensure the sensor is functioning properly.
- I2C Scanner: Run an I2C scanner sketch to confirm the sensor's address and connectivity.
- Consult Datasheet: Refer to the MLX90614 datasheet for detailed information and troubleshooting tips.
FAQs
Q: Can the MLX90614 measure the temperature of liquids? A: The MLX90614 is designed for non-contact temperature measurements, so it can measure the surface temperature of liquids if they are within its field of view.
Q: What is the maximum distance for accurate temperature measurement? A: The maximum distance depends on the object size and the sensor's field of view. Consult the datasheet for specific details.
Q: How can I calibrate the MLX90614? A: The MLX90614 comes factory-calibrated. However, for critical applications, refer to the calibration procedures outlined in the datasheet.
Q: Is the MLX90614 affected by ambient temperature? A: The sensor has compensation for ambient temperature variations, but extreme changes can affect readings. Allow the sensor to acclimate to new environments before taking measurements.