Cirkit Designer Logo
Cirkit Designer
Your all-in-one circuit design IDE
Home / 
Component Documentation

How to Use lego 5v motor: Examples, Pinouts, and Specs

Image of lego 5v motor
Cirkit Designer LogoDesign with lego 5v motor in Cirkit Designer

Introduction

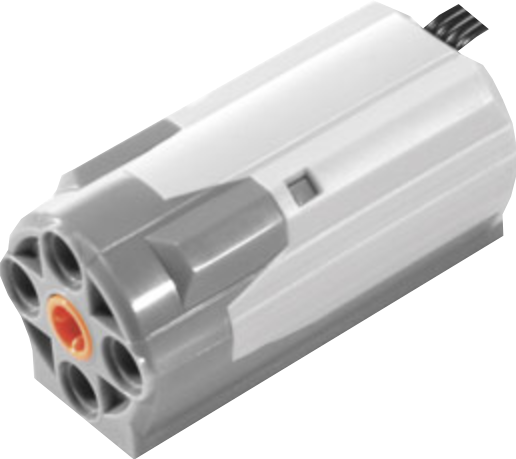
The LEGO 5V Motor is a small electric motor designed to operate at 5 volts. It is commonly used in LEGO robotics and educational kits for driving mechanical parts. This motor is ideal for projects that require precise control and reliable performance, making it a popular choice among hobbyists, educators, and engineers.

Explore Projects Built with lego 5v motor

Use Cirkit Designer to design, explore, and prototype these projects online. Some projects support real-time simulation. Click "Open Project" to start designing instantly!
Battery-Powered Dual DC Motor Control with L298N and 7805 Voltage Regulator
Image of Motor driver: A project utilizing lego 5v motor in a practical application
This circuit uses a 9V battery to power an L298N motor driver, which controls two DC motors. A 7805 voltage regulator is used to step down the voltage to 5V for the motor driver, enabling the control of motor direction and speed through the motor driver's input pins.
Cirkit Designer LogoOpen Project in Cirkit Designer
Battery-Powered Raspberry Pi Robotic Motor Controller with PWM
Image of 1.1: A project utilizing lego 5v motor in a practical application
This circuit is a motor control system powered by a series of 18650 Li-ion batteries. A Raspberry Pi 5 communicates with an Adafruit PCA9685 PWM Servo Breakout to control an L298N DC motor driver, which in turn drives two DC motors. The setup allows for precise control of the motors via PWM signals from the Raspberry Pi.
Cirkit Designer LogoOpen Project in Cirkit Designer
Arduino-Controlled Robotic Vehicle with IR Sensors and L298N Motor Driver
Image of xe do line: A project utilizing lego 5v motor in a practical application
This circuit is designed to control a pair of DC gearmotors using an L298N motor driver module, which is interfaced with an Arduino UNO microcontroller. The Arduino is also connected to a 5-channel IR sensor for input, which may be used for line tracking or obstacle detection. Power is supplied by a 9V battery connected through a 2.1mm barrel jack, and the motor driver module regulates this power to drive the left and right gearmotors for a mobile robot platform.
Cirkit Designer LogoOpen Project in Cirkit Designer
Battery-Powered DC Motor Control Using L298N and 7805 Voltage Regulator
Image of og Motor driver: A project utilizing lego 5v motor in a practical application
This circuit is designed to control a DC motor using an L298N motor driver powered by a 9V battery. The 7805 voltage regulator steps down the 9V to 5V to power the motor driver, which in turn controls the motor's operation. The microcontroller code is currently a placeholder with no specific functionality implemented.
Cirkit Designer LogoOpen Project in Cirkit Designer

Explore Projects Built with lego 5v motor

Use Cirkit Designer to design, explore, and prototype these projects online. Some projects support real-time simulation. Click "Open Project" to start designing instantly!
Image of Motor driver: A project utilizing lego 5v motor in a practical application
Battery-Powered Dual DC Motor Control with L298N and 7805 Voltage Regulator
This circuit uses a 9V battery to power an L298N motor driver, which controls two DC motors. A 7805 voltage regulator is used to step down the voltage to 5V for the motor driver, enabling the control of motor direction and speed through the motor driver's input pins.
Cirkit Designer LogoOpen Project in Cirkit Designer
Image of 1.1: A project utilizing lego 5v motor in a practical application
Battery-Powered Raspberry Pi Robotic Motor Controller with PWM
This circuit is a motor control system powered by a series of 18650 Li-ion batteries. A Raspberry Pi 5 communicates with an Adafruit PCA9685 PWM Servo Breakout to control an L298N DC motor driver, which in turn drives two DC motors. The setup allows for precise control of the motors via PWM signals from the Raspberry Pi.
Cirkit Designer LogoOpen Project in Cirkit Designer
Image of xe do line: A project utilizing lego 5v motor in a practical application
Arduino-Controlled Robotic Vehicle with IR Sensors and L298N Motor Driver
This circuit is designed to control a pair of DC gearmotors using an L298N motor driver module, which is interfaced with an Arduino UNO microcontroller. The Arduino is also connected to a 5-channel IR sensor for input, which may be used for line tracking or obstacle detection. Power is supplied by a 9V battery connected through a 2.1mm barrel jack, and the motor driver module regulates this power to drive the left and right gearmotors for a mobile robot platform.
Cirkit Designer LogoOpen Project in Cirkit Designer
Image of og Motor driver: A project utilizing lego 5v motor in a practical application
Battery-Powered DC Motor Control Using L298N and 7805 Voltage Regulator
This circuit is designed to control a DC motor using an L298N motor driver powered by a 9V battery. The 7805 voltage regulator steps down the 9V to 5V to power the motor driver, which in turn controls the motor's operation. The microcontroller code is currently a placeholder with no specific functionality implemented.
Cirkit Designer LogoOpen Project in Cirkit Designer

Common Applications and Use Cases

  • LEGO Robotics: Used to drive wheels, gears, and other mechanical components.
  • Educational Kits: Ideal for teaching basic principles of electronics and mechanics.
  • DIY Projects: Suitable for custom-built robots, automated systems, and other creative applications.

Technical Specifications

Key Technical Details

Parameter Value
Operating Voltage 5V DC
Current Rating 100mA (no load)
Power Rating 0.5W
Speed 150 RPM
Torque 0.2 Nm
Dimensions 30mm x 20mm x 15mm
Weight 25g

Pin Configuration and Descriptions

Pin Number Pin Name Description
1 VCC Power supply (5V)
2 GND Ground
3 IN1 Control input 1 (for direction)
4 IN2 Control input 2 (for direction)

Usage Instructions

How to Use the Component in a Circuit

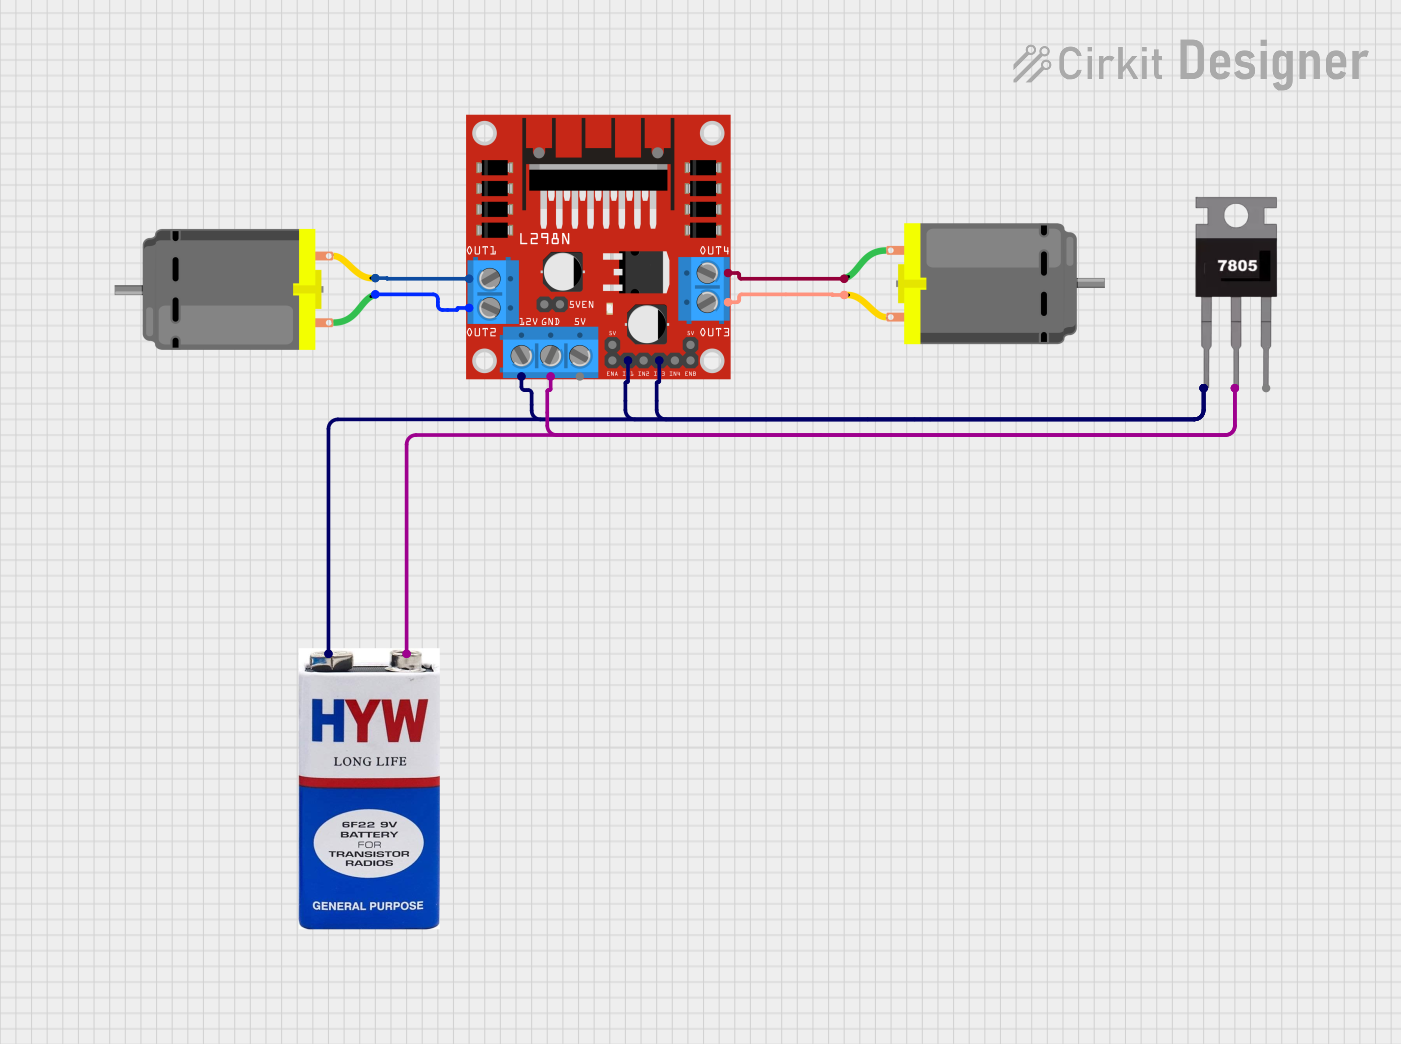
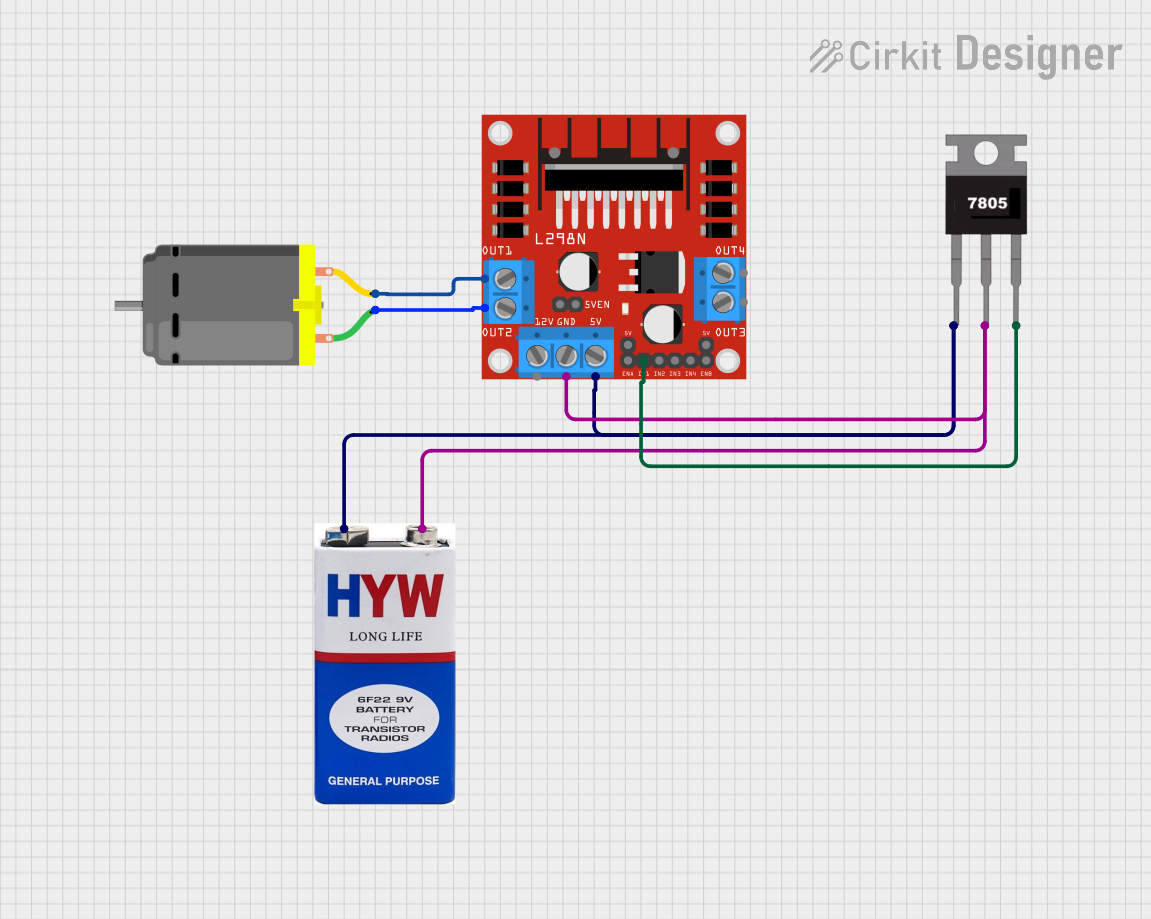
To use the LEGO 5V Motor in a circuit, you will need a motor driver (such as the L298N) to control the motor's direction and speed. Below is a basic example of how to connect the motor to an Arduino UNO using an L298N motor driver.

Circuit Diagram

Arduino UNO       L298N Motor Driver       LEGO 5V Motor
-----------       ------------------       --------------
  5V  -----------  VCC
 GND  -----------  GND
 D3   -----------  IN1
 D4   -----------  IN2
                  OUT1  ------------------  Motor Terminal 1
                  OUT2  ------------------  Motor Terminal 2

Important Considerations and Best Practices

  • Power Supply: Ensure that the motor is supplied with a stable 5V DC power source.
  • Heat Dissipation: Avoid running the motor at maximum load for extended periods to prevent overheating.
  • Control Inputs: Use appropriate motor drivers to control the motor's direction and speed effectively.
  • Mechanical Load: Do not exceed the motor's torque rating to avoid damage.

Example Code

Here is an example Arduino code to control the LEGO 5V Motor using an L298N motor driver:

// Define motor control pins
const int motorPin1 = 3; // IN1 connected to Arduino pin 3
const int motorPin2 = 4; // IN2 connected to Arduino pin 4

void setup() {
  // Set motor control pins as outputs
  pinMode(motorPin1, OUTPUT);
  pinMode(motorPin2, OUTPUT);
}

void loop() {
  // Rotate motor clockwise
  digitalWrite(motorPin1, HIGH);
  digitalWrite(motorPin2, LOW);
  delay(2000); // Run motor for 2 seconds

  // Stop motor
  digitalWrite(motorPin1, LOW);
  digitalWrite(motorPin2, LOW);
  delay(1000); // Stop for 1 second

  // Rotate motor counterclockwise
  digitalWrite(motorPin1, LOW);
  digitalWrite(motorPin2, HIGH);
  delay(2000); // Run motor for 2 seconds

  // Stop motor
  digitalWrite(motorPin1, LOW);
  digitalWrite(motorPin2, LOW);
  delay(1000); // Stop for 1 second
}

Troubleshooting and FAQs

Common Issues Users Might Face

  1. Motor Not Running:

    • Solution: Check the power supply and ensure it is providing 5V. Verify all connections are secure and correct.
  2. Motor Running in One Direction Only:

    • Solution: Ensure that the control inputs (IN1 and IN2) are correctly connected and receiving the appropriate signals from the Arduino.
  3. Motor Overheating:

    • Solution: Avoid running the motor at maximum load for extended periods. Ensure proper ventilation and consider adding a heat sink if necessary.
  4. Motor Vibrating or Making Noise:

    • Solution: Check for any mechanical obstructions or misalignments. Ensure the motor is securely mounted and balanced.

FAQs

Q: Can I use a different motor driver instead of the L298N? A: Yes, you can use other motor drivers that support the required voltage and current ratings for the LEGO 5V Motor.

Q: How can I control the speed of the motor? A: You can control the speed of the motor using Pulse Width Modulation (PWM) signals from the Arduino. Connect the PWM pin to the motor driver's enable pin.

Q: Is it possible to run multiple motors simultaneously? A: Yes, you can run multiple motors simultaneously by using additional motor drivers and control pins on the Arduino.

Q: Can I power the motor directly from the Arduino? A: It is not recommended to power the motor directly from the Arduino's 5V pin, as it may not provide sufficient current. Use an external power supply for the motor.

This documentation provides a comprehensive guide to using the LEGO 5V Motor in various applications. By following the instructions and best practices outlined here, you can ensure reliable and efficient operation of your motor in any project.