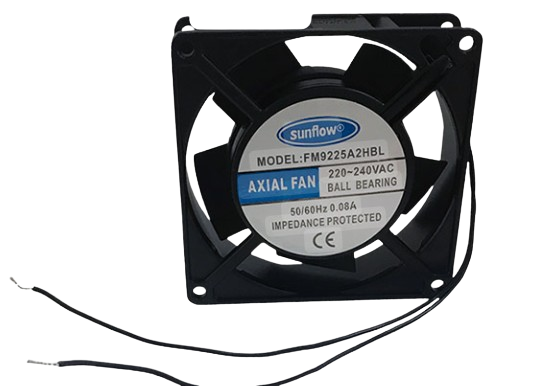
The Sunflow Blower Fan is a high-performance cooling solution designed to deliver powerful airflow for a variety of applications. Manufactured by Sunflow, this fan is ideal for electronics cooling, ventilation systems, and air circulation in both industrial and consumer devices. Its compact design and efficient operation make it a versatile choice for maintaining optimal temperatures in sensitive equipment.
Explore Projects Built with Sunflow Blower Fan
Use Cirkit Designer to design, explore, and prototype these projects online. Some projects support real-time simulation. Click "Open Project" to start designing instantly!
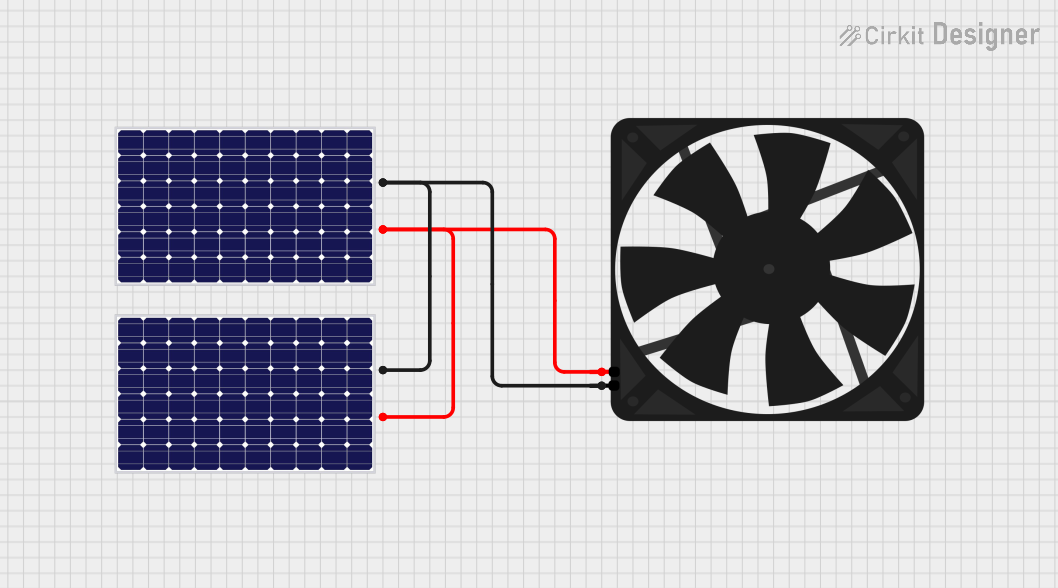
This circuit consists of two solar panels connected in parallel to a fan. The solar panels provide power to the fan, with their positive terminals connected to the fan's 5V input and their negative terminals connected to the fan's ground (GND). There is no microcontroller or additional control logic involved, indicating that the fan operates directly off the power supplied by the solar panels when sufficient sunlight is available.
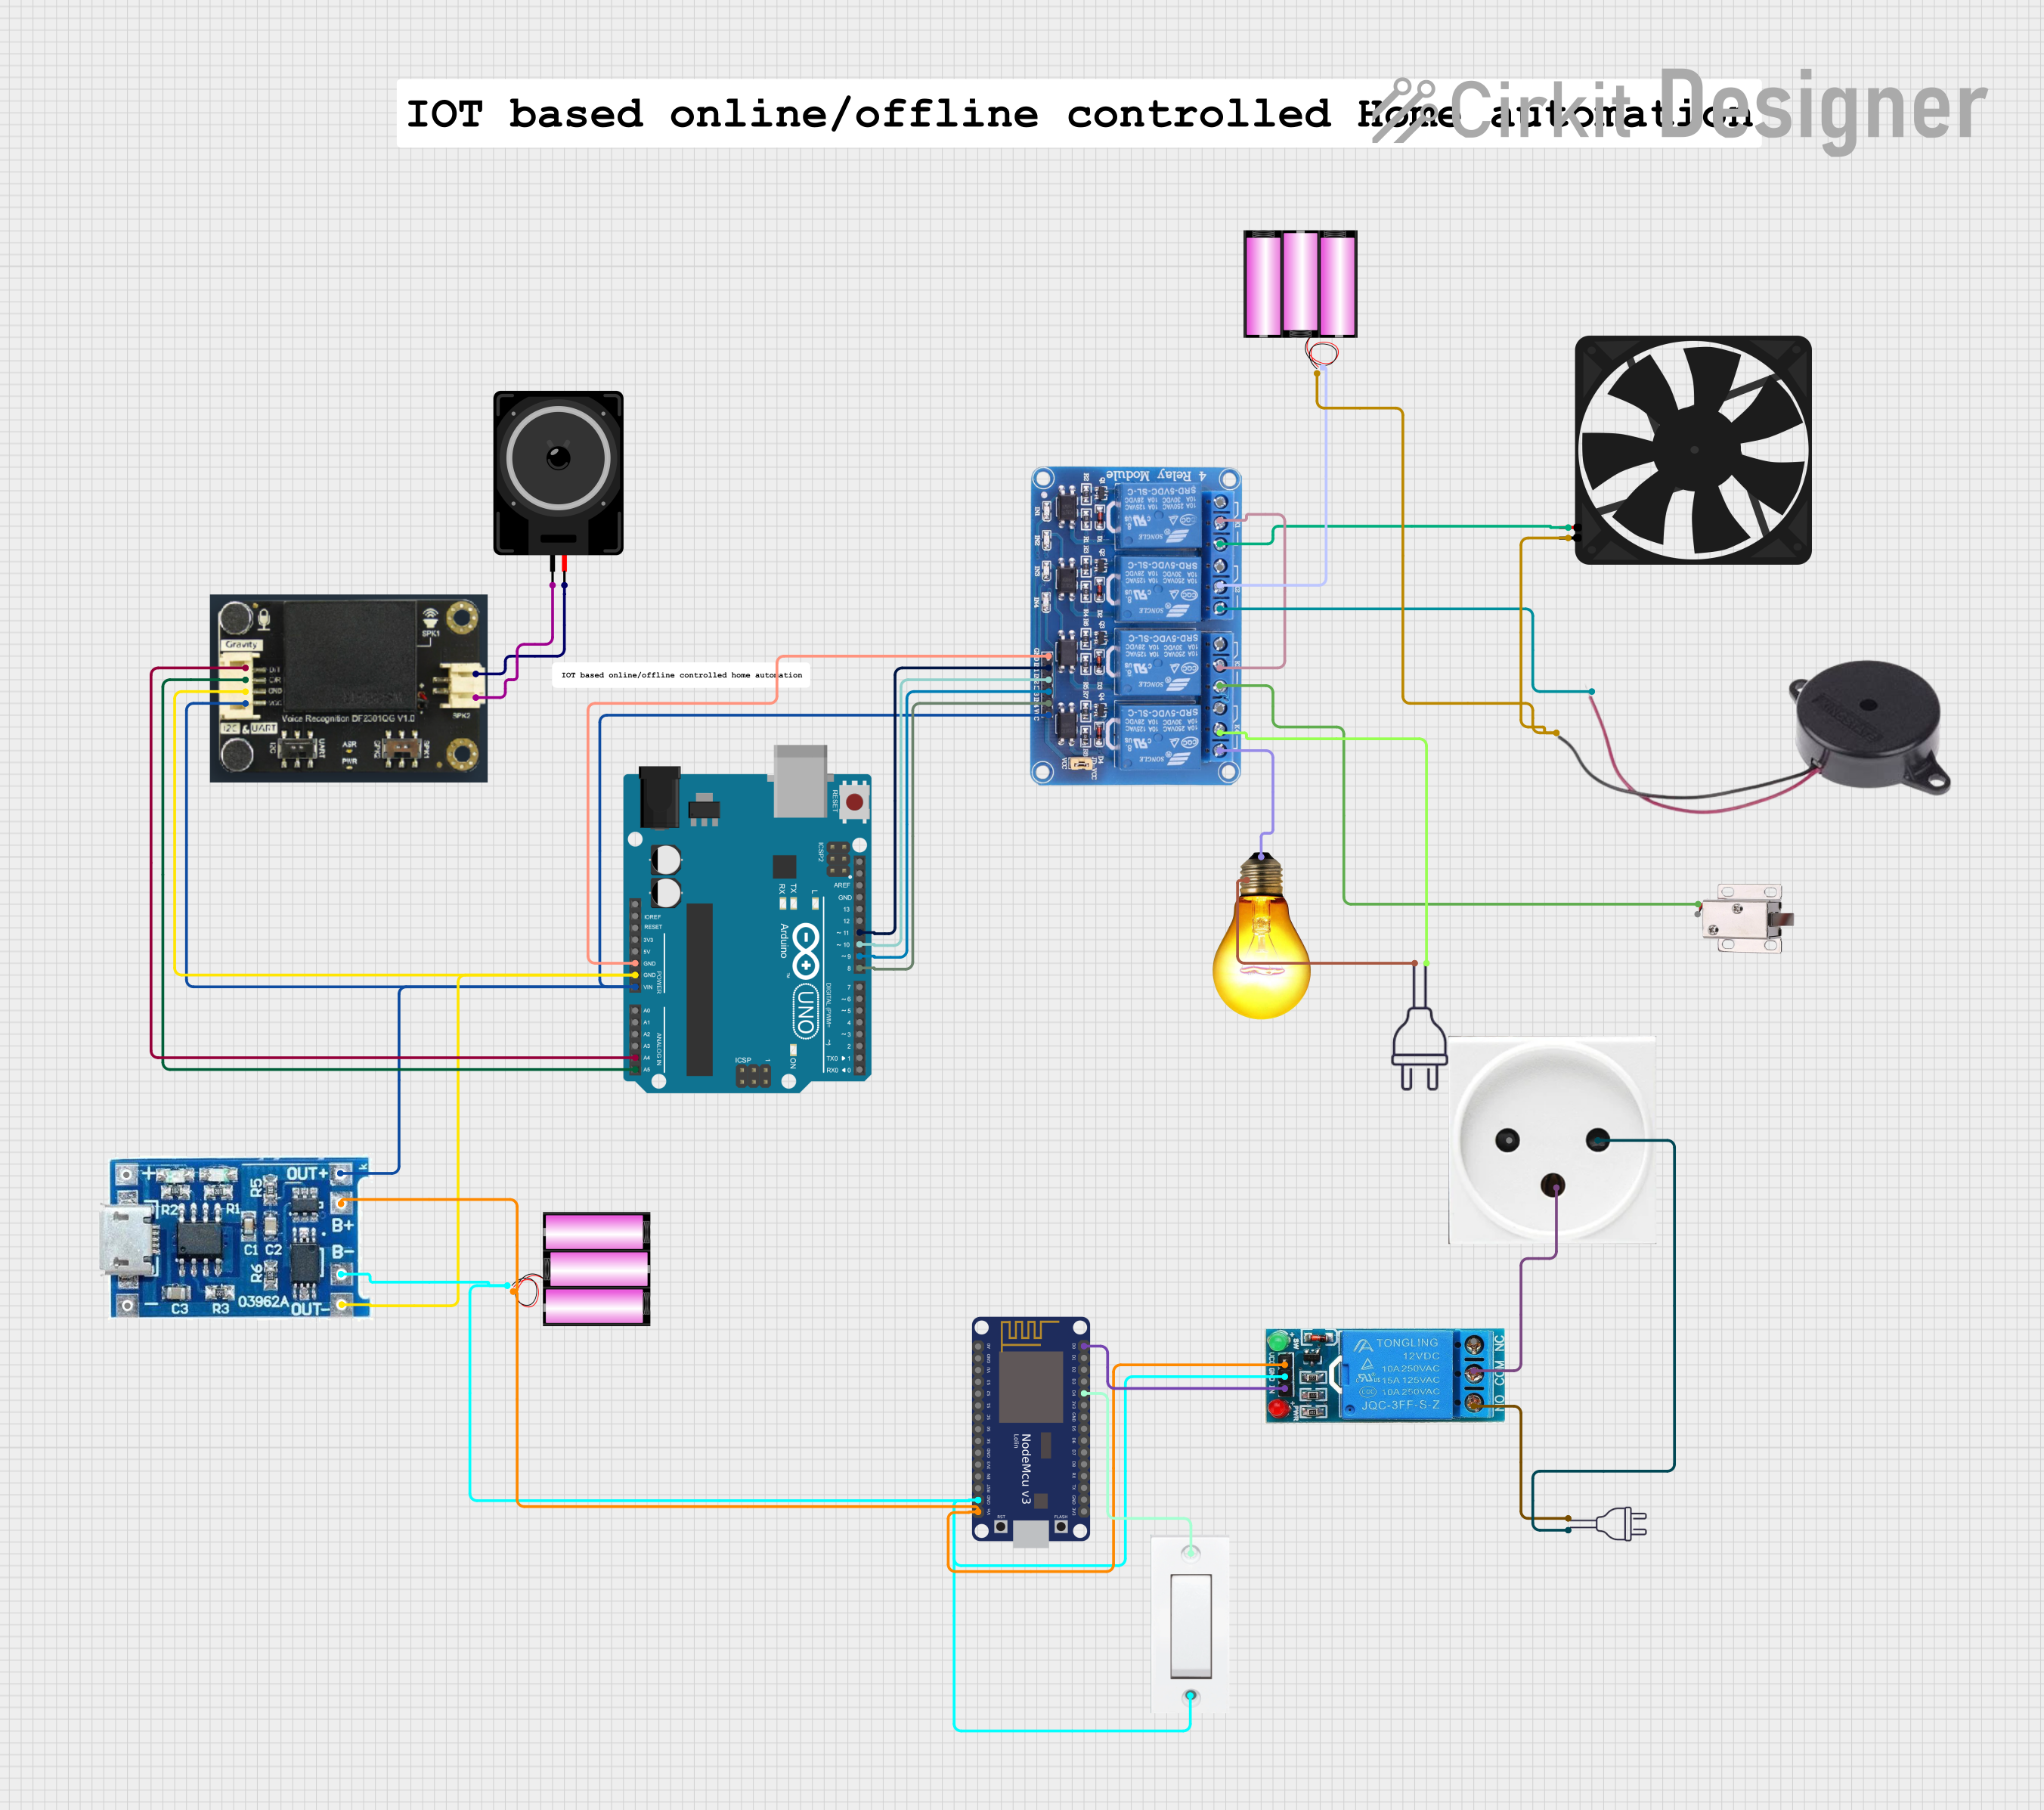
This is a voice-activated control system powered by solar energy with battery backup. It uses an Arduino UNO to interpret voice commands via a DF Robot Gravity voice recognition module and control a 4-channel relay that switches a fan, buzzer, solenoid lock, and AC bulb. A NodeMCU ESP8266 is included for potential IoT connectivity.
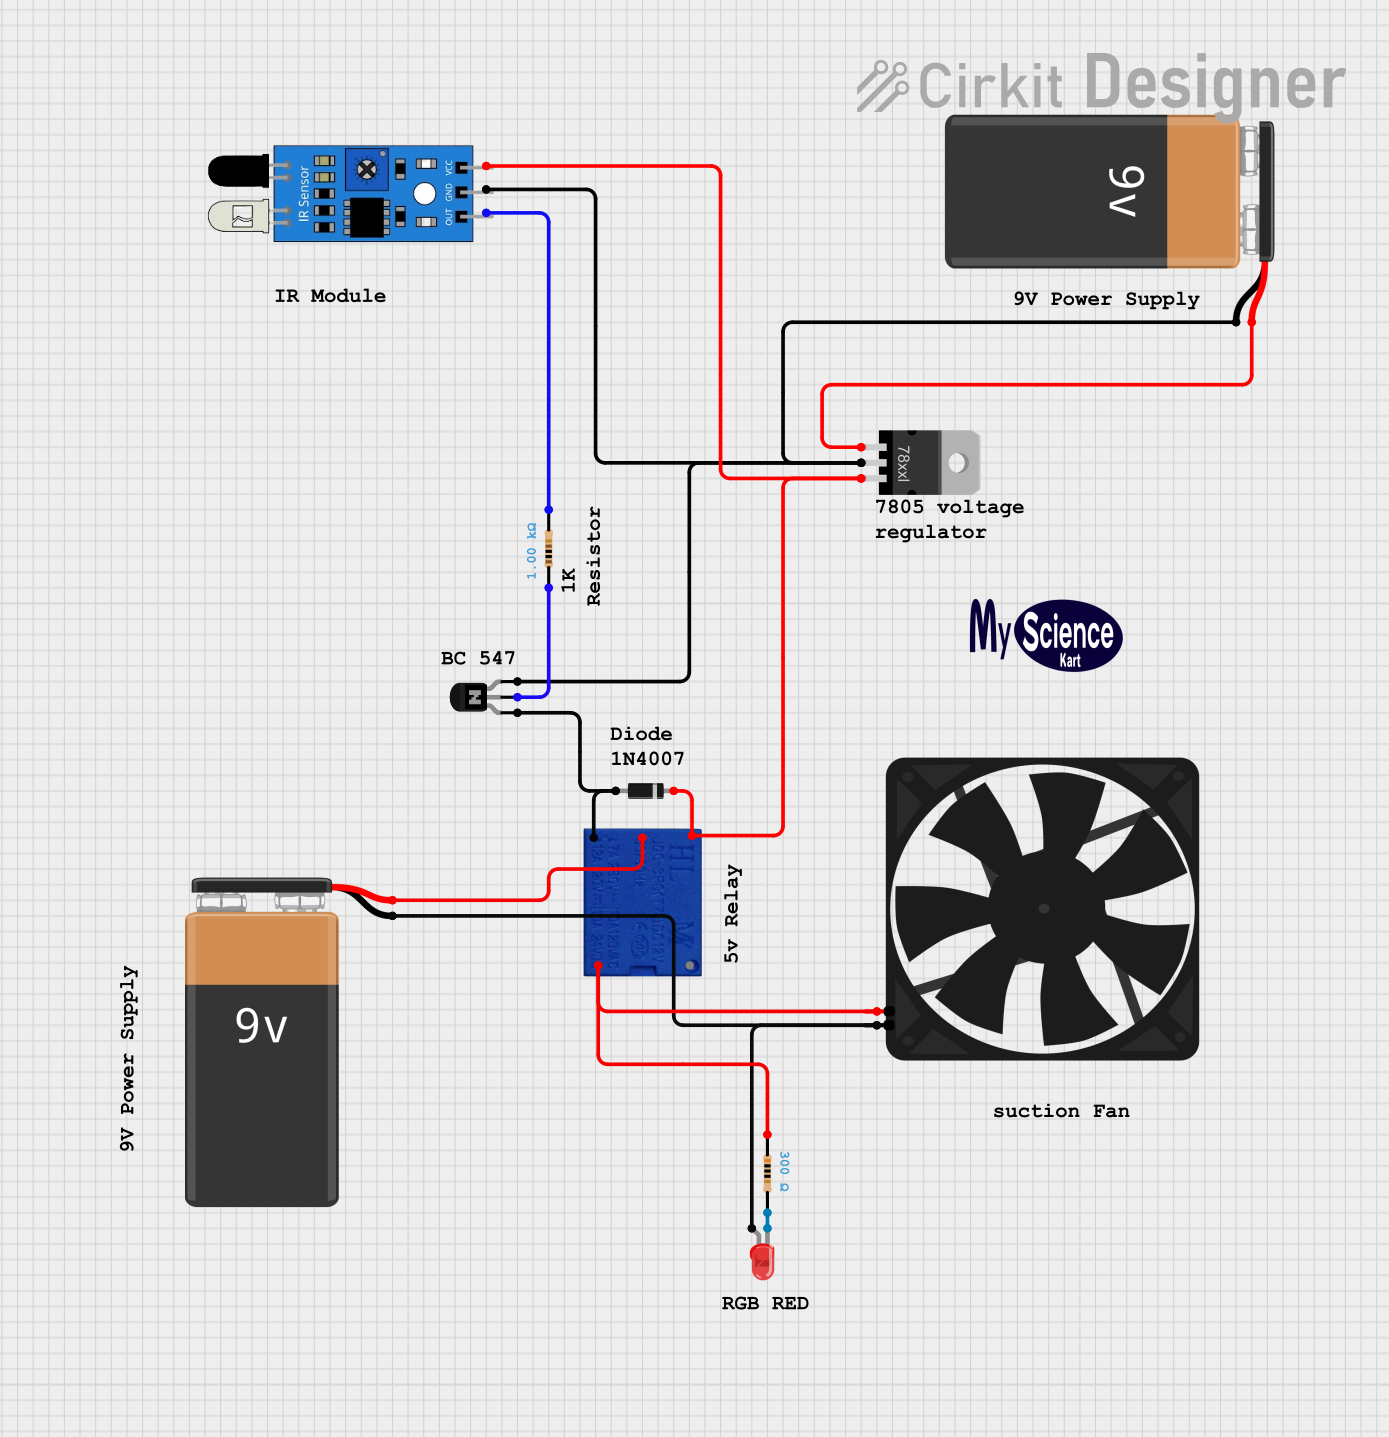
This circuit is a fan control system that uses an IR sensor to detect motion and activate a relay, which in turn powers a fan. The circuit includes a voltage regulator to step down the voltage from a 9V battery to 5V, and an NPN transistor to control the relay coil, with an LED indicator to show the status of the fan.
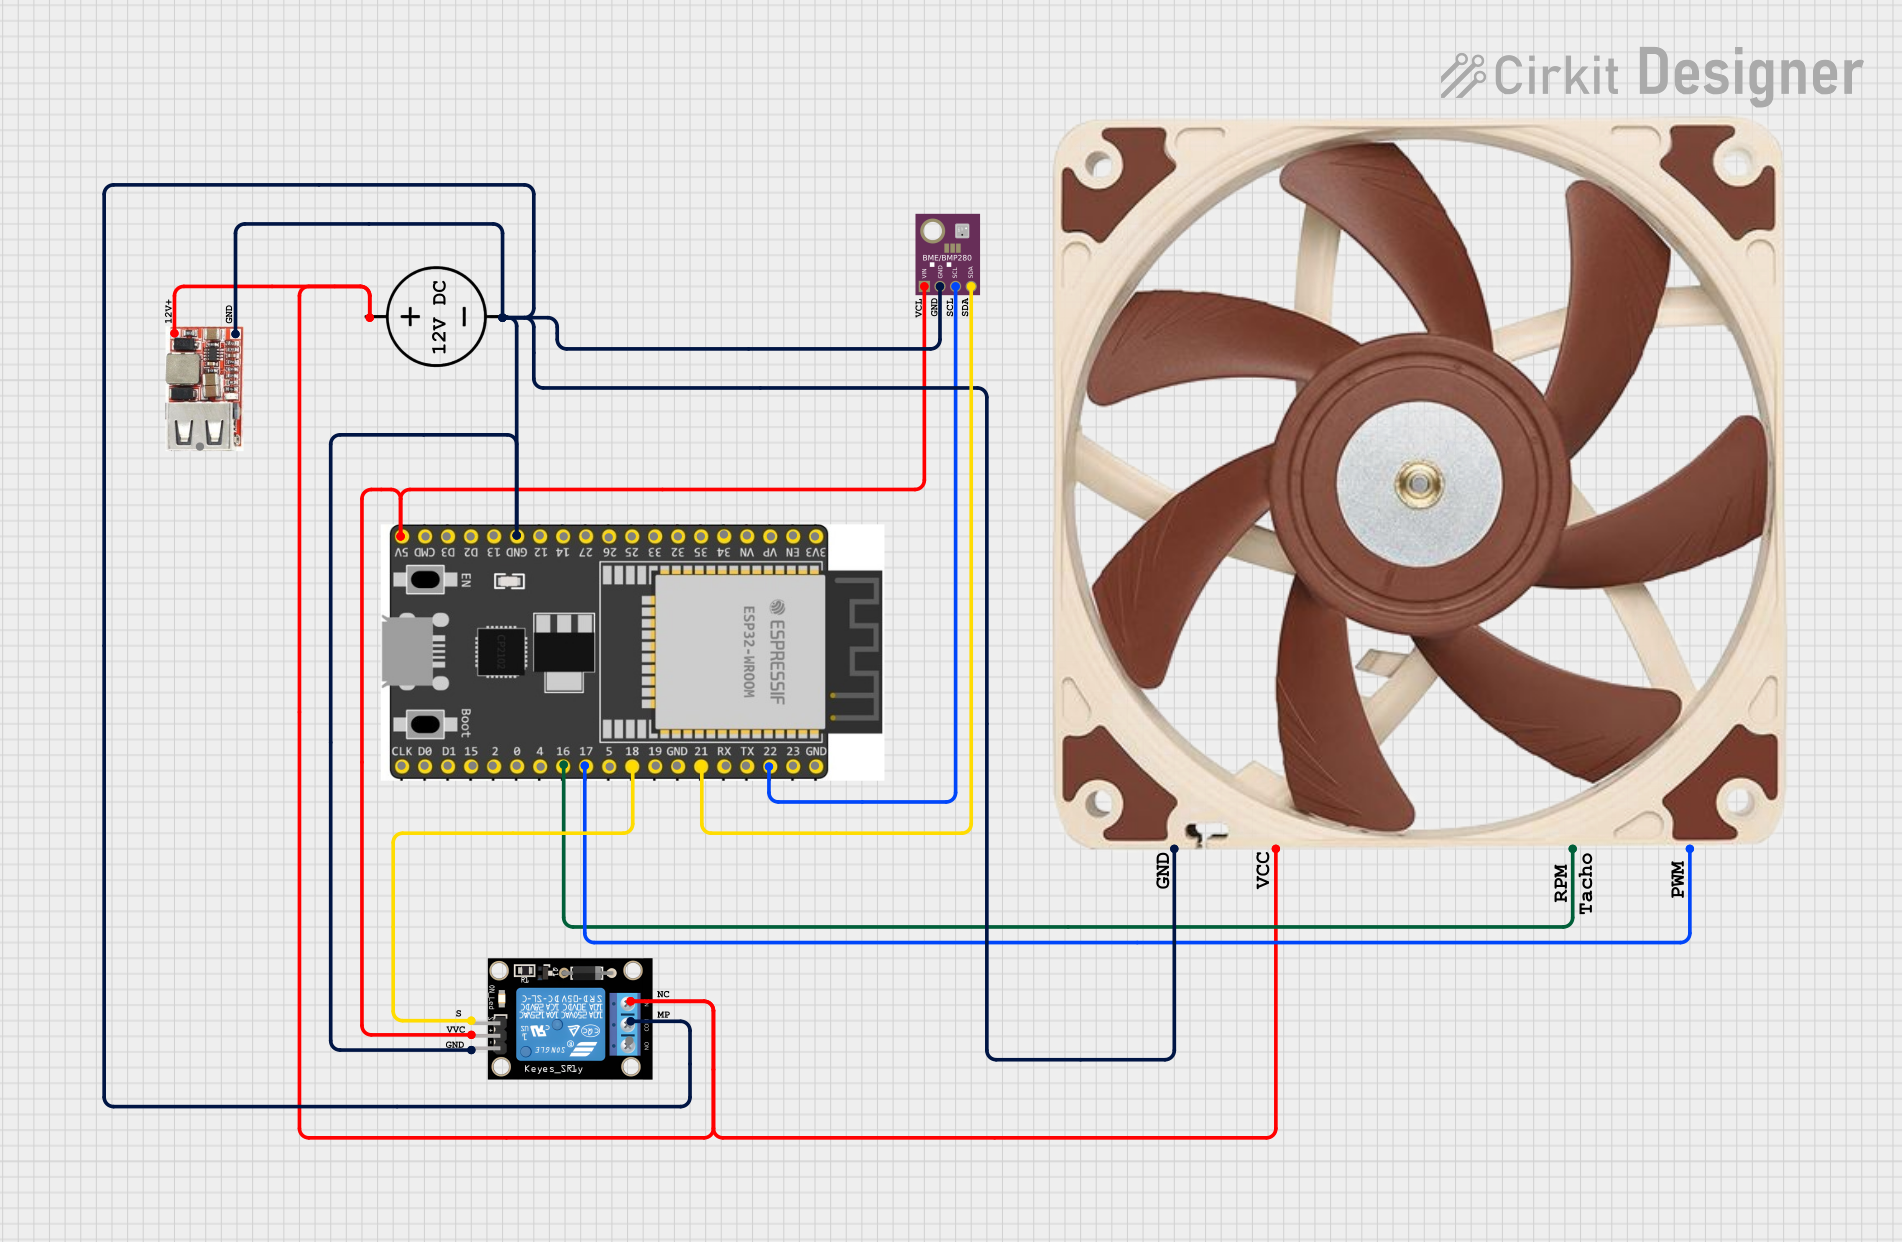
This circuit features an ESP32 microcontroller interfaced with a BME/BMP280 sensor for environmental monitoring, controlling a 12V PWM fan via a relay module. The ESP32 uses I2C communication (SCL, SDA) to read data from the BME/BMP280 sensor and controls the fan speed and on/off state through GPIO pins connected to the relay and the fan's PWM input. A USB regulator provides power to the circuit, and the DC power source is used to drive the relay and the fan.
Cooling for electronic components such as CPUs, GPUs, and power supplies
Ventilation in enclosures, cabinets, and small spaces
Air circulation in 3D printers, laser cutters, and other machinery
HVAC systems and small-scale air filtration units
Technical Specifications
The Sunflow Blower Fan is engineered to meet demanding cooling requirements. Below are its key technical specifications:
Parameter
Value
Operating Voltage
12V DC
Current Rating
0.2A
Power Consumption
2.4W
Airflow
5.5 CFM (Cubic Feet per Minute)
Noise Level
25 dBA
Dimensions
50mm x 50mm x 15mm
Bearing Type
Sleeve Bearing
Connector Type
2-pin JST
Operating Temperature
-10°C to 70°C
Lifespan
30,000 hours (at 25°C)
Pin Configuration and Descriptions
The Sunflow Blower Fan features a 2-pin JST connector for power input. The pin configuration is as follows:
Pin
Wire Color
Description
1
Red
Positive Voltage (VCC)
2
Black
Ground (GND)
Usage Instructions
How to Use the Component in a Circuit
Power Supply: Connect the fan to a 12V DC power source. Ensure the power supply can provide at least 0.2A of current to avoid underpowering the fan.
Wiring: Use the 2-pin JST connector to connect the fan. Match the red wire to the positive terminal (VCC) and the black wire to the ground (GND).
Mounting: Secure the fan using screws or adhesive mounts. Ensure the airflow direction aligns with your cooling or ventilation requirements (check the arrow markings on the fan housing).
Important Considerations and Best Practices
Voltage Tolerance: Do not exceed the rated 12V DC input to prevent damage to the fan.
Airflow Optimization: Position the fan in a way that minimizes obstructions to airflow for maximum efficiency.
Noise Reduction: Use rubber mounts or grommets to reduce vibration and noise during operation.
Maintenance: Periodically clean the fan blades and housing to prevent dust buildup, which can reduce performance and lifespan.
Example: Connecting to an Arduino UNO
The Sunflow Blower Fan can be controlled using an Arduino UNO and a transistor for switching. Below is an example circuit and code to control the fan:
Circuit Diagram
Connect the fan's red wire to the collector of an NPN transistor (e.g., 2N2222).
Connect the fan's black wire to the ground (GND).
Connect the emitter of the transistor to GND.
Connect a 1kΩ resistor between the base of the transistor and a digital pin on the Arduino (e.g., pin 9).
Connect the Arduino's GND to the power supply's GND.
Arduino Code
// Sunflow Blower Fan Control Example
// This code demonstrates how to control the fan using PWM on an Arduino UNO.

const int fanPin = 9; // Pin connected to the transistor base

void setup() {
  pinMode(fanPin, OUTPUT); // Set the fan control pin as an output
}

void loop() {
  analogWrite(fanPin, 128); // Set fan speed to 50% (PWM value: 128)
  delay(5000); // Run the fan at 50% speed for 5 seconds

  analogWrite(fanPin, 255); // Set fan speed to 100% (PWM value: 255)
  delay(5000); // Run the fan at full speed for 5 seconds

  analogWrite(fanPin, 0); // Turn off the fan
  delay(5000); // Wait for 5 seconds before repeating
}
Troubleshooting and FAQs
Common Issues and Solutions
Fan Does Not Spin
Cause: Insufficient power supply or incorrect wiring.
Solution: Verify the power supply provides 12V DC and at least 0.2A. Check the wiring to ensure the red wire is connected to VCC and the black wire to GND.
Excessive Noise
Cause: Dust buildup or improper mounting.
Solution: Clean the fan blades and housing. Use rubber mounts to reduce vibration.
Overheating Components
Cause: Insufficient airflow or incorrect fan placement.
Solution: Ensure the fan is positioned to direct airflow effectively. Remove any obstructions.
Fan Stops Intermittently
Cause: Loose connections or power fluctuations.
Solution: Check all connections and ensure a stable power supply.
FAQs
Can I use the fan with a 5V power supply?
No, the fan requires a 12V DC power supply for proper operation.
Is the fan waterproof?
No, the Sunflow Blower Fan is not waterproof. Avoid exposing it to moisture or liquids.
Can I control the fan speed without an Arduino?
Yes, you can use a PWM controller or a variable resistor to adjust the fan speed manually.
What is the expected lifespan of the fan?
The fan has an expected lifespan of 30,000 hours under normal operating conditions at 25°C.
By following this documentation, you can effectively integrate the Sunflow Blower Fan into your projects and ensure reliable performance.

 Open Project in Cirkit Designer