How to Use FINGERPRINT : Examples, Pinouts, and Specs
Introduction
A fingerprint sensor is a biometric device designed to capture and verify an individual's fingerprint for authentication purposes. It is widely used in security systems, mobile devices, time attendance systems, and access control applications. By leveraging unique fingerprint patterns, this component ensures secure and reliable identification, making it an essential tool in modern authentication systems.
Explore Projects Built with FINGERPRINT

Explore Projects Built with FINGERPRINT
Common Applications:
- Biometric security systems
- Mobile device authentication
- Time and attendance tracking
- Access control for doors and safes
- Embedded systems requiring user identification
Technical Specifications
Below are the general technical specifications for a typical fingerprint sensor module (e.g., the R307 or GT-521F32):
| Specification | Details |
|---|---|
| Operating Voltage | 3.3V - 6V DC |
| Operating Current | 50mA (Idle), 120mA (Peak) |
| Interface | UART (TTL) or USB |
| Baud Rate | 9600 bps (default, adjustable) |
| Fingerprint Capacity | 200 - 1000 templates (varies by model) |
| Image Resolution | 500 DPI |
| Scanning Area | ~14mm x 18mm |
| Matching Speed | <1 second |
| False Acceptance Rate (FAR) | <0.001% |
| False Rejection Rate (FRR) | <1.0% |
| Operating Temperature | -20°C to 50°C |
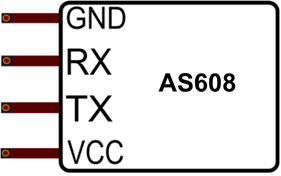
Pin Configuration
The pinout for a typical fingerprint sensor module (e.g., R307) is as follows:
| Pin | Name | Description |
|---|---|---|
| 1 | VCC | Power supply (3.3V - 6V DC) |
| 2 | GND | Ground |
| 3 | TX | UART Transmit (data output from the sensor) |
| 4 | RX | UART Receive (data input to the sensor) |
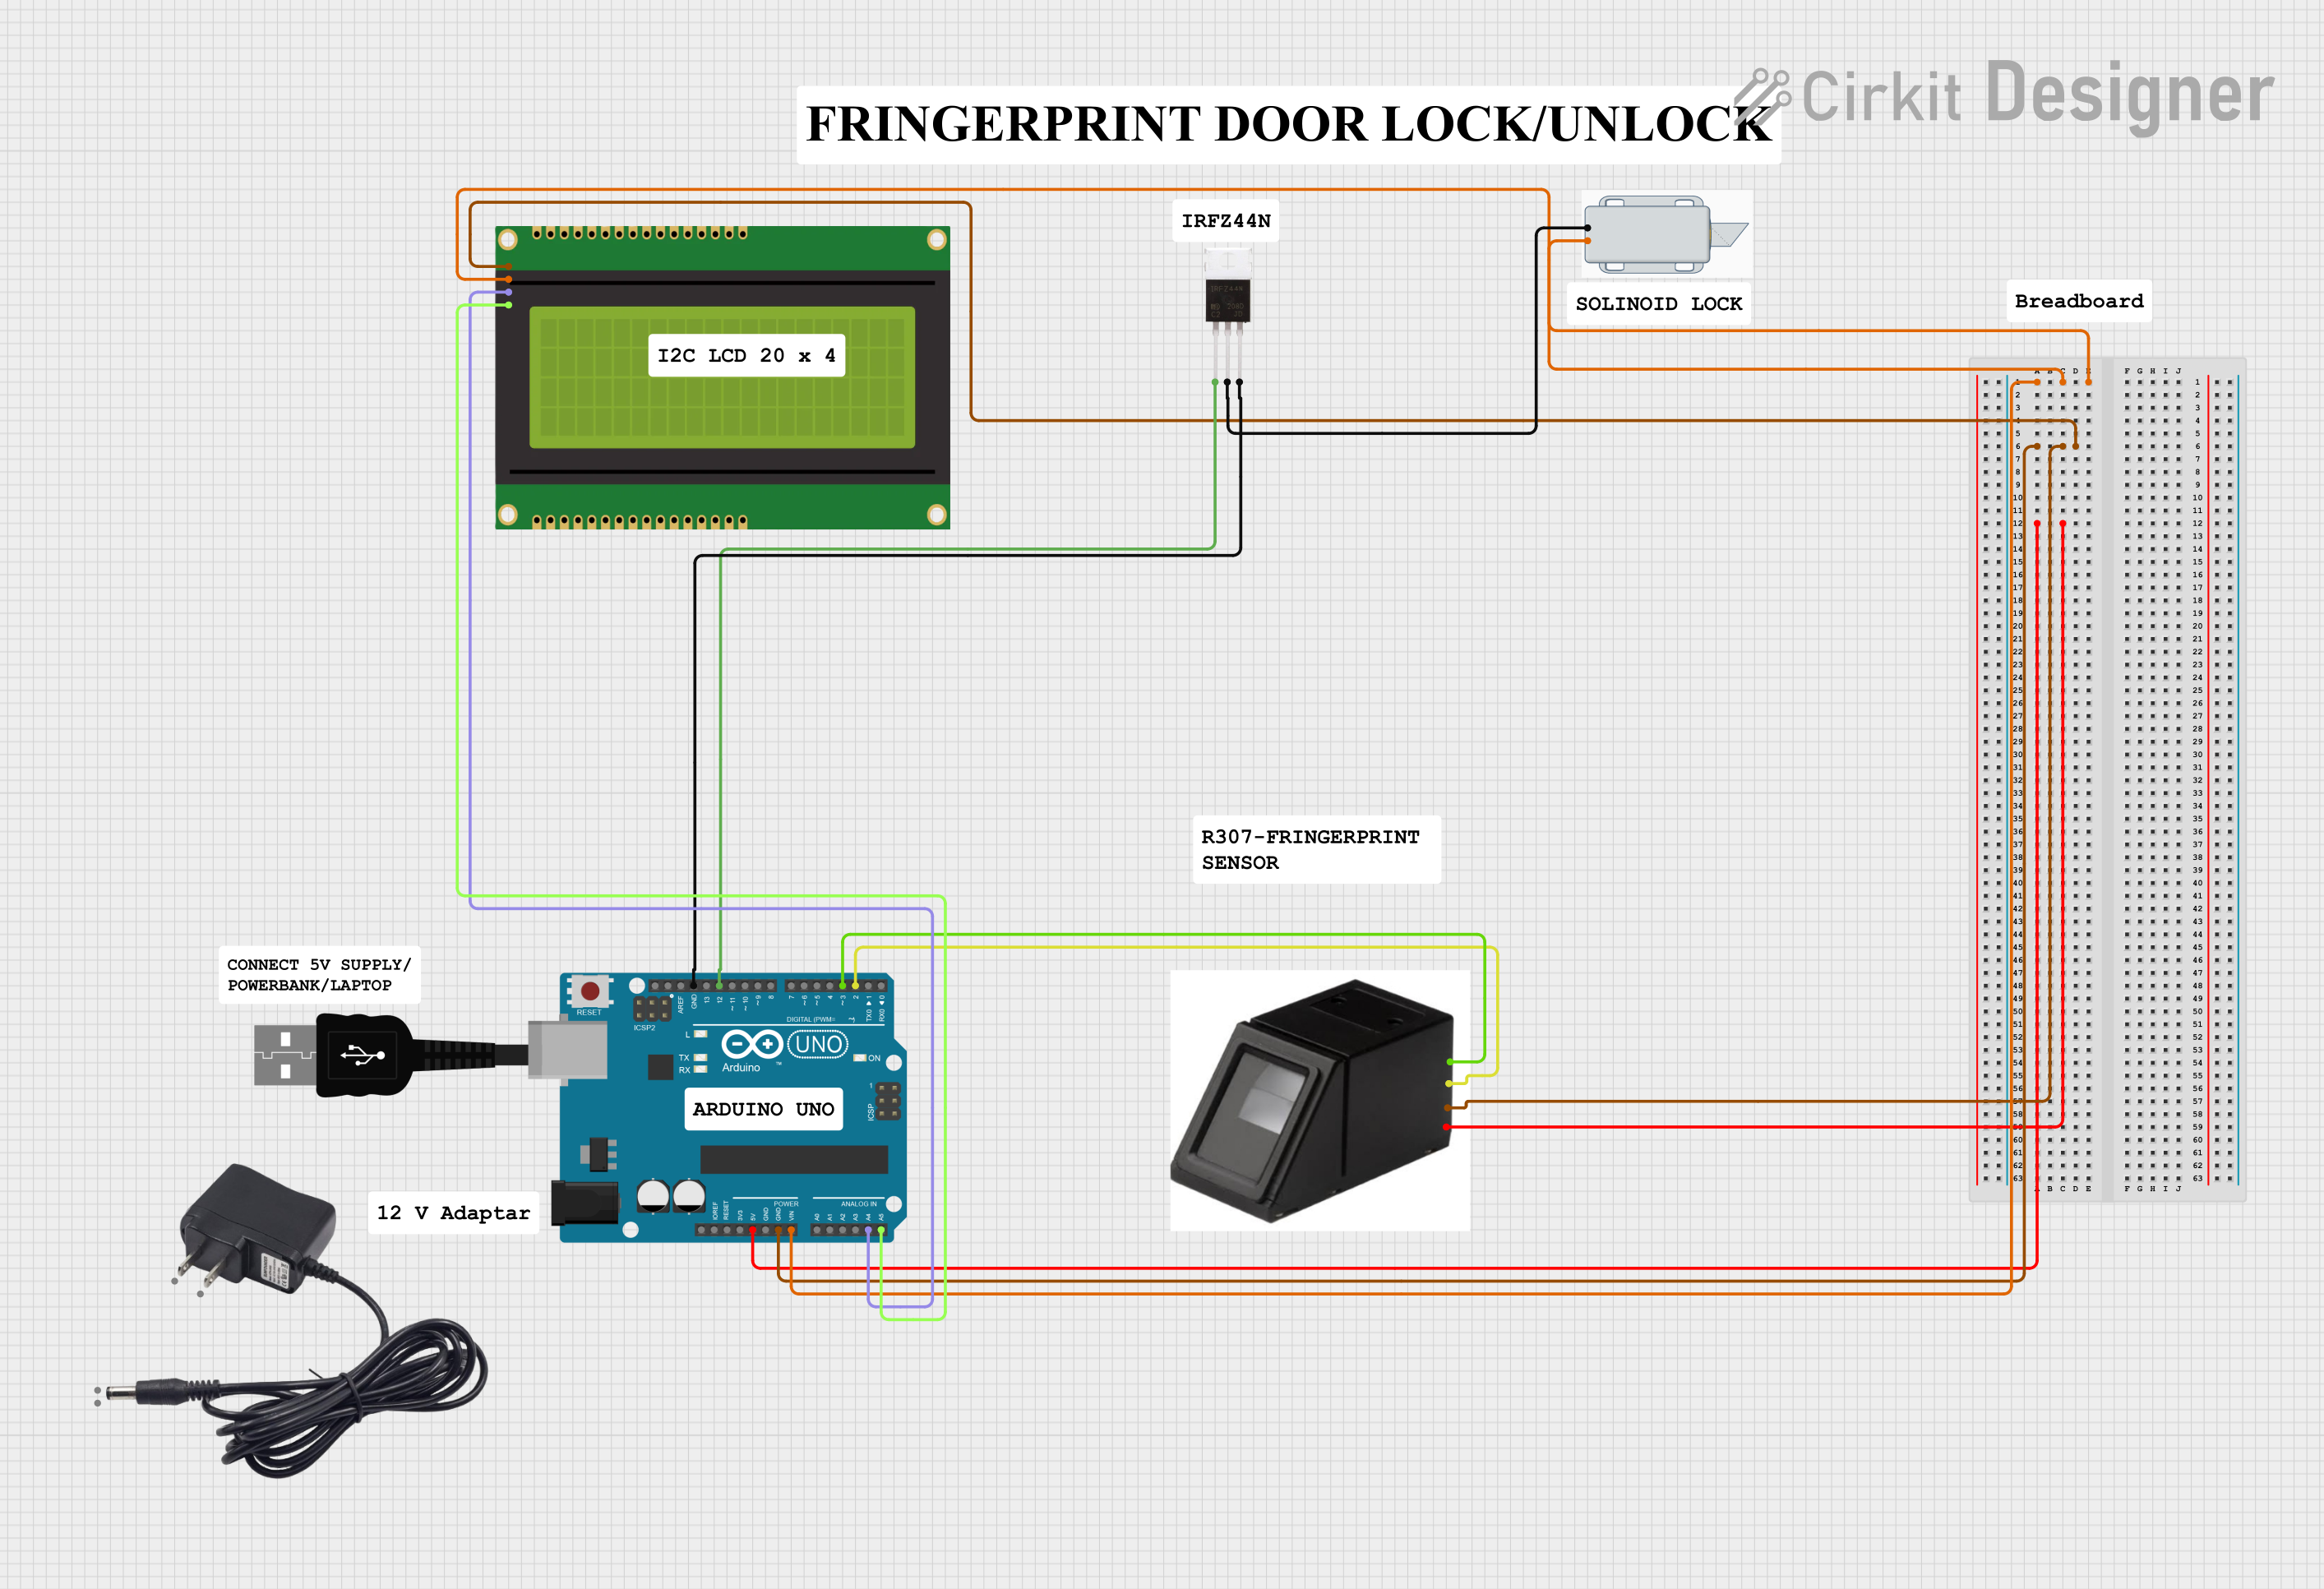
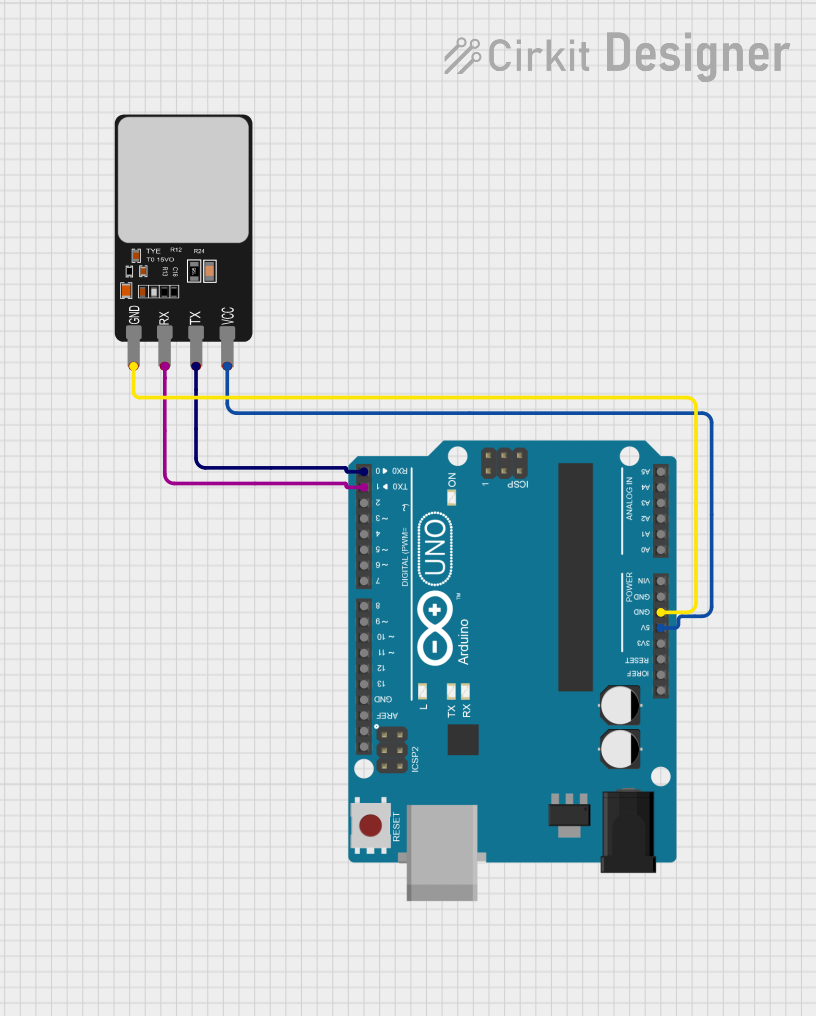
Usage Instructions
Connecting the Fingerprint Sensor to an Arduino UNO
To use the fingerprint sensor with an Arduino UNO, follow these steps:
Wiring:
- Connect the
VCCpin of the sensor to the 5V pin on the Arduino. - Connect the
GNDpin of the sensor to the GND pin on the Arduino. - Connect the
TXpin of the sensor to the Arduino's digital pin 2 (via a voltage divider if required). - Connect the
RXpin of the sensor to the Arduino's digital pin 3.
- Connect the
Install Required Libraries:
- Download and install the
Adafruit Fingerprint Sensor Libraryfrom the Arduino Library Manager.
- Download and install the
Upload Example Code: Use the following example code to enroll and verify fingerprints:
#include <Adafruit_Fingerprint.h>
#include <SoftwareSerial.h>

// Define the pins for SoftwareSerial
SoftwareSerial mySerial(2, 3); // RX, TX

// Initialize the fingerprint sensor
Adafruit_Fingerprint finger(&mySerial);

void setup() {
  Serial.begin(9600); // Initialize serial monitor
  while (!Serial);    // Wait for the serial monitor to open
  Serial.println("Fingerprint Sensor Test");

  // Start the fingerprint sensor
  finger.begin(57600);
  if (finger.verifyPassword()) {
    Serial.println("Sensor detected!");
  } else {
    Serial.println("Sensor not detected. Check wiring!");
    while (1);
  }
}

void loop() {
  Serial.println("Place your finger on the sensor...");
  int result = finger.getImage();
  if (result == FINGERPRINT_OK) {
    Serial.println("Fingerprint detected!");
  } else if (result == FINGERPRINT_NOFINGER) {
    Serial.println("No finger detected.");
  } else {
    Serial.println("Error reading fingerprint.");
  }
  delay(1000); // Wait before the next scan
}
Important Considerations:
- Ensure proper wiring to avoid communication issues.
- Use a stable power supply to prevent sensor malfunctions.
- Avoid exposing the sensor to dirt, moisture, or direct sunlight for accurate readings.
- Clean the sensor surface regularly with a soft, dry cloth.
Troubleshooting and FAQs
Common Issues and Solutions:
Sensor Not Detected:
- Cause: Incorrect wiring or loose connections.
- Solution: Double-check the wiring and ensure the sensor is powered correctly.
Fingerprint Not Recognized:
- Cause: Poor fingerprint placement or dirty sensor surface.
- Solution: Place the finger flat on the sensor and clean the surface.
Communication Errors:
- Cause: Incorrect baud rate or damaged cables.
- Solution: Verify the baud rate in the code matches the sensor's default setting.
Slow Matching Speed:
- Cause: Large number of stored templates.
- Solution: Reduce the number of stored fingerprints if possible.
FAQs:
Q1: Can the fingerprint sensor store multiple fingerprints?
Yes, most fingerprint sensors can store between 200 and 1000 templates, depending on the model.
Q2: Can I use the fingerprint sensor with a Raspberry Pi?
Yes, the sensor can be used with a Raspberry Pi via UART or USB, but you may need additional libraries or drivers.
Q3: What happens if the sensor gets dirty?
A dirty sensor may fail to read fingerprints accurately. Clean it gently with a soft, dry cloth to restore functionality.
Q4: Can the sensor work outdoors?
While some sensors are designed for outdoor use, most are sensitive to extreme temperatures, moisture, and direct sunlight. Check the specifications of your specific model.
By following this documentation, you can effectively integrate and troubleshoot a fingerprint sensor in your projects.