How to Use dy50 fingerprint scanner: Examples, Pinouts, and Specs
Introduction
The DY50 Fingerprint Scanner, manufactured by Adafruit, is a biometric device designed to identify individuals by scanning and analyzing their unique fingerprint patterns. This compact and reliable module is widely used in security systems, access control, and other applications requiring biometric authentication. Its ease of integration with microcontrollers, such as Arduino, makes it a popular choice for hobbyists and professionals alike.
Explore Projects Built with dy50 fingerprint scanner
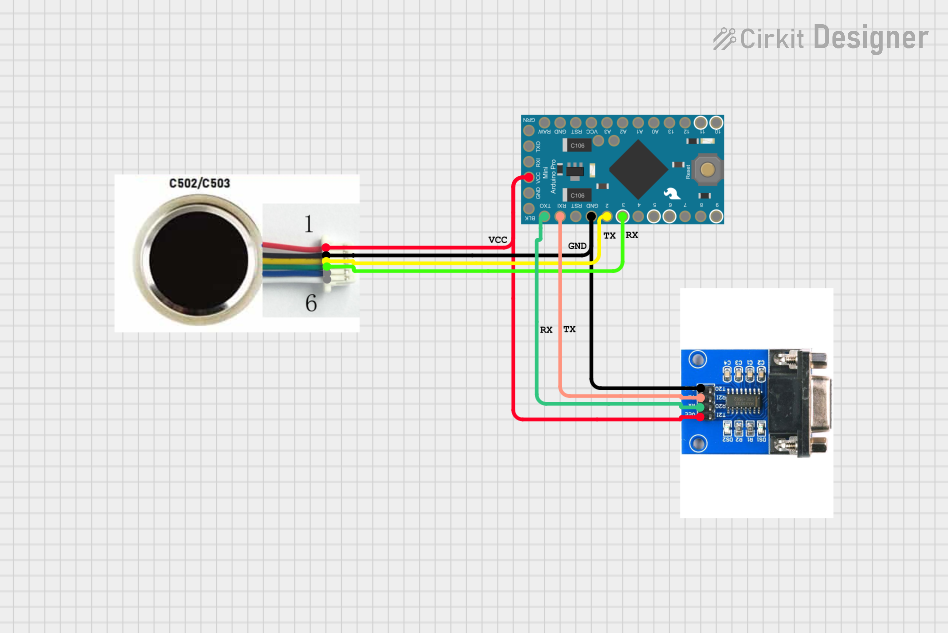
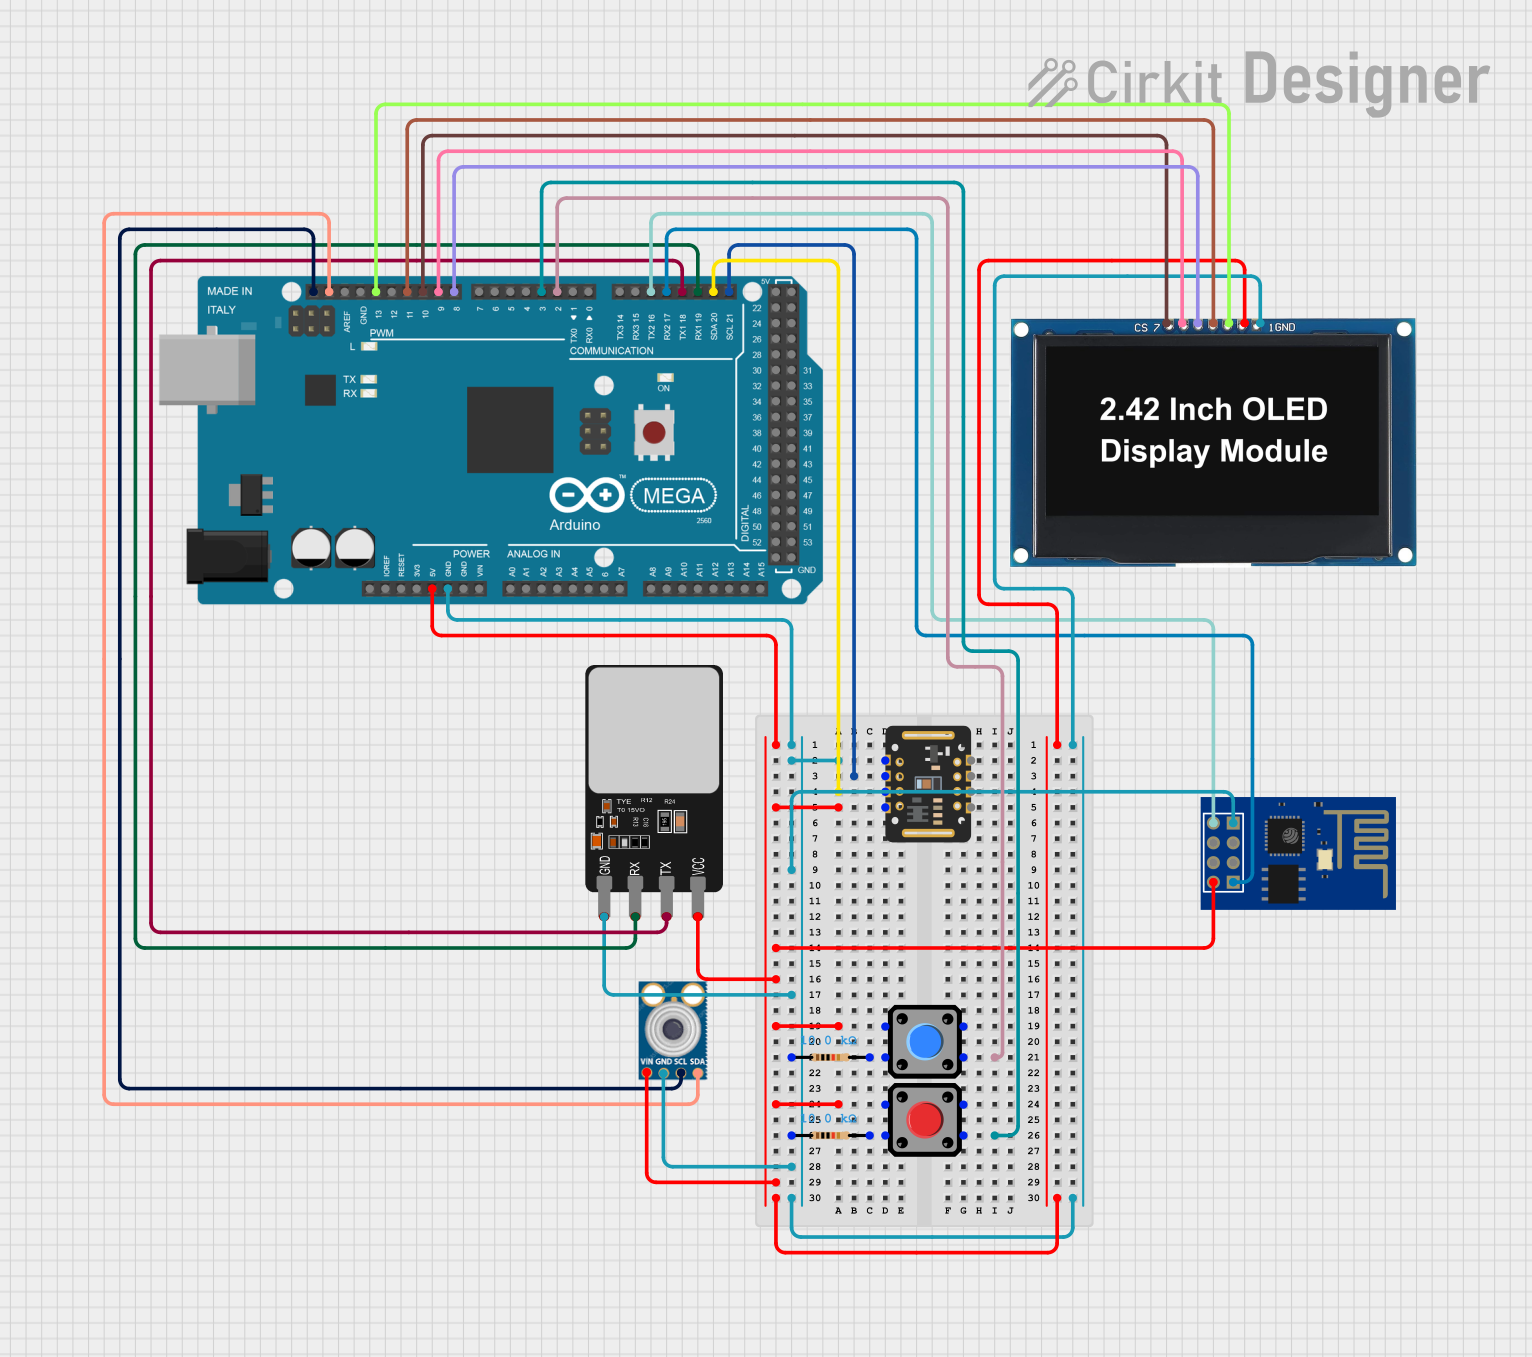
Explore Projects Built with dy50 fingerprint scanner
Common Applications and Use Cases
- Door lock systems with fingerprint authentication
- Time and attendance tracking systems
- Secure access control for devices and systems
- Personal identification in embedded projects
- Biometric data collection for research purposes
Technical Specifications
The DY50 Fingerprint Scanner is equipped with advanced features to ensure accurate and reliable fingerprint recognition. Below are its key technical details:
Key Technical Details
| Parameter | Specification |
|---|---|
| Operating Voltage | 3.6V to 6.0V |
| Operating Current | 120mA (typical), 150mA (max) |
| Interface | UART (TTL) |
| Baud Rate | Configurable (default: 57600 bps) |
| Fingerprint Capacity | 162 templates |
| Image Resolution | 508 DPI |
| Scanning Time | < 1 second |
| False Acceptance Rate | < 0.001% |
| False Rejection Rate | < 1.0% |
| Operating Temperature | -20°C to +50°C |
| Module Dimensions | 56mm x 20mm x 21.5mm |
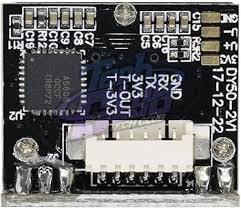
Pin Configuration and Descriptions
The DY50 Fingerprint Scanner has a 6-pin interface for connecting to external devices. Below is the pinout:
| Pin Number | Name | Description |
|---|---|---|
| 1 | VCC | Power supply input (3.6V to 6.0V) |
| 2 | GND | Ground connection |
| 3 | TXD | UART Transmit pin (data output) |
| 4 | RXD | UART Receive pin (data input) |
| 5 | TOUCH | Touch detection signal (active high) |
| 6 | RESET | Reset pin (active low, optional for hard reset) |
Usage Instructions
The DY50 Fingerprint Scanner is straightforward to use and can be easily integrated into a circuit. Below are the steps and best practices for using the module:
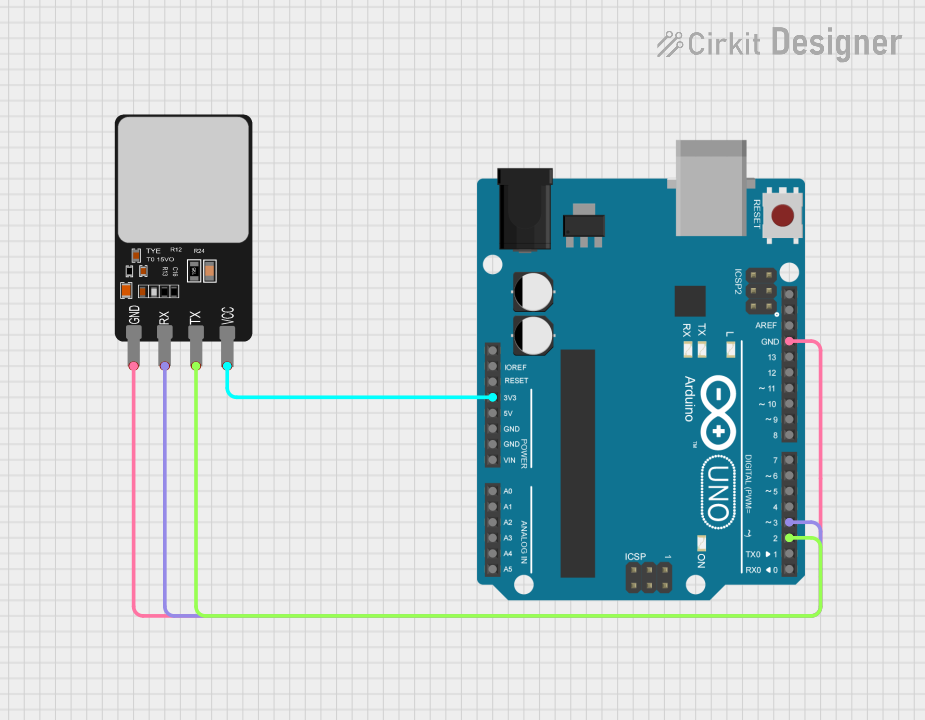
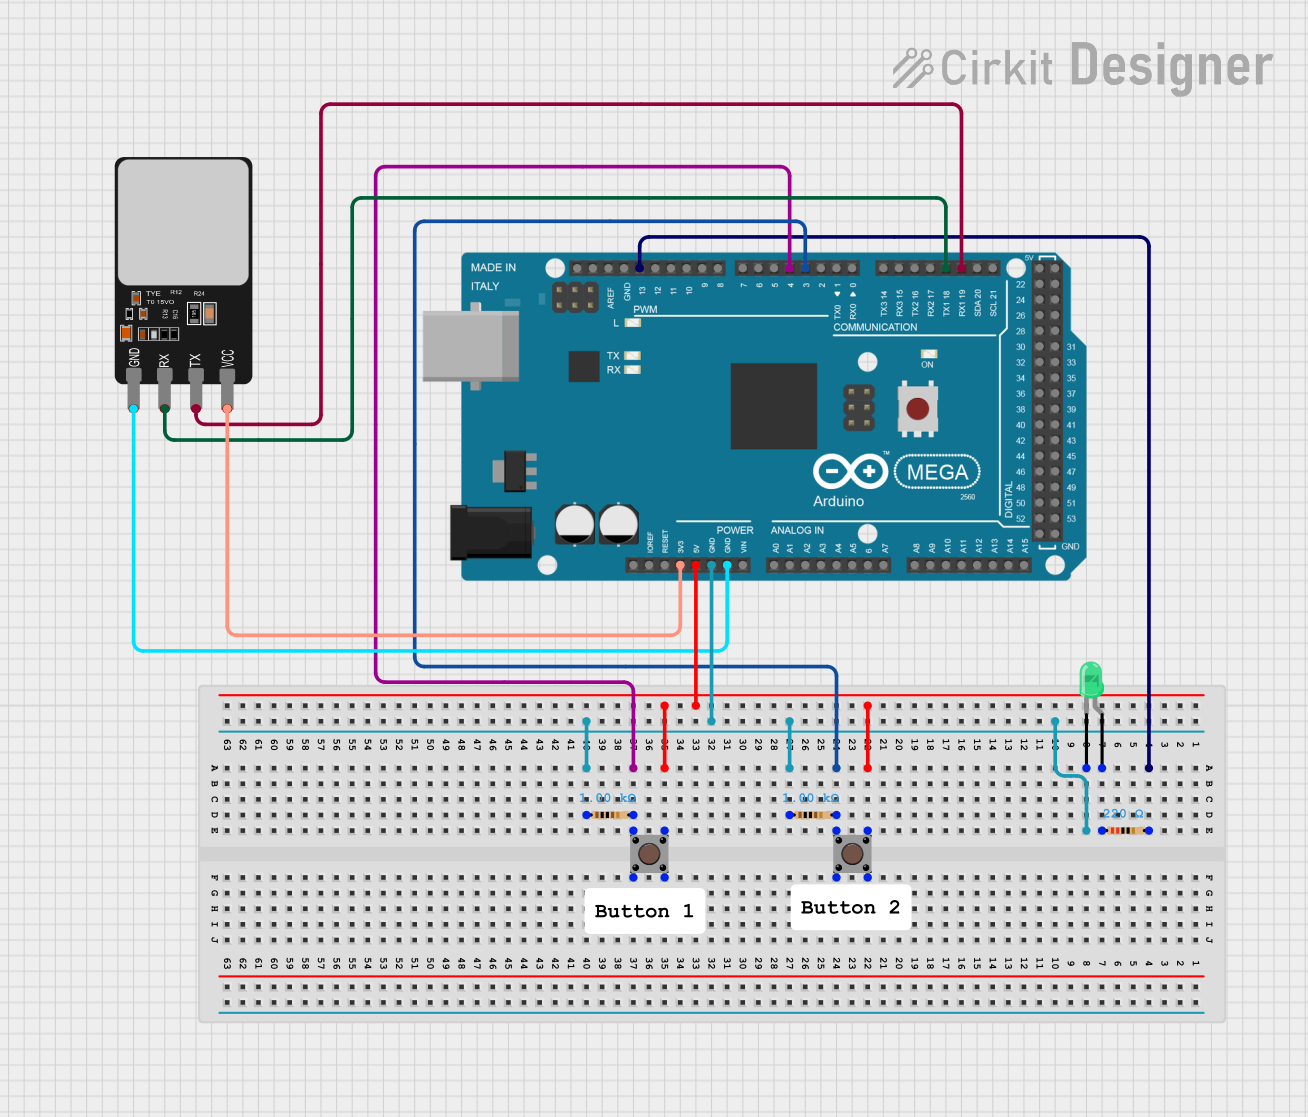
Connecting the DY50 to an Arduino UNO
Wiring the Module:
- Connect the
VCCpin of the scanner to the 5V pin on the Arduino. - Connect the
GNDpin of the scanner to the GND pin on the Arduino. - Connect the
TXDpin of the scanner to the Arduino's digital pin 2 (via a voltage divider if needed). - Connect the
RXDpin of the scanner to the Arduino's digital pin 3. - Optionally, connect the
RESETpin to a digital pin on the Arduino for manual resets.
- Connect the
Installing the Adafruit Fingerprint Library:
- Open the Arduino IDE and go to Sketch > Include Library > Manage Libraries.
- Search for "Adafruit Fingerprint Sensor Library" and install it.
Uploading Example Code: Use the following example code to enroll and verify fingerprints:
#include <Adafruit_Fingerprint.h> #include <SoftwareSerial.h> // Define the RX and TX pins for the fingerprint scanner SoftwareSerial mySerial(2, 3); // RX, TX Adafruit_Fingerprint finger(&mySerial); void setup() { Serial.begin(9600); // Initialize serial monitor while (!Serial); // Wait for serial connection Serial.println("Adafruit Fingerprint Sensor example"); // Initialize the fingerprint scanner finger.begin(57600); if (finger.verifyPassword()) { Serial.println("Fingerprint sensor detected!"); } else { Serial.println("Did not find fingerprint sensor :("); while (1) { delay(1); } } } void loop() { Serial.println("Place your finger on the sensor..."); int result = finger.getImage(); if (result == FINGERPRINT_OK) { Serial.println("Fingerprint image taken!"); } else if (result == FINGERPRINT_NOFINGER) { Serial.println("No finger detected"); } else { Serial.println("Error reading fingerprint"); } delay(1000); // Wait before the next scan }- Upload the code to your Arduino UNO.
- Open the Serial Monitor (set to 9600 baud) to interact with the scanner.
Important Considerations and Best Practices
- Power Supply: Ensure a stable power supply to avoid malfunctions. Use a decoupling capacitor if necessary.
- UART Communication: Match the baud rate of the scanner with your microcontroller.
- Fingerprint Enrollment: Enroll fingerprints in a controlled environment for better accuracy.
- Touch Pin: Use the
TOUCHpin to detect when a finger is placed on the scanner, reducing power consumption in idle mode. - Reset Pin: Use the
RESETpin for hardware resets if the module becomes unresponsive.
Troubleshooting and FAQs
Common Issues and Solutions
Fingerprint Scanner Not Detected:
- Cause: Incorrect wiring or baud rate mismatch.
- Solution: Double-check the connections and ensure the baud rate is set to 57600.
No Finger Detected:
- Cause: Finger not properly placed on the scanner.
- Solution: Ensure the finger is clean and placed flat on the scanner.
Low Recognition Accuracy:
- Cause: Poor-quality fingerprint images or environmental factors.
- Solution: Re-enroll fingerprints in a clean and stable environment.
Module Becomes Unresponsive:
- Cause: Power fluctuations or software issues.
- Solution: Perform a hardware reset using the
RESETpin.
FAQs
Q1: Can the DY50 store multiple fingerprints?
Yes, the DY50 can store up to 162 fingerprint templates in its internal memory.
Q2: Can I use the DY50 with a 3.3V microcontroller?
Yes, the DY50 supports a voltage range of 3.6V to 6.0V. However, ensure proper level shifting for UART communication.
Q3: How do I clear all stored fingerprints?
Use the emptyDatabase() function from the Adafruit Fingerprint Sensor Library to clear all stored templates.
Q4: What is the default baud rate of the DY50?
The default baud rate is 57600 bps, but it can be configured using library functions.
By following this documentation, you can effectively integrate and use the DY50 Fingerprint Scanner in your projects.