How to Use BMP388: Examples, Pinouts, and Specs
Introduction
The BMP388, manufactured by Bosch Sensortec, is a high-precision barometric pressure sensor designed to measure atmospheric pressure and temperature. This sensor is widely used in applications requiring accurate environmental data, such as weather forecasting, altitude measurement, and indoor navigation. Its compact size, low power consumption, and high accuracy make it an ideal choice for mobile devices, drones, and IoT applications.
Explore Projects Built with BMP388
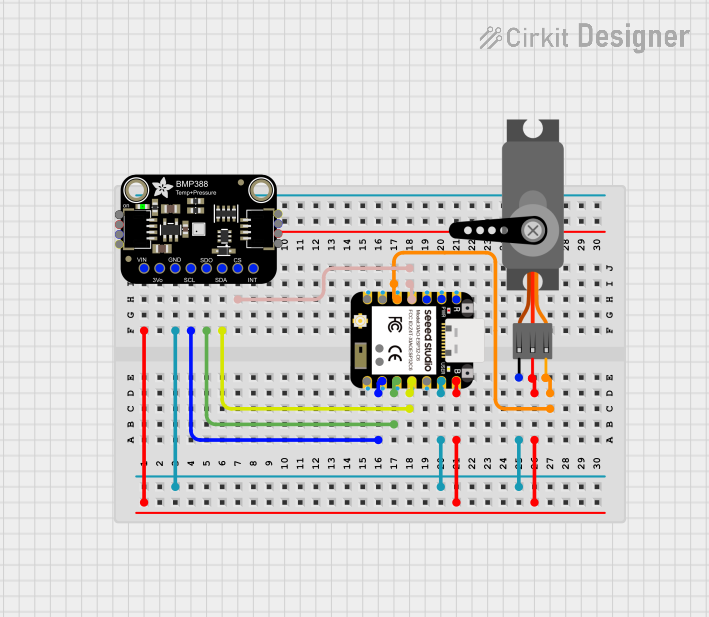
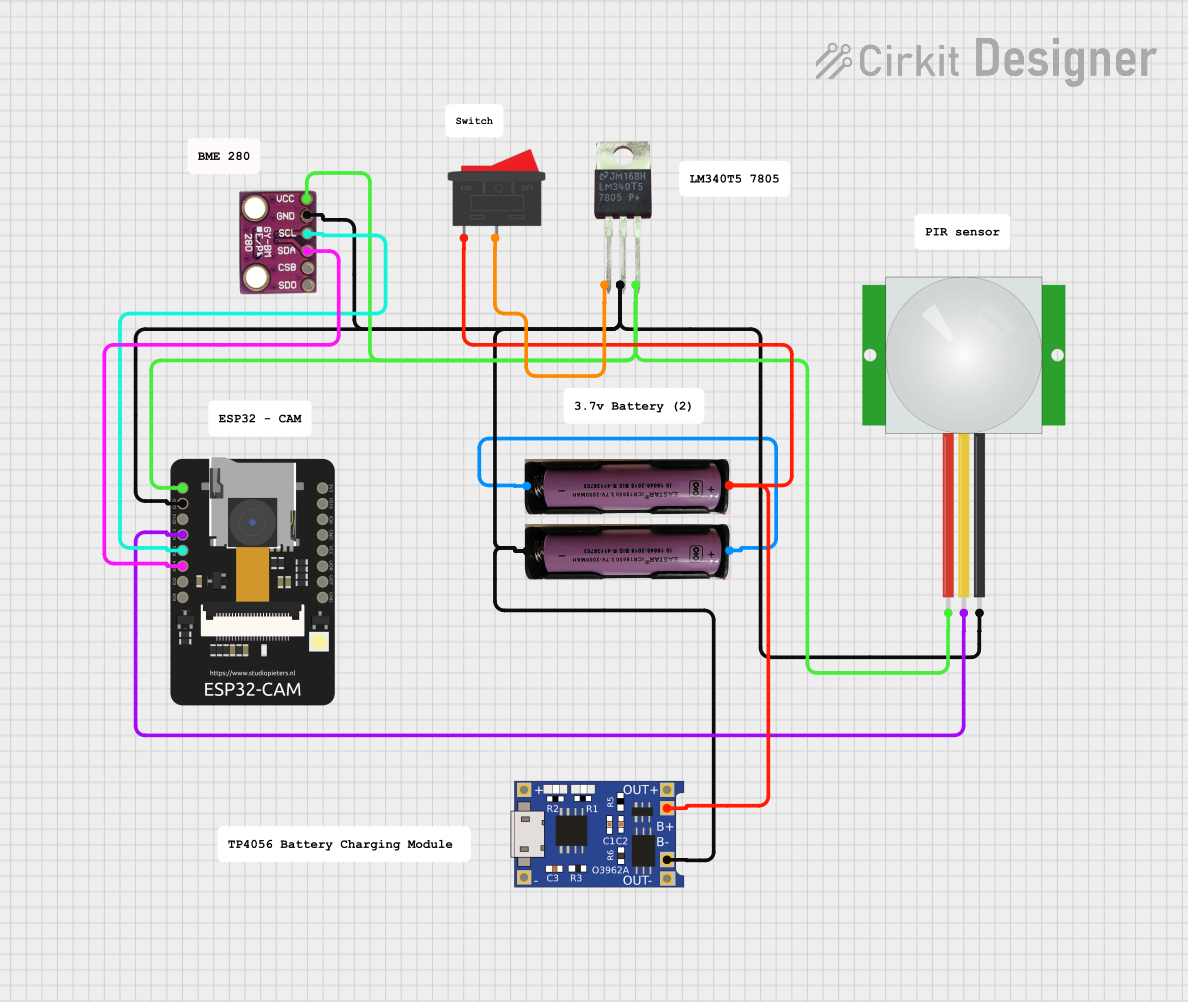
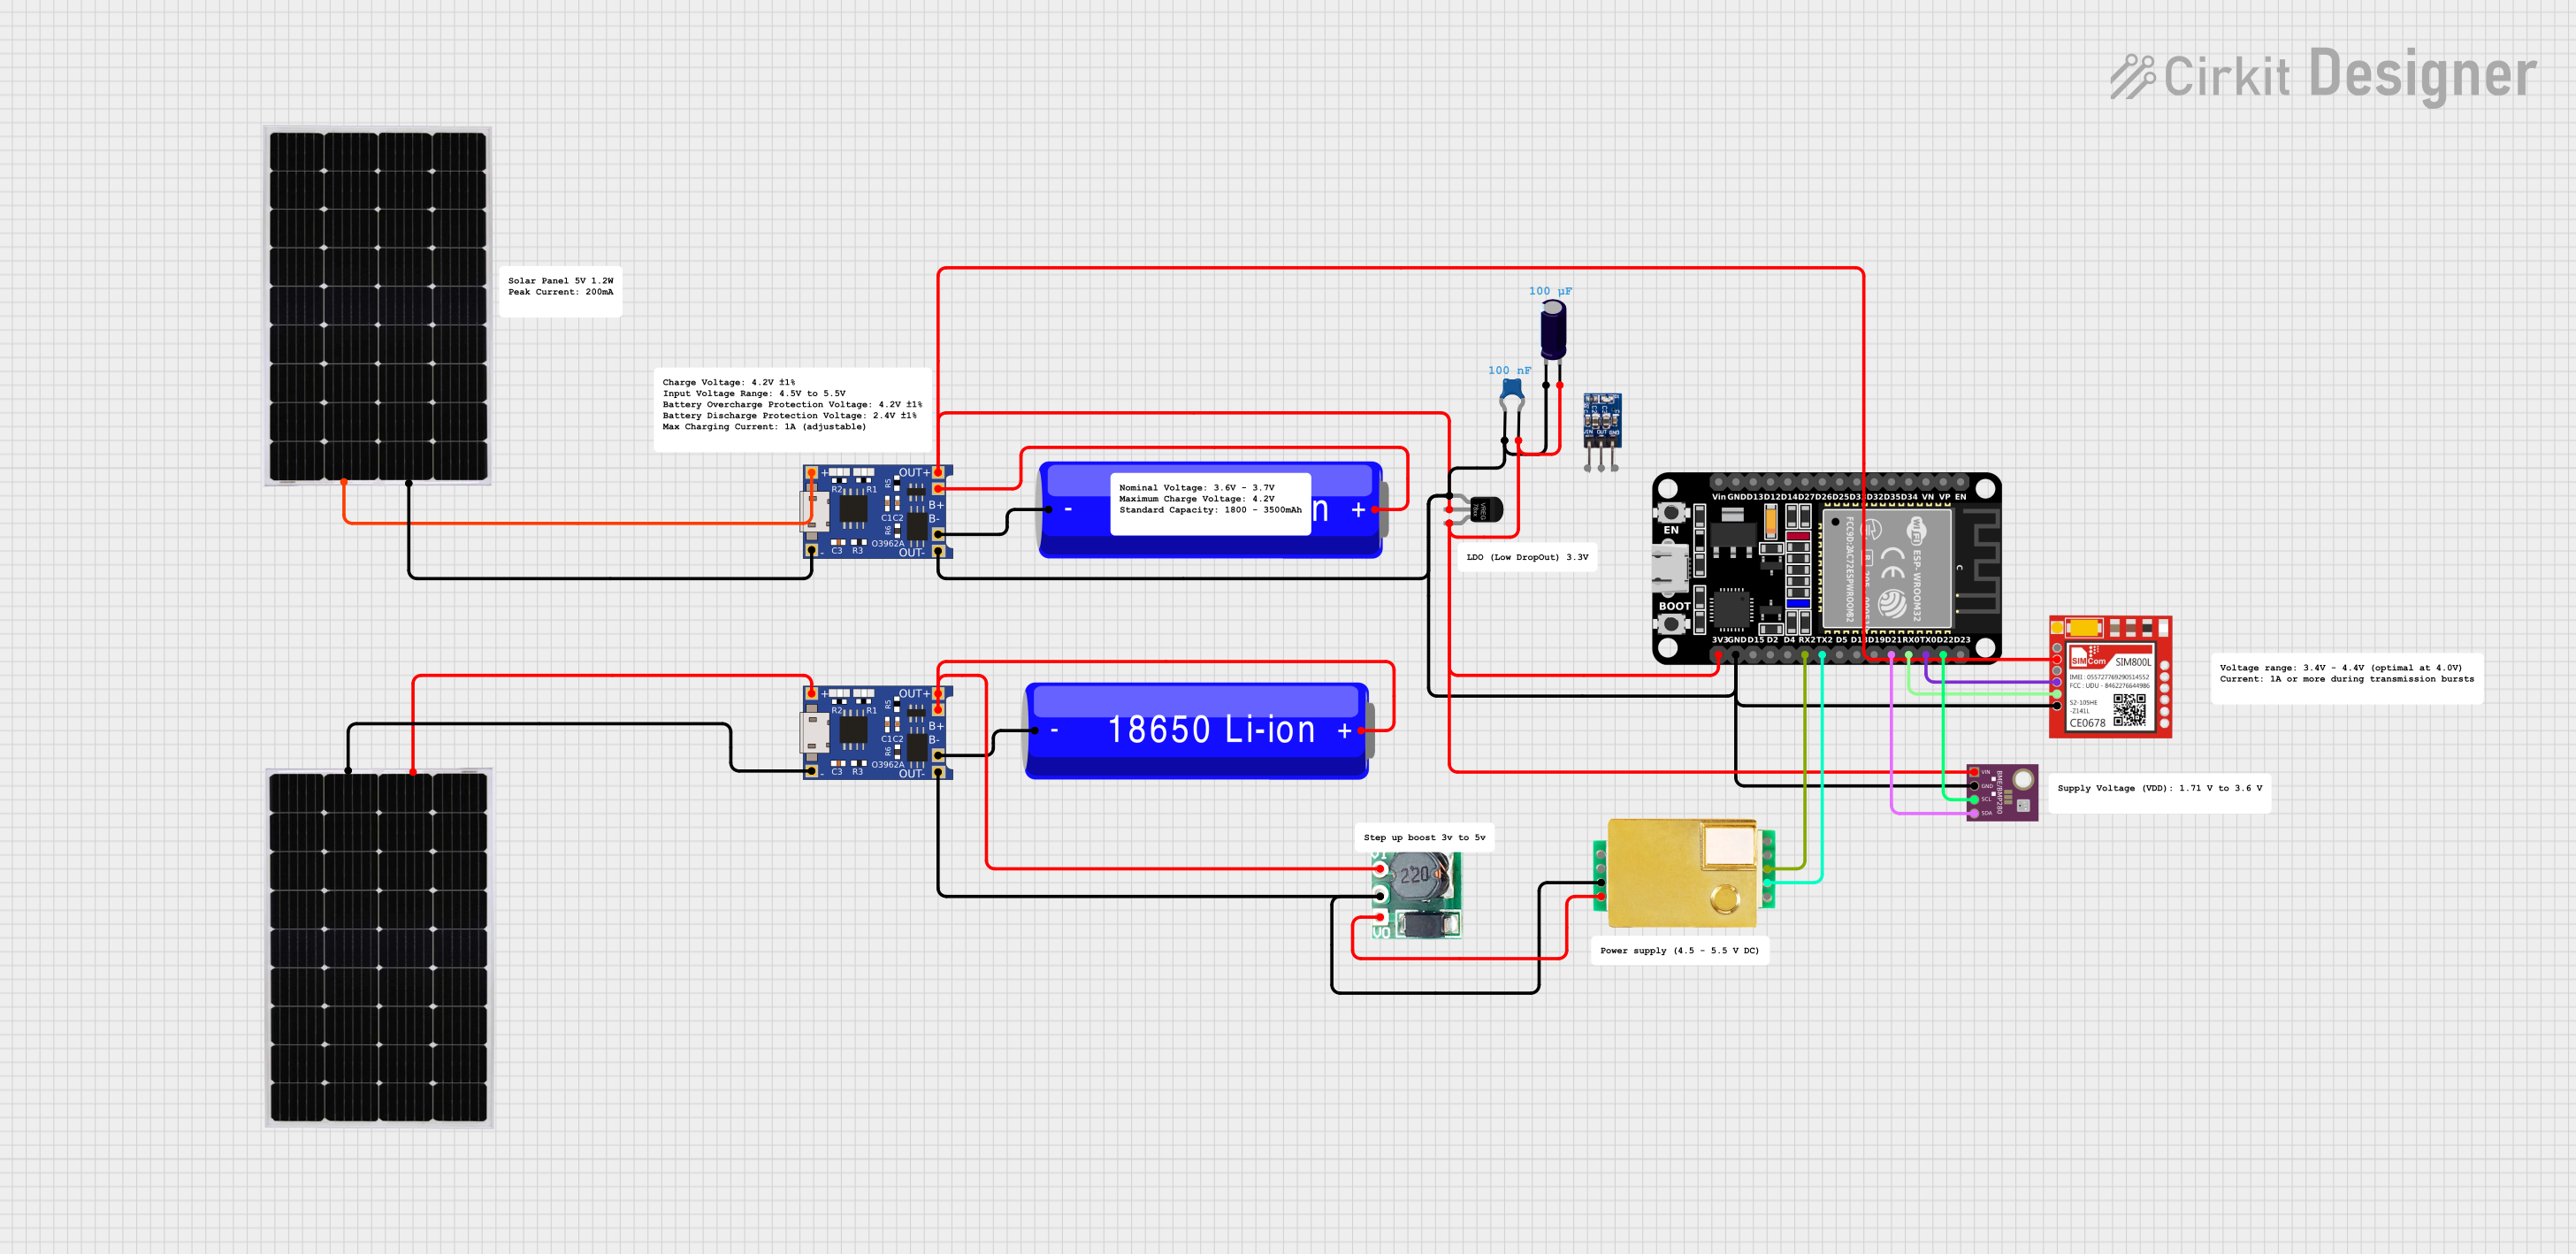
Explore Projects Built with BMP388
Common Applications
- Weather forecasting and environmental monitoring
- Altitude measurement for drones and wearables
- Indoor navigation and positioning systems
- IoT devices requiring pressure and temperature data
- Vertical velocity estimation in sports and fitness devices
Technical Specifications
The BMP388 offers advanced features and specifications that make it suitable for a wide range of applications. Below are the key technical details:
Key Specifications
| Parameter | Value |
|---|---|
| Operating Voltage | 1.65V to 3.6V |
| Current Consumption | 3.4 µA (low-power mode) |
| Pressure Measurement Range | 300 hPa to 1250 hPa |
| Pressure Accuracy | ±0.08 hPa (typical) |
| Temperature Measurement Range | -40°C to +85°C |
| Temperature Accuracy | ±0.5°C |
| Interface | I2C (up to 3.4 MHz) or SPI |
| Package Size | 2.0 mm x 2.0 mm x 0.75 mm |
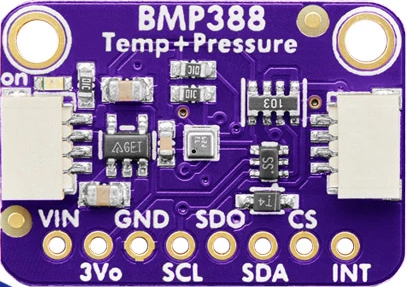
Pin Configuration
The BMP388 comes in a compact LGA package with the following pinout:
| Pin Number | Pin Name | Description |
|---|---|---|
| 1 | VDD | Power supply (1.65V to 3.6V) |
| 2 | GND | Ground |
| 3 | SCL/SPC | I2C clock / SPI clock |
| 4 | SDA/SDI | I2C data / SPI data input |
| 5 | SDO | SPI data output / I2C address selection |
| 6 | CSB | Chip select for SPI (active low) |
Usage Instructions
The BMP388 can be easily integrated into a circuit using either the I2C or SPI communication protocol. Below are the steps and best practices for using the BMP388:
Connecting the BMP388 to an Arduino UNO
Wiring: Connect the BMP388 to the Arduino UNO as follows:
VDDto Arduino3.3VGNDto ArduinoGNDSCLto ArduinoA5(I2C clock)SDAto ArduinoA4(I2C data)- Leave
CSBandSDOunconnected for I2C mode.
Install Libraries: Use the Adafruit BMP3XX library for easy integration. Install it via the Arduino Library Manager.
Arduino Code Example:
#include <Wire.h>
#include <Adafruit_Sensor.h>
#include <Adafruit_BMP3XX.h>

// Create an instance of the BMP388 sensor
Adafruit_BMP3XX bmp;

void setup() {
  Serial.begin(9600);
  while (!Serial); // Wait for Serial Monitor to open

  // Initialize I2C communication
  if (!bmp.begin_I2C()) {
    Serial.println("Could not find a valid BMP388 sensor, check wiring!");
    while (1);
  }

  // Configure the sensor
  bmp.setTemperatureOversampling(BMP3_OVERSAMPLING_8X);
  bmp.setPressureOversampling(BMP3_OVERSAMPLING_4X);
  bmp.setIIRFilterCoeff(BMP3_IIR_FILTER_COEFF_3);
  bmp.setOutputDataRate(BMP3_ODR_50_HZ);

  Serial.println("BMP388 initialized successfully!");
}

void loop() {
  // Read temperature and pressure
  if (!bmp.performReading()) {
    Serial.println("Failed to perform reading!");
    return;
  }

  // Print temperature and pressure to Serial Monitor
  Serial.print("Temperature = ");
  Serial.print(bmp.temperature);
  Serial.println(" °C");

  Serial.print("Pressure = ");
  Serial.print(bmp.pressure / 100.0); // Convert Pa to hPa
  Serial.println(" hPa");

  delay(1000); // Wait 1 second before next reading
}
Best Practices
- Use a 3.3V logic level for communication to avoid damaging the sensor.
- Place a 0.1 µF decoupling capacitor close to the
VDDpin for stable operation. - Avoid exposing the sensor to water or dust, as it may affect accuracy.
- Calibrate the sensor if precise altitude measurements are required.
Troubleshooting and FAQs
Common Issues and Solutions
Sensor Not Detected:
- Ensure proper wiring and check for loose connections.
- Verify that the I2C address (default: 0x76 or 0x77) matches the library configuration.
Incorrect Readings:
- Check for power supply stability and ensure the sensor is not exposed to extreme conditions.
- Verify that the oversampling and filter settings are configured correctly.
Communication Errors:
- Ensure pull-up resistors (4.7 kΩ) are connected to the I2C lines.
- For SPI mode, confirm that the
CSBpin is correctly controlled.
FAQs
Q: Can the BMP388 measure altitude directly?
A: Yes, the BMP388 can calculate altitude using the barometric pressure data. Use the formula provided in the library or datasheet for altitude estimation.
Q: What is the maximum cable length for I2C communication?
A: The maximum cable length depends on the pull-up resistor values and the I2C clock speed. For reliable communication, keep the cable length under 1 meter.
Q: Can the BMP388 operate at 5V?
A: No, the BMP388 operates at a voltage range of 1.65V to 3.6V. Use a level shifter if interfacing with a 5V system.
By following this documentation, users can effectively integrate and utilize the BMP388 sensor in their projects.