How to Use Humidity Sensor Keyes: Examples, Pinouts, and Specs
Introduction
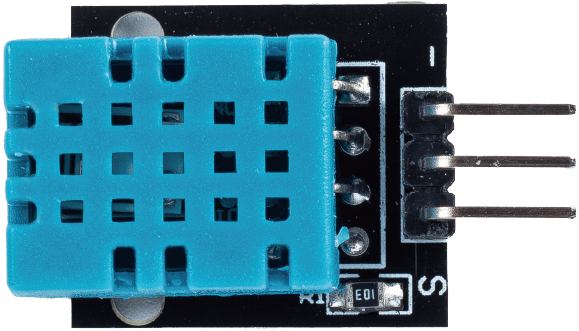
The Keyes Humidity Sensor is a versatile electronic component designed to measure the moisture level in the air. It provides both analog and digital outputs, making it suitable for a wide range of applications. This sensor is commonly used in environmental monitoring, weather stations, agricultural systems, and smart home devices. Its compact design and ease of integration with microcontrollers, such as the Arduino UNO, make it a popular choice for hobbyists and professionals alike.
Explore Projects Built with Humidity Sensor Keyes
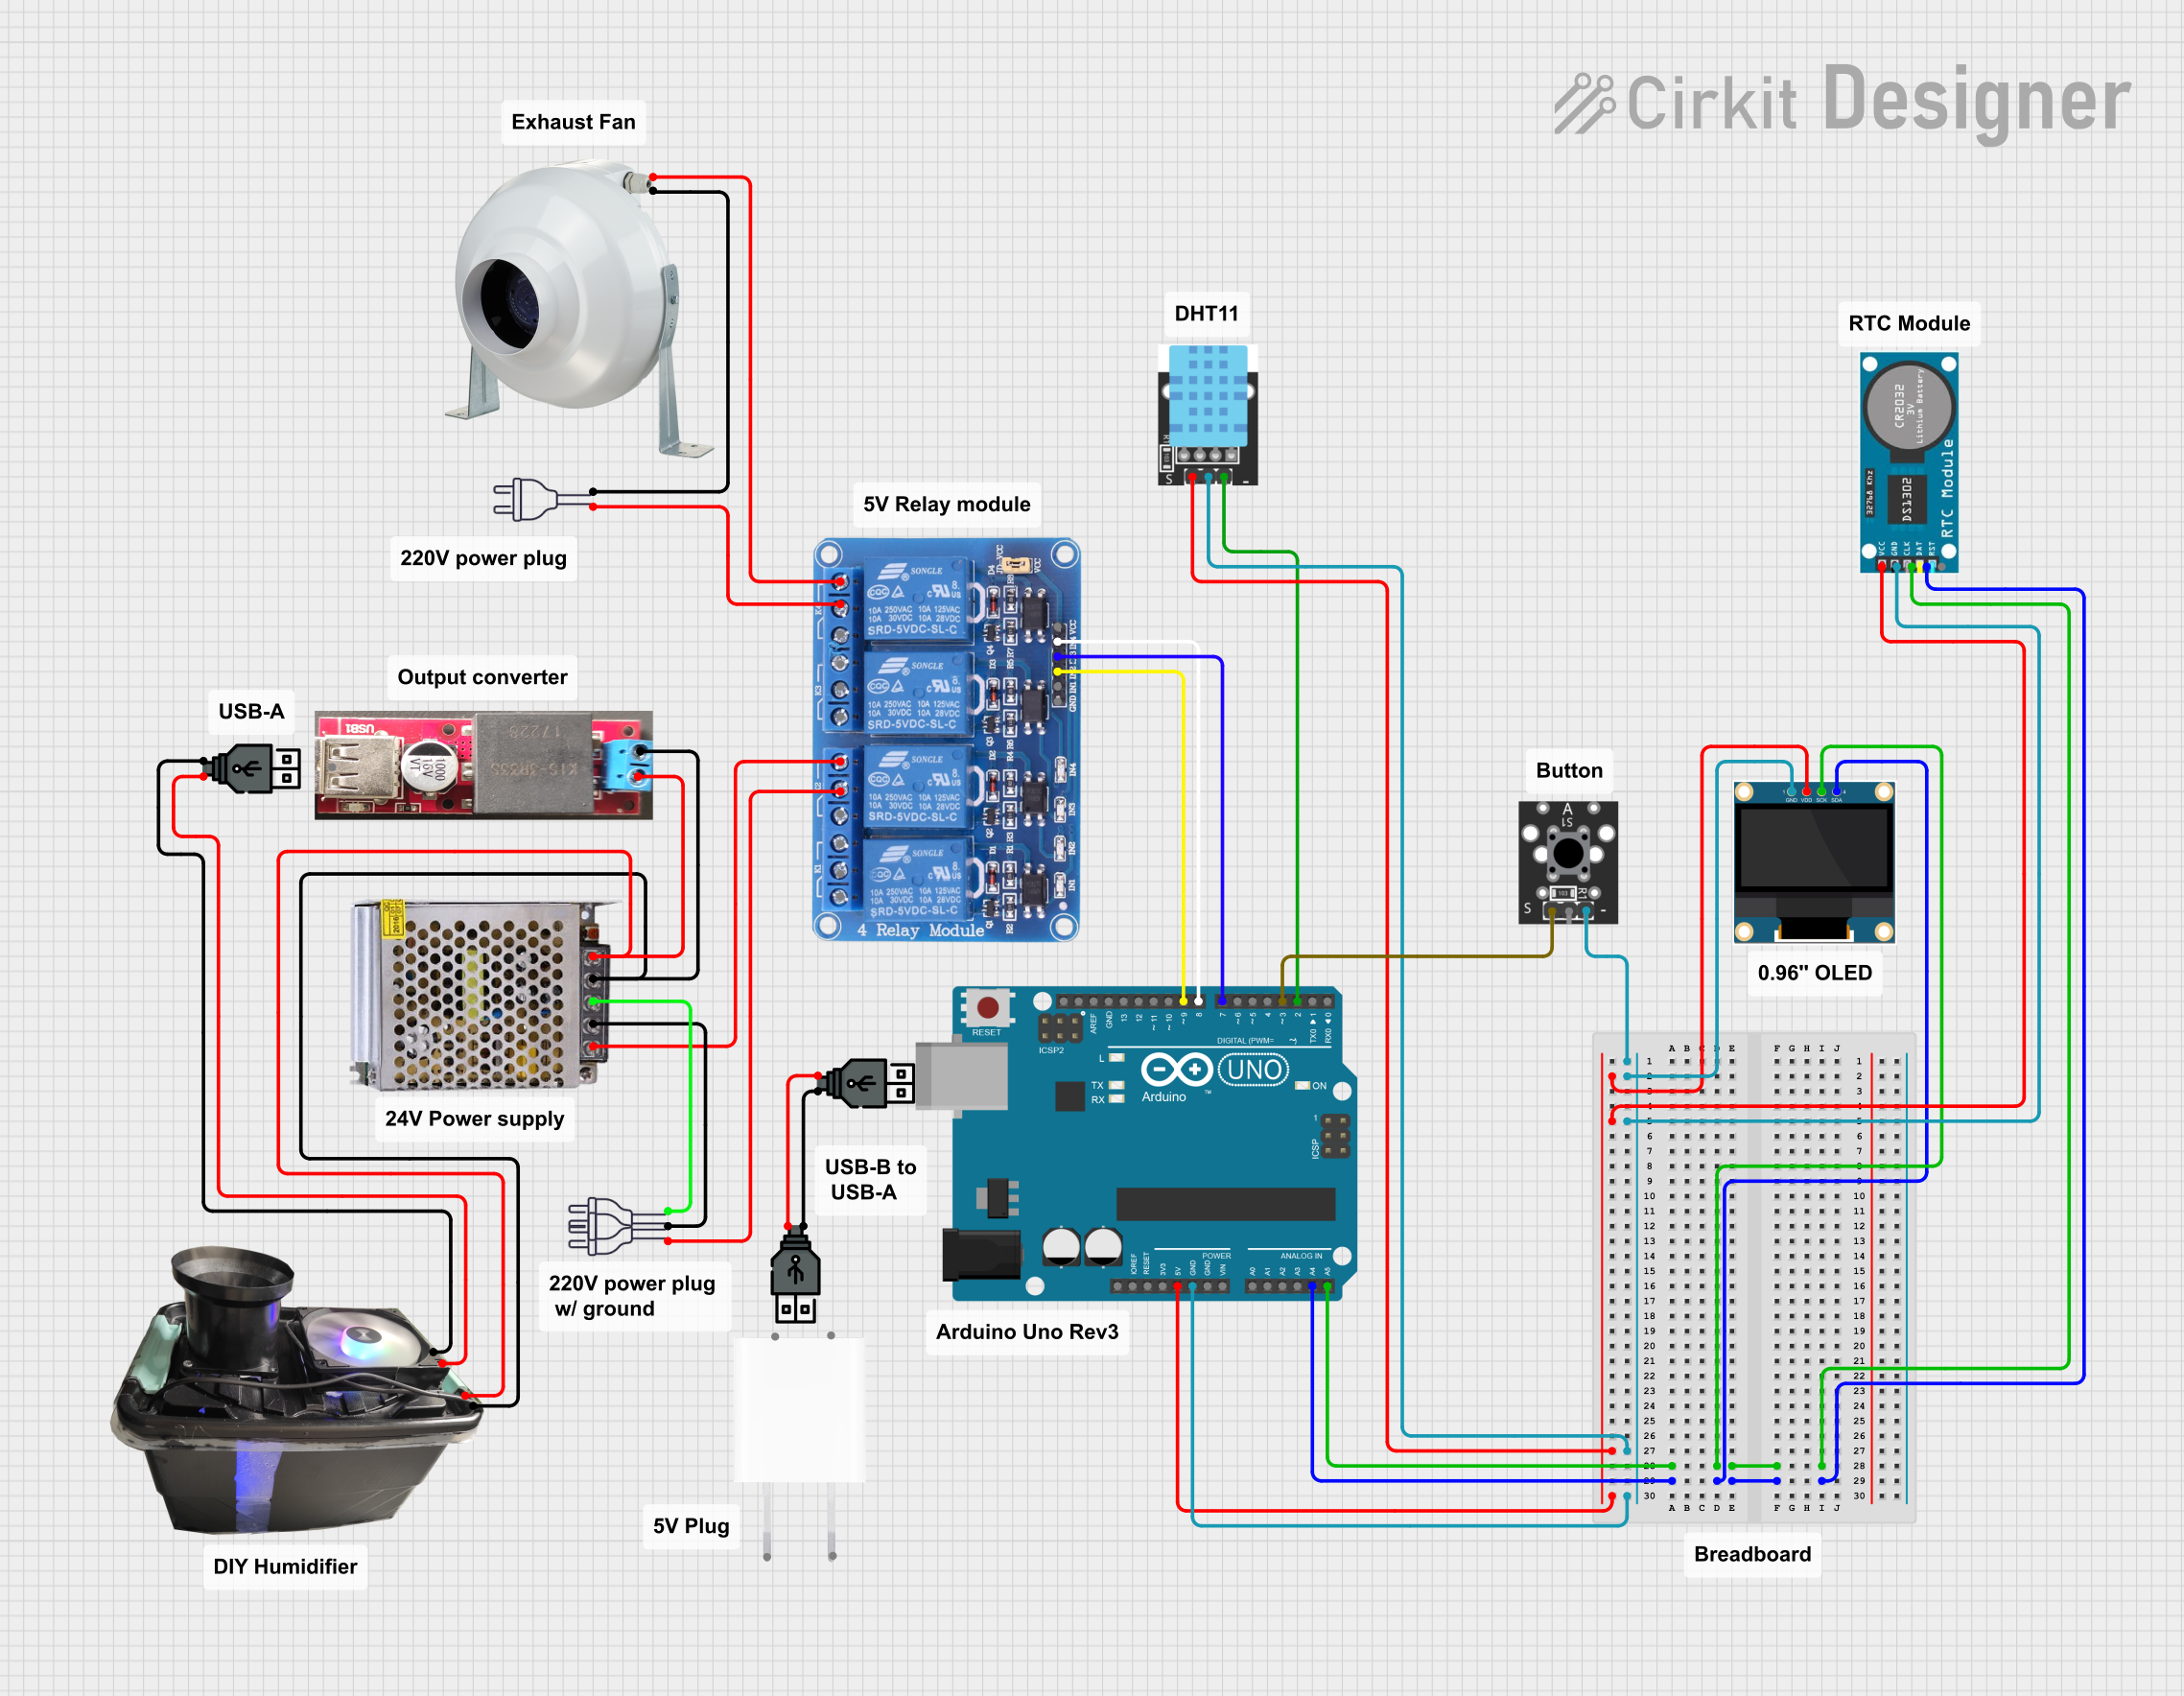
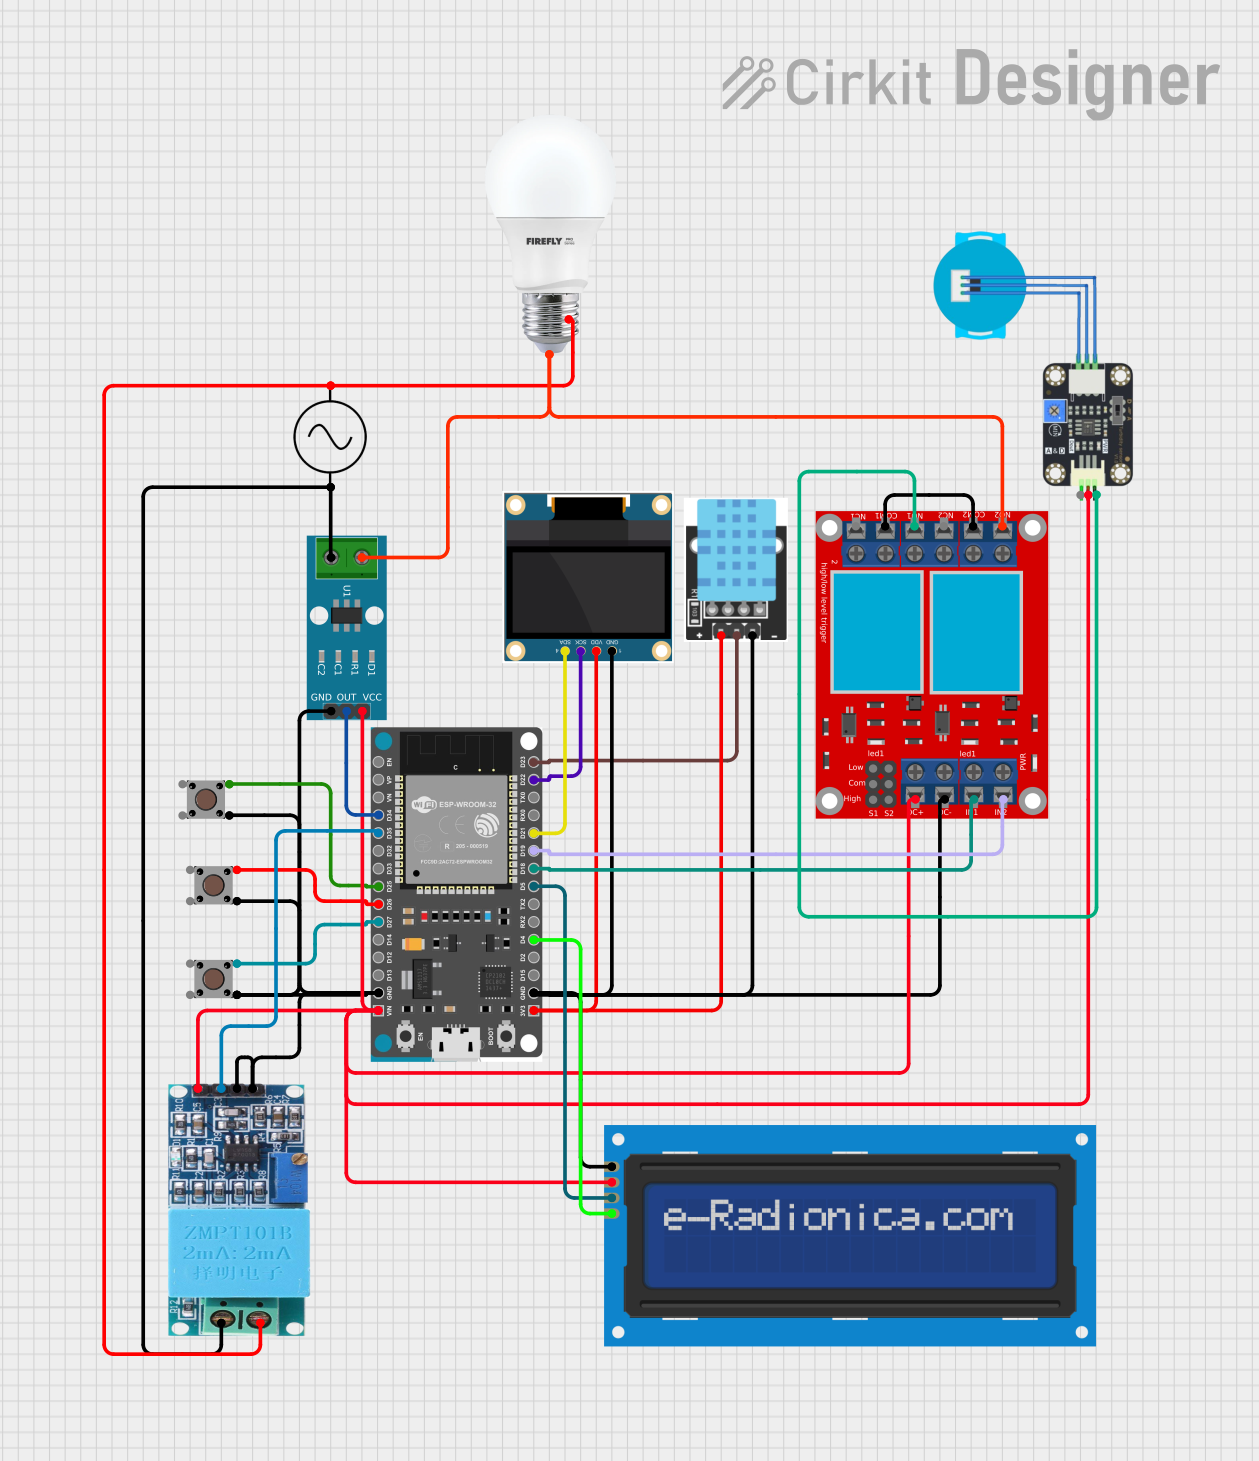
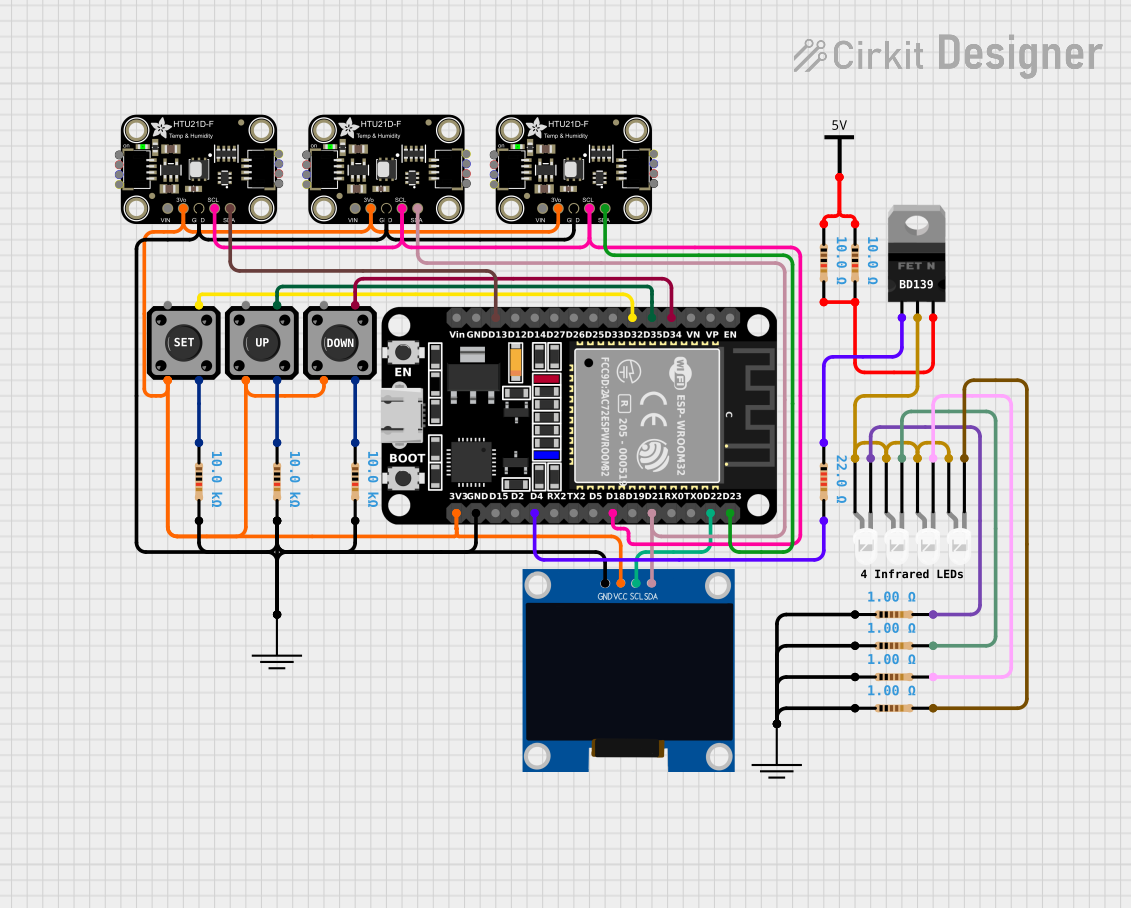
Explore Projects Built with Humidity Sensor Keyes
Technical Specifications
- Manufacturer: Keyes
- Model: Humidity Sensor
- Output Type: Analog and Digital
- Operating Voltage: 3.3V to 5V DC
- Current Consumption: ≤ 20mA
- Humidity Range: 20% to 90% Relative Humidity (RH)
- Operating Temperature: 0°C to 50°C
- Dimensions: 30mm x 15mm x 10mm (approx.)
Pin Configuration and Descriptions
The Keyes Humidity Sensor has a 3-pin interface. Below is the pinout description:
| Pin | Name | Description |
|---|---|---|
| 1 | VCC | Power supply pin. Connect to 3.3V or 5V DC. |
| 2 | GND | Ground pin. Connect to the ground of the circuit. |
| 3 | OUT | Output pin. Provides an analog voltage proportional to humidity or a digital signal. |
Usage Instructions
Connecting the Sensor
- Power Supply: Connect the VCC pin to a 3.3V or 5V power source, depending on your microcontroller's operating voltage.
- Ground: Connect the GND pin to the ground of your circuit.
- Output:
- For analog output, connect the OUT pin to an analog input pin on your microcontroller.
- For digital output, connect the OUT pin to a digital input pin. Adjust the onboard potentiometer to set the desired humidity threshold for digital triggering.
Example Circuit with Arduino UNO
Below is an example of how to connect the Keyes Humidity Sensor to an Arduino UNO:
- VCC → 5V on Arduino
- GND → GND on Arduino
- OUT → A0 (for analog reading) or D2 (for digital reading)
Sample Code for Arduino UNO
The following code demonstrates how to read the analog output of the Keyes Humidity Sensor and display the humidity level in the Serial Monitor:
// Define the analog pin connected to the sensor's OUT pin
const int sensorPin = A0;

void setup() {
  Serial.begin(9600); // Initialize serial communication at 9600 baud
  pinMode(sensorPin, INPUT); // Set the sensor pin as input
}

void loop() {
  int sensorValue = analogRead(sensorPin); // Read the analog value from the sensor
  float humidity = map(sensorValue, 0, 1023, 20, 90);
  // Map the sensor value to the humidity range (20% to 90% RH)

  Serial.print("Humidity: ");
  Serial.print(humidity);
  Serial.println("%");

  delay(1000); // Wait for 1 second before taking the next reading
}
Important Considerations
- Calibration: The sensor may require calibration for precise measurements. Use the onboard potentiometer to adjust the digital output threshold.
- Environmental Factors: Avoid exposing the sensor to extreme temperatures or direct water contact, as this may damage the component.
- Power Supply: Ensure a stable power supply to avoid fluctuations in readings.
Troubleshooting and FAQs
Common Issues
No Output or Incorrect Readings:
- Cause: Loose connections or incorrect wiring.
- Solution: Double-check all connections and ensure the sensor is powered correctly.
Fluctuating Readings:
- Cause: Electrical noise or unstable power supply.
- Solution: Use decoupling capacitors near the sensor's power pins to stabilize the voltage.
Digital Output Not Triggering:
- Cause: Incorrect potentiometer adjustment.
- Solution: Rotate the potentiometer to adjust the humidity threshold.
Sensor Not Responding:
- Cause: Sensor damage or exceeding operating conditions.
- Solution: Verify the operating temperature and humidity range. Replace the sensor if necessary.
FAQs
Q1: Can this sensor measure humidity below 20% or above 90%?
A1: No, the sensor is designed to operate within the range of 20% to 90% RH. Readings outside this range may not be accurate.
Q2: Can I use this sensor with a 3.3V microcontroller?
A2: Yes, the sensor is compatible with both 3.3V and 5V systems.
Q3: How do I know if the digital output is triggered?
A3: The digital output pin will go HIGH or LOW depending on the humidity level and the threshold set by the potentiometer.
Q4: Is this sensor waterproof?
A4: No, the sensor is not waterproof. Avoid direct exposure to water or high humidity for extended periods.
By following this documentation, you can effectively integrate the Keyes Humidity Sensor into your projects for reliable humidity monitoring.