How to Use pixhawk r15: Examples, Pinouts, and Specs
Introduction
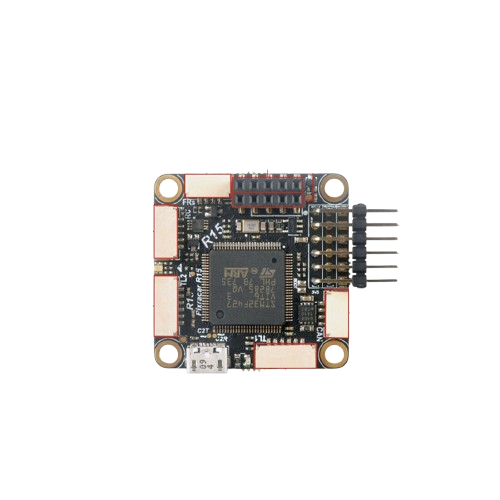
The Pixhawk R15 is an advanced flight control hardware designed for drones and other unmanned vehicles. It features a powerful processor, multiple sensor interfaces, and compatibility with various autopilot software platforms, such as PX4 and ArduPilot. This versatile flight controller enables precise navigation, stable flight, and robust control for a wide range of applications.
Explore Projects Built with pixhawk r15

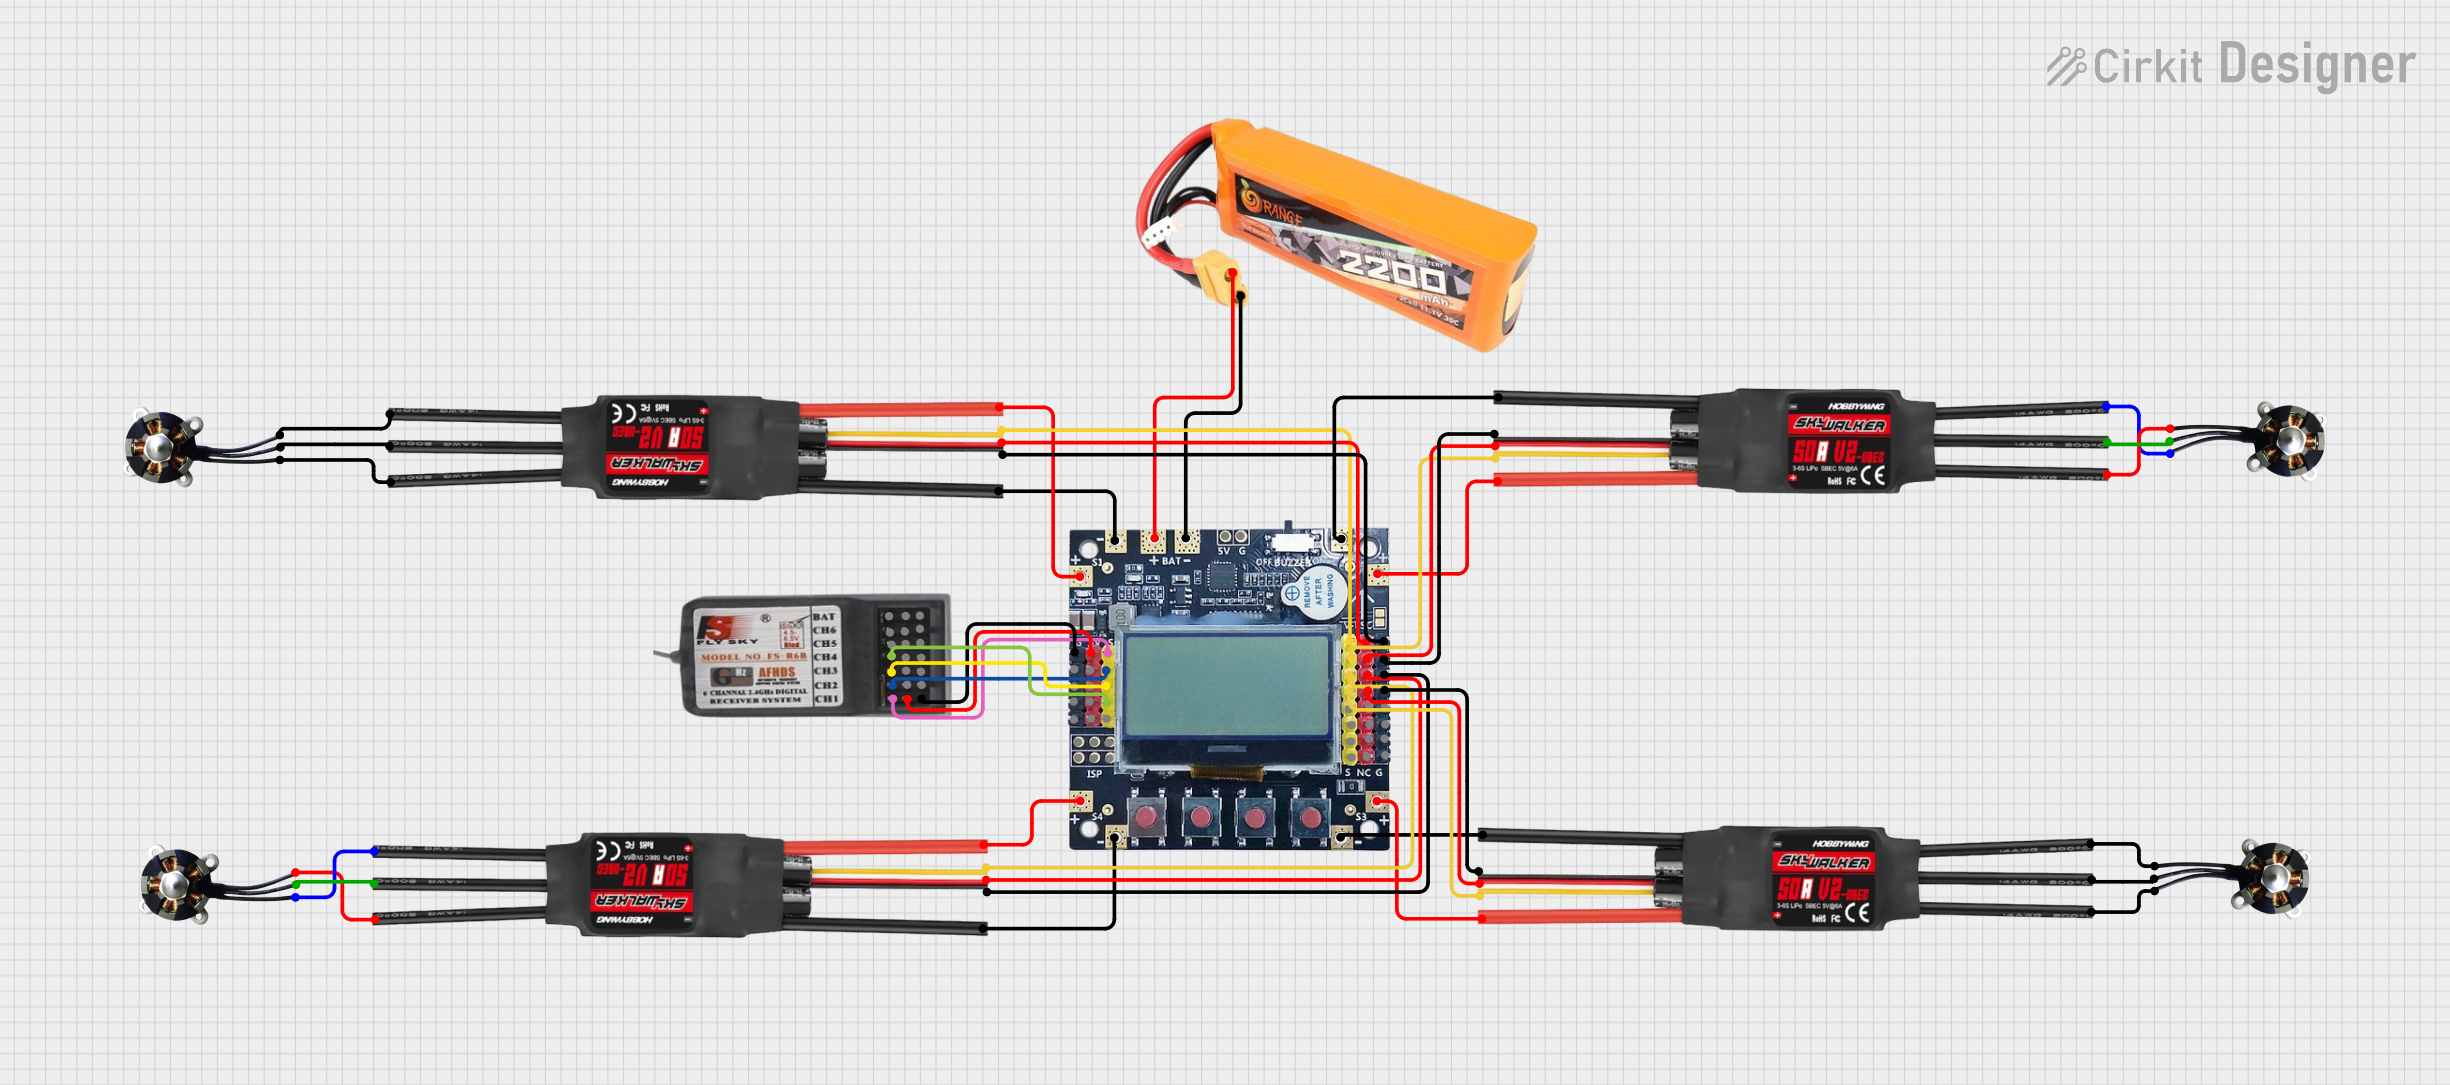
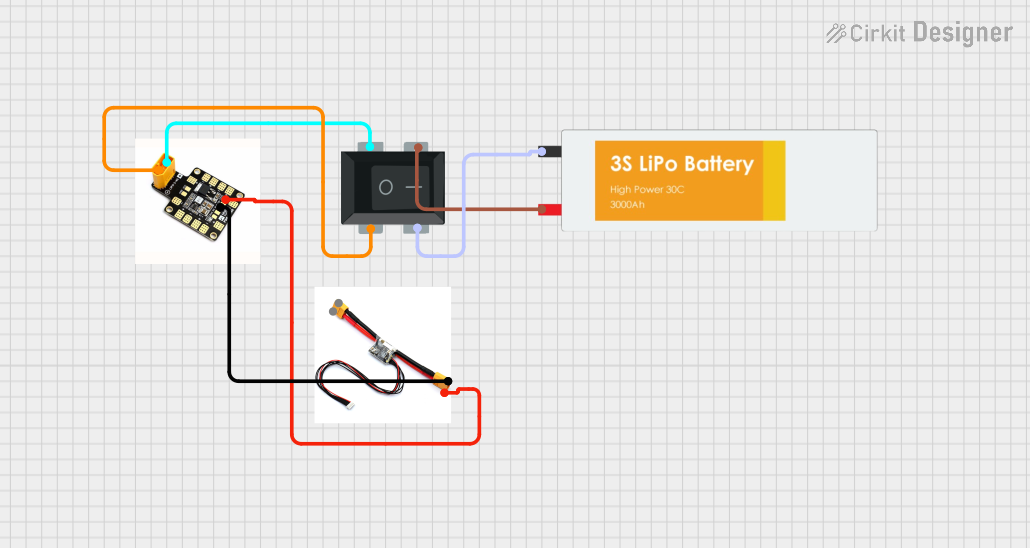
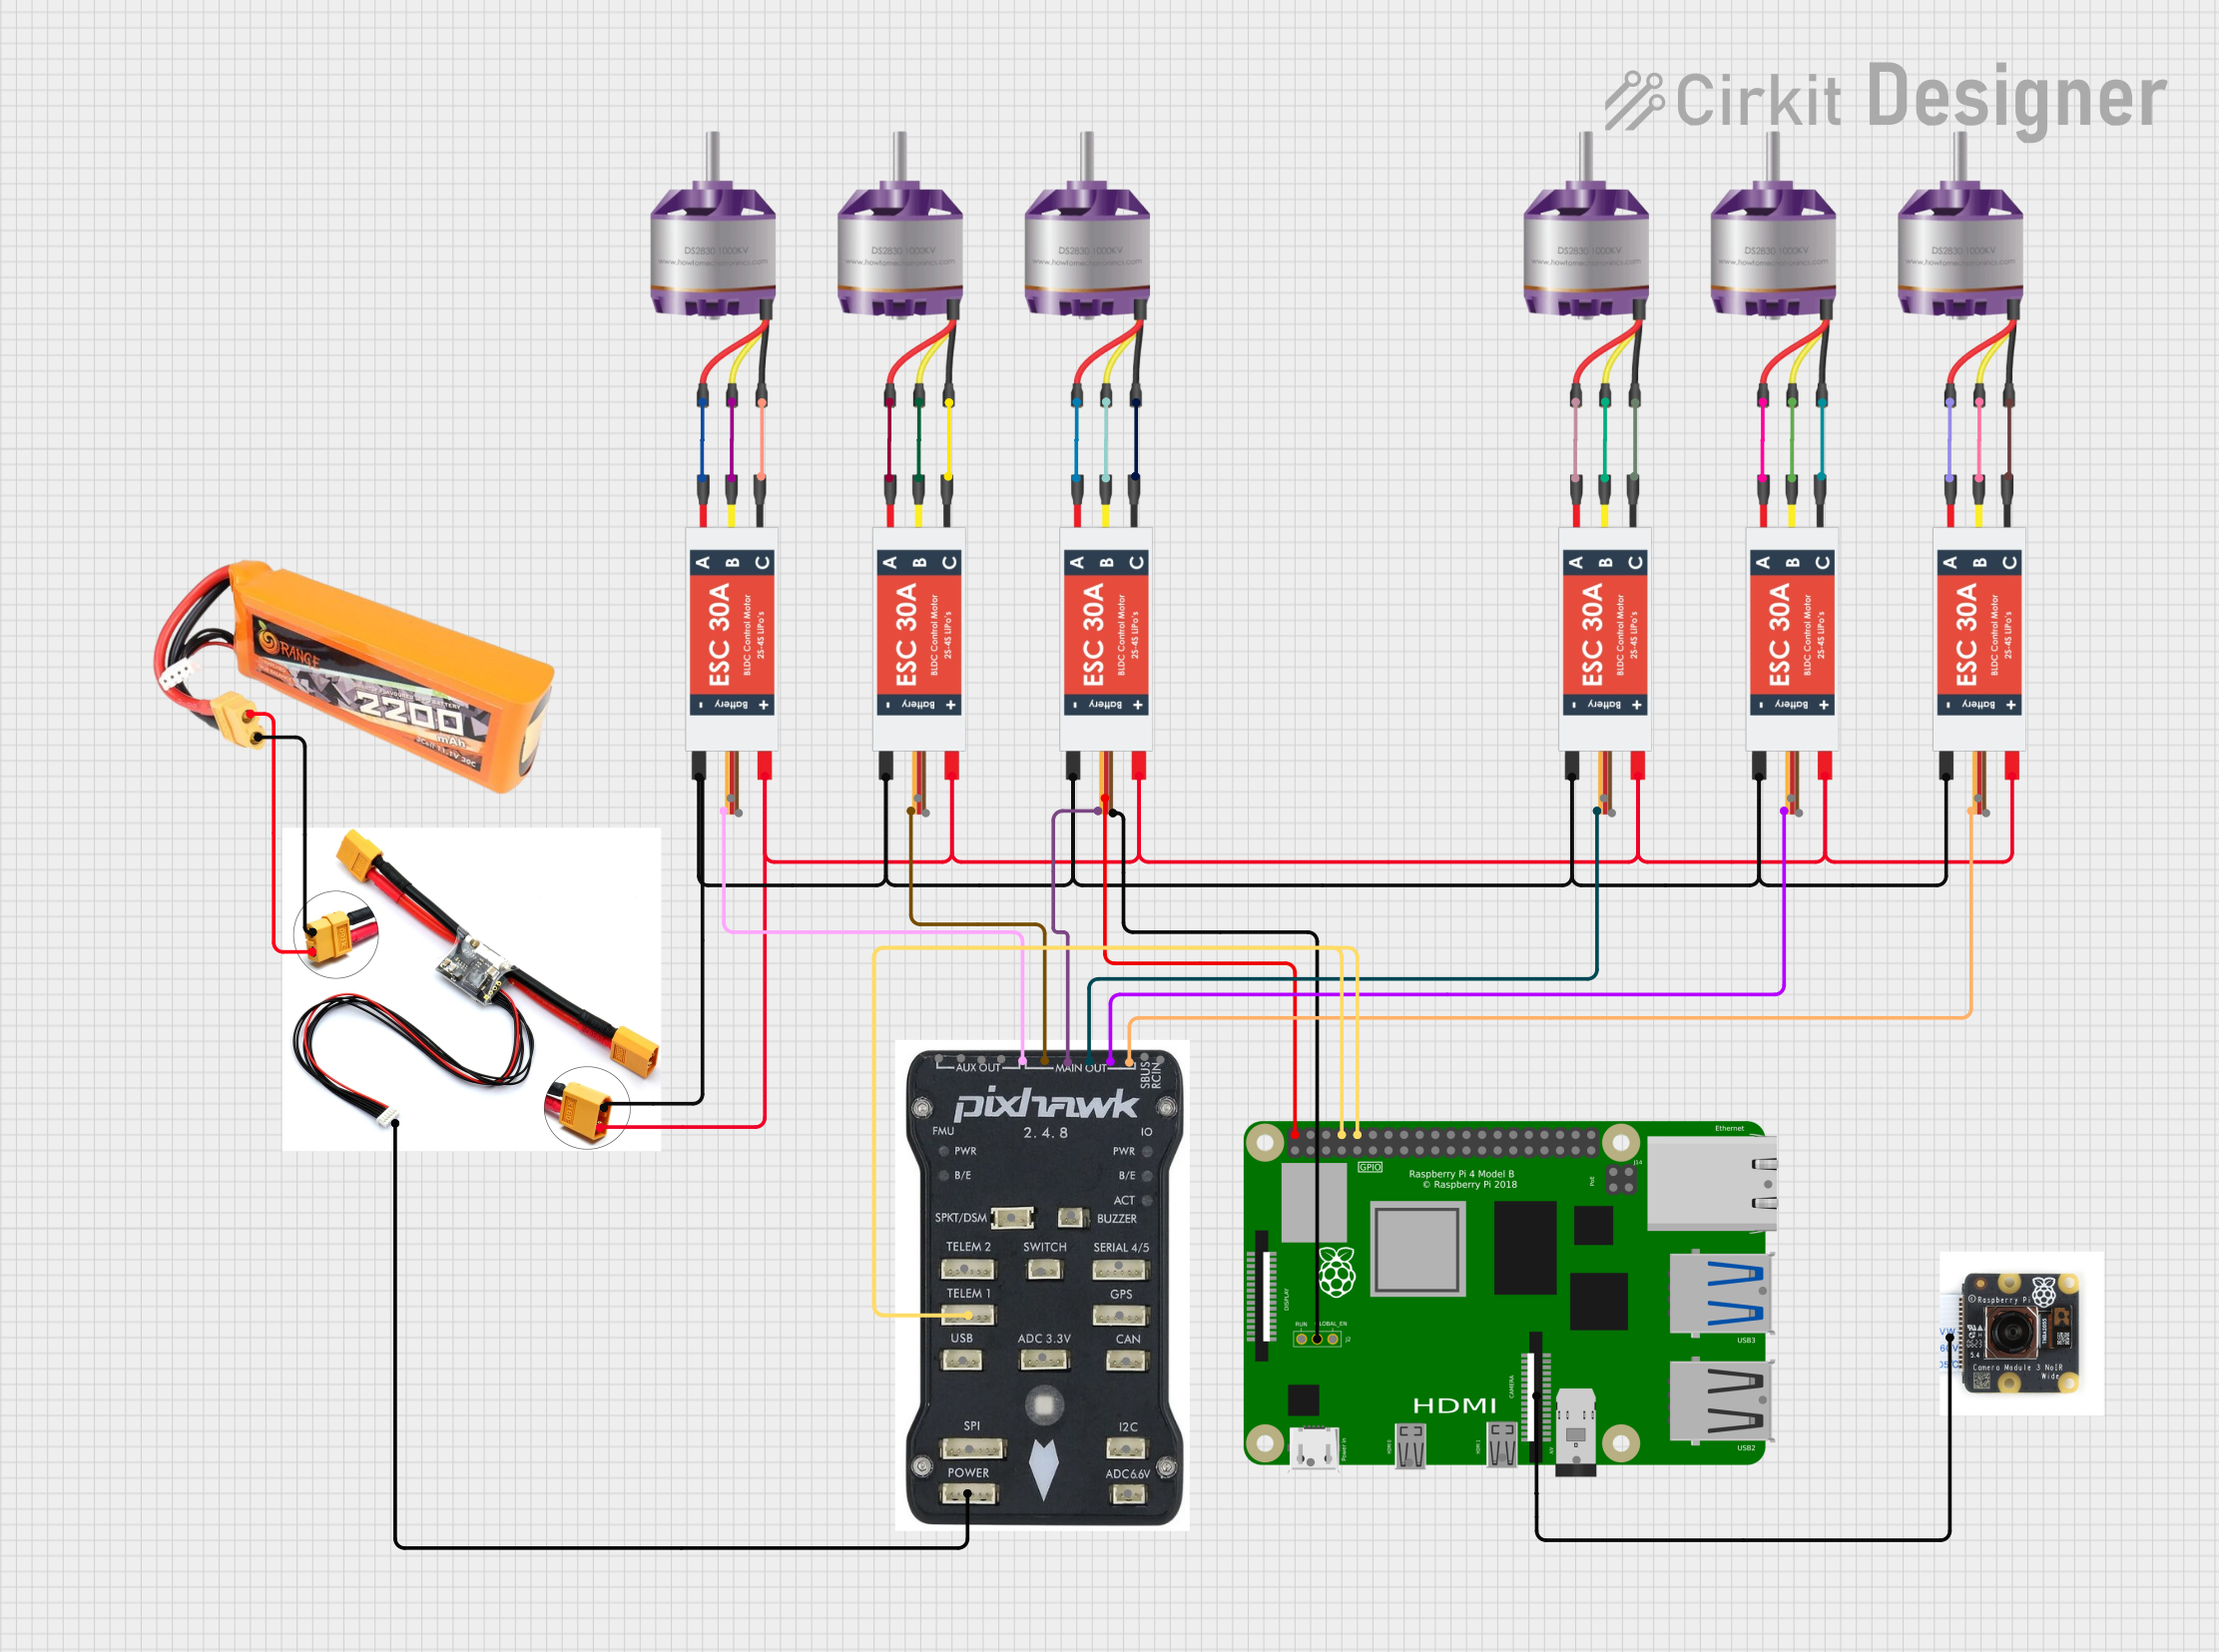
Explore Projects Built with pixhawk r15
Common Applications and Use Cases
- Multirotor drones for aerial photography, mapping, and surveying
- Fixed-wing UAVs for long-range missions
- Autonomous ground vehicles and marine vessels
- Research and development in robotics and autonomous systems
- Industrial applications, such as inspection and delivery systems
Technical Specifications
Key Technical Details
- Processor: STM32H7 microcontroller with ARM Cortex-M7 core
- IMUs (Inertial Measurement Units): Triple redundant IMUs for enhanced reliability
- Barometer: Dual redundant barometers for altitude measurement
- Input Voltage Range: 4.1V to 5.7V
- Power Consumption: ~2.5W (typical)
- Communication Interfaces:
- 2x CAN bus
- 5x UART
- I2C, SPI, and USB
- PWM Outputs: 8 main outputs, 6 auxiliary outputs
- Storage: MicroSD card slot for data logging
- Dimensions: 50mm x 50mm x 15mm
- Weight: ~38g
Pin Configuration and Descriptions
The Pixhawk R15 features multiple connectors for peripherals and sensors. Below is a summary of the key pin configurations:
Power Input
| Pin Name | Description | Voltage Range |
|---|---|---|
| VDD_5V | Main power input | 4.1V - 5.7V |
| GND | Ground connection | - |
PWM Outputs
| Pin Name | Description | Signal Type |
|---|---|---|
| PWM1-8 | Main motor/servo outputs | PWM |
| AUX1-6 | Auxiliary outputs | PWM |
Communication Interfaces
| Pin Name | Description | Protocol |
|---|---|---|
| CAN1, CAN2 | CAN bus interfaces | CAN |
| UART1-5 | Serial communication ports | UART |
| I2C | Sensor interface | I2C |
| SPI | High-speed sensor interface | SPI |
| USB | USB interface for setup | USB |
Other Interfaces
| Pin Name | Description | Notes |
|---|---|---|
| GPS | GPS module connection | Supports GPS+Compass |
| SD Card | MicroSD slot for logging | FAT32 format |
Usage Instructions
How to Use the Pixhawk R15 in a Circuit
Powering the Pixhawk R15:
- Connect a regulated 5V power source to the VDD_5V pin. Ensure the power supply can provide sufficient current for the connected peripherals.
- Alternatively, use a power module compatible with the Pixhawk R15 for simplified power management.
Connecting Peripherals:
- Attach motors or servos to the PWM output pins (PWM1-8 for main outputs, AUX1-6 for auxiliary outputs).
- Connect sensors (e.g., GPS, barometer, or IMU) to the appropriate interfaces (I2C, SPI, or UART).
- Use the CAN bus for advanced peripherals like LiDAR or gimbals.
Flashing Firmware:
- Connect the Pixhawk R15 to your computer via the USB interface.
- Use a ground control station (e.g., QGroundControl or Mission Planner) to flash the desired autopilot firmware (PX4 or ArduPilot).
Configuring the System:
- After flashing the firmware, configure the system using the ground control station.
- Calibrate sensors, set up flight modes, and define mission parameters.
Testing and Deployment:
- Perform a pre-flight check to ensure all components are functioning correctly.
- Test the system in a controlled environment before deploying it in real-world applications.
Important Considerations and Best Practices
- Always use a high-quality power supply to avoid voltage fluctuations that could damage the Pixhawk R15.
- Ensure proper vibration isolation for the flight controller to maintain accurate sensor readings.
- Regularly update the firmware to benefit from the latest features and bug fixes.
- Use a compatible GPS module with a compass for precise navigation.
- Secure all connections to prevent disconnections during operation.
Example: Connecting to an Arduino UNO
The Pixhawk R15 can communicate with an Arduino UNO via UART. Below is an example code snippet for reading data from the Pixhawk R15:
#include <SoftwareSerial.h>

// Define RX and TX pins for communication with Pixhawk
SoftwareSerial pixhawkSerial(10, 11); // RX = pin 10, TX = pin 11

void setup() {
  // Initialize serial communication
  Serial.begin(9600); // For debugging via Serial Monitor
  pixhawkSerial.begin(57600); // Pixhawk UART baud rate

  Serial.println("Starting communication with Pixhawk...");
}

void loop() {
  // Check if data is available from Pixhawk
  if (pixhawkSerial.available()) {
    // Read and print data from Pixhawk
    char data = pixhawkSerial.read();
    Serial.print(data);
  }
}
Troubleshooting and FAQs
Common Issues and Solutions
Pixhawk R15 does not power on:
- Check the power supply voltage and ensure it is within the 4.1V to 5.7V range.
- Verify all power connections and ensure the power module is functioning correctly.
Sensors not detected:
- Ensure the sensors are connected to the correct interfaces (e.g., I2C, SPI, or UART).
- Check for loose connections or damaged cables.
- Verify that the firmware supports the connected sensors.
Unstable flight or poor navigation:
- Calibrate the IMUs, compass, and barometer using the ground control station.
- Ensure the flight controller is properly mounted with vibration isolation.
- Check for firmware updates that may address stability issues.
Unable to flash firmware:
- Ensure the USB cable is functional and properly connected.
- Close any other applications that may be using the USB port.
- Try a different USB port or computer.
FAQs
Q: Can the Pixhawk R15 be used with fixed-wing aircraft?
A: Yes, the Pixhawk R15 supports fixed-wing aircraft, multirotors, and other vehicle types. Configuration can be done via the ground control station.
Q: What is the maximum storage capacity for the MicroSD card?
A: The Pixhawk R15 supports MicroSD cards up to 32GB formatted in FAT32.
Q: Does the Pixhawk R15 support dual GPS modules?
A: Yes, the Pixhawk R15 supports dual GPS modules for enhanced navigation accuracy.
Q: Can I use the Pixhawk R15 with ArduPilot?
A: Absolutely. The Pixhawk R15 is compatible with both ArduPilot and PX4 autopilot firmware.