How to Use Mach RNR2: Examples, Pinouts, and Specs
Introduction
The Mach RNR2 is a high-performance rotary encoder designed for precise position sensing in a wide range of applications. It features robust construction and high resolution, making it ideal for providing accurate feedback in motion control systems. This component is commonly used in robotics, CNC machines, industrial automation, and other systems requiring precise angular position or rotational speed measurements.
Explore Projects Built with Mach RNR2
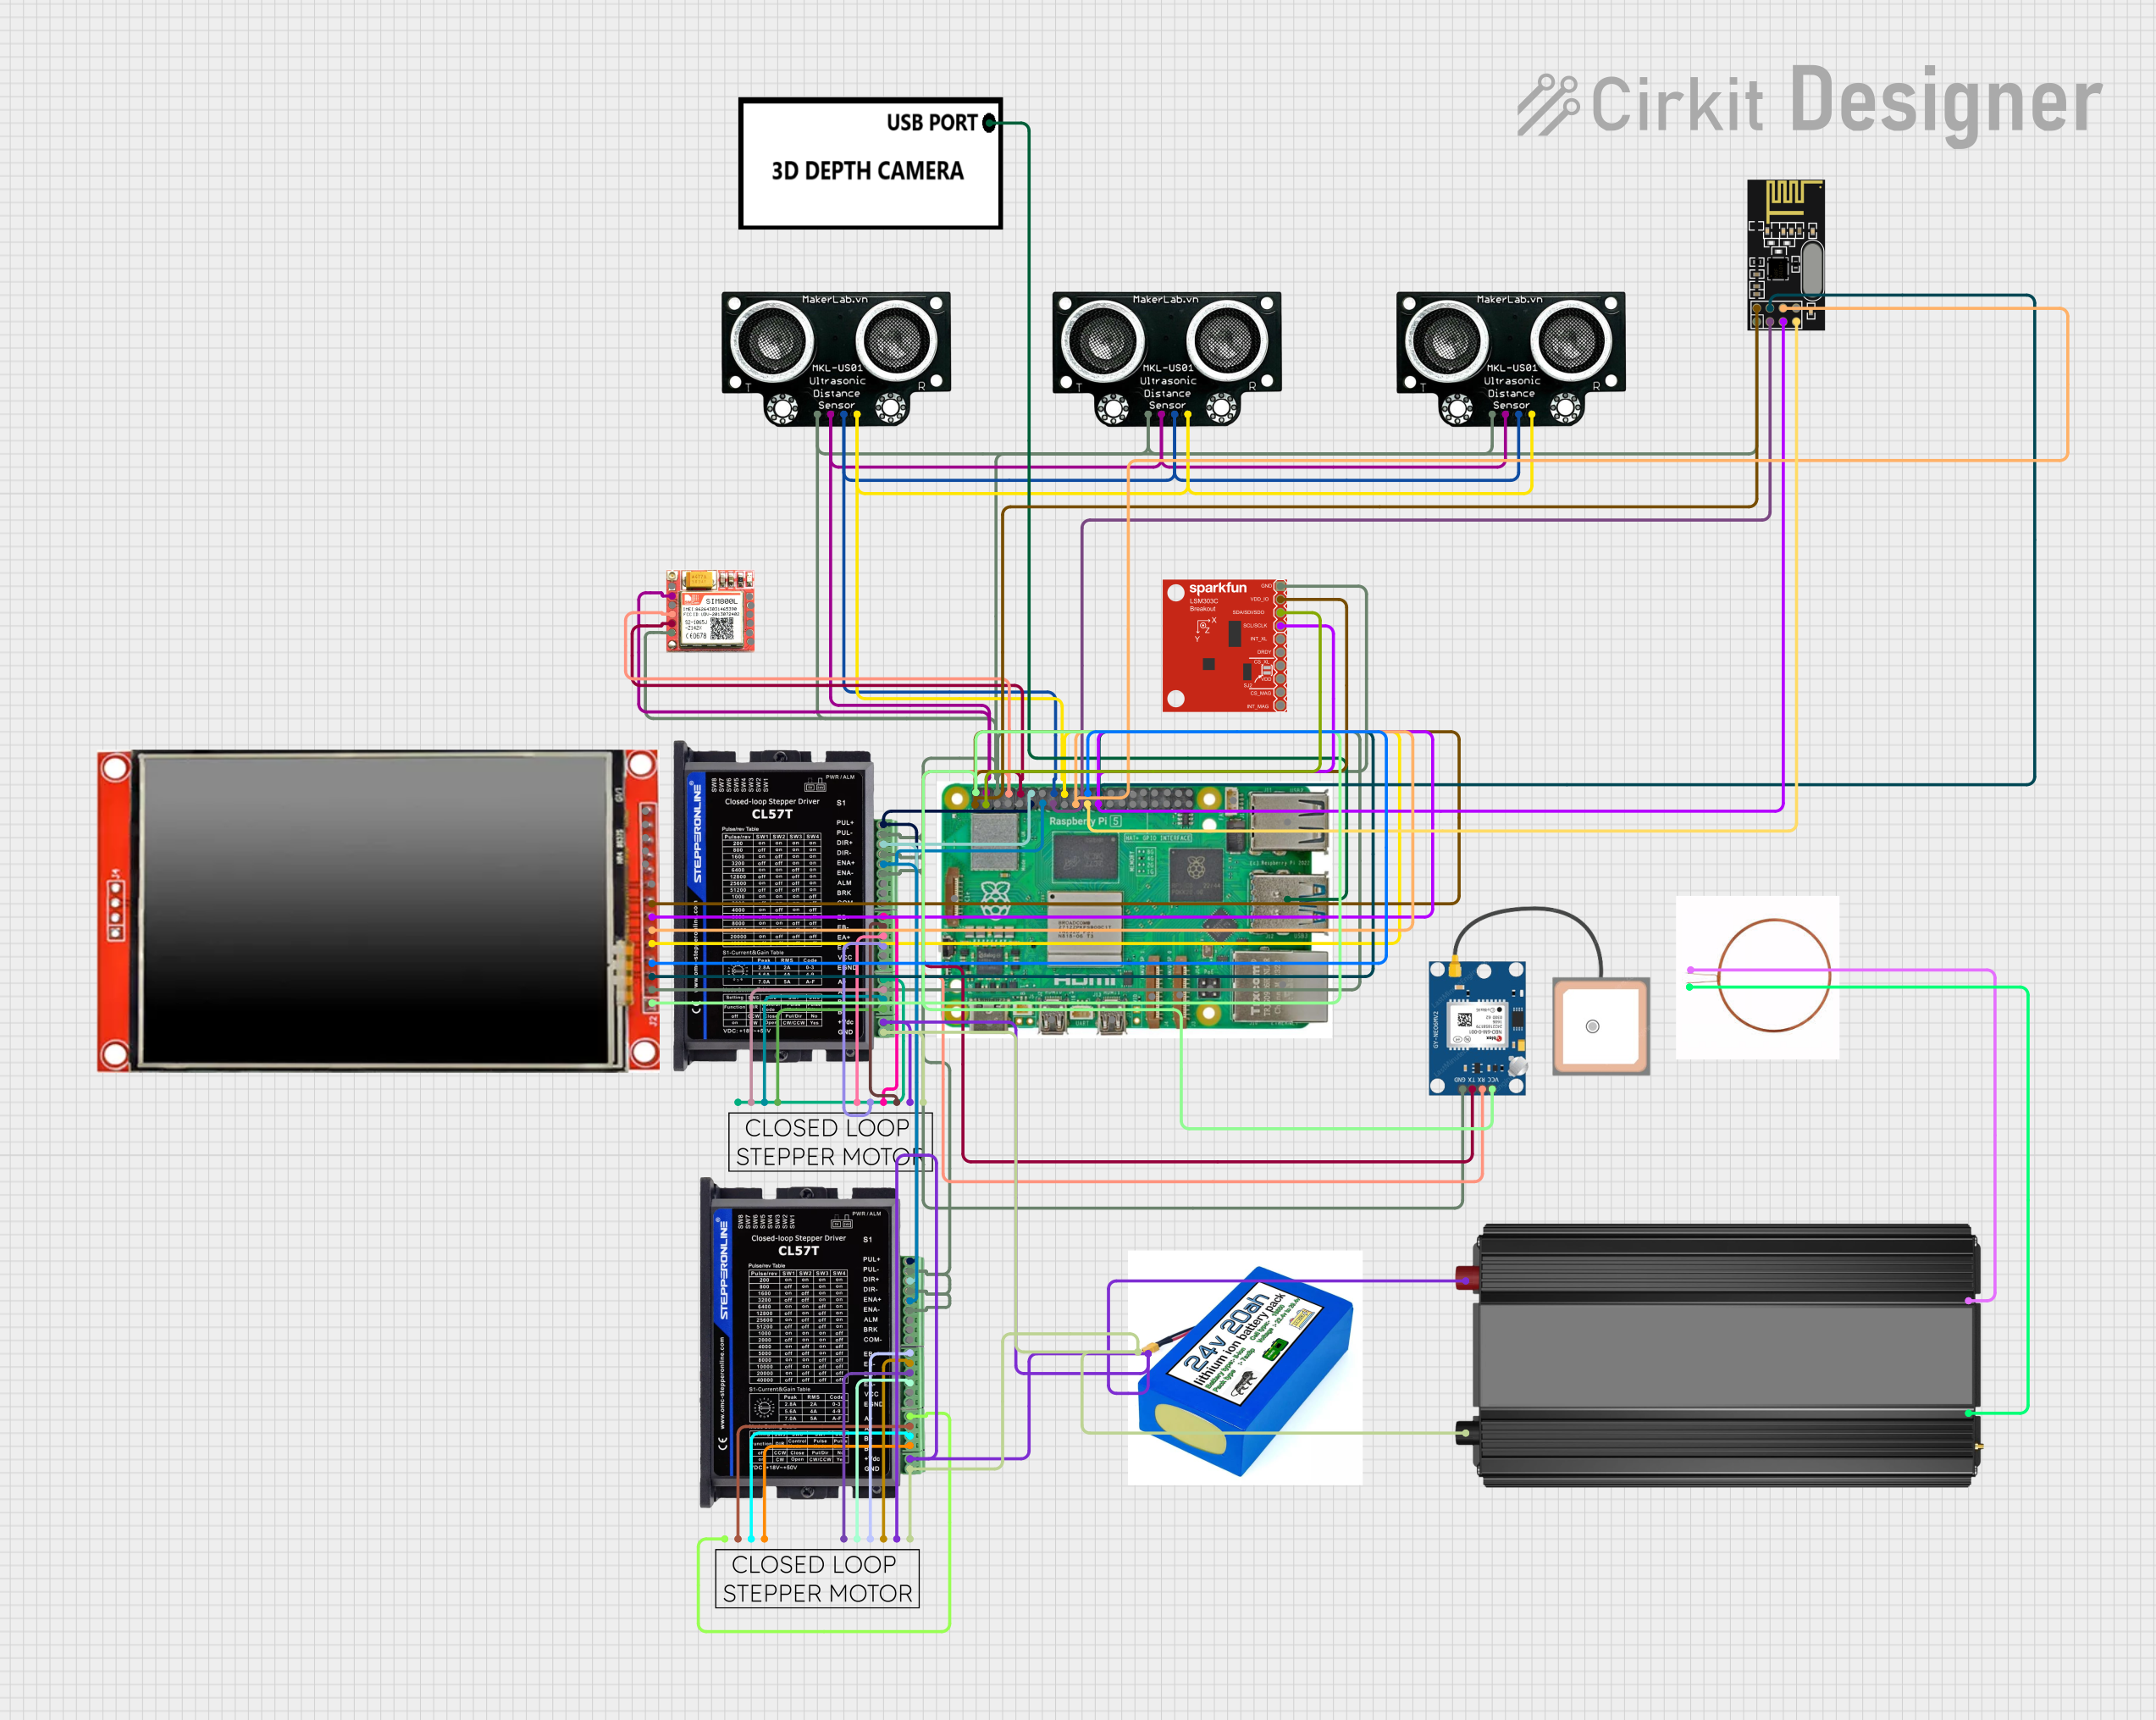
Explore Projects Built with Mach RNR2
Technical Specifications
The Mach RNR2 is engineered to deliver reliable performance under demanding conditions. Below are its key technical specifications:
General Specifications
| Parameter | Value |
|---|---|
| Resolution | Up to 10,000 pulses per revolution (PPR) |
| Operating Voltage | 5V to 24V DC |
| Output Signal Type | Quadrature (A, B) with optional Index (Z) |
| Maximum Rotational Speed | 6,000 RPM |
| Operating Temperature | -20°C to 85°C |
| Shaft Diameter | 6 mm |
| Housing Material | Aluminum Alloy |
| Protection Rating | IP65 |
Pin Configuration
The Mach RNR2 typically comes with a 5-pin connector. The pinout is as follows:
| Pin Number | Name | Description |
|---|---|---|
| 1 | VCC | Power supply input (5V to 24V DC) |
| 2 | GND | Ground |
| 3 | A | Quadrature output channel A |
| 4 | B | Quadrature output channel B |
| 5 | Z | Index pulse (optional, one pulse per revolution) |
Usage Instructions
To use the Mach RNR2 rotary encoder in a circuit, follow these steps:
- Power Connection: Connect the VCC pin to a regulated DC power supply (5V to 24V) and the GND pin to the ground of your circuit.
- Signal Connection: Connect the A and B output channels to the input pins of your microcontroller or motion controller. If the Z channel is required, connect it to an additional input pin.
- Pull-Up Resistors: If the encoder outputs are open-collector, use pull-up resistors (typically 10kΩ) on the A, B, and Z lines to ensure proper signal levels.
- Debouncing: Implement software or hardware debouncing to filter out noise from the encoder signals.
- Code Implementation: If using an Arduino UNO, you can use the following example code to read the encoder signals:
// Example code to read Mach RNR2 rotary encoder signals with Arduino UNO

// Define encoder pins
const int pinA = 2; // Connect to encoder channel A
const int pinB = 3; // Connect to encoder channel B

volatile int encoderPosition = 0; // Variable to store encoder position
int lastEncoded = 0; // Variable to store the last encoder state

void setup() {
  pinMode(pinA, INPUT); // Set pinA as input
  pinMode(pinB, INPUT); // Set pinB as input

  // Attach interrupts to encoder pins
  attachInterrupt(digitalPinToInterrupt(pinA), updateEncoder, CHANGE);
  attachInterrupt(digitalPinToInterrupt(pinB), updateEncoder, CHANGE);

  Serial.begin(9600); // Initialize serial communication
}

void loop() {
  // Print the current encoder position
  Serial.println(encoderPosition);
  delay(100); // Delay for readability
}

void updateEncoder() {
  // Read the current state of the encoder pins
  int MSB = digitalRead(pinA); // Most significant bit
  int LSB = digitalRead(pinB); // Least significant bit

  int encoded = (MSB << 1) | LSB; // Combine the two bits
  int sum = (lastEncoded << 2) | encoded; // Combine with previous state

  // Determine the direction of rotation
  if (sum == 0b1101 || sum == 0b0100 || sum == 0b0010 || sum == 0b1011) {
    encoderPosition++; // Clockwise rotation
  } else if (sum == 0b1110 || sum == 0b0111 || sum == 0b0001 || sum == 0b1000) {
    encoderPosition--; // Counterclockwise rotation
  }

  lastEncoded = encoded; // Update the last state
}
Important Considerations
- Ensure the encoder is mounted securely to avoid mechanical vibrations that could affect accuracy.
- Use shielded cables for signal lines to minimize electromagnetic interference (EMI).
- Avoid exceeding the maximum rotational speed (6,000 RPM) to prevent damage to the encoder.
Troubleshooting and FAQs
Common Issues
No Output Signal:
- Verify the power supply voltage is within the specified range (5V to 24V).
- Check all connections, especially the VCC, GND, A, and B pins.
- Ensure pull-up resistors are used if required.
Erratic or Noisy Signals:
- Use shielded cables to reduce EMI.
- Implement software or hardware debouncing to filter out noise.
- Check for loose or poor mechanical mounting.
Incorrect Position Readings:
- Verify the encoder resolution matches the expected value in your software.
- Ensure the encoder is not rotating faster than the maximum specified speed.
FAQs
Q1: Can the Mach RNR2 be used in outdoor environments?
A1: Yes, the Mach RNR2 has an IP65 protection rating, making it suitable for outdoor use. However, ensure it is not exposed to extreme conditions beyond its operating temperature range.
Q2: What is the purpose of the Z (Index) channel?
A2: The Z channel provides a single pulse per revolution, which is useful for applications requiring precise homing or zero-position detection.
Q3: Can I use the Mach RNR2 with a 3.3V microcontroller?
A3: Yes, but you will need to ensure the encoder's output signals are compatible with the 3.3V logic levels, possibly using level shifters.
Q4: How do I calculate the angular position from the encoder signals?
A4: Divide the encoder position count by the resolution (PPR) and multiply by 360° to get the angular position in degrees.
By following this documentation, you can effectively integrate the Mach RNR2 rotary encoder into your projects and achieve precise position sensing.