How to Use Servo Hub: Examples, Pinouts, and Specs
Introduction
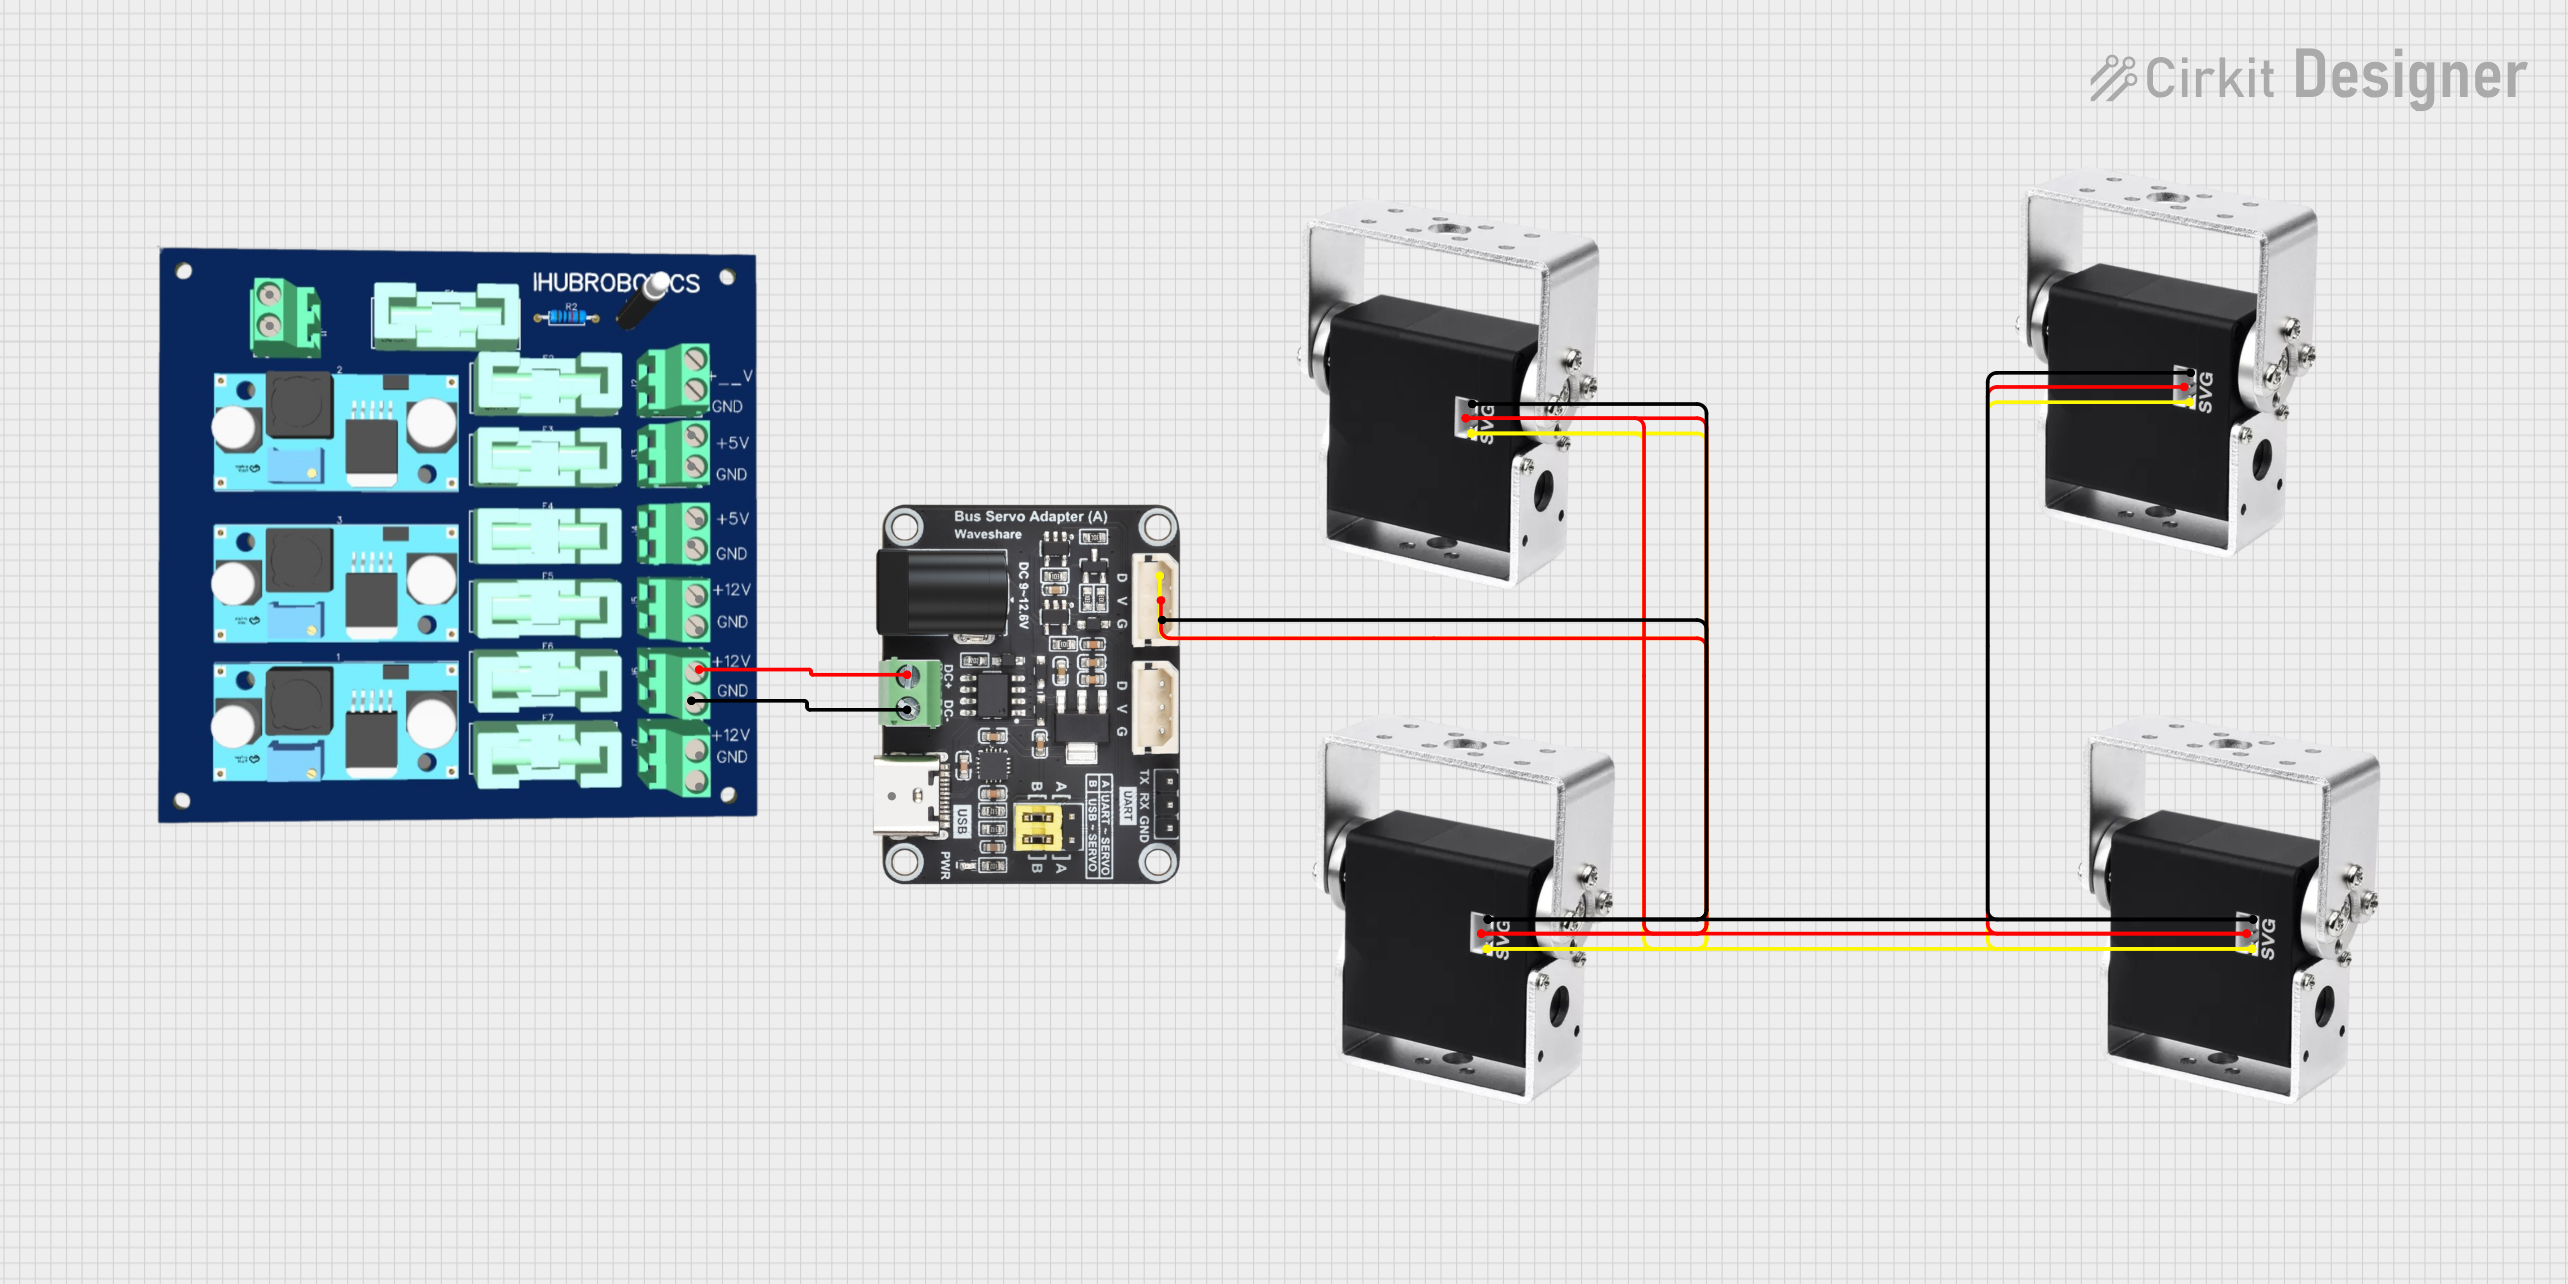
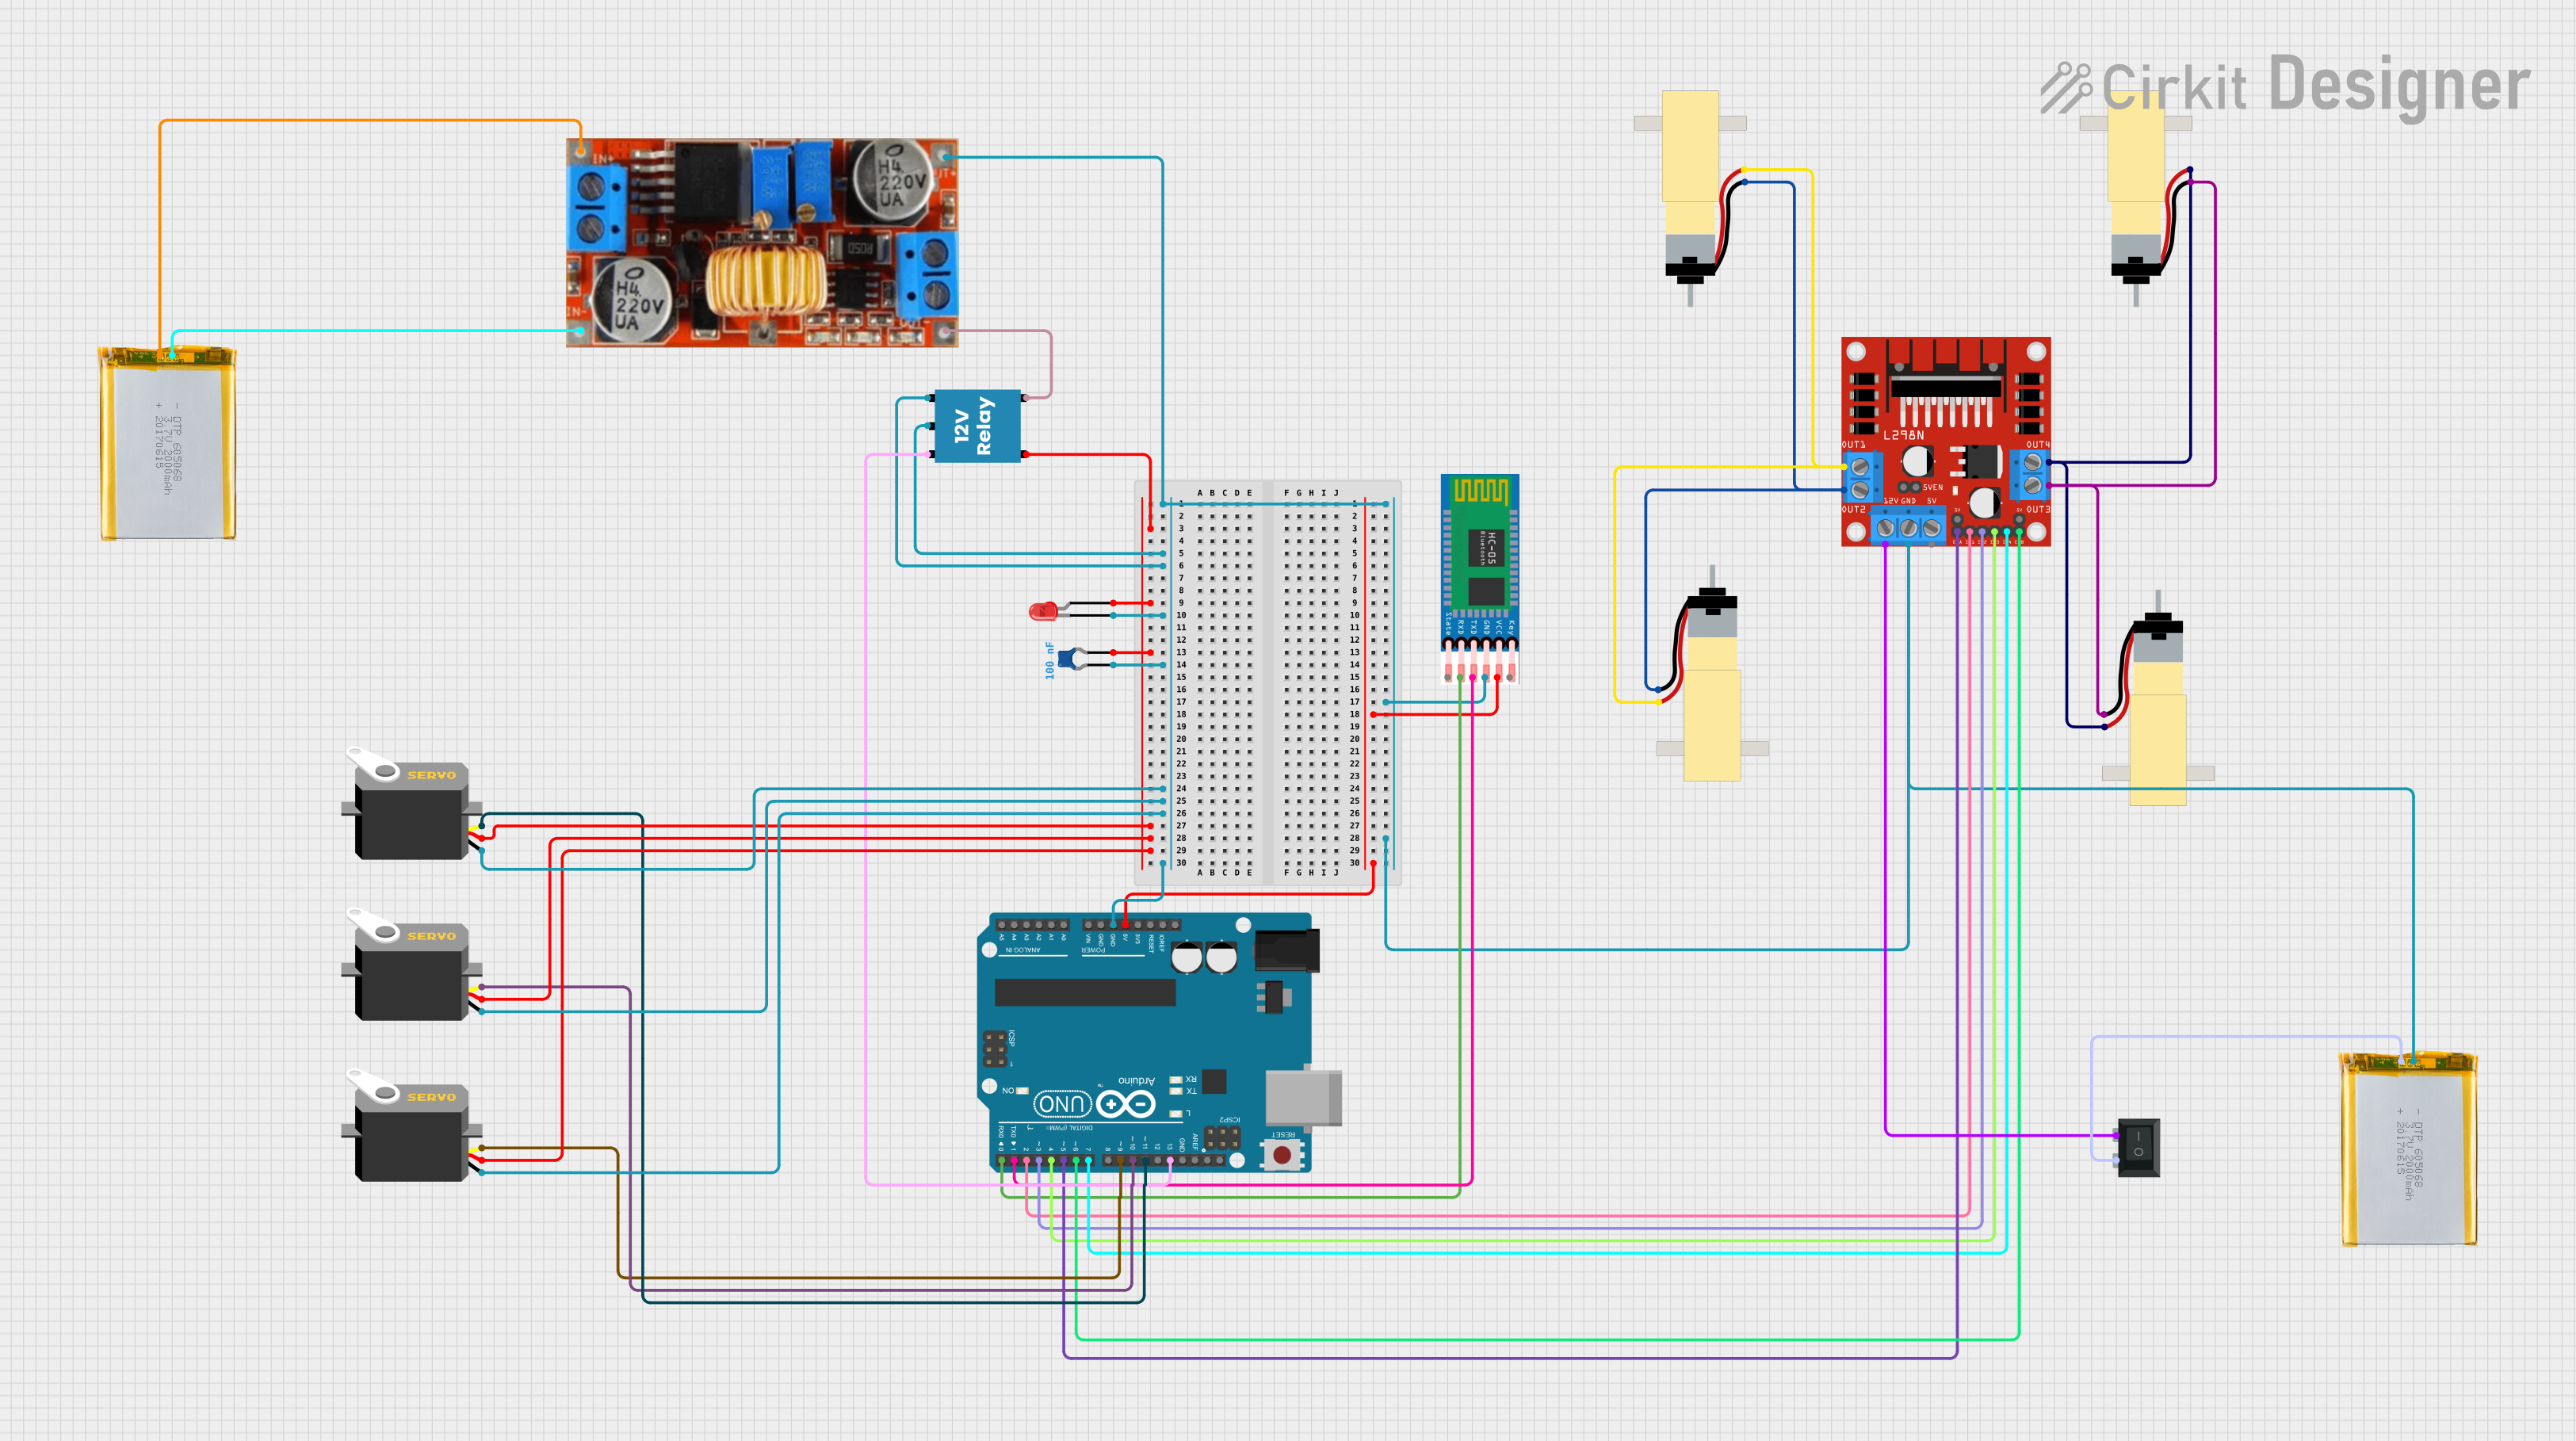
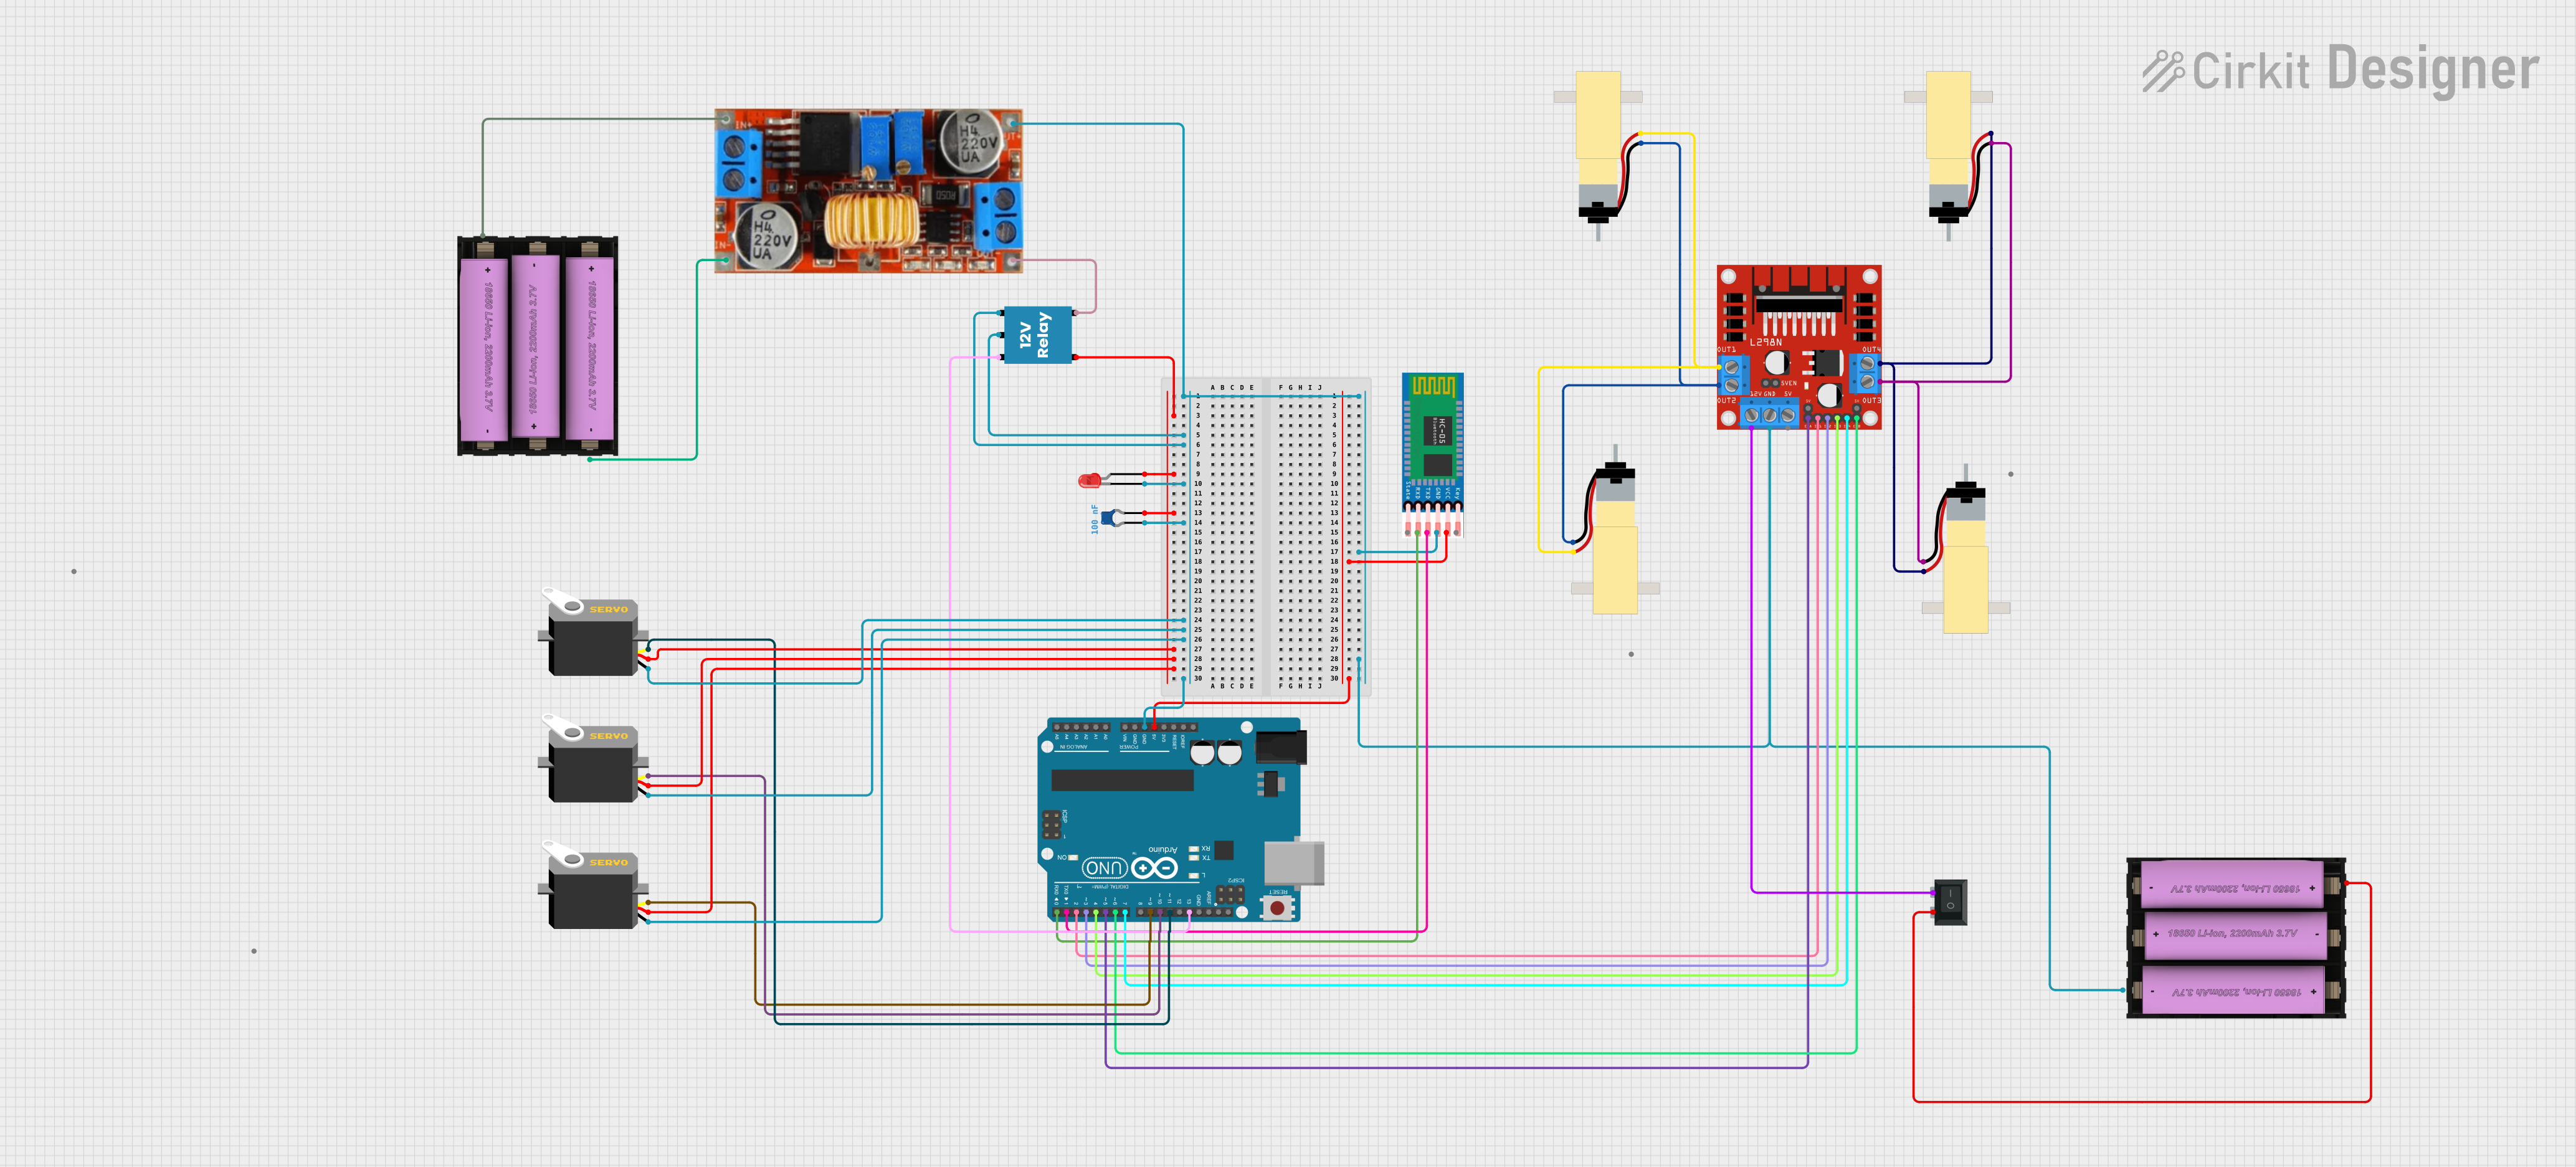
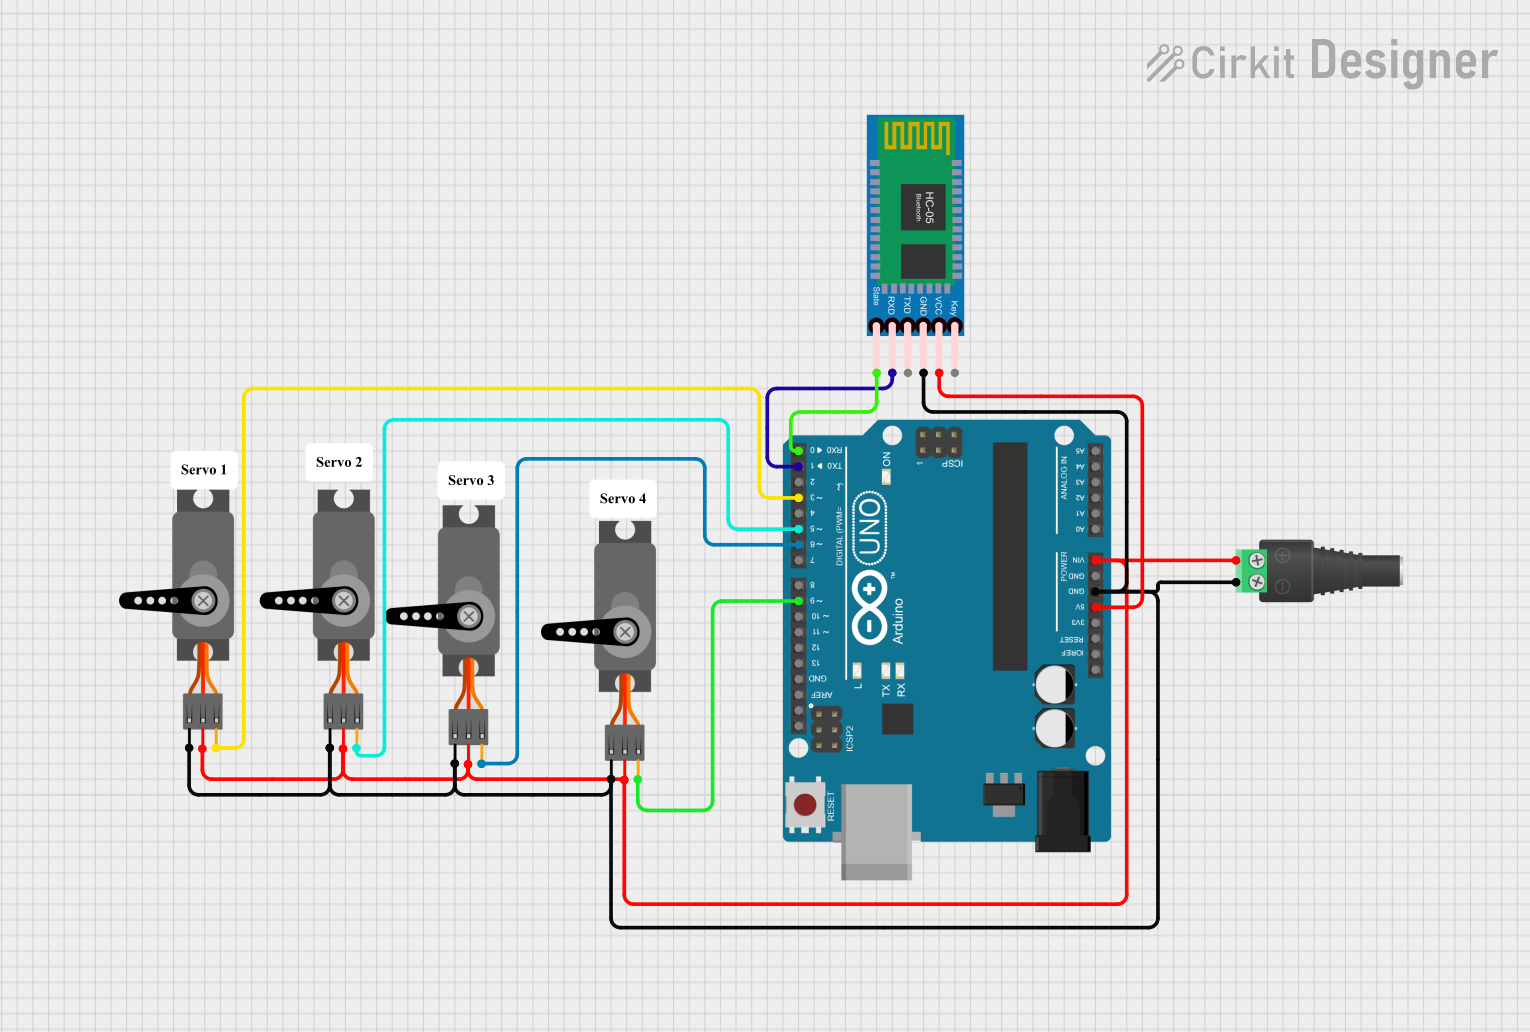
The Servo Hub (REV-11-1855) is a mechanical component designed by REV Robotics to facilitate the connection and synchronized control of multiple servo motors to a single control board. This hub is particularly useful in robotics and automation projects where precise and coordinated movement is required, such as in robotic arms, animatronics, or complex motion systems.
Explore Projects Built with Servo Hub
Explore Projects Built with Servo Hub
Common Applications and Use Cases
- Robotic arms and grippers
- Multi-servo control systems in animatronics
- Educational robotics kits
- Custom automation projects
Technical Specifications
The Servo Hub is designed to be robust and compatible with a wide range of servo motors commonly used in educational and hobbyist robotics. Below are the key technical details and pin configurations for the Servo Hub.
Key Technical Details
- Manufacturer: REV Robotics
- Part ID: REV-11-1855
- Material: High-strength aluminum
- Mounting Hole Size: Compatible with M3 screws
- Servo Compatibility: Standard size servo motors
- Number of Servo Connections: Multiple, depending on configuration
Pin Configuration and Descriptions
The Servo Hub does not have an electronic pin configuration as it is a mechanical component. However, it features several mechanical interfaces for connecting servo motors. The following table describes the typical mechanical interfaces found on the Servo Hub:
| Interface Description | Quantity | Notes |
|---|---|---|
| Servo Mounting Holes | Multiple | For attaching standard size servo motors |
| Central Mounting Hole | 1 | For attaching the hub to a base or structure |
| Peripheral Holes | Multiple | For additional mounting options or accessories |
Usage Instructions
How to Use the Servo Hub in a Circuit
- Mounting Servos: Securely attach your servo motors to the Servo Hub using M3 screws. Ensure that the servos are properly aligned and that their gears are free to move without obstruction.
- Connecting to Control Board: Connect the servo motors to your control board using appropriate servo cables. Ensure that the connections are secure and that the polarity is correct.
- Programming: Program your control board to send the correct PWM signals to each servo motor for synchronized operation.
Important Considerations and Best Practices
- Load Distribution: Ensure that the load is evenly distributed across the servos to prevent excessive strain on individual motors.
- Alignment: Properly align the servos to the hub to avoid mechanical binding or uneven movement.
- Cable Management: Organize and secure servo cables to prevent entanglement or disconnection during operation.
Troubleshooting and FAQs
Common Issues
- Servos Not Responding: Check connections and ensure that the control board is programmed correctly and powered on.
- Uneven Movement: Verify that the servos are mounted correctly and that there is no mechanical obstruction.
- Excessive Noise or Vibration: This may indicate that the servos are under strain. Check the load distribution and servo alignment.
Solutions and Tips for Troubleshooting
- Recheck Connections: Loose or incorrect connections can cause issues. Double-check all connections.
- Review Code: Ensure that the code uploaded to the control board is correct and that the PWM signals are within the specifications of the servos.
- Inspect Mechanical Setup: Look for any signs of wear or damage to the Servo Hub or servos that could affect performance.
FAQs
Q: Can the Servo Hub be used with different types of servo motors? A: The Servo Hub is designed for standard size servo motors. Compatibility with other types of servos will depend on the mounting options and physical dimensions.
Q: How many servos can be connected to the Servo Hub? A: The number of servos that can be connected to the Servo Hub depends on the specific model and configuration. Refer to the product specifications for details.
Q: Is the Servo Hub compatible with Arduino UNO? A: The Servo Hub itself is a mechanical component and does not directly interface with an Arduino UNO. However, the servos connected to the hub can be controlled by an Arduino UNO using appropriate code.
Example Arduino Code for Servo Control
#include <Servo.h>

Servo servo1;  // Create servo object to control a servo
// Repeat the above line for each servo you are controlling

void setup() {
  servo1.attach(9);  // Attaches the servo on pin 9 to the servo object
  // Repeat the above line for each servo, using the appropriate pin
}

void loop() {
  servo1.write(90);  // Set servo to mid-point
  // Add control logic for each servo
  delay(1000);       // Wait for a second
}
Note: The above code is a simple example to control a single servo. When using multiple servos with the Servo Hub, you will need to create multiple Servo objects and write control logic for each servo to achieve synchronized movement.