How to Use Ultrasound: Examples, Pinouts, and Specs
Introduction
Ultrasound is a medical imaging technique that utilizes high-frequency sound waves to produce real-time images of internal organs, tissues, and structures within the body. This non-invasive method is widely used in healthcare for diagnostic purposes, such as prenatal scanning, detecting abnormalities, and guiding medical procedures. Ultrasound is valued for its safety, as it does not involve ionizing radiation, and its ability to provide detailed, dynamic imaging.
Explore Projects Built with Ultrasound

Explore Projects Built with Ultrasound
Common Applications and Use Cases
- Prenatal Scanning: Monitoring fetal development and detecting potential complications during pregnancy.
- Cardiology: Assessing heart function and detecting abnormalities in heart valves or blood flow.
- Abdominal Imaging: Diagnosing conditions in organs such as the liver, kidneys, and gallbladder.
- Musculoskeletal Imaging: Evaluating injuries or conditions affecting muscles, tendons, and joints.
- Guided Procedures: Assisting in biopsies, fluid drainage, or catheter placement.
Technical Specifications
Below are the general technical specifications for a typical medical ultrasound system:
| Parameter | Specification |
|---|---|
| Frequency Range | 2 MHz to 15 MHz |
| Imaging Depth | Up to 30 cm (varies based on frequency and application) |
| Resolution | Axial: 0.1–1 mm, Lateral: 1–5 mm |
| Power Output | Typically < 720 mW/cm² (regulated for safety) |
| Modes of Operation | B-mode, M-mode, Doppler, 3D/4D imaging |
| Transducer Types | Linear, Convex, Phased Array, Endocavitary |
Transducer Pin Configuration
The ultrasound transducer, which emits and receives sound waves, typically connects to the imaging system via a multi-pin connector. Below is an example of a simplified pin configuration for a linear transducer:
| Pin Number | Signal | Description |
|---|---|---|
| 1 | Ground | Electrical ground for the transducer |
| 2 | Power Supply | Provides power to the transducer circuitry |
| 3–10 | Piezoelectric Elements | Individual channels for transmitting/receiving |
| 11 | Temperature Sensor | Monitors transducer temperature |
| 12 | Shield | Electromagnetic shielding |
Note: Actual pin configurations may vary depending on the manufacturer and transducer type.
Usage Instructions
How to Use the Component in a System
- Connect the Transducer: Attach the ultrasound transducer to the imaging system using the appropriate connector. Ensure the connection is secure and aligned correctly.
- Apply Coupling Gel: Use a water-based ultrasound gel on the skin or transducer surface to eliminate air gaps and improve sound wave transmission.
- Select the Mode: Choose the desired imaging mode (e.g., B-mode for 2D imaging, Doppler for blood flow analysis).
- Adjust Settings: Configure parameters such as frequency, depth, and gain to optimize image quality for the specific application.
- Perform the Scan: Move the transducer over the target area while observing the real-time image on the display.
- Interpret Results: Analyze the images or recordings to diagnose or monitor the condition.
Important Considerations and Best Practices
- Frequency Selection: Use lower frequencies (e.g., 2–5 MHz) for deeper imaging and higher frequencies (e.g., 7–15 MHz) for superficial structures.
- Safety: Follow regulatory guidelines for power output and exposure time to ensure patient safety.
- Maintenance: Regularly inspect the transducer for damage and clean it with approved disinfectants to prevent cross-contamination.
- Avoid Air Bubbles: Ensure the coupling gel is applied evenly to avoid artifacts caused by air bubbles.
Example Code for Arduino Integration
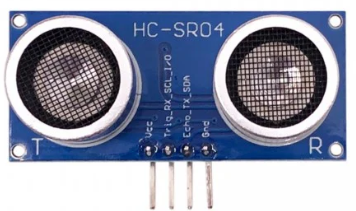
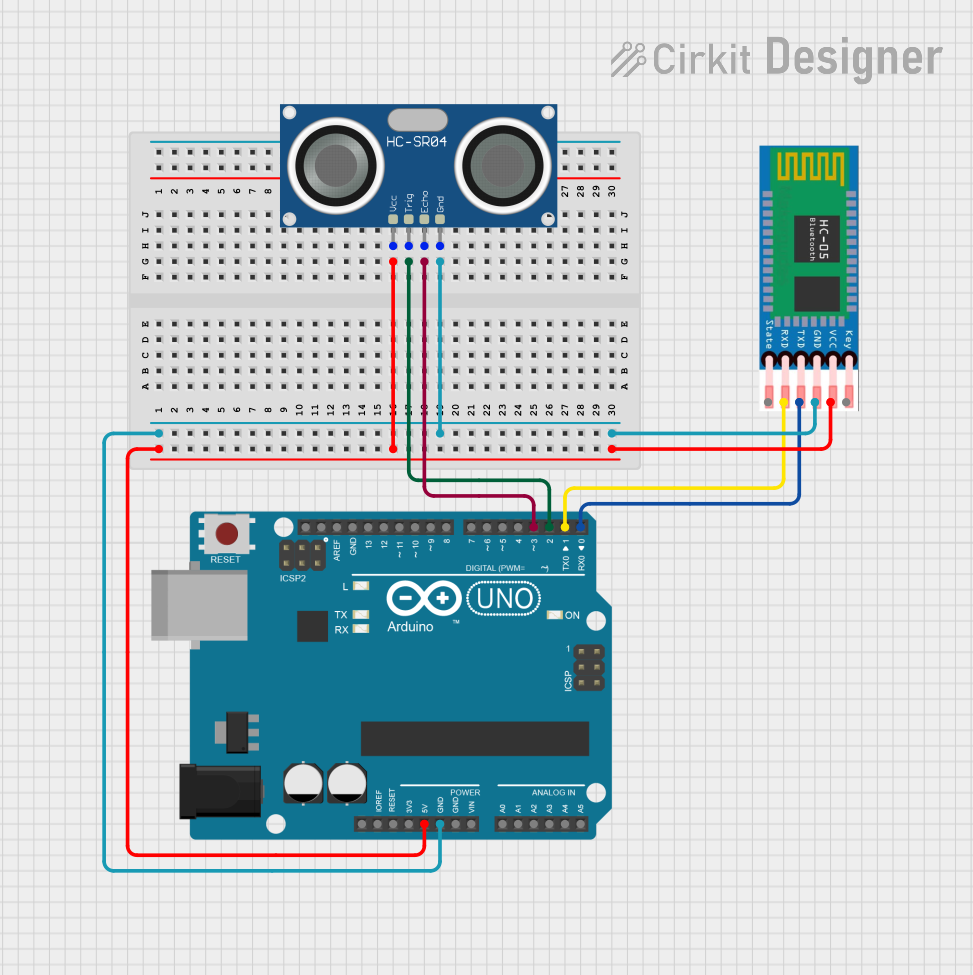
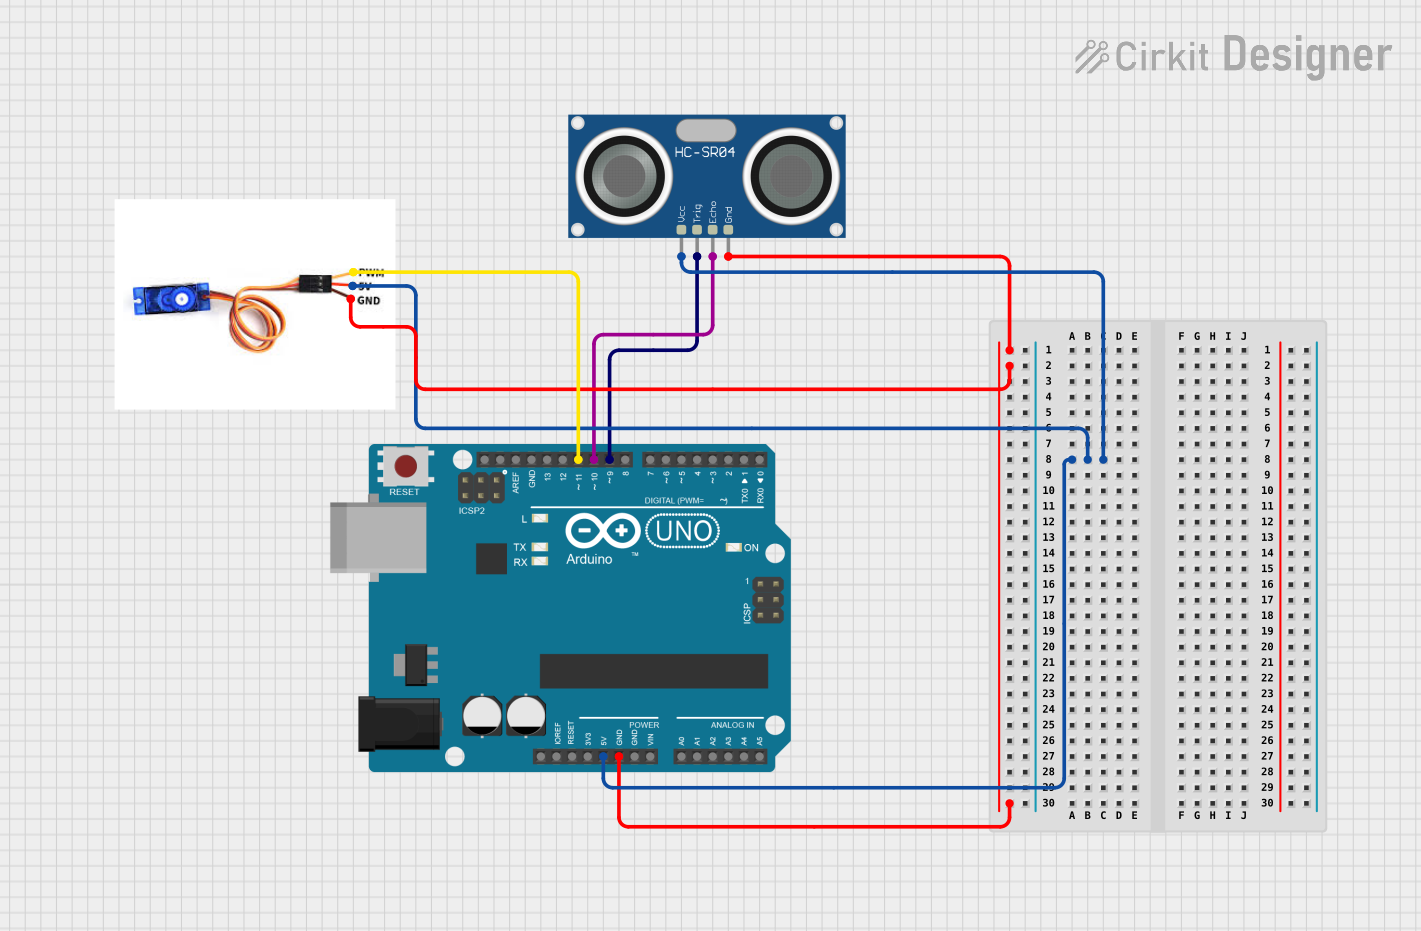
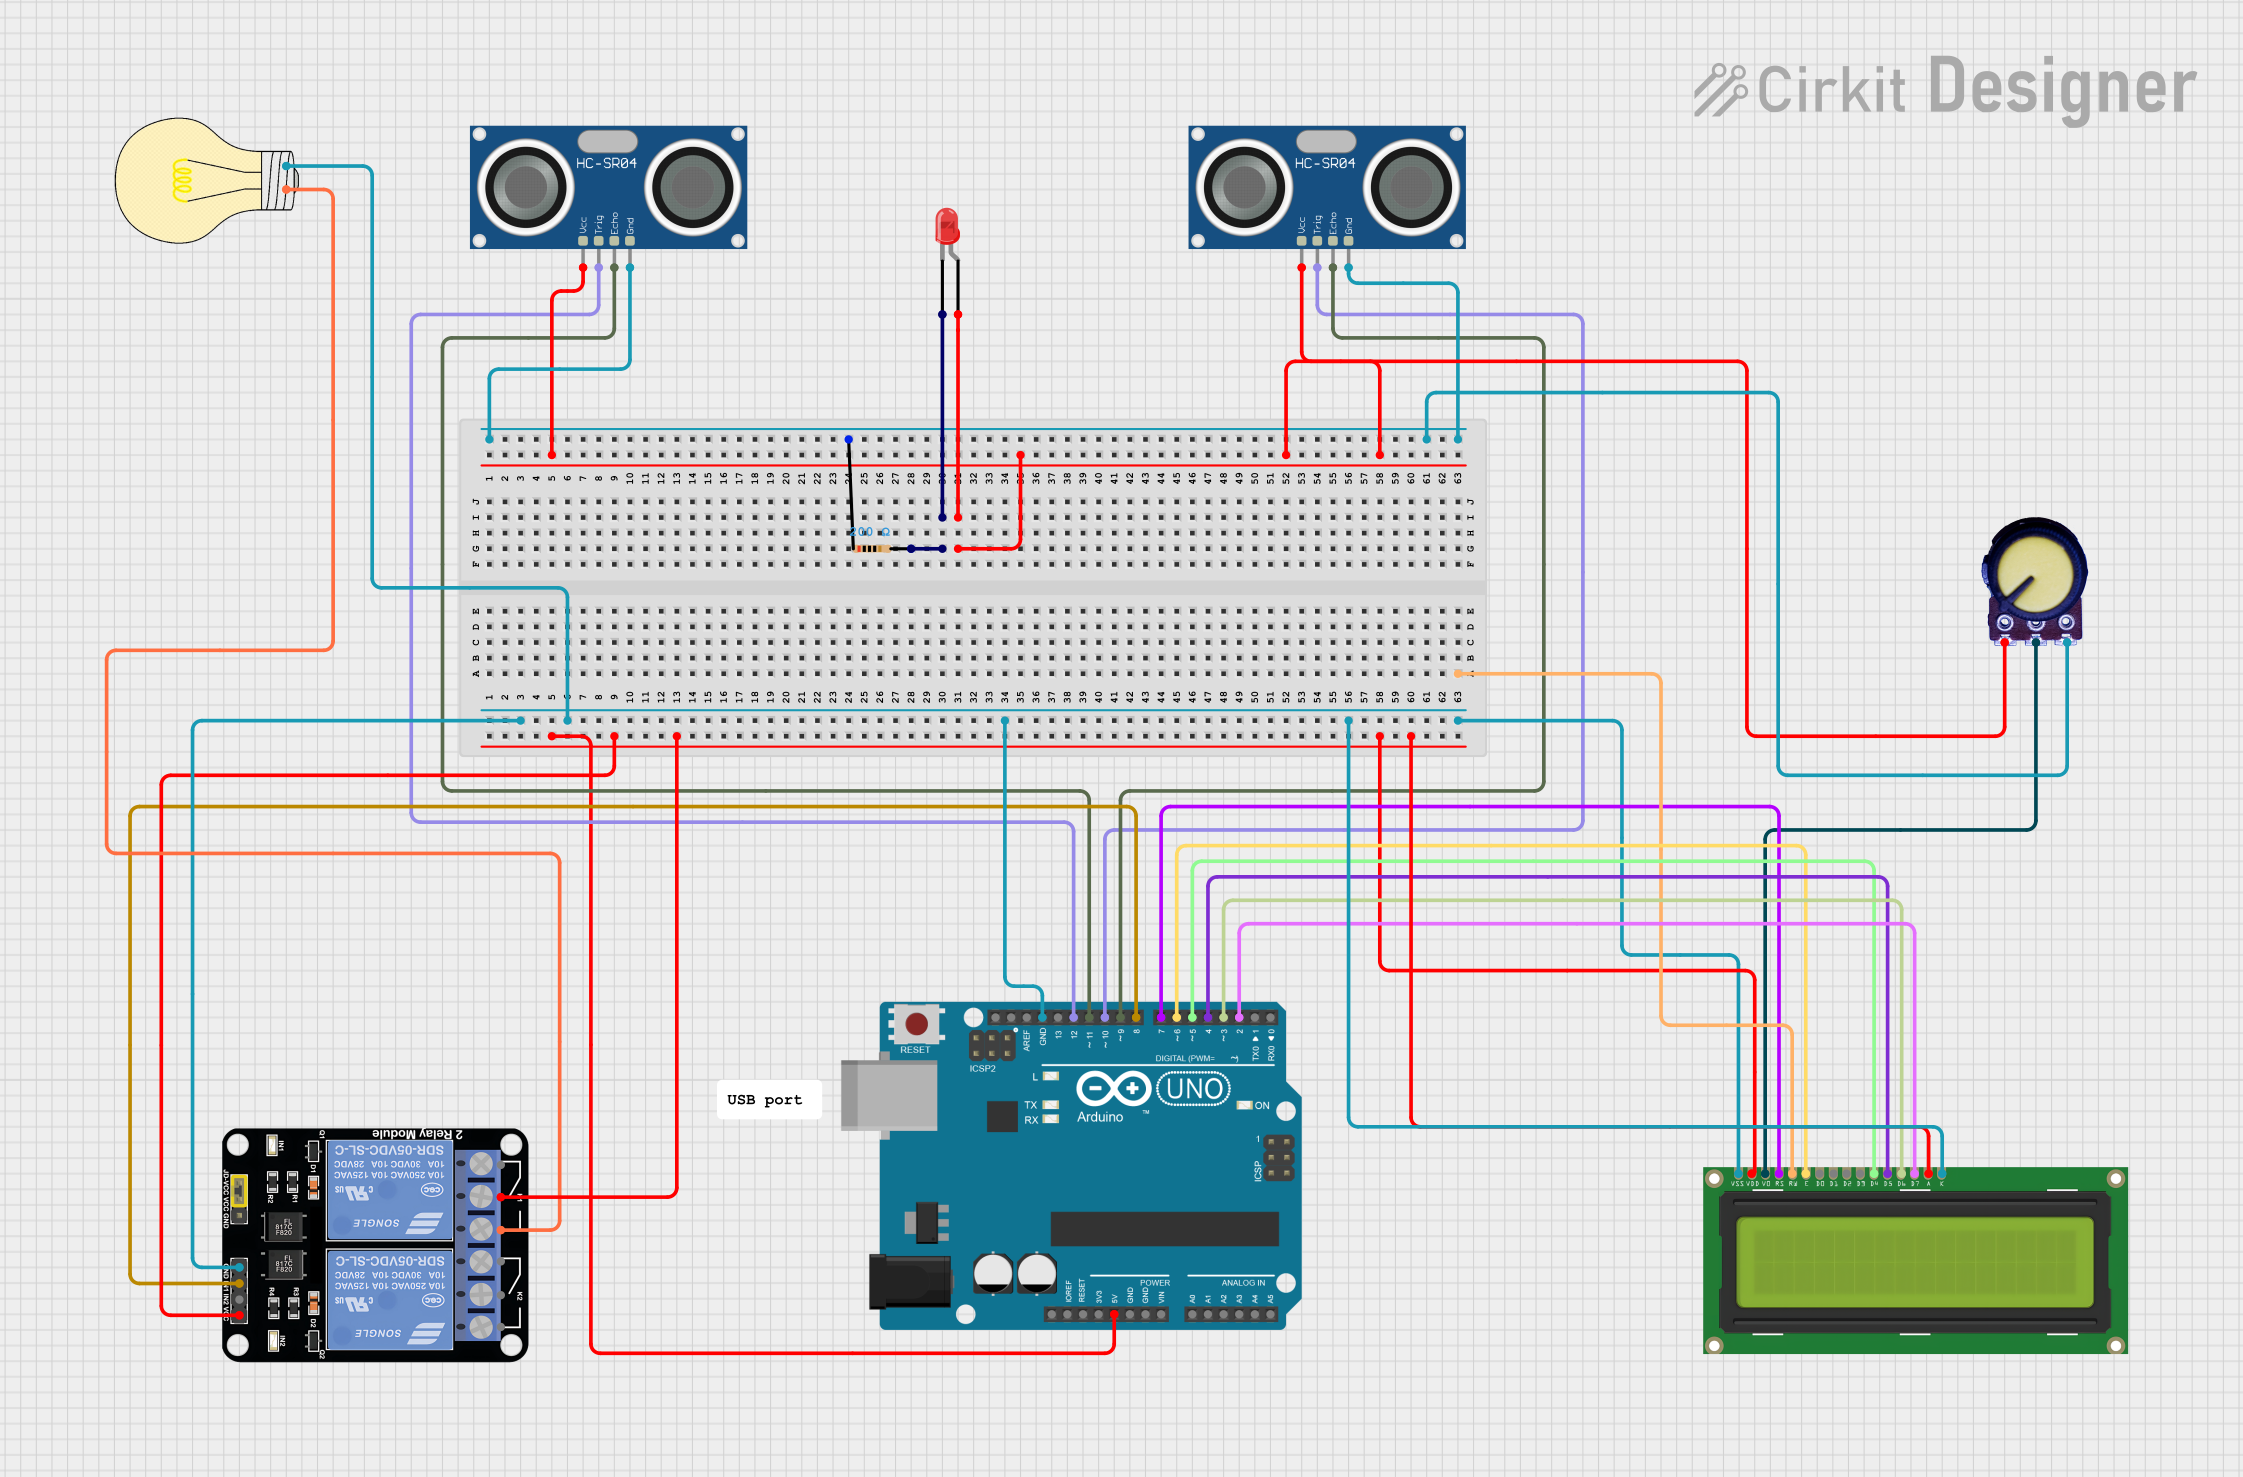
While ultrasound imaging systems are complex and not typically controlled by Arduino, basic ultrasonic distance sensors (e.g., HC-SR04) can be used for educational purposes. Below is an example code snippet for using an HC-SR04 sensor with an Arduino UNO:
// Define pins for the ultrasonic sensor
const int trigPin = 9; // Trigger pin connected to digital pin 9
const int echoPin = 10; // Echo pin connected to digital pin 10

void setup() {
  pinMode(trigPin, OUTPUT); // Set trigger pin as output
  pinMode(echoPin, INPUT);  // Set echo pin as input
  Serial.begin(9600);       // Initialize serial communication
}

void loop() {
  // Send a 10-microsecond pulse to the trigger pin
  digitalWrite(trigPin, LOW);
  delayMicroseconds(2);
  digitalWrite(trigPin, HIGH);
  delayMicroseconds(10);
  digitalWrite(trigPin, LOW);

  // Measure the duration of the echo pulse
  long duration = pulseIn(echoPin, HIGH);

  // Calculate the distance in centimeters
  float distance = duration * 0.034 / 2;

  // Print the distance to the serial monitor
  Serial.print("Distance: ");
  Serial.print(distance);
  Serial.println(" cm");

  delay(500); // Wait for 500 milliseconds before the next reading
}
Troubleshooting and FAQs
Common Issues
No Image or Poor Image Quality:
- Cause: Incorrect frequency selection or improper transducer placement.
- Solution: Adjust the frequency and ensure proper contact with the skin using coupling gel.
Artifacts in the Image:
- Cause: Air bubbles in the gel or patient movement.
- Solution: Reapply the gel evenly and ask the patient to remain still.
Overheating of the Transducer:
- Cause: Prolonged use or high power output.
- Solution: Monitor the transducer temperature and allow it to cool if necessary.
Connection Issues:
- Cause: Loose or damaged cables.
- Solution: Inspect and secure all connections, and replace damaged cables.
FAQs
Q: Is ultrasound safe for repeated use?
- A: Yes, ultrasound is considered safe as it does not use ionizing radiation. However, exposure should be minimized to what is medically necessary.
Q: Can ultrasound detect all types of abnormalities?
- A: While ultrasound is versatile, it may not detect certain conditions, especially those requiring higher resolution or deeper imaging. Other imaging modalities like MRI or CT may be needed.
Q: How do I clean the transducer?
- A: Use manufacturer-approved disinfectants and follow cleaning protocols to avoid damaging the transducer or compromising patient safety.
This documentation provides a comprehensive overview of ultrasound technology, its applications, and practical usage tips. For further assistance, consult the device's user manual or contact the manufacturer.