Cirkit Designer
Your all-in-one circuit design IDE
Home /
Component Documentation
How to Use AA Battery: Examples, Pinouts, and Specs

Introduction
- The AA battery is a cylindrical electrochemical cell that provides a nominal voltage of 1.5 volts. It is one of the most widely used battery types in the world due to its compact size, reliability, and versatility.
- Common applications include powering portable electronic devices such as remote controls, flashlights, toys, clocks, wireless mice, and handheld gaming devices.
Explore Projects Built with AA Battery
Battery-Powered LED Circuit with Pushbutton Control and Capacitance Smoothing

This circuit consists of a 4 x AAA battery mount providing power, two pushbuttons acting as switches, an electrolytic capacitor for smoothing voltage fluctuations, and a red LED as an indicator. The LED lights up when either pushbutton is pressed, with the capacitor likely serving to debounce the pushbutton signal or provide a more stable LED operation. There is no microcontroller in this circuit, indicating a simple, direct-control user interface.
Simple Battery-Powered Red LED Circuit
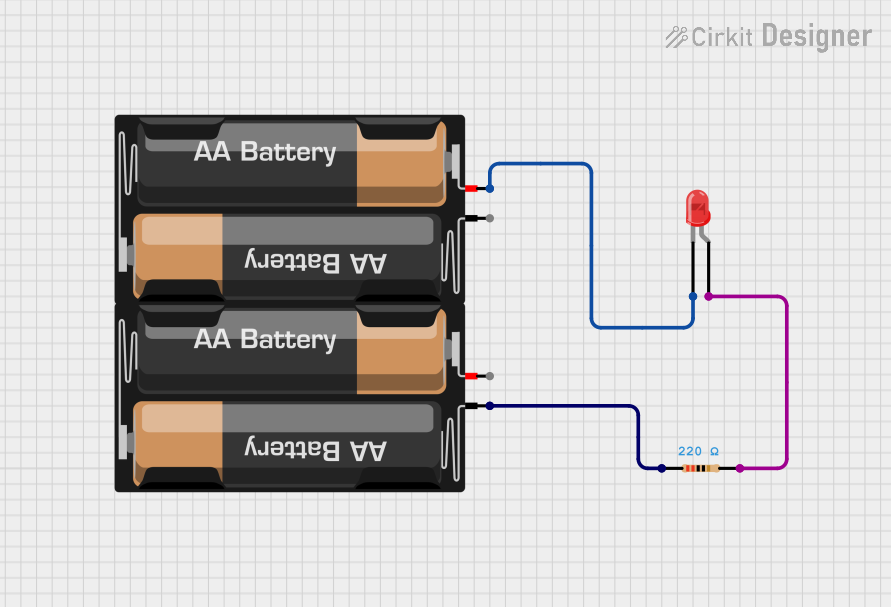
This circuit is a simple LED lighting circuit powered by two AA batteries. The LED's anode is connected through a 220 Ohm resistor to the positive terminal of one battery mount, and its cathode is directly connected to the negative terminal of the other battery mount. The resistor limits the current to protect the LED from excessive current that could damage it.
Simple Battery-Powered LED Circuit
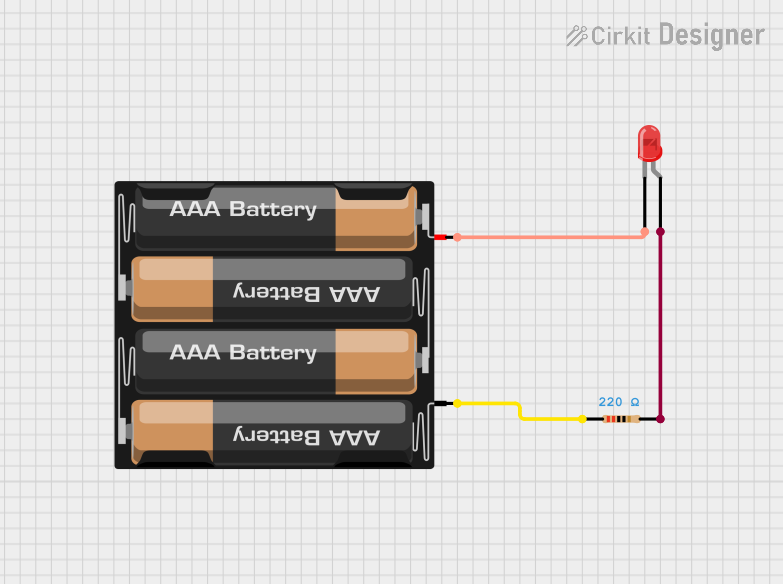
This circuit is a simple LED lighting circuit powered by a 4 x AAA battery mount. The LED's anode is connected to the positive terminal of the battery through a 220 Ohm resistor, which limits the current to protect the LED. The cathode of the LED is connected directly to the negative terminal of the battery, completing the circuit and allowing the LED to light up when the battery is connected.
Battery-Powered LED Circuit with Resistor
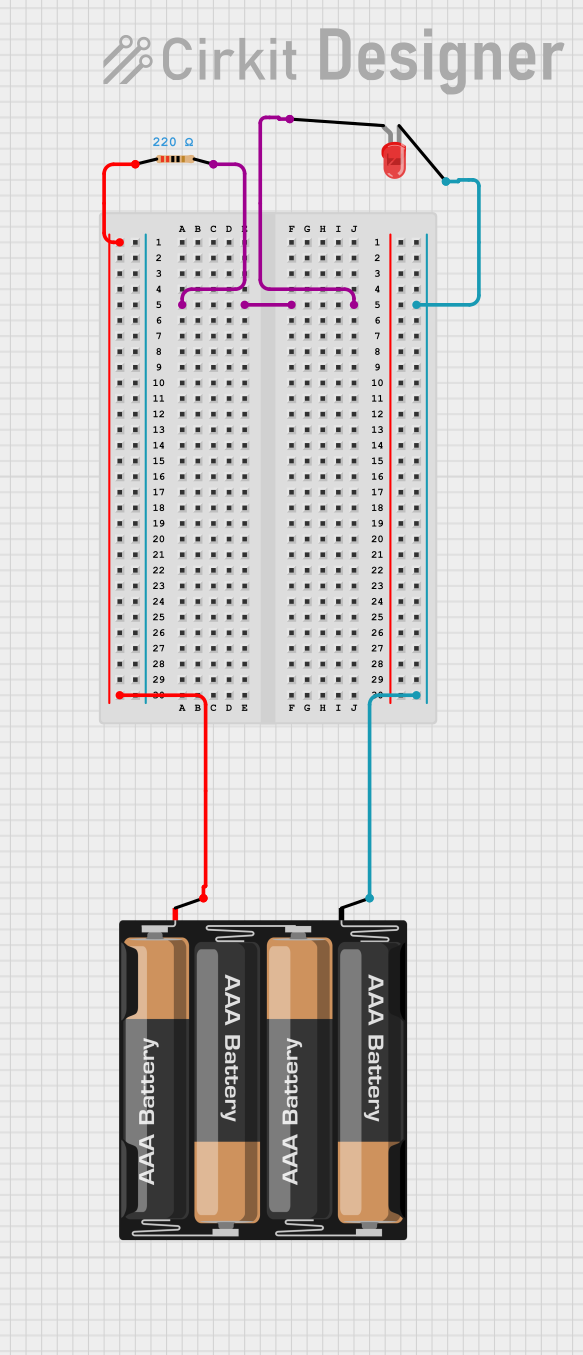
This circuit consists of a 4 x AAA battery mount powering a red LED through a 220-ohm resistor. The resistor limits the current flowing through the LED, which is connected in series with the battery pack to ensure safe operation and prevent damage to the LED.
Explore Projects Built with AA Battery
Battery-Powered LED Circuit with Pushbutton Control and Capacitance Smoothing
This circuit consists of a 4 x AAA battery mount providing power, two pushbuttons acting as switches, an electrolytic capacitor for smoothing voltage fluctuations, and a red LED as an indicator. The LED lights up when either pushbutton is pressed, with the capacitor likely serving to debounce the pushbutton signal or provide a more stable LED operation. There is no microcontroller in this circuit, indicating a simple, direct-control user interface.
Simple Battery-Powered Red LED Circuit
This circuit is a simple LED lighting circuit powered by two AA batteries. The LED's anode is connected through a 220 Ohm resistor to the positive terminal of one battery mount, and its cathode is directly connected to the negative terminal of the other battery mount. The resistor limits the current to protect the LED from excessive current that could damage it.
Simple Battery-Powered LED Circuit
This circuit is a simple LED lighting circuit powered by a 4 x AAA battery mount. The LED's anode is connected to the positive terminal of the battery through a 220 Ohm resistor, which limits the current to protect the LED. The cathode of the LED is connected directly to the negative terminal of the battery, completing the circuit and allowing the LED to light up when the battery is connected.
Battery-Powered LED Circuit with Resistor
This circuit consists of a 4 x AAA battery mount powering a red LED through a 220-ohm resistor. The resistor limits the current flowing through the LED, which is connected in series with the battery pack to ensure safe operation and prevent damage to the LED.
Technical Specifications
- Type: Primary (non-rechargeable) or secondary (rechargeable)
- Nominal Voltage: 1.5V (primary) or 1.2V (rechargeable)
- Capacity: Typically ranges from 1800mAh to 3000mAh for alkaline batteries
- Chemistry: Alkaline, NiMH (Nickel-Metal Hydride), or Lithium
- Dimensions:
- Length: 50.5 mm
- Diameter: 14.5 mm
- Polarity: Positive terminal (button top) and negative terminal (flat bottom)
Pin Configuration and Descriptions
| Terminal | Description | Polarity |
|---|---|---|
| Top | Positive terminal (button top) | + |
| Bottom | Negative terminal (flat base) | - |
Usage Instructions
Connecting the AA Battery:
- Ensure the device or circuit is designed to operate at the nominal voltage of the AA battery (1.5V for primary or 1.2V for rechargeable).
- Insert the battery into the holder or compartment, aligning the positive terminal (+) with the positive contact and the negative terminal (-) with the negative contact.
Important Considerations:
- Polarity: Always check the polarity before inserting the battery. Reversing the polarity can damage the device or circuit.
- Battery Type: Use the correct type of AA battery (alkaline, NiMH, or lithium) as specified by the device manufacturer.
- Rechargeable Batteries: Only charge rechargeable AA batteries (e.g., NiMH) using a compatible charger. Do not attempt to recharge non-rechargeable (alkaline) batteries.
- Storage: Store batteries in a cool, dry place. Avoid exposing them to extreme temperatures or moisture.
Using AA Batteries with Arduino UNO:
- AA batteries can be used to power an Arduino UNO via the VIN pin or the DC barrel jack. A battery holder with a series connection of 4 AA batteries (providing ~6V) is commonly used.
- Example code to blink an LED using an Arduino UNO powered by AA batteries:
// This code blinks an LED connected to pin 13 of the Arduino UNO.
// Ensure the Arduino is powered by a 4xAA battery pack (6V) via the VIN pin.

void setup() {
  pinMode(13, OUTPUT); // Set pin 13 as an output pin
}

void loop() {
  digitalWrite(13, HIGH); // Turn the LED on
  delay(1000);            // Wait for 1 second
  digitalWrite(13, LOW);  // Turn the LED off
  delay(1000);            // Wait for 1 second
}
Troubleshooting and FAQs
Common Issues
Device Not Powering On:
- Cause: Incorrect battery orientation or depleted batteries.
- Solution: Check the polarity and replace the batteries if necessary.
Short Battery Life:
- Cause: High current draw from the device or use of low-capacity batteries.
- Solution: Use high-capacity batteries (e.g., lithium or NiMH) for devices with high power requirements.
Battery Leakage:
- Cause: Prolonged storage in a device or exposure to high temperatures.
- Solution: Remove batteries from devices when not in use for extended periods. Store batteries in a cool, dry place.
Overheating During Use:
- Cause: Short circuit or use of incompatible batteries.
- Solution: Inspect the circuit for shorts and ensure the correct battery type is used.
FAQs
Can I mix different types of AA batteries in the same device?
- No, mixing different types (e.g., alkaline and NiMH) or old and new batteries can cause uneven discharge and leakage.
How many AA batteries do I need to power a 5V device?
- You will need at least 4 AA batteries in series (providing ~6V) with a voltage regulator to step down to 5V.
Can I use AA batteries in parallel?
- Yes, connecting AA batteries in parallel increases the capacity (mAh) while maintaining the same voltage. Ensure all batteries are of the same type and charge level.
What is the shelf life of an AA battery?
- Alkaline AA batteries typically have a shelf life of 5-10 years, while lithium AA batteries can last up to 20 years when stored properly.