Cirkit Designer
Your all-in-one circuit design IDE
Home /
Component Documentation
How to Use money acceptor: Examples, Pinouts, and Specs

Introduction
The Money Acceptor is a crucial component in vending machines, kiosks, and other automated systems that require the acceptance and validation of currency, such as coins or bills. This device ensures that only legitimate currency is accepted, providing a secure and efficient way to handle transactions.
Common applications and use cases include:
- Vending machines
- Parking meters
- Automated kiosks
- Arcade machines
- Public transportation ticketing systems
Explore Projects Built with money acceptor
ESP32-Based Coin and Bill Acceptor with TFT Display and Thermal Printer
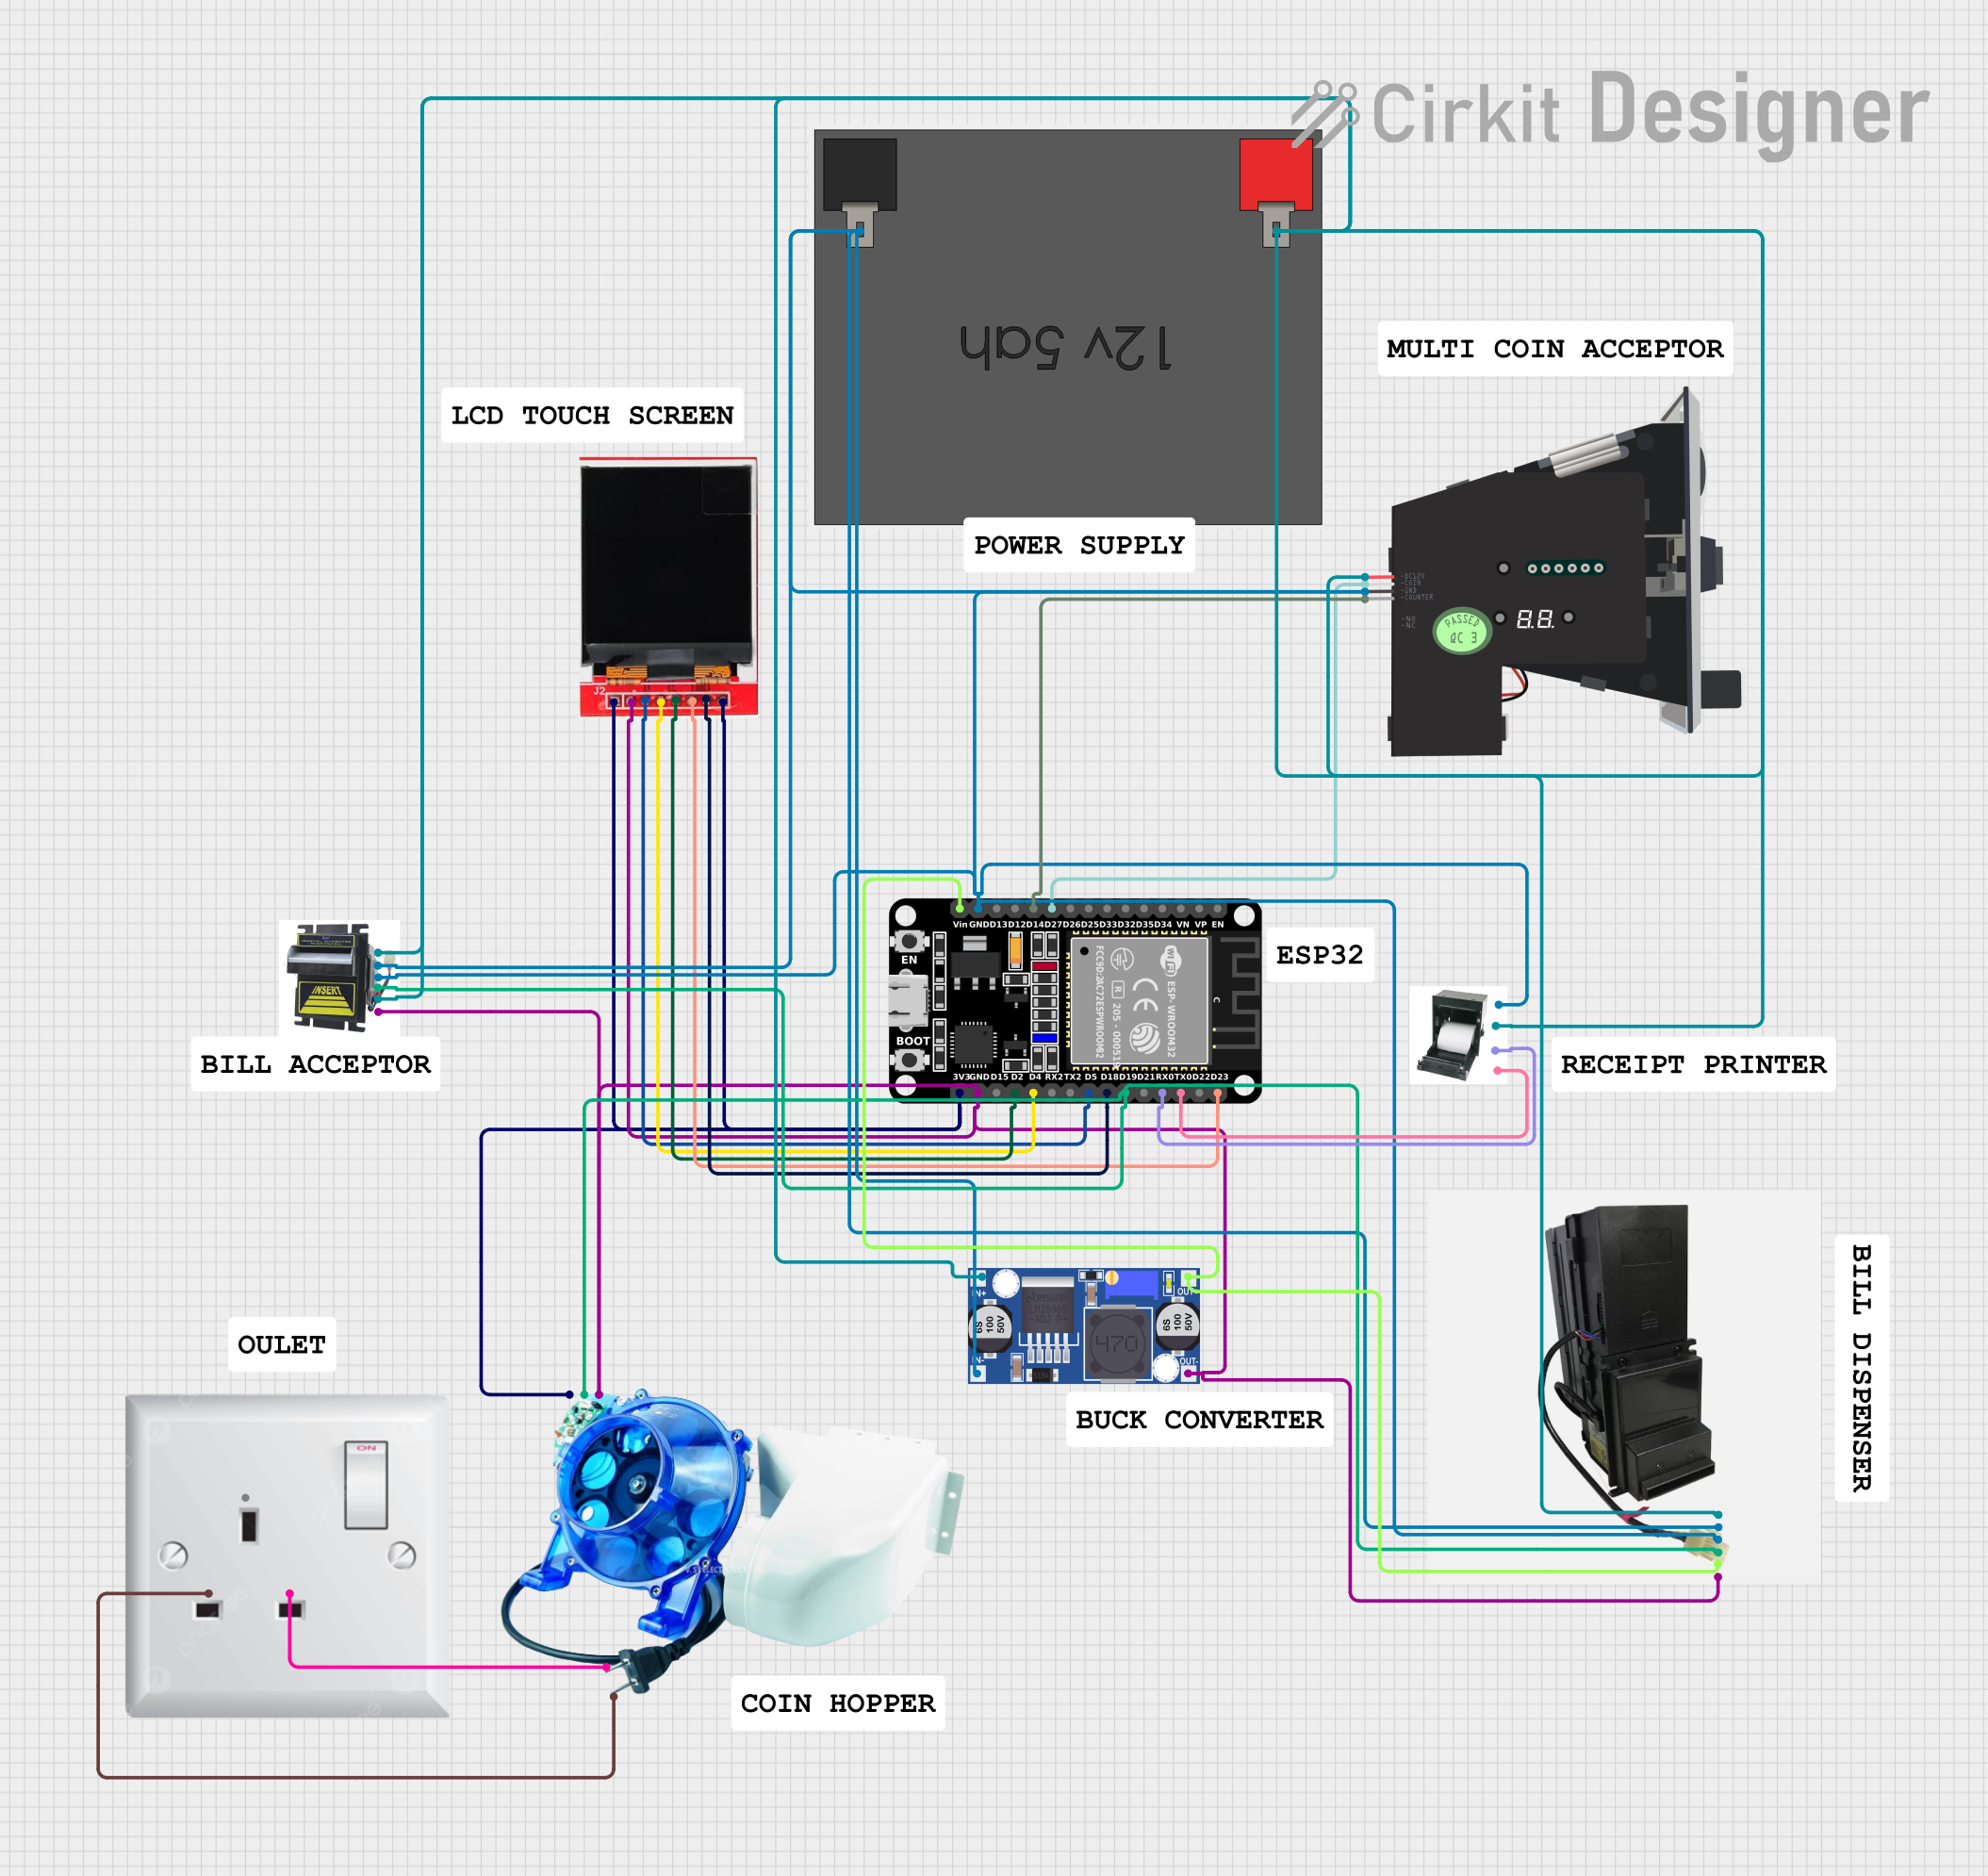
This circuit is a vending machine control system that integrates an ESP32 microcontroller to manage various peripherals including a multi-coin acceptor, coin hopper, bill dispenser, money acceptor, thermal printer, and a TFT LCD display. The system is powered by a 12V battery and a buck converter to step down the voltage for the ESP32 and other components, enabling the machine to accept and dispense coins and bills, print receipts, and display information on the screen.
ESP32-Based Coin and Bill Acceptor with TFT Display and Thermal Printer

This circuit is a vending machine controller that uses an ESP32 microcontroller to interface with various peripherals including a multi-coin acceptor, coin hopper, bill dispenser, and a thermal printer. The ESP32 also drives a TFT LCD display for user interaction, and the entire system is powered by a 12V battery with a buck converter to step down the voltage for the ESP32 and other components.
Arduino UNO Coin Counting Machine with IR Sensors and 16x2 I2C LCD Display
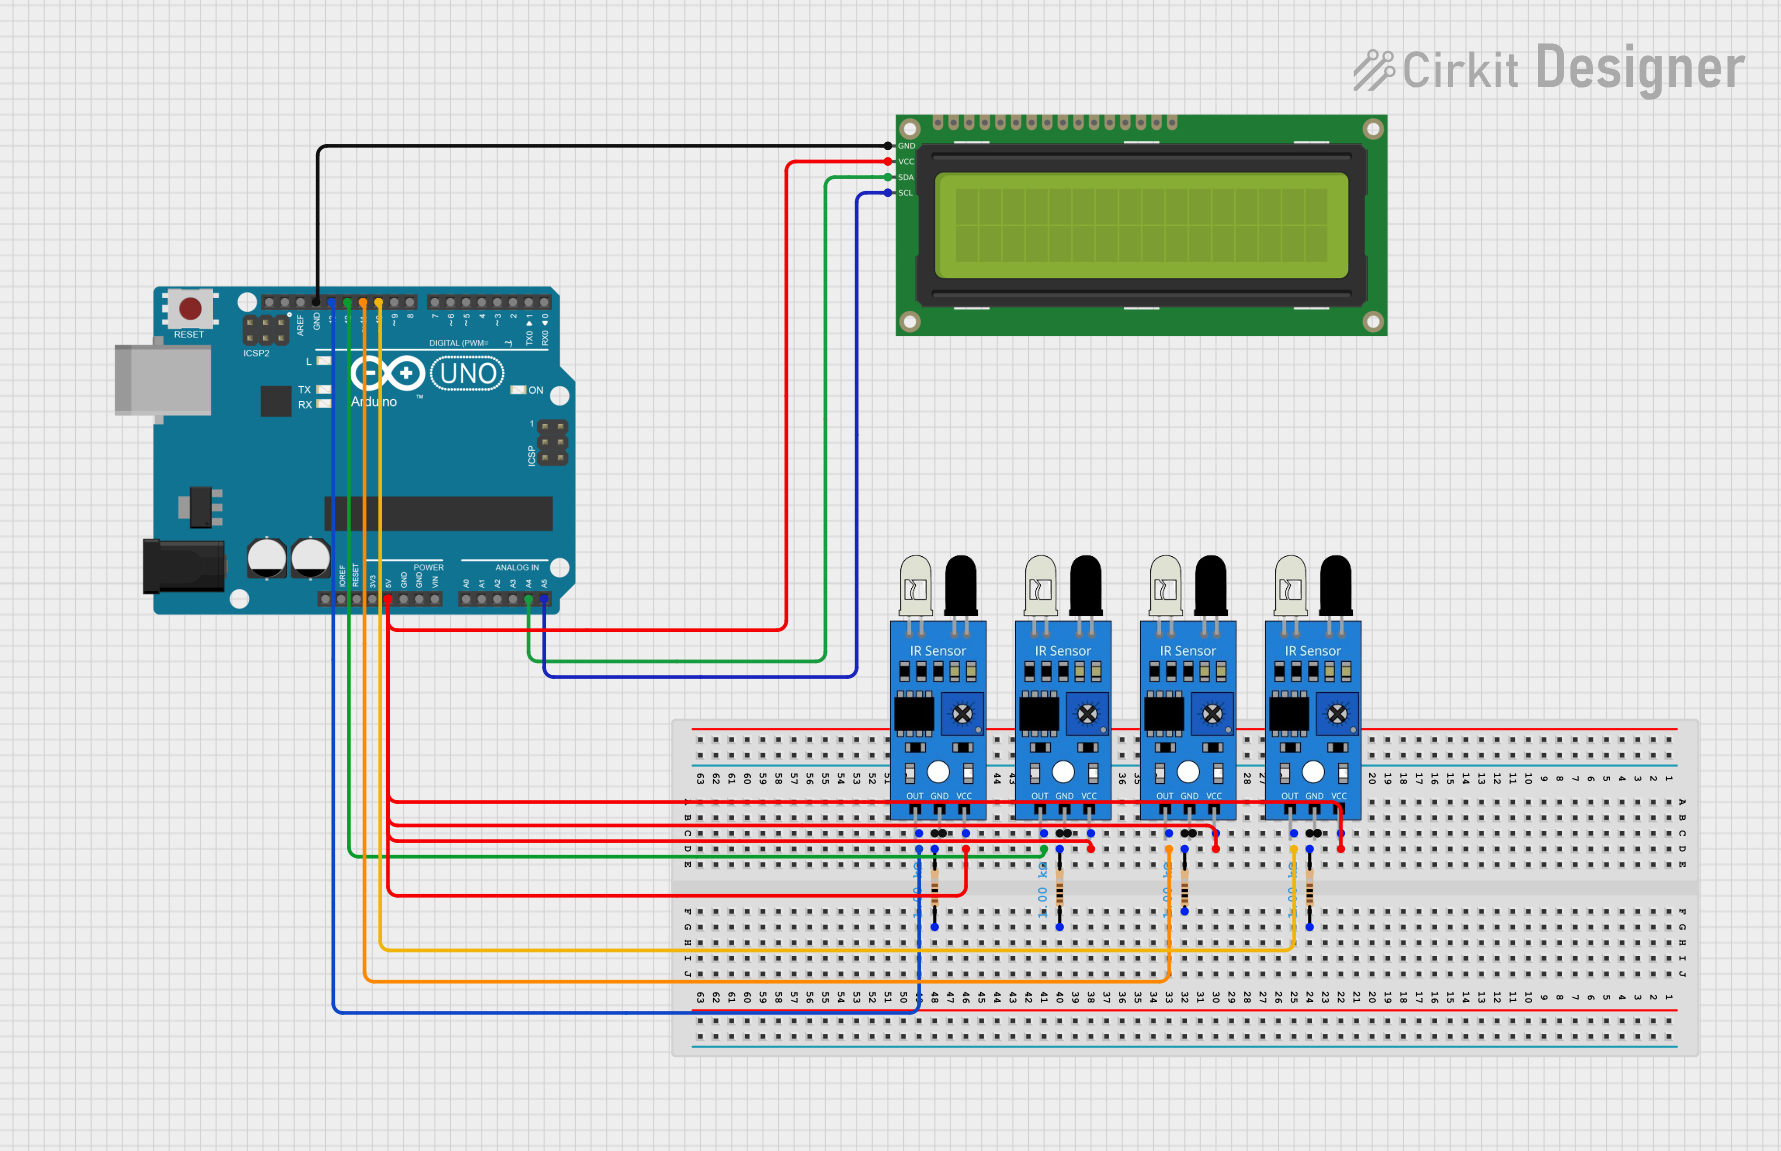
This circuit is a coin counting machine that uses four IR sensors to detect different coin denominations and displays the count on a 16x2 I2C LCD. The Arduino UNO microcontroller reads the sensor inputs and updates the LCD with the current count of 1 peso, 5 peso, 10 peso, and 20 peso coins.
Raspberry Pi 4B-based Payment Kiosk with Coin and Bill Acceptors
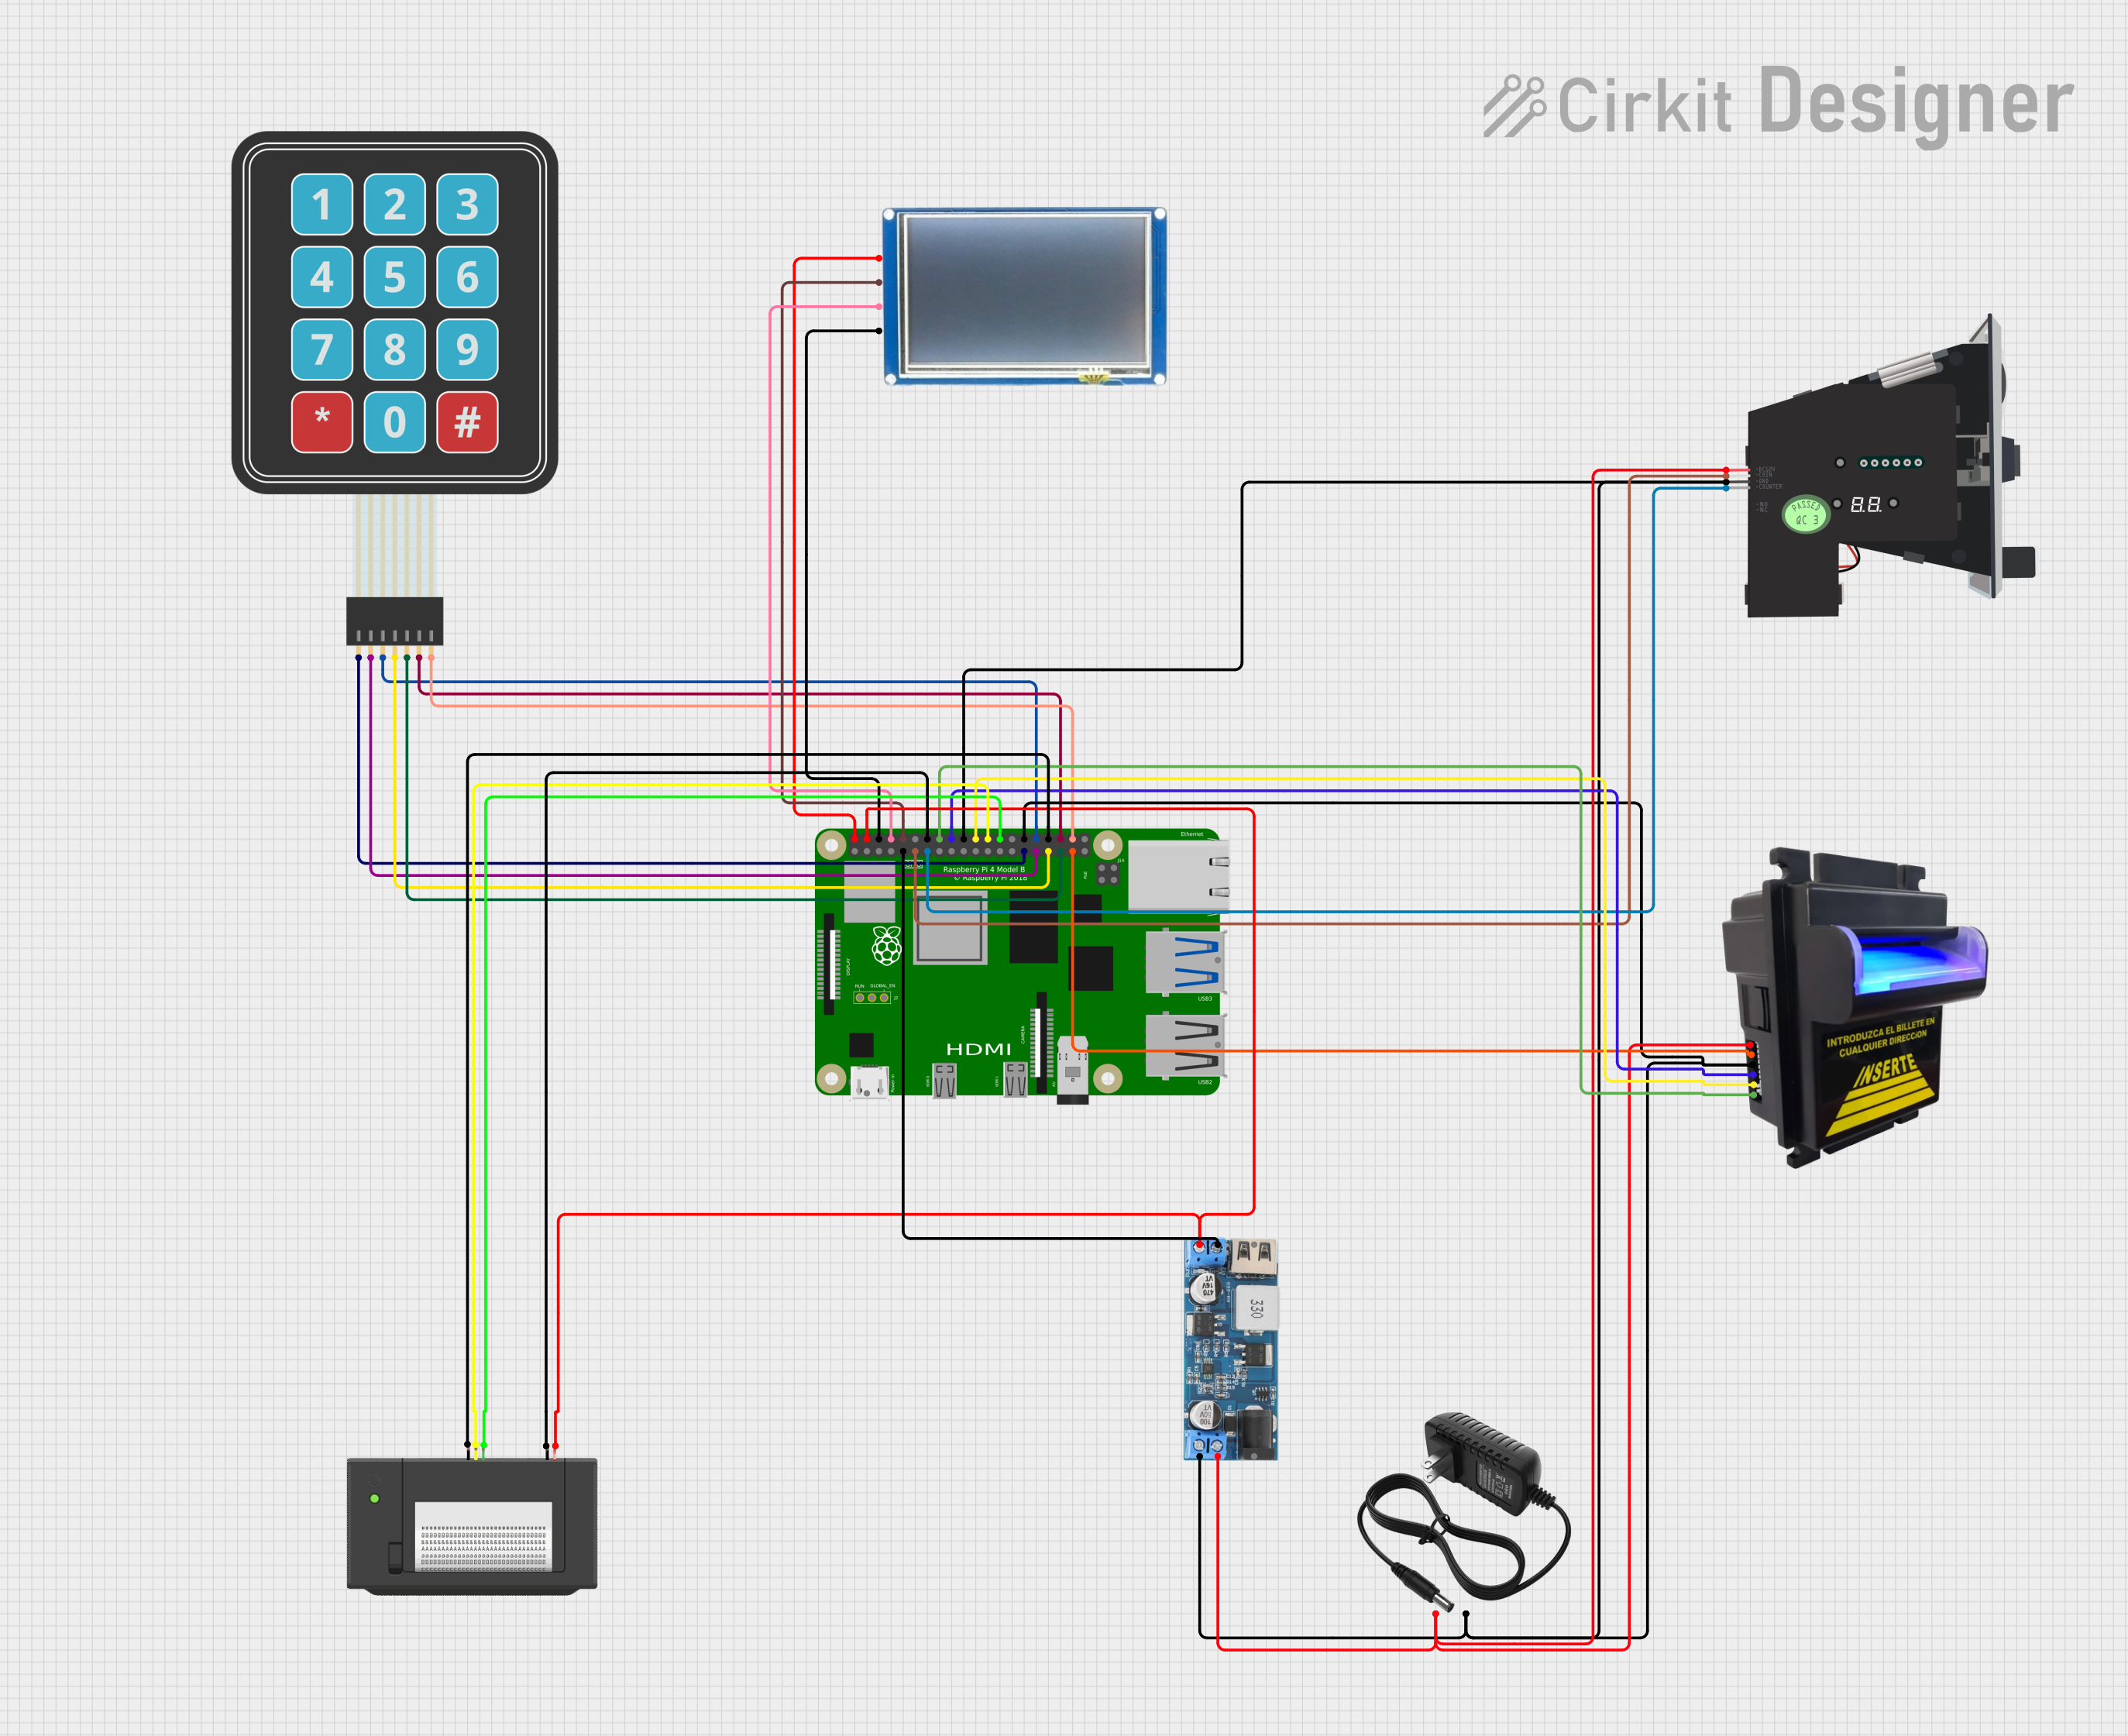
This circuit features a Raspberry Pi 4B as the central controller, interfaced with a variety of peripherals for a payment and display system. It includes a bill acceptor and multi coin acceptor for monetary input, a thermal printer for receipts, and a touch display for user interaction. The circuit also incorporates a 12V to 5V step-down converter to power the 5V components and a membrane matrix keypad for additional input options.
Explore Projects Built with money acceptor
ESP32-Based Coin and Bill Acceptor with TFT Display and Thermal Printer
This circuit is a vending machine control system that integrates an ESP32 microcontroller to manage various peripherals including a multi-coin acceptor, coin hopper, bill dispenser, money acceptor, thermal printer, and a TFT LCD display. The system is powered by a 12V battery and a buck converter to step down the voltage for the ESP32 and other components, enabling the machine to accept and dispense coins and bills, print receipts, and display information on the screen.
ESP32-Based Coin and Bill Acceptor with TFT Display and Thermal Printer
This circuit is a vending machine controller that uses an ESP32 microcontroller to interface with various peripherals including a multi-coin acceptor, coin hopper, bill dispenser, and a thermal printer. The ESP32 also drives a TFT LCD display for user interaction, and the entire system is powered by a 12V battery with a buck converter to step down the voltage for the ESP32 and other components.
Arduino UNO Coin Counting Machine with IR Sensors and 16x2 I2C LCD Display
This circuit is a coin counting machine that uses four IR sensors to detect different coin denominations and displays the count on a 16x2 I2C LCD. The Arduino UNO microcontroller reads the sensor inputs and updates the LCD with the current count of 1 peso, 5 peso, 10 peso, and 20 peso coins.
Raspberry Pi 4B-based Payment Kiosk with Coin and Bill Acceptors
This circuit features a Raspberry Pi 4B as the central controller, interfaced with a variety of peripherals for a payment and display system. It includes a bill acceptor and multi coin acceptor for monetary input, a thermal printer for receipts, and a touch display for user interaction. The circuit also incorporates a 12V to 5V step-down converter to power the 5V components and a membrane matrix keypad for additional input options.
Technical Specifications
Key Technical Details
| Parameter | Value |
|---|---|
| Operating Voltage | 12V DC |
| Current Consumption | 500mA (max) |
| Accepted Currency | Coins and Bills |
| Interface | Serial (RS232) / Pulse Output |
| Validation Speed | < 2 seconds |
| Dimensions | 150mm x 100mm x 50mm |
| Weight | 300g |
Pin Configuration and Descriptions
Serial Interface (RS232)
| Pin Number | Pin Name | Description |
|---|---|---|
| 1 | VCC | Power Supply (12V DC) |
| 2 | GND | Ground |
| 3 | TX | Transmit Data (to host) |
| 4 | RX | Receive Data (from host) |
| 5 | NC | Not Connected |
Pulse Output Interface
| Pin Number | Pin Name | Description |
|---|---|---|
| 1 | VCC | Power Supply (12V DC) |
| 2 | GND | Ground |
| 3 | COIN | Coin Pulse Output |
| 4 | BILL | Bill Pulse Output |
| 5 | INHIBIT | Inhibit Signal (active low) |
Usage Instructions
How to Use the Component in a Circuit
- Power Supply: Connect the VCC pin to a 12V DC power supply and the GND pin to the ground.
- Interface Connection:
- For Serial Interface: Connect the TX pin to the RX pin of the host (e.g., Arduino UNO) and the RX pin to the TX pin of the host.
- For Pulse Output Interface: Connect the COIN and BILL pins to the respective input pins of the host to receive pulse signals.
- Inhibit Signal: If using the inhibit feature, connect the INHIBIT pin to a digital output pin of the host to control the acceptance of currency.
Important Considerations and Best Practices
- Ensure the power supply is stable and within the specified voltage range to avoid damage.
- Use proper grounding techniques to prevent noise and interference.
- Regularly clean the acceptor to maintain accuracy in currency validation.
- Test the system thoroughly to ensure reliable operation in the intended environment.
Example Code for Arduino UNO
Below is an example code to interface the Money Acceptor with an Arduino UNO using the pulse output interface.
// Define pin connections
const int coinPin = 2;  // Coin pulse output connected to digital pin 2
const int billPin = 3;  // Bill pulse output connected to digital pin 3
const int inhibitPin = 4;  // Inhibit signal connected to digital pin 4

// Variables to store pulse counts
volatile int coinCount = 0;
volatile int billCount = 0;

// Interrupt service routine for coin pulse
void coinISR() {
  coinCount++;
}

// Interrupt service routine for bill pulse
void billISR() {
  billCount++;
}

void setup() {
  // Initialize serial communication
  Serial.begin(9600);

  // Set pin modes
  pinMode(coinPin, INPUT);
  pinMode(billPin, INPUT);
  pinMode(inhibitPin, OUTPUT);

  // Attach interrupts to pulse pins
  attachInterrupt(digitalPinToInterrupt(coinPin), coinISR, RISING);
  attachInterrupt(digitalPinToInterrupt(billPin), billISR, RISING);

  // Enable currency acceptance
  digitalWrite(inhibitPin, HIGH);
}

void loop() {
  // Print pulse counts to serial monitor
  Serial.print("Coins: ");
  Serial.println(coinCount);
  Serial.print("Bills: ");
  Serial.println(billCount);

  // Add a delay to avoid flooding the serial monitor
  delay(1000);
}
Troubleshooting and FAQs
Common Issues Users Might Face
Currency Not Accepted:
- Ensure the power supply is stable and within the specified range.
- Check the inhibit signal; it should be inactive (high) to accept currency.
- Verify that the currency is clean and not damaged.
Incorrect Pulse Count:
- Ensure proper grounding to avoid noise and interference.
- Check the connections and ensure they are secure.
- Verify that the interrupt service routines are correctly implemented.
Communication Issues (Serial Interface):
- Ensure the TX and RX pins are correctly connected.
- Verify the baud rate settings match between the Money Acceptor and the host.
Solutions and Tips for Troubleshooting
- Power Supply Issues: Use a regulated power supply and check for voltage drops.
- Connection Problems: Double-check all connections and use secure, soldered joints if possible.
- Software Debugging: Use serial print statements to debug and verify the flow of the program.
By following this documentation, users should be able to effectively integrate and troubleshoot the Money Acceptor in their automated systems.