How to Use 801s vibration : Examples, Pinouts, and Specs

Introduction
The 801s Vibration Sensor, manufactured by Burhan Butt, is a compact and reliable vibration transducer designed to detect and measure vibrations in a wide range of applications. This sensor is commonly used in industrial environments for monitoring the health of machinery and equipment, enabling predictive maintenance and reducing downtime. Its robust design and high sensitivity make it suitable for detecting even subtle vibrations.
Explore Projects Built with 801s vibration

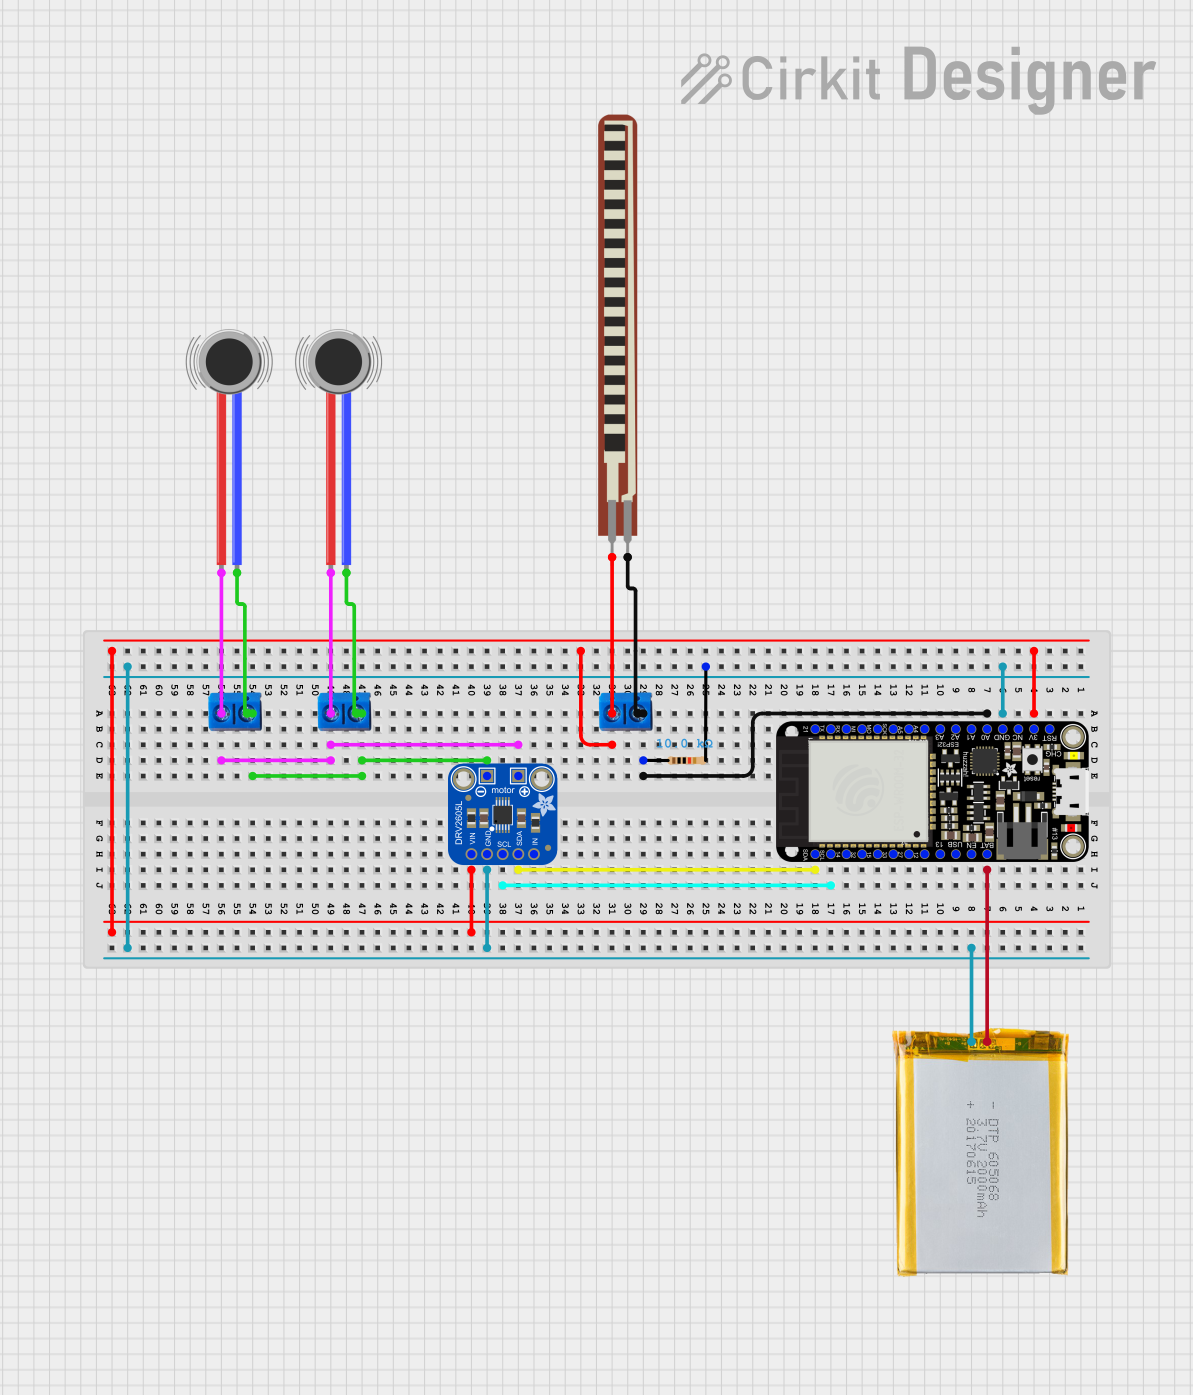

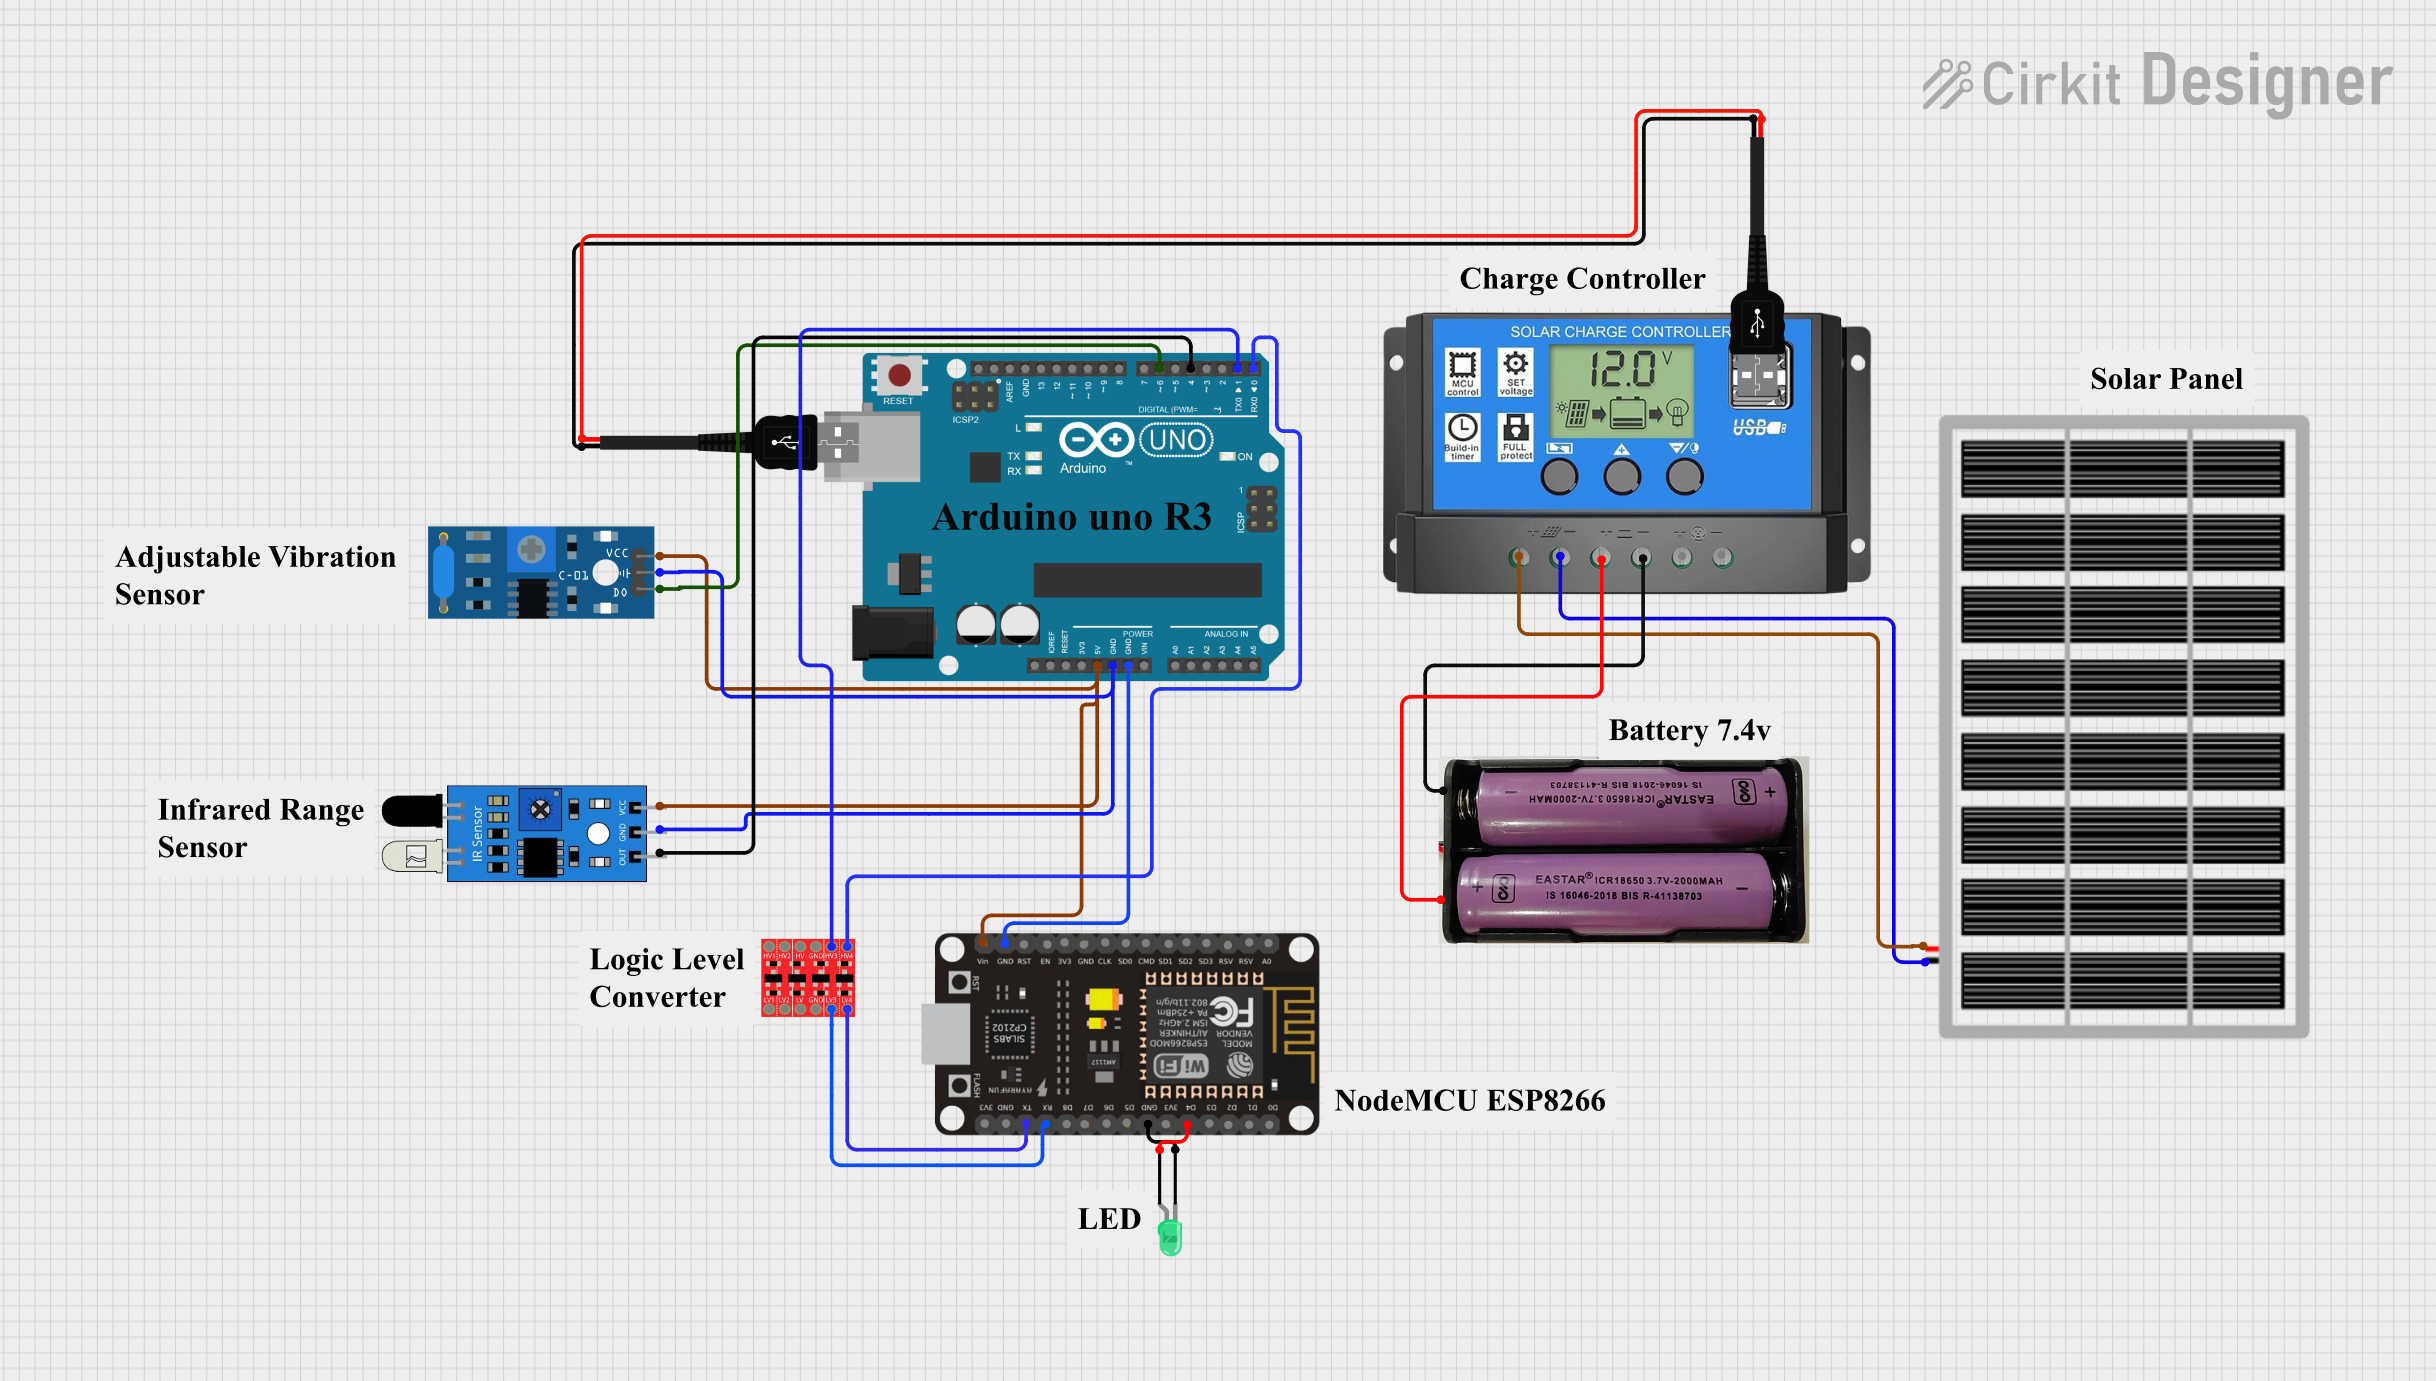
Explore Projects Built with 801s vibration
Common Applications and Use Cases
- Industrial Machinery Monitoring: Detect abnormal vibrations in motors, pumps, and other equipment.
- Predictive Maintenance: Identify potential failures before they occur.
- Security Systems: Detect vibrations caused by tampering or unauthorized access.
- Consumer Electronics: Used in devices requiring vibration feedback or detection.
- Robotics: Monitor movement or detect collisions.
Technical Specifications
The following table outlines the key technical details of the 801s Vibration Sensor:
| Parameter | Specification |
|---|---|
| Manufacturer | Burhan Butt |
| Part ID | 801s Vibration |
| Operating Voltage | 3.3V to 5V DC |
| Output Signal | Digital (High/Low) |
| Sensitivity | High |
| Operating Temperature | -20°C to 70°C |
| Dimensions | 10mm x 10mm x 35mm |
| Mounting Type | Through-hole |
Pin Configuration and Descriptions
The 801s Vibration Sensor has three pins, as described in the table below:
| Pin | Name | Description |
|---|---|---|
| 1 | VCC | Power supply pin (3.3V to 5V DC) |
| 2 | GND | Ground connection |
| 3 | OUT | Digital output pin (High when vibration is detected) |
Usage Instructions
How to Use the 801s Vibration Sensor in a Circuit
- Power the Sensor: Connect the VCC pin to a 3.3V or 5V DC power source and the GND pin to the ground of your circuit.
- Connect the Output: Attach the OUT pin to a digital input pin of your microcontroller or monitoring system.
- Mount the Sensor: Secure the sensor to the surface or equipment you want to monitor. Ensure it is firmly attached to avoid false readings.
- Read the Output: Monitor the OUT pin. It will output a HIGH signal when vibration is detected and LOW when no vibration is present.
Important Considerations and Best Practices
- Power Supply: Ensure a stable power supply to avoid erratic behavior.
- Mounting: Properly mount the sensor to the surface for accurate vibration detection.
- Debouncing: Use software or hardware debouncing to filter out noise or false triggers caused by minor vibrations.
- Environmental Factors: Avoid exposing the sensor to extreme temperatures or moisture, as this may affect its performance.
Example: Connecting the 801s Vibration Sensor to an Arduino UNO
Below is an example of how to connect and use the 801s Vibration Sensor with an Arduino UNO:
Circuit Connections
- VCC: Connect to the 5V pin on the Arduino.
- GND: Connect to the GND pin on the Arduino.
- OUT: Connect to digital pin 2 on the Arduino.
Arduino Code
// 801s Vibration Sensor Example Code
// This code reads the output of the 801s vibration sensor and prints the status
// to the Serial Monitor. The sensor outputs HIGH when vibration is detected.

const int sensorPin = 2; // Pin connected to the OUT pin of the sensor
int sensorState = 0;     // Variable to store the sensor state

void setup() {
  pinMode(sensorPin, INPUT); // Set the sensor pin as input
  Serial.begin(9600);        // Initialize serial communication at 9600 baud
}

void loop() {
  sensorState = digitalRead(sensorPin); // Read the sensor output

  if (sensorState == HIGH) {
    // If vibration is detected, print a message
    Serial.println("Vibration detected!");
  } else {
    // If no vibration is detected, print a different message
    Serial.println("No vibration.");
  }

  delay(500); // Wait for 500ms before reading again
}
Troubleshooting and FAQs
Common Issues and Solutions
No Output Signal
- Cause: Loose or incorrect wiring.
- Solution: Double-check all connections, ensuring the VCC, GND, and OUT pins are properly connected.
False Triggers
- Cause: Environmental noise or improper mounting.
- Solution: Securely mount the sensor and use software debouncing to filter noise.
Sensor Not Responding
- Cause: Insufficient power supply or damaged sensor.
- Solution: Verify the power supply voltage and replace the sensor if necessary.
Inconsistent Readings
- Cause: Fluctuating power supply or external interference.
- Solution: Use a regulated power supply and minimize interference sources.
FAQs
Q1: Can the 801s Vibration Sensor detect the intensity of vibrations?
A1: No, the 801s Vibration Sensor provides a digital output (HIGH/LOW) and does not measure the intensity of vibrations.
Q2: Is the sensor suitable for outdoor use?
A2: The sensor is not waterproof or weatherproof. Use it in a controlled environment or protect it with a suitable enclosure.
Q3: Can I use the sensor with a 3.3V microcontroller?
A3: Yes, the sensor operates within a voltage range of 3.3V to 5V, making it compatible with 3.3V microcontrollers.
Q4: How do I reduce false triggers in a noisy environment?
A4: Use software debouncing techniques and ensure the sensor is securely mounted to minimize false triggers.