Cirkit Designer Logo
Cirkit Designer
Your all-in-one circuit design IDE
Home / 
Component Documentation

How to Use Analog Joystick (Wokwi Compatible): Examples, Pinouts, and Specs

Image of Analog Joystick (Wokwi Compatible)
Cirkit Designer LogoDesign with Analog Joystick (Wokwi Compatible) in Cirkit Designer

Introduction

An analog joystick is a manual control input device commonly used in various electronic projects and applications, such as gaming controllers, robotics, and user interfaces. It provides two-dimensional input by translating the position of the joystick handle into analog signals. The Analog Joystick (Wokwi Compatible) is designed to interface easily with microcontrollers such as Arduino, making it an excellent choice for hobbyists and educators working on interactive projects.

Explore Projects Built with Analog Joystick (Wokwi Compatible)

Use Cirkit Designer to design, explore, and prototype these projects online. Some projects support real-time simulation. Click "Open Project" to start designing instantly!
ESP32-Based Dual Joystick Controller with Wi-Fi Connectivity
Image of new_project: A project utilizing Analog Joystick (Wokwi Compatible) in a practical application
This circuit features an ESP32 microcontroller interfaced with two analog joysticks. The joysticks provide analog input to the ESP32, allowing it to read horizontal and vertical positions as well as the select button state from each joystick.
Cirkit Designer LogoOpen Project in Cirkit Designer
Arduino UNO-Based Analog Joystick Interface
Image of Joystick: A project utilizing Analog Joystick (Wokwi Compatible) in a practical application
This circuit consists of an Arduino UNO microcontroller connected to an analog joystick. The joystick's vertical and horizontal movements are read by the Arduino's analog pins A0 and A1, respectively. The embedded code on the Arduino reads these analog values and outputs the joystick's position to the serial monitor.
Cirkit Designer LogoOpen Project in Cirkit Designer
Arduino UNO Based Analog Joystick Interface
Image of PILAPIL_JOYSTICK: A project utilizing Analog Joystick (Wokwi Compatible) in a practical application
This circuit consists of an Arduino UNO microcontroller connected to an analog joystick. The joystick's vertical and horizontal movements are read by the Arduino through analog pins A0 and A1, respectively. The microcontroller is programmed to read these analog values and output the joystick's position to the serial monitor.
Cirkit Designer LogoOpen Project in Cirkit Designer
Arduino Nano Joystick-Controlled Bluetooth Module with Battery Power
Image of padelpro transmitter: A project utilizing Analog Joystick (Wokwi Compatible) in a practical application
This circuit is a wireless joystick controller that uses an Arduino Nano to read analog signals from a KY-023 Dual Axis Joystick Module and transmits the data via an HC-05 Bluetooth Module. The system is powered by a 18650 Li-Ion battery with a rocker switch for power control.
Cirkit Designer LogoOpen Project in Cirkit Designer

Explore Projects Built with Analog Joystick (Wokwi Compatible)

Use Cirkit Designer to design, explore, and prototype these projects online. Some projects support real-time simulation. Click "Open Project" to start designing instantly!
Image of new_project: A project utilizing Analog Joystick (Wokwi Compatible) in a practical application
ESP32-Based Dual Joystick Controller with Wi-Fi Connectivity
This circuit features an ESP32 microcontroller interfaced with two analog joysticks. The joysticks provide analog input to the ESP32, allowing it to read horizontal and vertical positions as well as the select button state from each joystick.
Cirkit Designer LogoOpen Project in Cirkit Designer
Image of Joystick: A project utilizing Analog Joystick (Wokwi Compatible) in a practical application
Arduino UNO-Based Analog Joystick Interface
This circuit consists of an Arduino UNO microcontroller connected to an analog joystick. The joystick's vertical and horizontal movements are read by the Arduino's analog pins A0 and A1, respectively. The embedded code on the Arduino reads these analog values and outputs the joystick's position to the serial monitor.
Cirkit Designer LogoOpen Project in Cirkit Designer
Image of PILAPIL_JOYSTICK: A project utilizing Analog Joystick (Wokwi Compatible) in a practical application
Arduino UNO Based Analog Joystick Interface
This circuit consists of an Arduino UNO microcontroller connected to an analog joystick. The joystick's vertical and horizontal movements are read by the Arduino through analog pins A0 and A1, respectively. The microcontroller is programmed to read these analog values and output the joystick's position to the serial monitor.
Cirkit Designer LogoOpen Project in Cirkit Designer
Image of padelpro transmitter: A project utilizing Analog Joystick (Wokwi Compatible) in a practical application
Arduino Nano Joystick-Controlled Bluetooth Module with Battery Power
This circuit is a wireless joystick controller that uses an Arduino Nano to read analog signals from a KY-023 Dual Axis Joystick Module and transmits the data via an HC-05 Bluetooth Module. The system is powered by a 18650 Li-Ion battery with a rocker switch for power control.
Cirkit Designer LogoOpen Project in Cirkit Designer

Common Applications and Use Cases

  • Gaming controllers
  • Robotic control systems
  • Virtual reality navigation
  • Educational projects and learning platforms
  • User interface controls for devices and software

Technical Specifications

Key Technical Details

  • Voltage: 3.3V to 5V
  • Current: 10 mA (typical)
  • X-Axis Output: Analog, proportional to joystick horizontal position
  • Y-Axis Output: Analog, proportional to joystick vertical position
  • Button Output: Digital, active low

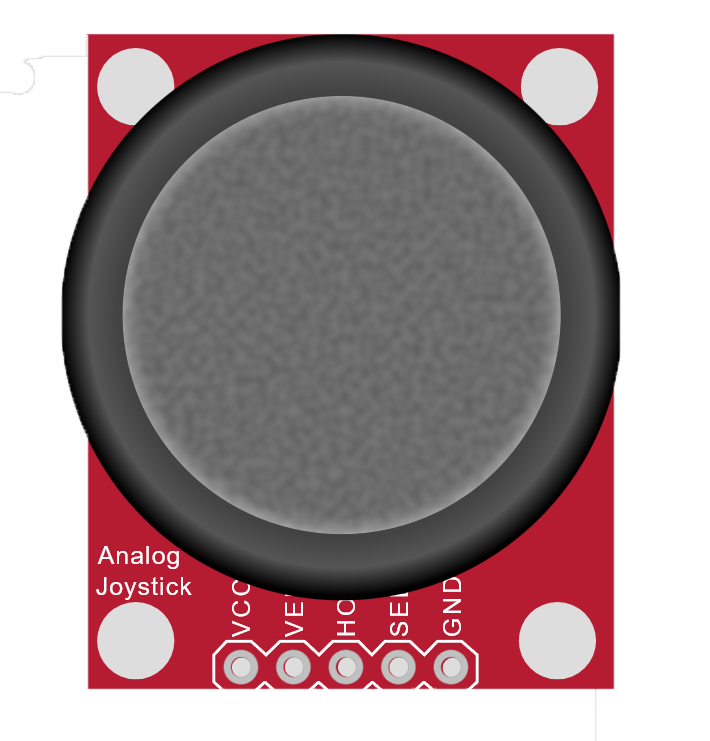
Pin Configuration and Descriptions

Pin Name Description
GND Ground
+5V Supply Voltage (3.3V to 5V)
VRx Analog output for X-axis
VRy Analog output for Y-axis
SW Digital output for joystick press button

Usage Instructions

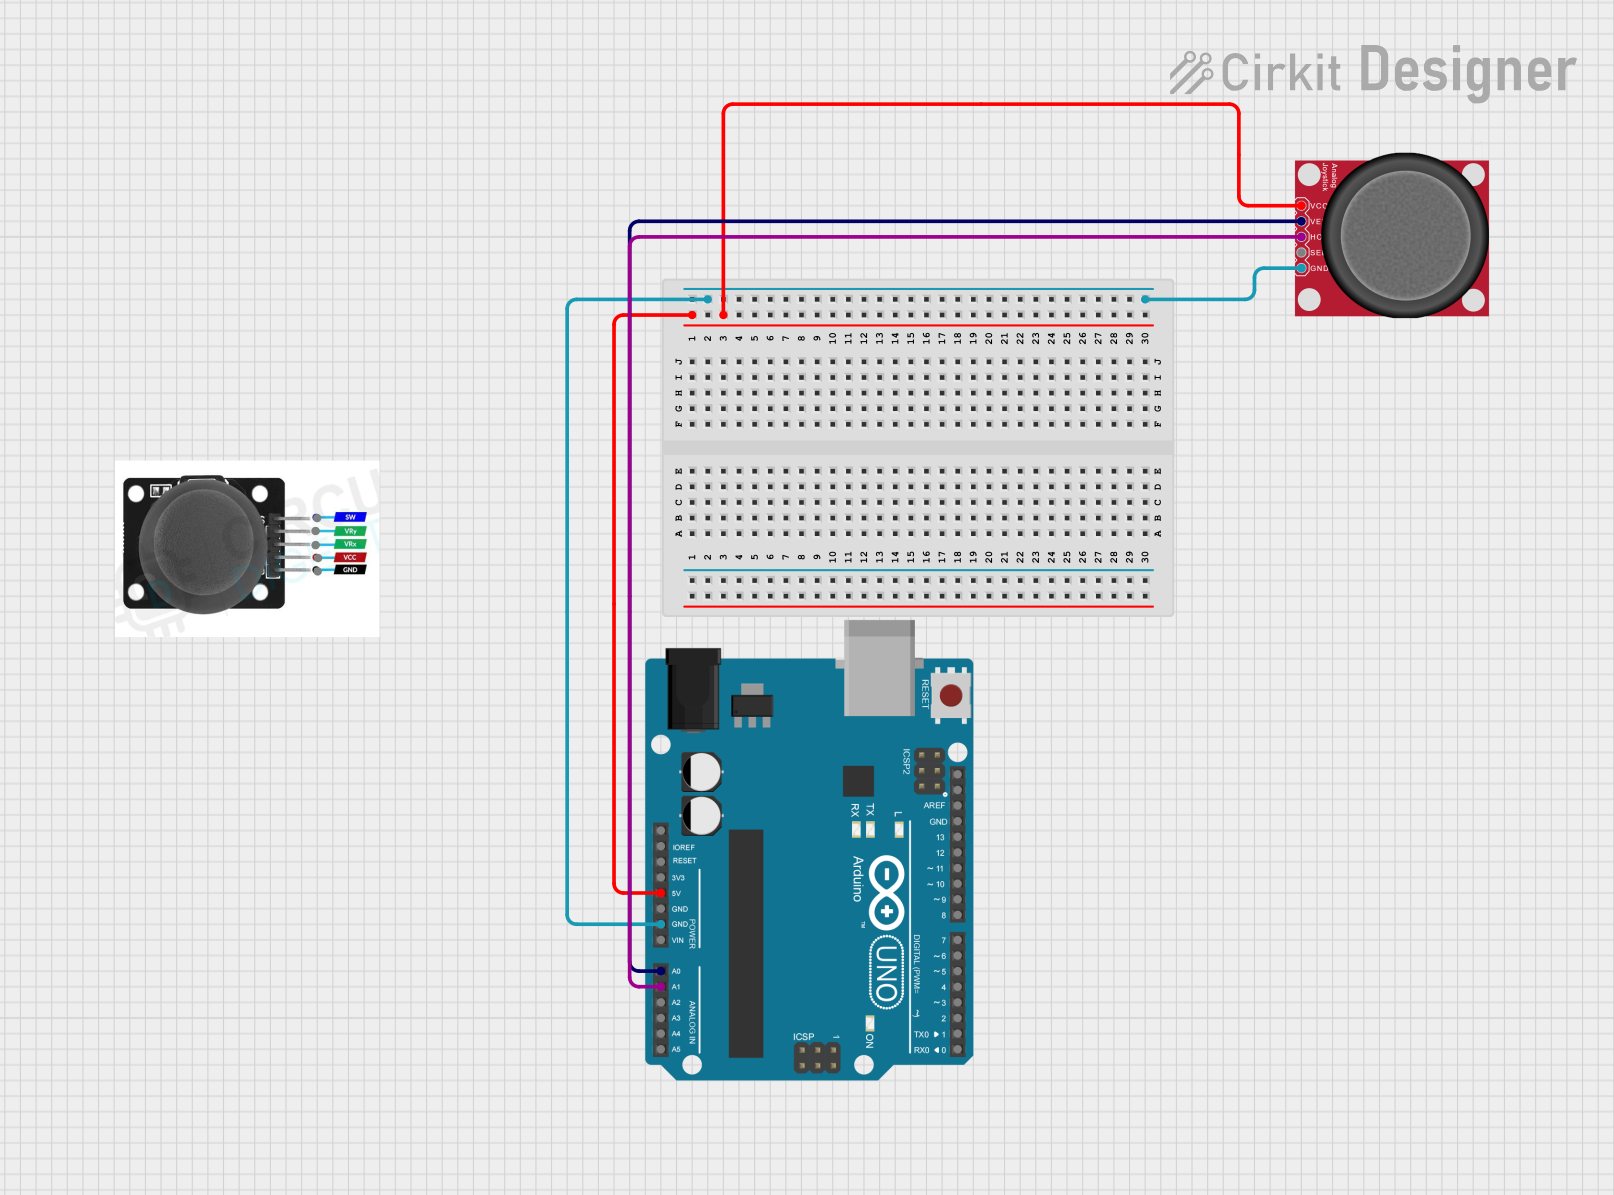
How to Use the Component in a Circuit

  1. Connect the GND pin to the ground of the power supply.
  2. Connect the +5V pin to the positive terminal of the power supply (3.3V to 5V).
  3. Connect the VRx pin to an analog input pin on the microcontroller to read the X-axis position.
  4. Connect the VRy pin to another analog input pin on the microcontroller to read the Y-axis position.
  5. Connect the SW pin to a digital input pin on the microcontroller to read the button press state.

Important Considerations and Best Practices

  • Ensure that the power supply voltage does not exceed the maximum rating of 5V.
  • Use pull-up resistors on the SW pin if the microcontroller does not have internal pull-ups.
  • Calibrate the joystick by reading the center values of VRx and VRy when the joystick is at rest.
  • Implement software debouncing for the button press to avoid false triggering due to mechanical bounce.

Example Code for Arduino UNO

// Analog Joystick (Wokwi Compatible) Example Code for Arduino UNO

const int xAxisPin = A0; // Analog input pin for X-axis
const int yAxisPin = A1; // Analog input pin for Y-axis
const int buttonPin = 2; // Digital input pin for button

void setup() {
  pinMode(buttonPin, INPUT_PULLUP); // Enable internal pull-up resistor
  Serial.begin(9600);               // Start serial communication
}

void loop() {
  int xPosition = analogRead(xAxisPin); // Read the X-axis analog value
  int yPosition = analogRead(yAxisPin); // Read the Y-axis analog value
  bool buttonState = !digitalRead(buttonPin); // Read the button state (active low)

  // Print the joystick values to the serial monitor
  Serial.print("X: ");
  Serial.print(xPosition);
  Serial.print(" | Y: ");
  Serial.print(yPosition);
  Serial.print(" | Button: ");
  Serial.println(buttonState ? "Pressed" : "Released");

  delay(100); // Delay for stability and readability
}

Troubleshooting and FAQs

Common Issues Users Might Face

  • Joystick not responding: Ensure all connections are secure and the power supply is within the specified voltage range.
  • Inaccurate readings: Calibrate the joystick's center position and check for any drift in the analog signals.
  • Button not registering presses: Verify the button is connected correctly and check for a faulty button or poor connection.

Solutions and Tips for Troubleshooting

  • Double-check wiring against the pin configuration table.
  • Use the analogReference() function in Arduino if operating at voltages other than 5V to get accurate readings.
  • Implement a software debounce routine to handle button press noise.

FAQs

Q: Can I use this joystick with a 3.3V system? A: Yes, the joystick is compatible with 3.3V systems. Adjust the analogReference() if necessary.

Q: How can I increase the precision of the joystick readings? A: Use the full range of the analog input and consider averaging multiple readings to reduce noise.

Q: Is it possible to use the joystick without the button feature? A: Yes, you can simply not connect the SW pin if the button feature is not required for your application.