How to Use CJMCU-GUVA-S12SD Ultraviolet Sensor: Examples, Pinouts, and Specs
Introduction
The CJMCU-GUVA-S12SD is a compact ultraviolet (UV) sensor designed to detect UV light levels and provide an analog output proportional to the intensity of UV radiation. This sensor is highly sensitive to UV-A and UV-B wavelengths, making it ideal for applications requiring accurate UV monitoring. Its small size and low power consumption make it suitable for portable devices and embedded systems.
Explore Projects Built with CJMCU-GUVA-S12SD Ultraviolet Sensor
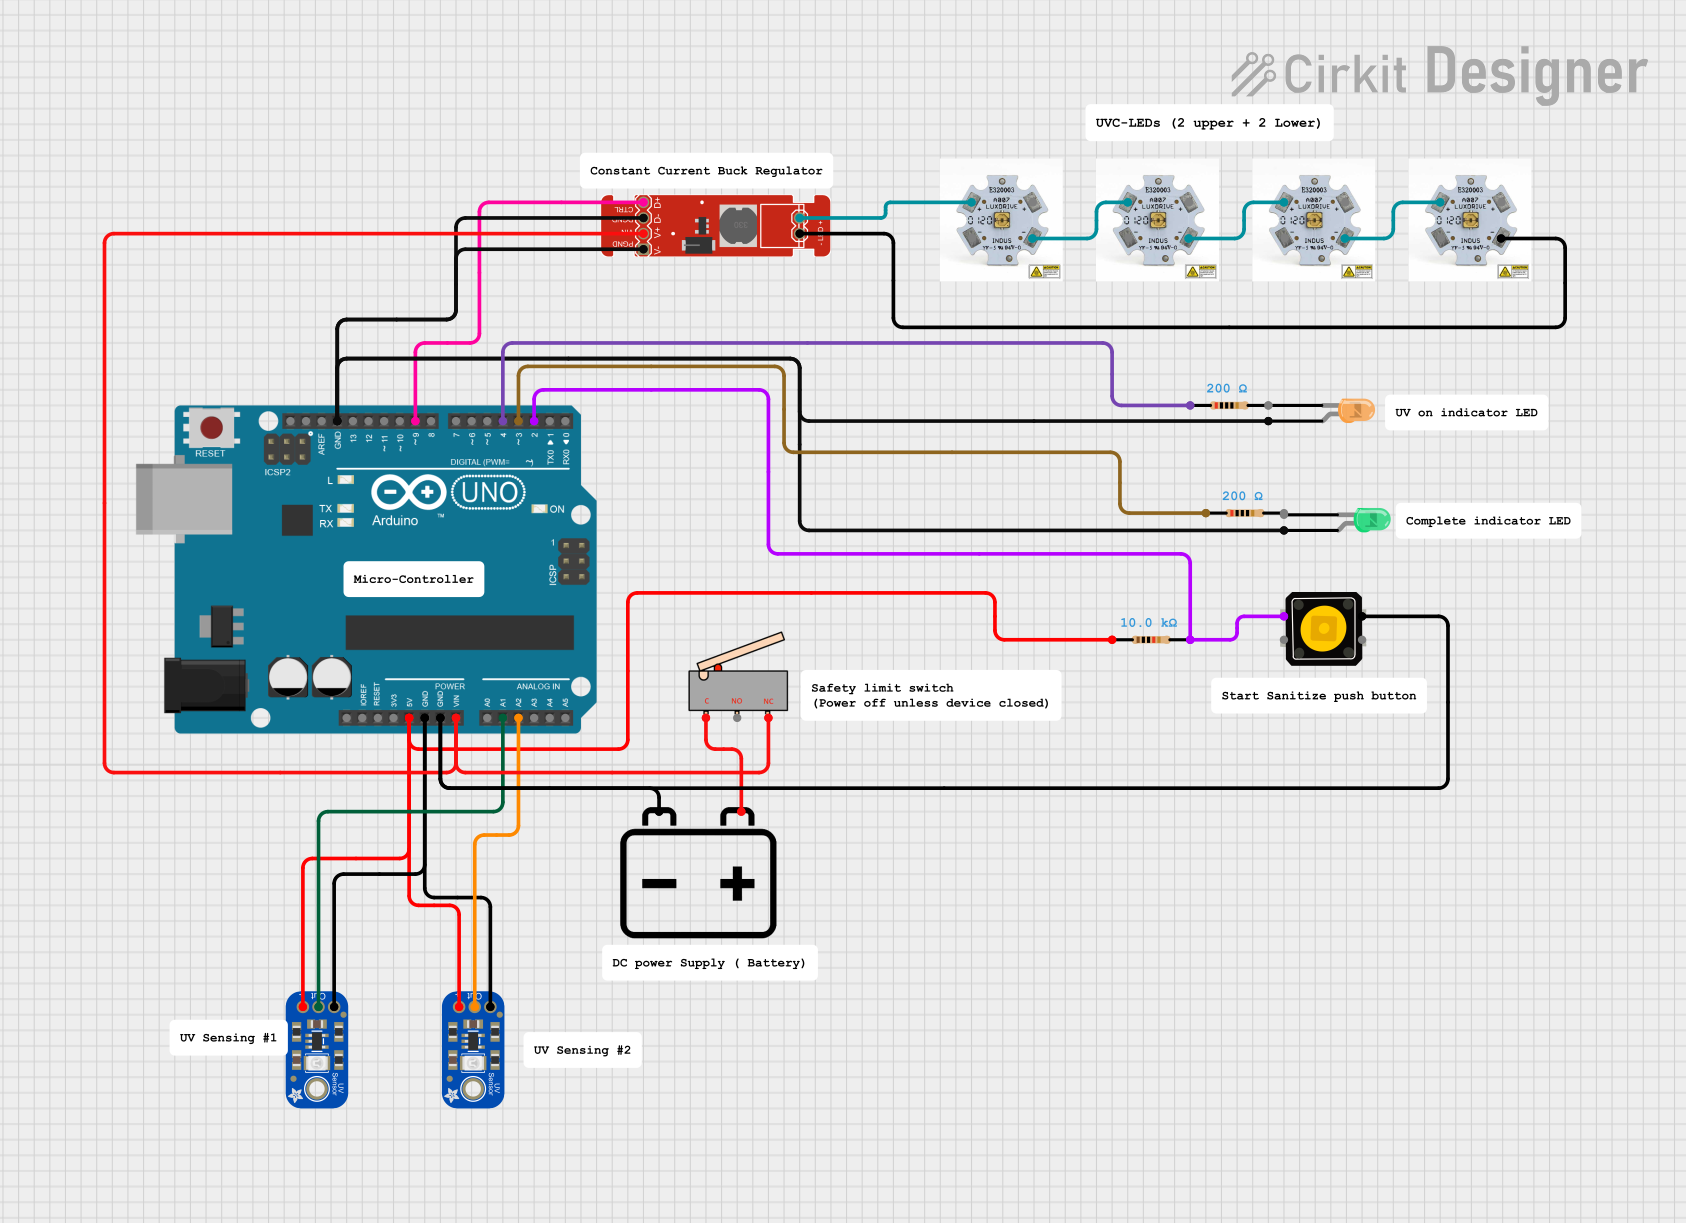

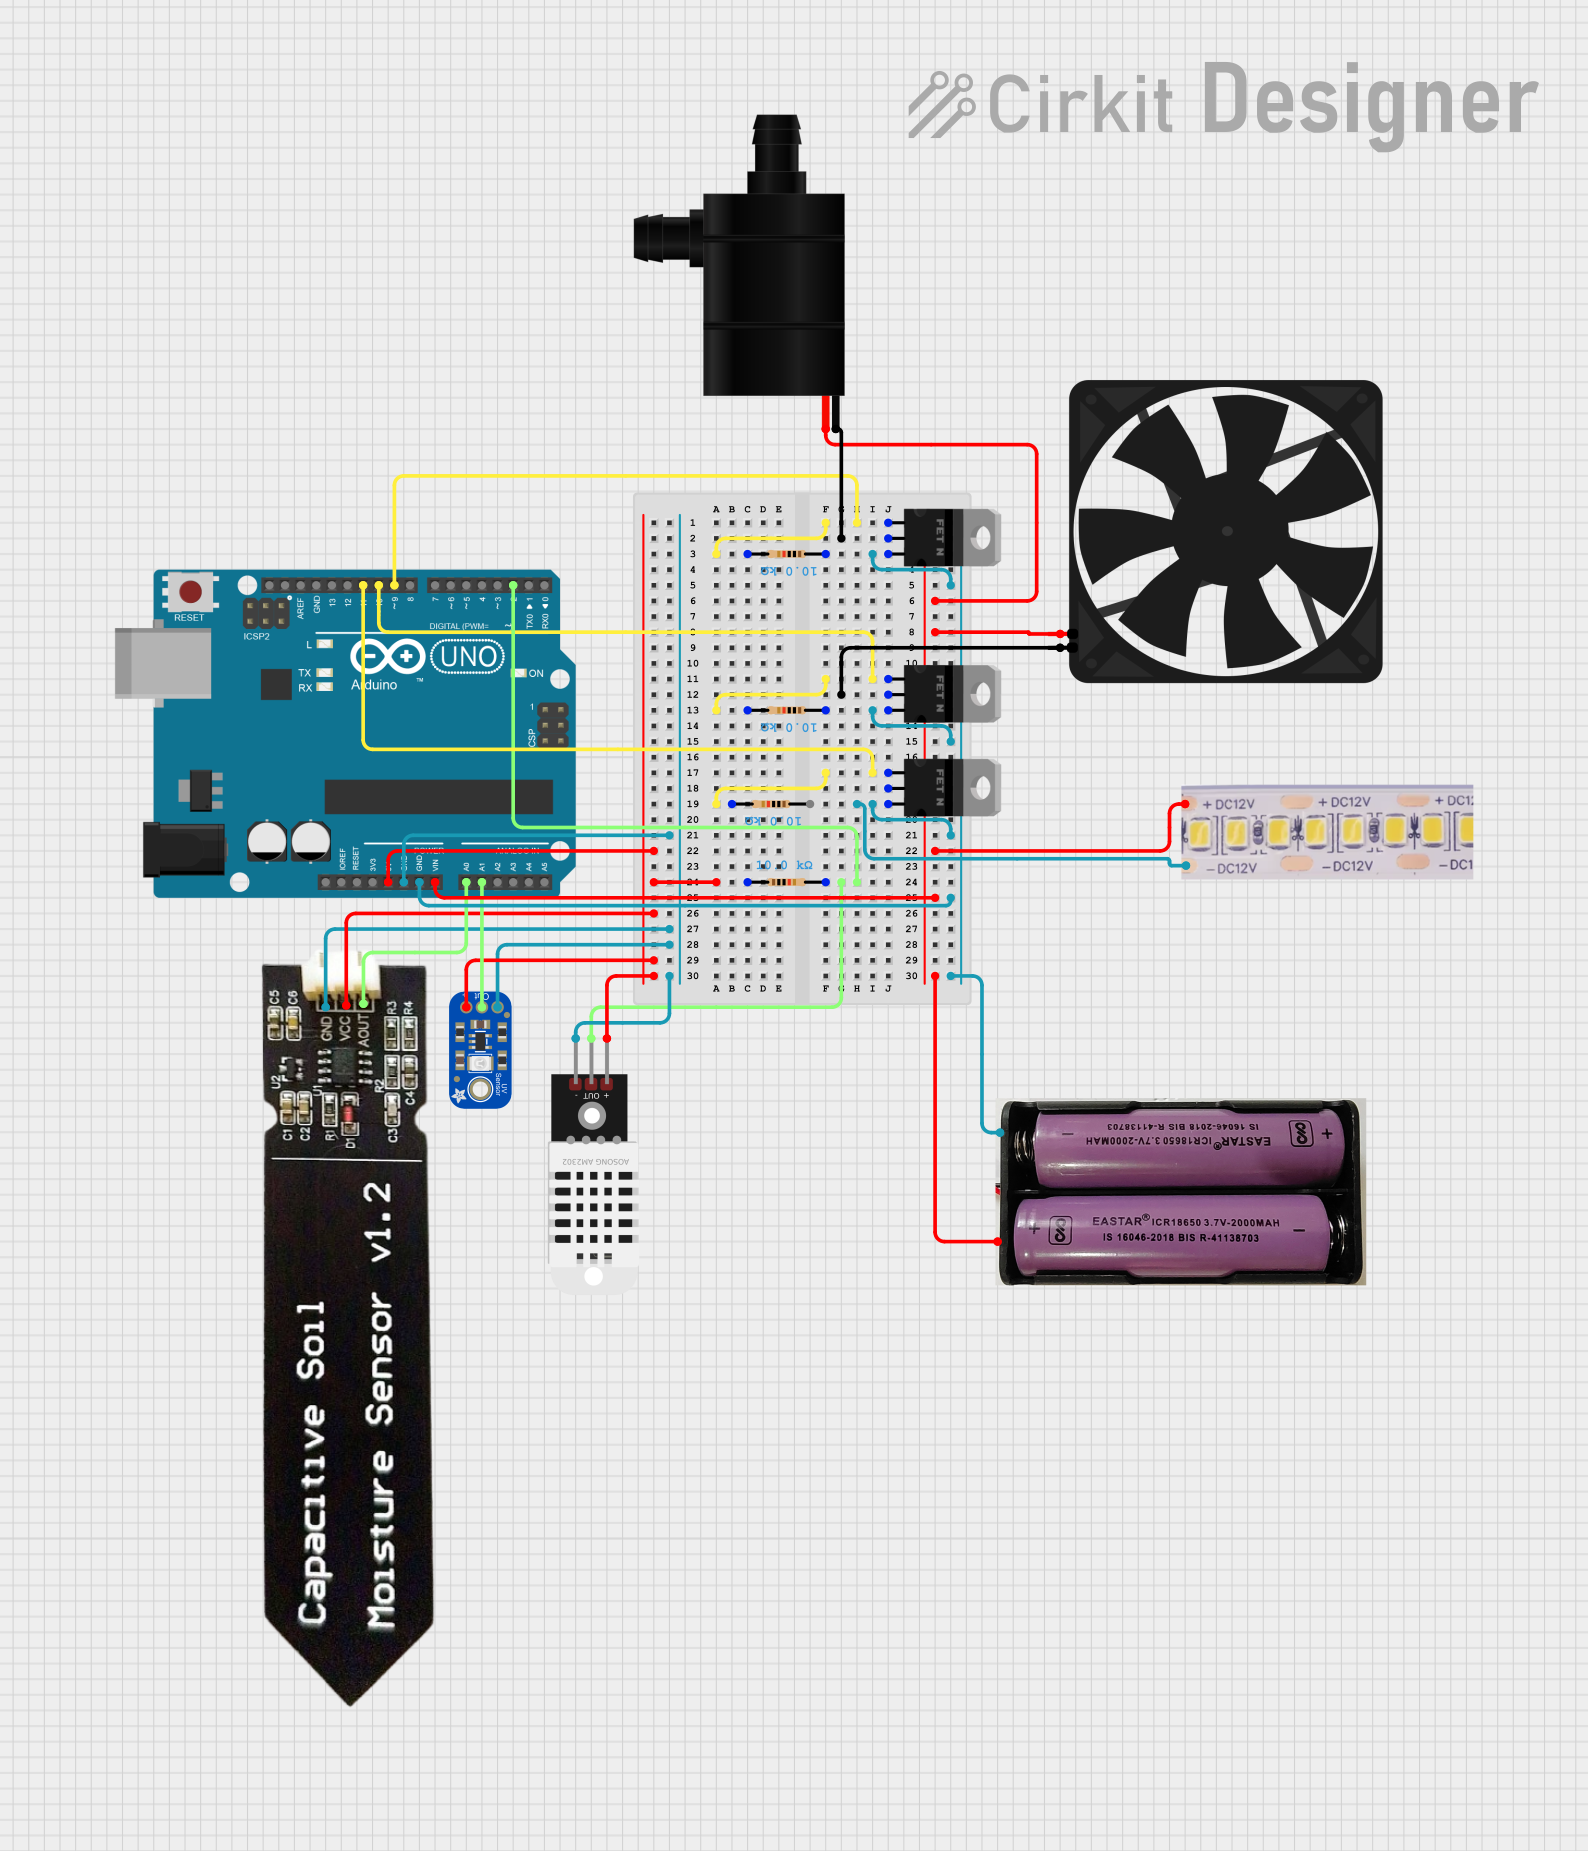

Explore Projects Built with CJMCU-GUVA-S12SD Ultraviolet Sensor
Common Applications
- UV index monitoring for weather stations
- Environmental sensing and research
- Wearable devices for UV exposure tracking
- Safety systems to prevent overexposure to UV radiation
- Industrial UV light monitoring
Technical Specifications
The CJMCU-GUVA-S12SD sensor is built for precision and ease of integration. Below are its key technical details:
| Parameter | Value |
|---|---|
| Operating Voltage | 3.3V to 5.0V |
| Output Type | Analog voltage |
| UV Detection Range | 240 nm to 370 nm (UV-A and UV-B) |
| Operating Current | 0.06 mA (typical) |
| Output Voltage Range | 0V to Vcc |
| Operating Temperature | -30°C to +85°C |
| Dimensions | 15mm x 15mm |
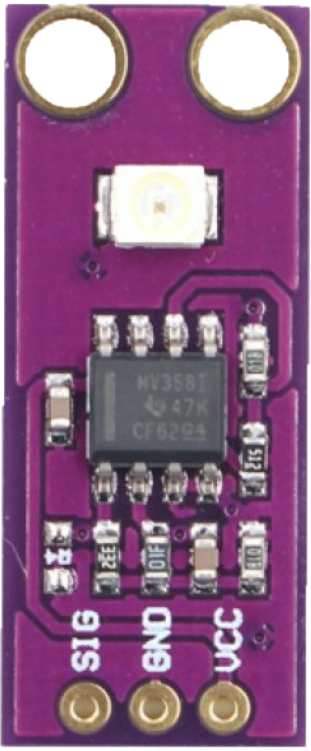
Pin Configuration
The CJMCU-GUVA-S12SD has a simple 4-pin interface for easy integration into circuits. The pinout is as follows:
| Pin | Name | Description |
|---|---|---|
| 1 | VCC | Power supply input (3.3V to 5.0V) |
| 2 | GND | Ground connection |
| 3 | OUT | Analog output voltage proportional to UV intensity |
| 4 | NC | Not connected (leave unconnected) |
Usage Instructions
How to Use the CJMCU-GUVA-S12SD in a Circuit
- Power the Sensor: Connect the VCC pin to a 3.3V or 5.0V power source and the GND pin to the ground of your circuit.
- Read the Output: Connect the OUT pin to an analog input pin of a microcontroller (e.g., Arduino) or an analog-to-digital converter (ADC) to measure the output voltage.
- Interpret the Output: The output voltage is proportional to the UV intensity. Higher UV levels result in higher output voltages.
Important Considerations
- Power Supply: Ensure a stable power supply within the specified voltage range to avoid inaccurate readings or damage to the sensor.
- Placement: Place the sensor in a location with direct exposure to UV light for accurate measurements. Avoid obstructions or shading.
- Calibration: For precise applications, calibrate the sensor output against a known UV source or reference device.
- Protection: Avoid exposing the sensor to extreme environmental conditions (e.g., high humidity or corrosive environments) to maintain its longevity.
Example: Connecting to an Arduino UNO
Below is an example of how to connect and read data from the CJMCU-GUVA-S12SD using an Arduino UNO:
Circuit Diagram
- Connect the VCC pin of the sensor to the 5V pin on the Arduino.
- Connect the GND pin of the sensor to the GND pin on the Arduino.
- Connect the OUT pin of the sensor to the A0 analog input pin on the Arduino.
Arduino Code
// CJMCU-GUVA-S12SD UV Sensor Example Code
// This code reads the analog output from the sensor and calculates the UV intensity.

const int uvSensorPin = A0; // Analog pin connected to the sensor's OUT pin
float uvVoltage = 0.0;      // Variable to store the sensor's output voltage
float uvIntensity = 0.0;    // Variable to store the calculated UV intensity

void setup() {
  Serial.begin(9600); // Initialize serial communication for debugging
  pinMode(uvSensorPin, INPUT); // Set the sensor pin as input
}

void loop() {
  int sensorValue = analogRead(uvSensorPin); // Read the analog value from the sensor
  uvVoltage = sensorValue * (5.0 / 1023.0); // Convert the analog value to voltage

  // Convert voltage to UV intensity (example conversion factor, adjust as needed)
  uvIntensity = uvVoltage * 100.0; // Example: 1V = 100 UV index units

  // Print the results to the Serial Monitor
  Serial.print("UV Voltage: ");
  Serial.print(uvVoltage);
  Serial.print(" V, UV Intensity: ");
  Serial.print(uvIntensity);
  Serial.println(" units");

  delay(1000); // Wait 1 second before the next reading
}
Notes on the Code
- The conversion factor from voltage to UV intensity may vary depending on the specific application. Adjust the formula as needed based on calibration or manufacturer data.
- Ensure the Arduino's analog reference voltage matches the sensor's output range for accurate readings.
Troubleshooting and FAQs
Common Issues and Solutions
No Output Voltage
- Cause: Incorrect wiring or insufficient power supply.
- Solution: Double-check the connections and ensure the power supply voltage is within the specified range.
Inaccurate Readings
- Cause: Sensor not exposed to direct UV light or interference from other light sources.
- Solution: Place the sensor in an unobstructed location with direct UV exposure. Shield it from visible or infrared light if necessary.
Fluctuating Output
- Cause: Unstable power supply or electrical noise.
- Solution: Use a decoupling capacitor (e.g., 0.1 µF) between VCC and GND to stabilize the power supply.
FAQs
Q: Can the sensor detect UV-C light?
A: No, the CJMCU-GUVA-S12SD is designed to detect UV-A and UV-B wavelengths (240 nm to 370 nm). It is not sensitive to UV-C light.
Q: How do I calibrate the sensor?
A: To calibrate, compare the sensor's output with a reference UV meter under the same conditions. Use the reference data to adjust the conversion factor in your calculations.
Q: Can I use this sensor outdoors?
A: Yes, but ensure the sensor is protected from extreme environmental conditions such as high humidity, rain, or dust. Consider using a UV-transparent enclosure for protection.
Q: What is the maximum UV intensity the sensor can measure?
A: The maximum measurable UV intensity depends on the output voltage range and the conversion factor. Refer to the sensor's datasheet for detailed information.
This concludes the documentation for the CJMCU-GUVA-S12SD Ultraviolet Sensor.