How to Use Sound Sensor: Examples, Pinouts, and Specs
Introduction
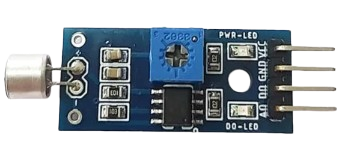
The Charan Sound Sensor is an electronic device designed to detect sound waves in the environment and convert them into electrical signals. This sensor is commonly used in various applications such as noise level monitoring, security systems, and interactive art installations. It can be interfaced with microcontrollers like the Arduino UNO to create responsive projects that react to sound.
Explore Projects Built with Sound Sensor
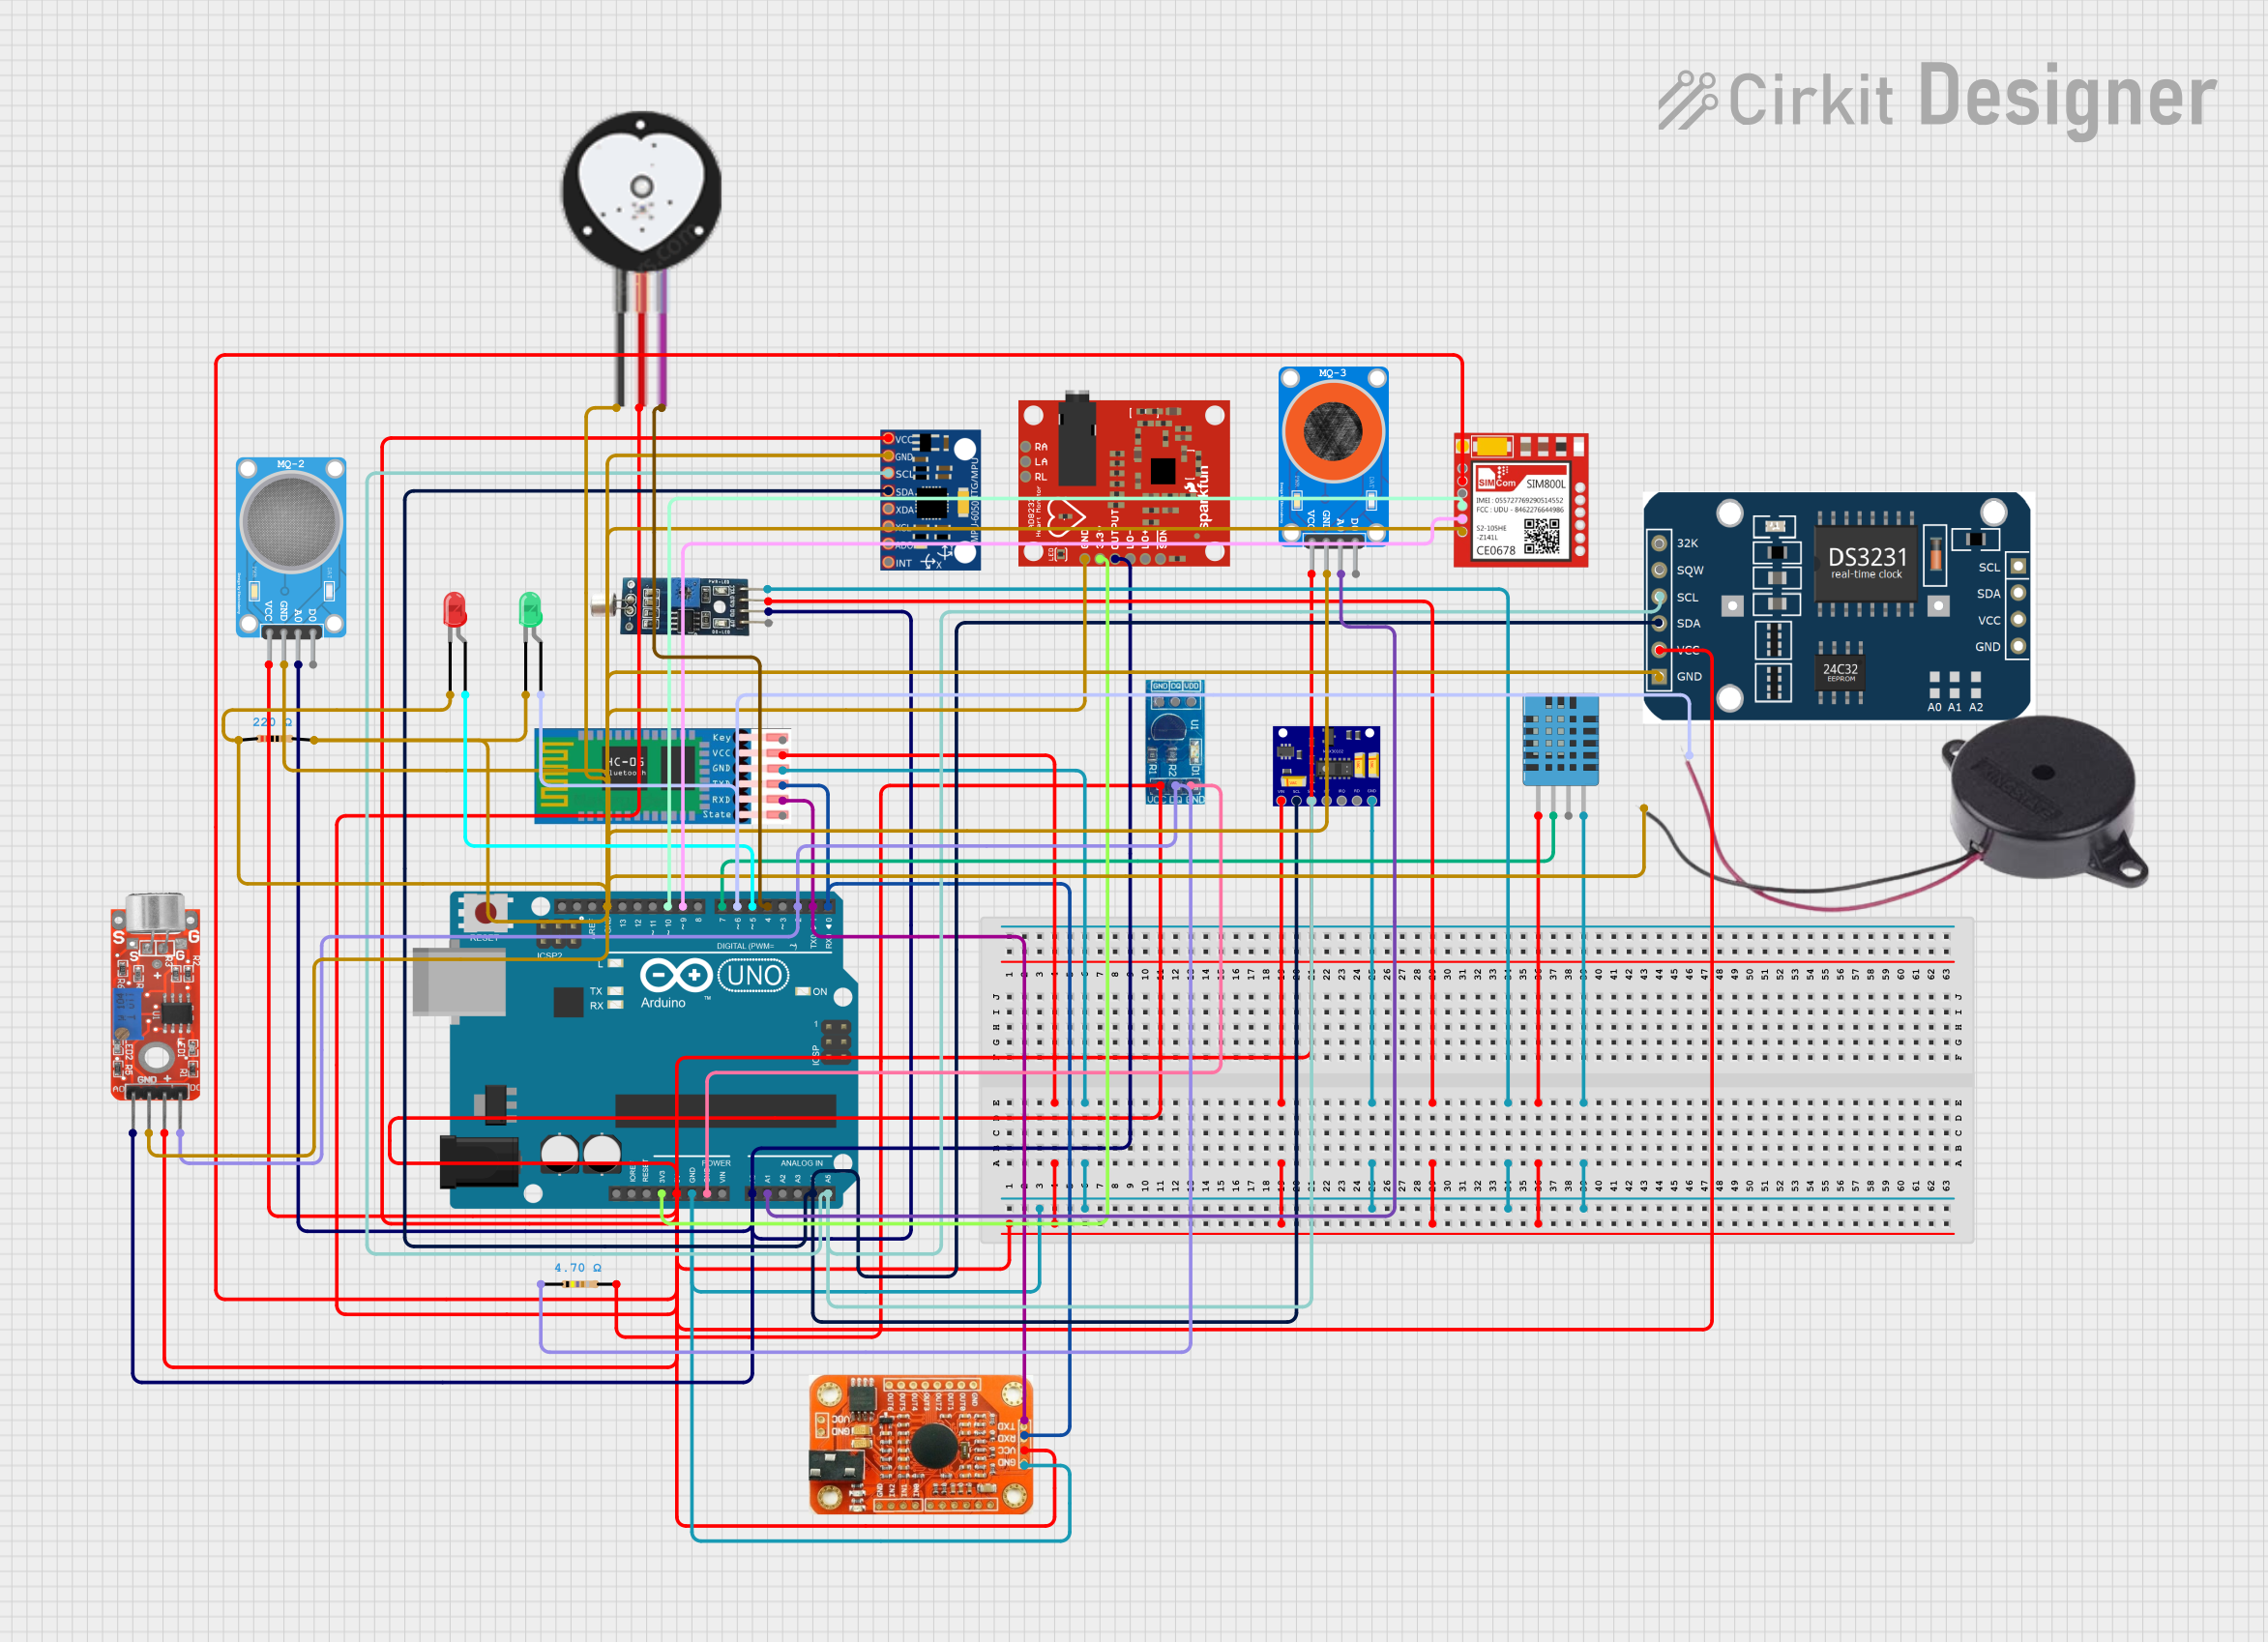
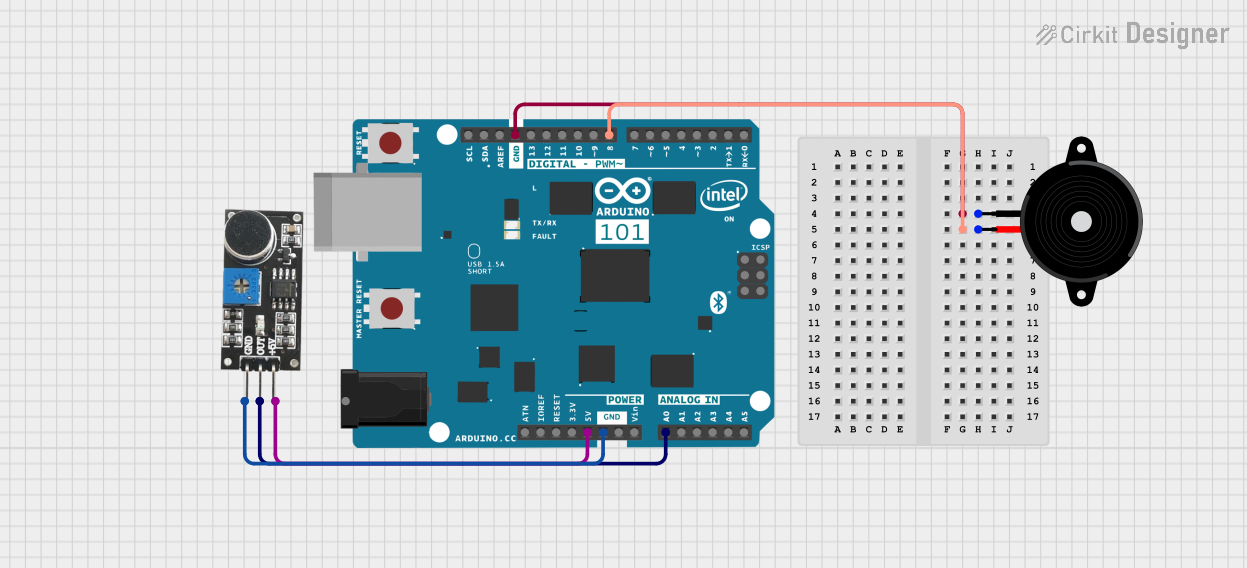
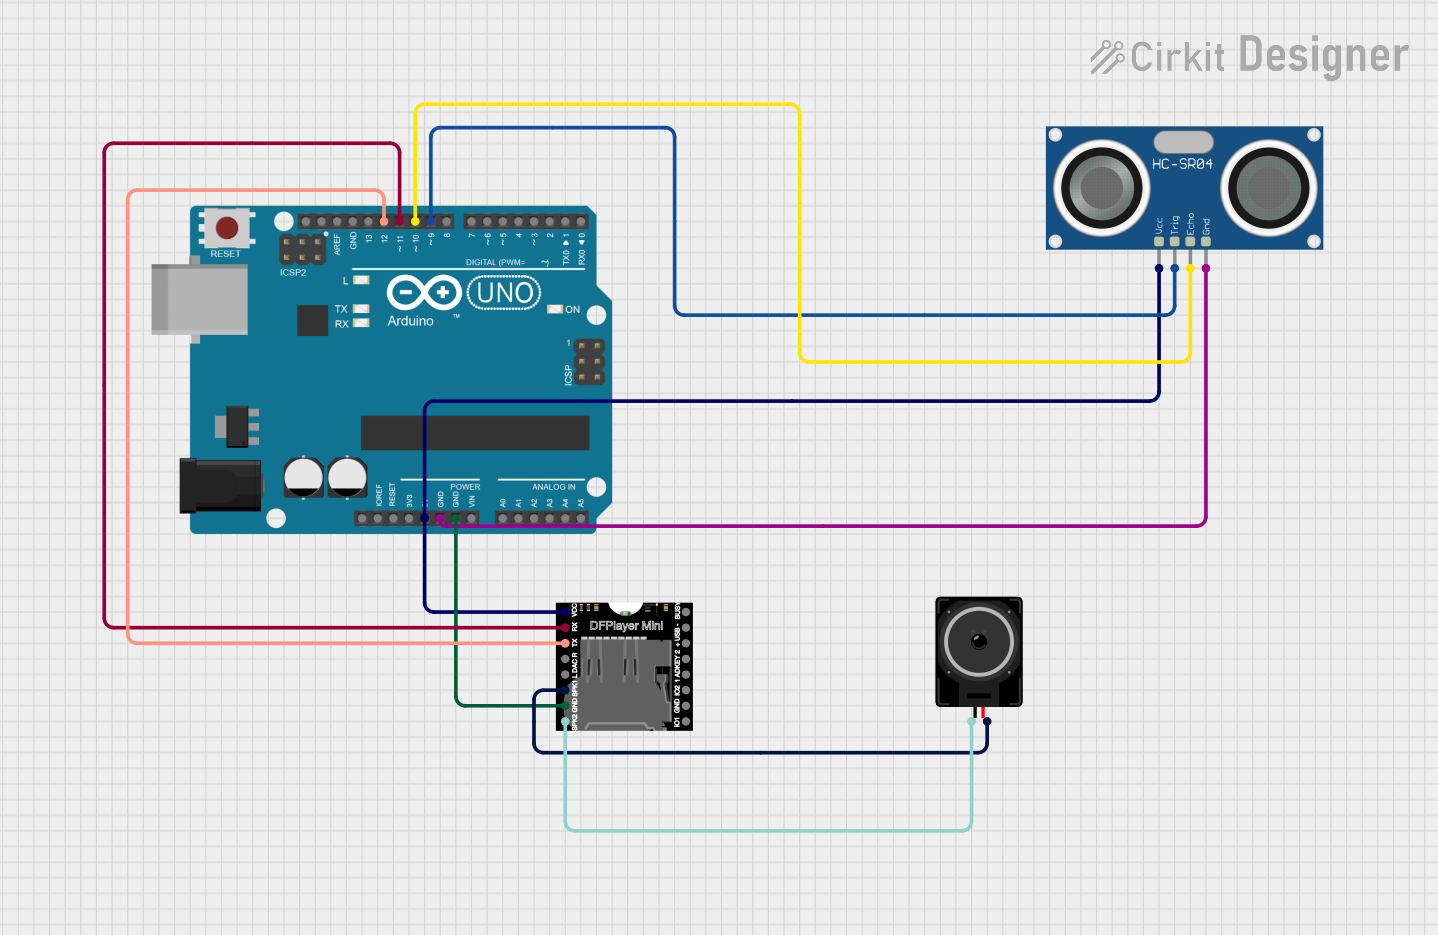
Explore Projects Built with Sound Sensor
Technical Specifications
Key Technical Details
- Operating Voltage: 3.3V to 5V DC
- Current Consumption: 4-5mA (typical)
- Digital Output Voltage: 0V or 5V (based on threshold)
- Analog Output Voltage: 0V to Vcc (proportional to sound level)
- Frequency Range: 50Hz to 20kHz
- Sensitivity: Adjustable via onboard potentiometer
Pin Configuration and Descriptions
| Pin Number | Pin Name | Description |
|---|---|---|
| 1 | VCC | Power supply (3.3V to 5V DC) |
| 2 | GND | Ground connection |
| 3 | DO | Digital output (active low) |
| 4 | AO | Analog output (sound level voltage) |
Usage Instructions
Interfacing with a Circuit
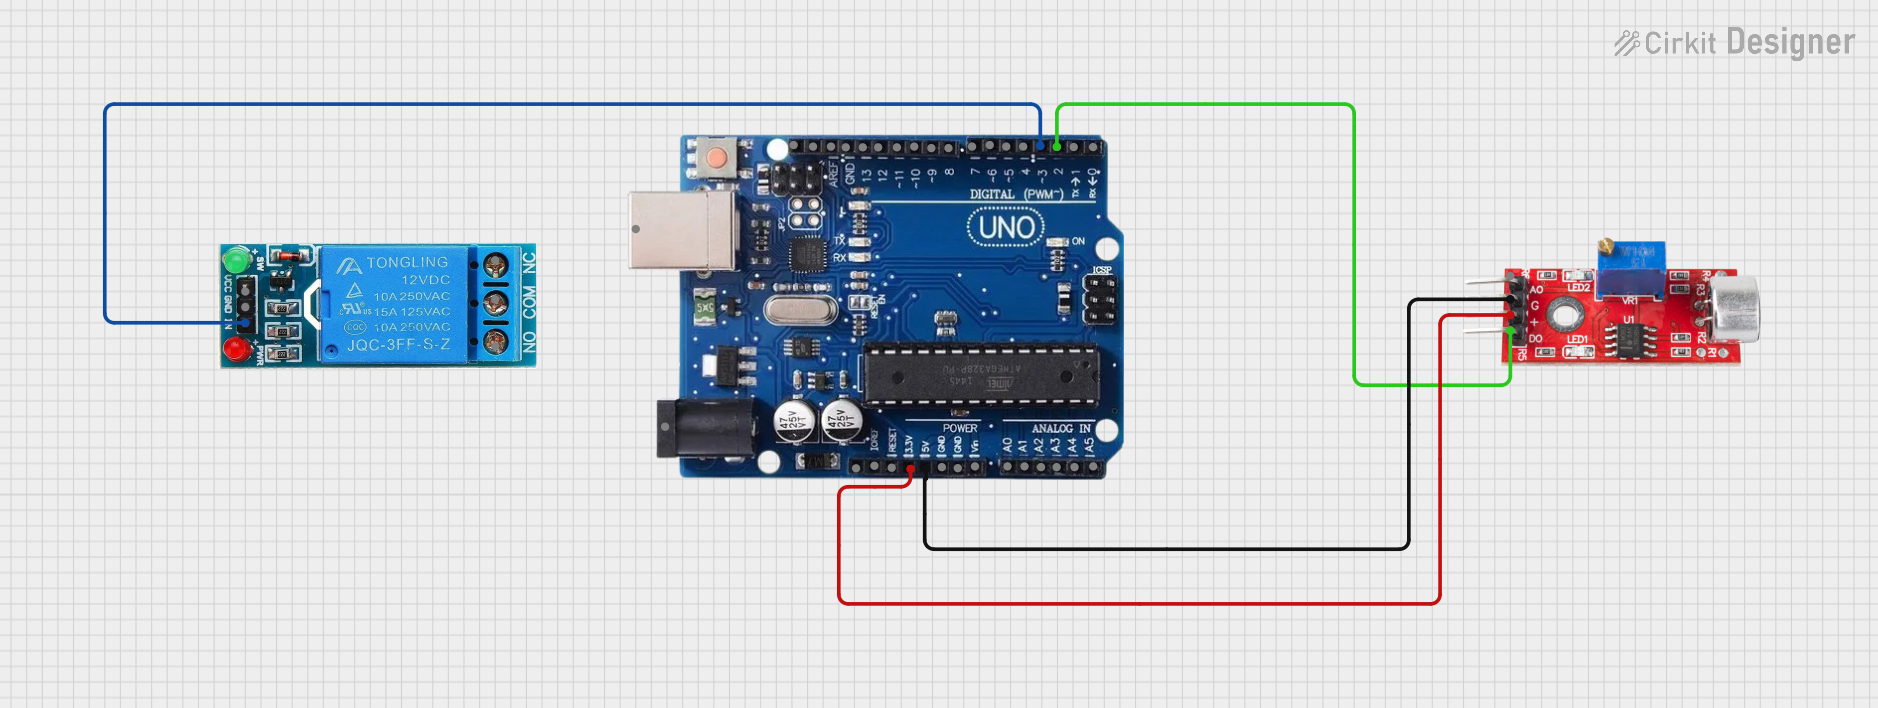
- Connect the VCC pin to the 5V output on the Arduino UNO.
- Connect the GND pin to one of the GND pins on the Arduino UNO.
- Connect the AO pin to an analog input pin on the Arduino UNO for analog signal processing.
- Optionally, connect the DO pin to a digital input pin on the Arduino UNO if you wish to use the digital output.
Important Considerations and Best Practices
- Ensure that the power supply voltage matches the operating voltage of the sensor.
- Adjust the sensitivity of the sensor using the onboard potentiometer to suit the application's requirements.
- When using the digital output, set a proper threshold level for sound detection.
- Keep the sensor away from vibration sources to avoid false triggers.
Example Arduino Code
// Define the analog pin for sound sensor
const int soundSensorPin = A0;

void setup() {
  // Initialize serial communication at 9600 baud rate
  Serial.begin(9600);
}

void loop() {
  // Read the analog value from sound sensor
  int sensorValue = analogRead(soundSensorPin);

  // Print the sensor value to the serial monitor
  Serial.println(sensorValue);

  // Wait for a short period before reading again
  delay(100);
}
Troubleshooting and FAQs
Common Issues
- No response from the sensor: Ensure that the sensor is properly powered and all connections are secure.
- Inconsistent readings: Check if the sensitivity potentiometer requires adjustment.
- False triggers: Relocate the sensor away from unintended sound sources or vibrations.
Solutions and Tips for Troubleshooting
- Double-check wiring against the pin configuration table.
- Use a multimeter to verify the power supply voltage at the VCC pin.
- If using the digital output, experiment with the threshold adjustment to achieve reliable detection.
FAQs
Q: Can the sensor detect the direction of the sound? A: No, the Charan Sound Sensor cannot determine the direction of the sound source.
Q: Is it possible to use multiple sound sensors with an Arduino UNO? A: Yes, multiple sensors can be connected to different analog pins on the Arduino UNO.
Q: How do I adjust the sensitivity of the sensor? A: Turn the onboard potentiometer clockwise to increase sensitivity and counterclockwise to decrease it.
Q: Can the sensor be used with a 3.3V system? A: Yes, the sensor can operate at 3.3V, but the output signal level will also be lower, in proportion to the supply voltage.