How to Use YL-40: Examples, Pinouts, and Specs

 Design with YL-40 in Cirkit Designer
Introduction
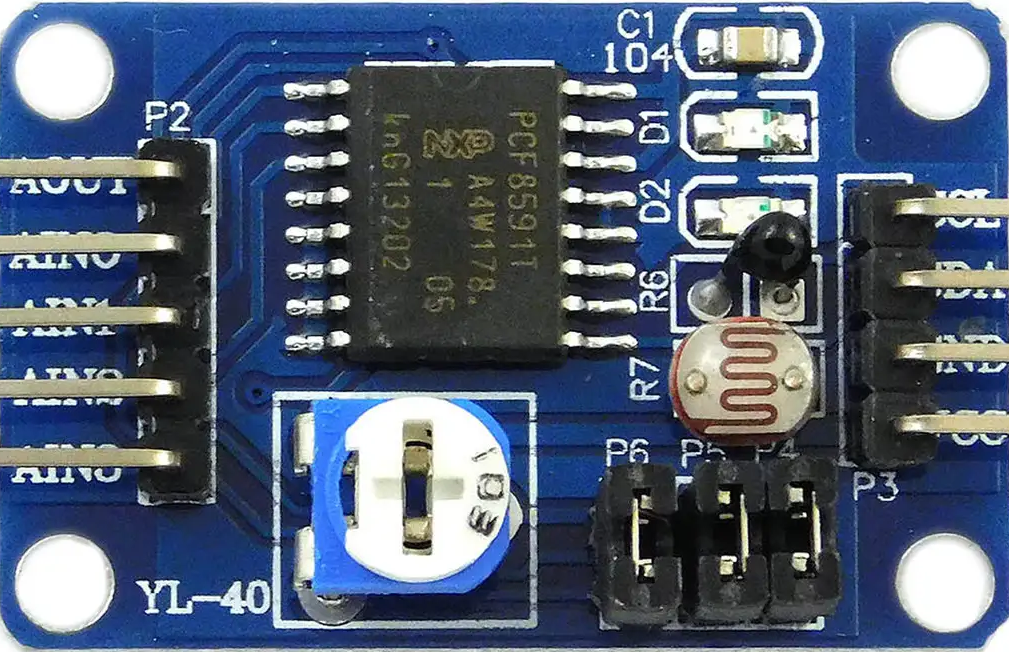
The YL-40 module is a versatile photoelectric sensor designed to measure environmental factors such as humidity and temperature. It is commonly used in a wide range of applications, including home automation, weather stations, and Internet of Things (IoT) projects. Its ease of use and accuracy make it a popular choice for hobbyists and professionals alike.
Explore Projects Built with YL-40

 Open Project in Cirkit Designer
 Open Project in Cirkit Designer
 Open Project in Cirkit Designer
 Open Project in Cirkit Designer
Explore Projects Built with YL-40

 Open Project in Cirkit Designer
 Open Project in Cirkit Designer
 Open Project in Cirkit Designer
 Open Project in Cirkit Designer
Technical Specifications
Key Technical Details
- Operating Voltage: 3.3V to 5V
- Temperature Measurement Range: -40°C to 80°C
- Humidity Measurement Range: 0% to 100% RH
- Temperature Measurement Accuracy: ±0.5°C
- Humidity Measurement Accuracy: ±2% RH
- Interface: I2C
Pin Configuration and Descriptions
| Pin Number | Pin Name | Description |
|---|---|---|
| 1 | VCC | Power supply (3.3V to 5V) |
| 2 | GND | Ground |
| 3 | SDA | I2C Data Line |
| 4 | SCL | I2C Clock Line |
Usage Instructions
Connecting to a Circuit
To use the YL-40 sensor module with an Arduino UNO, follow these steps:
- Connect the VCC pin of the YL-40 to the 5V output on the Arduino.
- Connect the GND pin to one of the GND pins on the Arduino.
- Connect the SDA pin to the A4 pin (SDA) on the Arduino.
- Connect the SCL pin to the A5 pin (SCL) on the Arduino.
Programming the Arduino
Here is a sample code snippet to read temperature and humidity data from the YL-40 sensor using an Arduino UNO. Before using the code, make sure to install the necessary libraries for handling the I2C communication.
#include <Wire.h>

// YL-40 I2C address (check datasheet for your module)
const int YL40_I2C_ADDRESS = 0xXX; // Replace 0xXX with the actual address

void setup() {
  Wire.begin(); // Initialize I2C communication
  Serial.begin(9600); // Start serial communication at 9600 baud rate
}

void loop() {
  // Request 4 bytes of data from the YL-40 sensor
  Wire.beginTransmission(YL40_I2C_ADDRESS);
  Wire.requestFrom(YL40_I2C_ADDRESS, 4);

  // Read the data if available
  if (Wire.available() == 4) {
    float humidity = Wire.read() * 256 + Wire.read();
    humidity /= 10;
    float temperature = Wire.read() * 256 + Wire.read();
    temperature /= 10;

    // Print the readings to the serial monitor
    Serial.print("Humidity: ");
    Serial.print(humidity);
    Serial.print("% RH, Temperature: ");
    Serial.print(temperature);
    Serial.println("C");
  }

  // Wait for 2 seconds before reading again
  delay(2000);
}
Important Considerations and Best Practices
- Ensure that the power supply voltage matches the operating voltage of the YL-40 module to prevent damage.
- Use pull-up resistors on the SDA and SCL lines if multiple I2C devices are connected to the same bus.
- Avoid placing the sensor near heat sources or in direct sunlight to prevent inaccurate readings.
- For long-term monitoring, implement error handling and reconnection strategies in your code.
Troubleshooting and FAQs
Common Issues
- Inaccurate Readings: Ensure the sensor is not affected by external heat sources and is properly calibrated.
- No Data on Serial Monitor: Check the wiring and ensure the correct I2C address is used in the code.
- Sensor Not Detected: Verify connections and scan the I2C bus for the correct address.
Solutions and Tips
- If the sensor readings are unstable, add a delay between readings to allow the sensor to stabilize.
- Use a logic level converter if you're interfacing the YL-40 with a 3.3V microcontroller to protect the sensor's I2C lines.
- Regularly update your sensor's firmware if available to ensure optimal performance.
FAQs
Q: Can the YL-40 sensor be used outdoors? A: Yes, but it should be placed in a weatherproof enclosure to protect it from the elements.
Q: How do I calibrate the YL-40 sensor? A: Calibration procedures vary; refer to the manufacturer's guidelines for specific instructions.
Q: What is the I2C address of the YL-40 sensor? A: The default I2C address is typically provided in the sensor's datasheet. If you're unsure, you can run an I2C scanner sketch to find out the address.
Remember to consult the YL-40 sensor's datasheet for more detailed information and specifications.