How to Use Soil PH Sensor: Examples, Pinouts, and Specs
Introduction
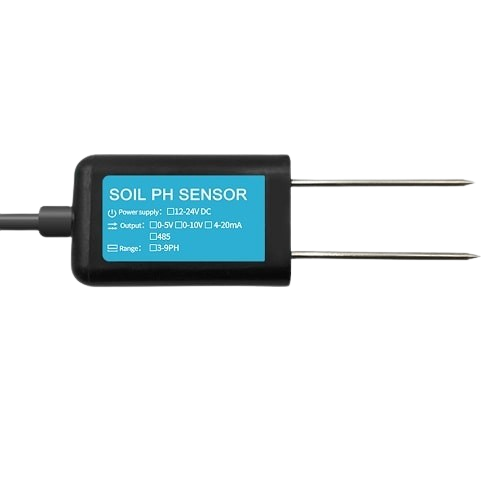
A Soil pH Sensor is a device used to measure the acidity or alkalinity of soil, providing essential data for agricultural and gardening applications. By determining the pH level of soil, users can optimize plant growth, ensure proper nutrient availability, and improve crop yields. This sensor is widely used in precision agriculture, gardening, environmental monitoring, and research projects.
Common applications and use cases include:
- Monitoring soil pH for agricultural optimization
- Gardening and landscaping to ensure proper soil conditions
- Environmental studies and soil quality analysis
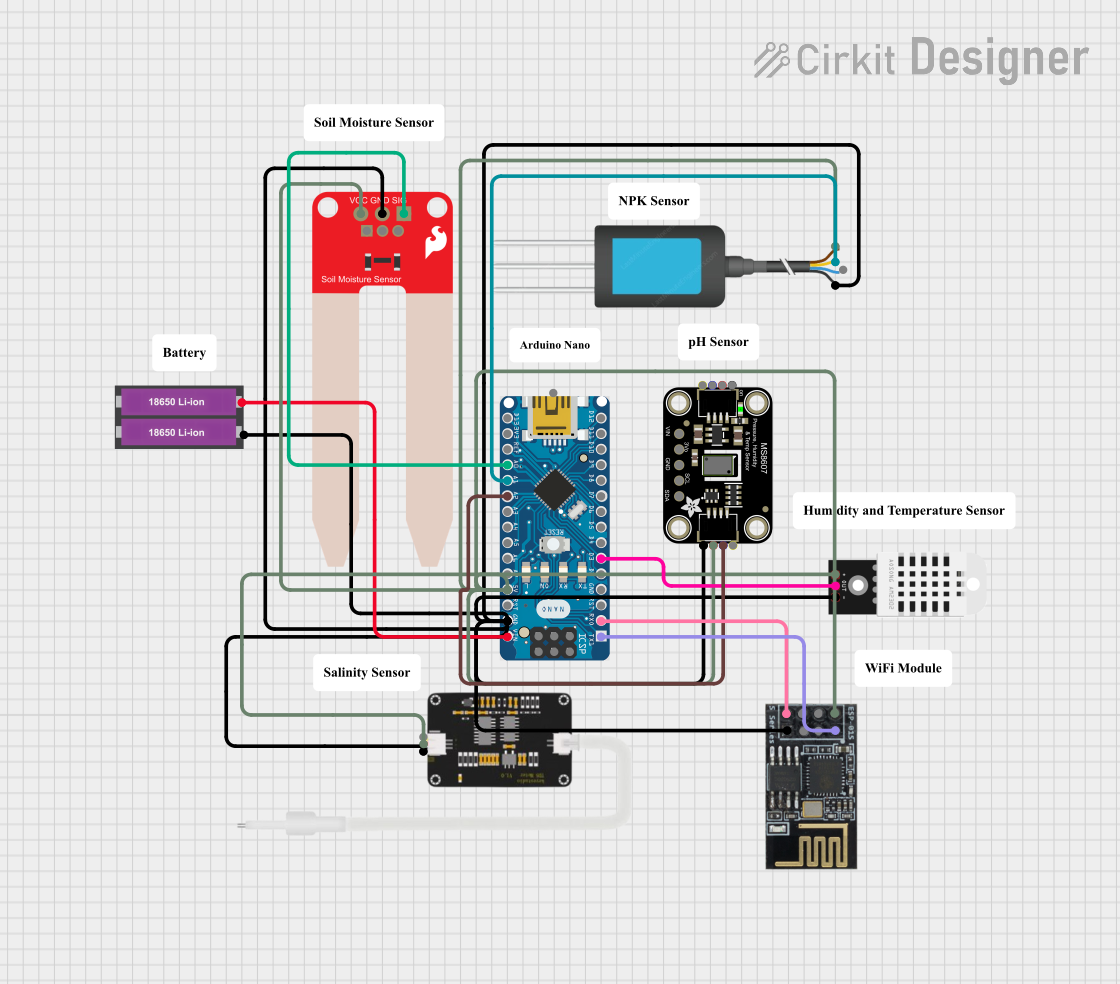
- Integration into automated irrigation and fertilization systems
Explore Projects Built with Soil PH Sensor
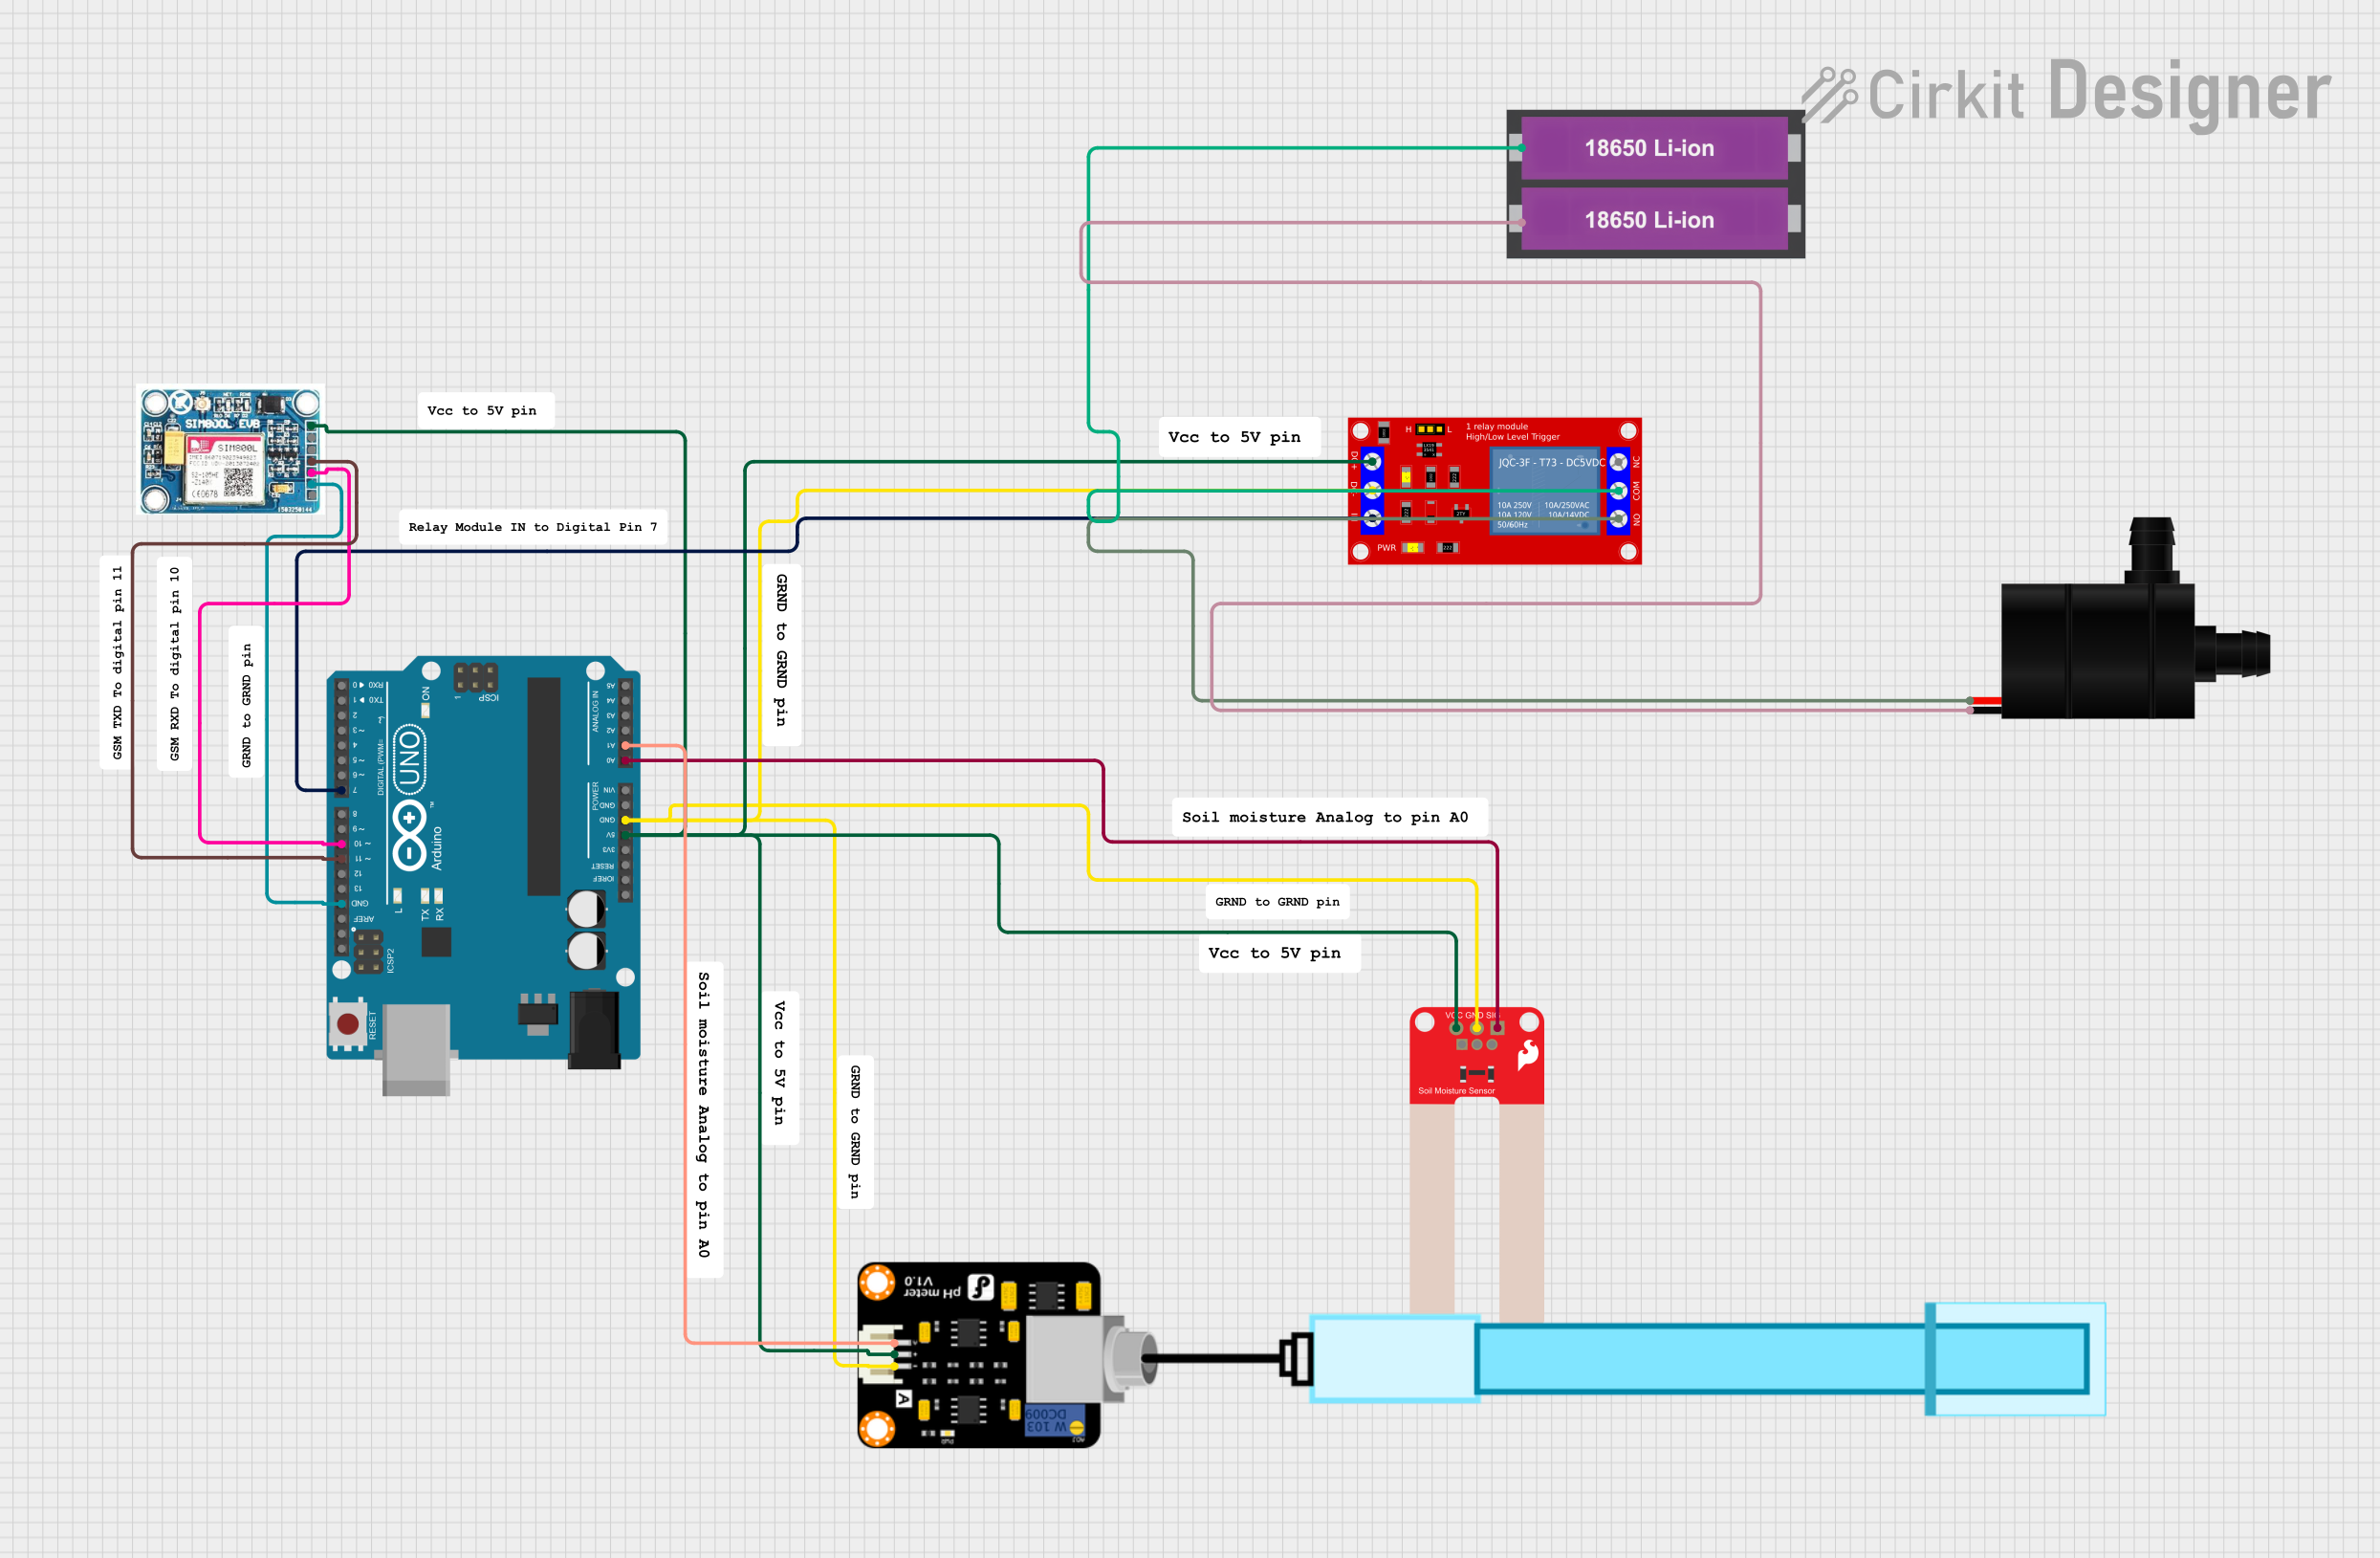
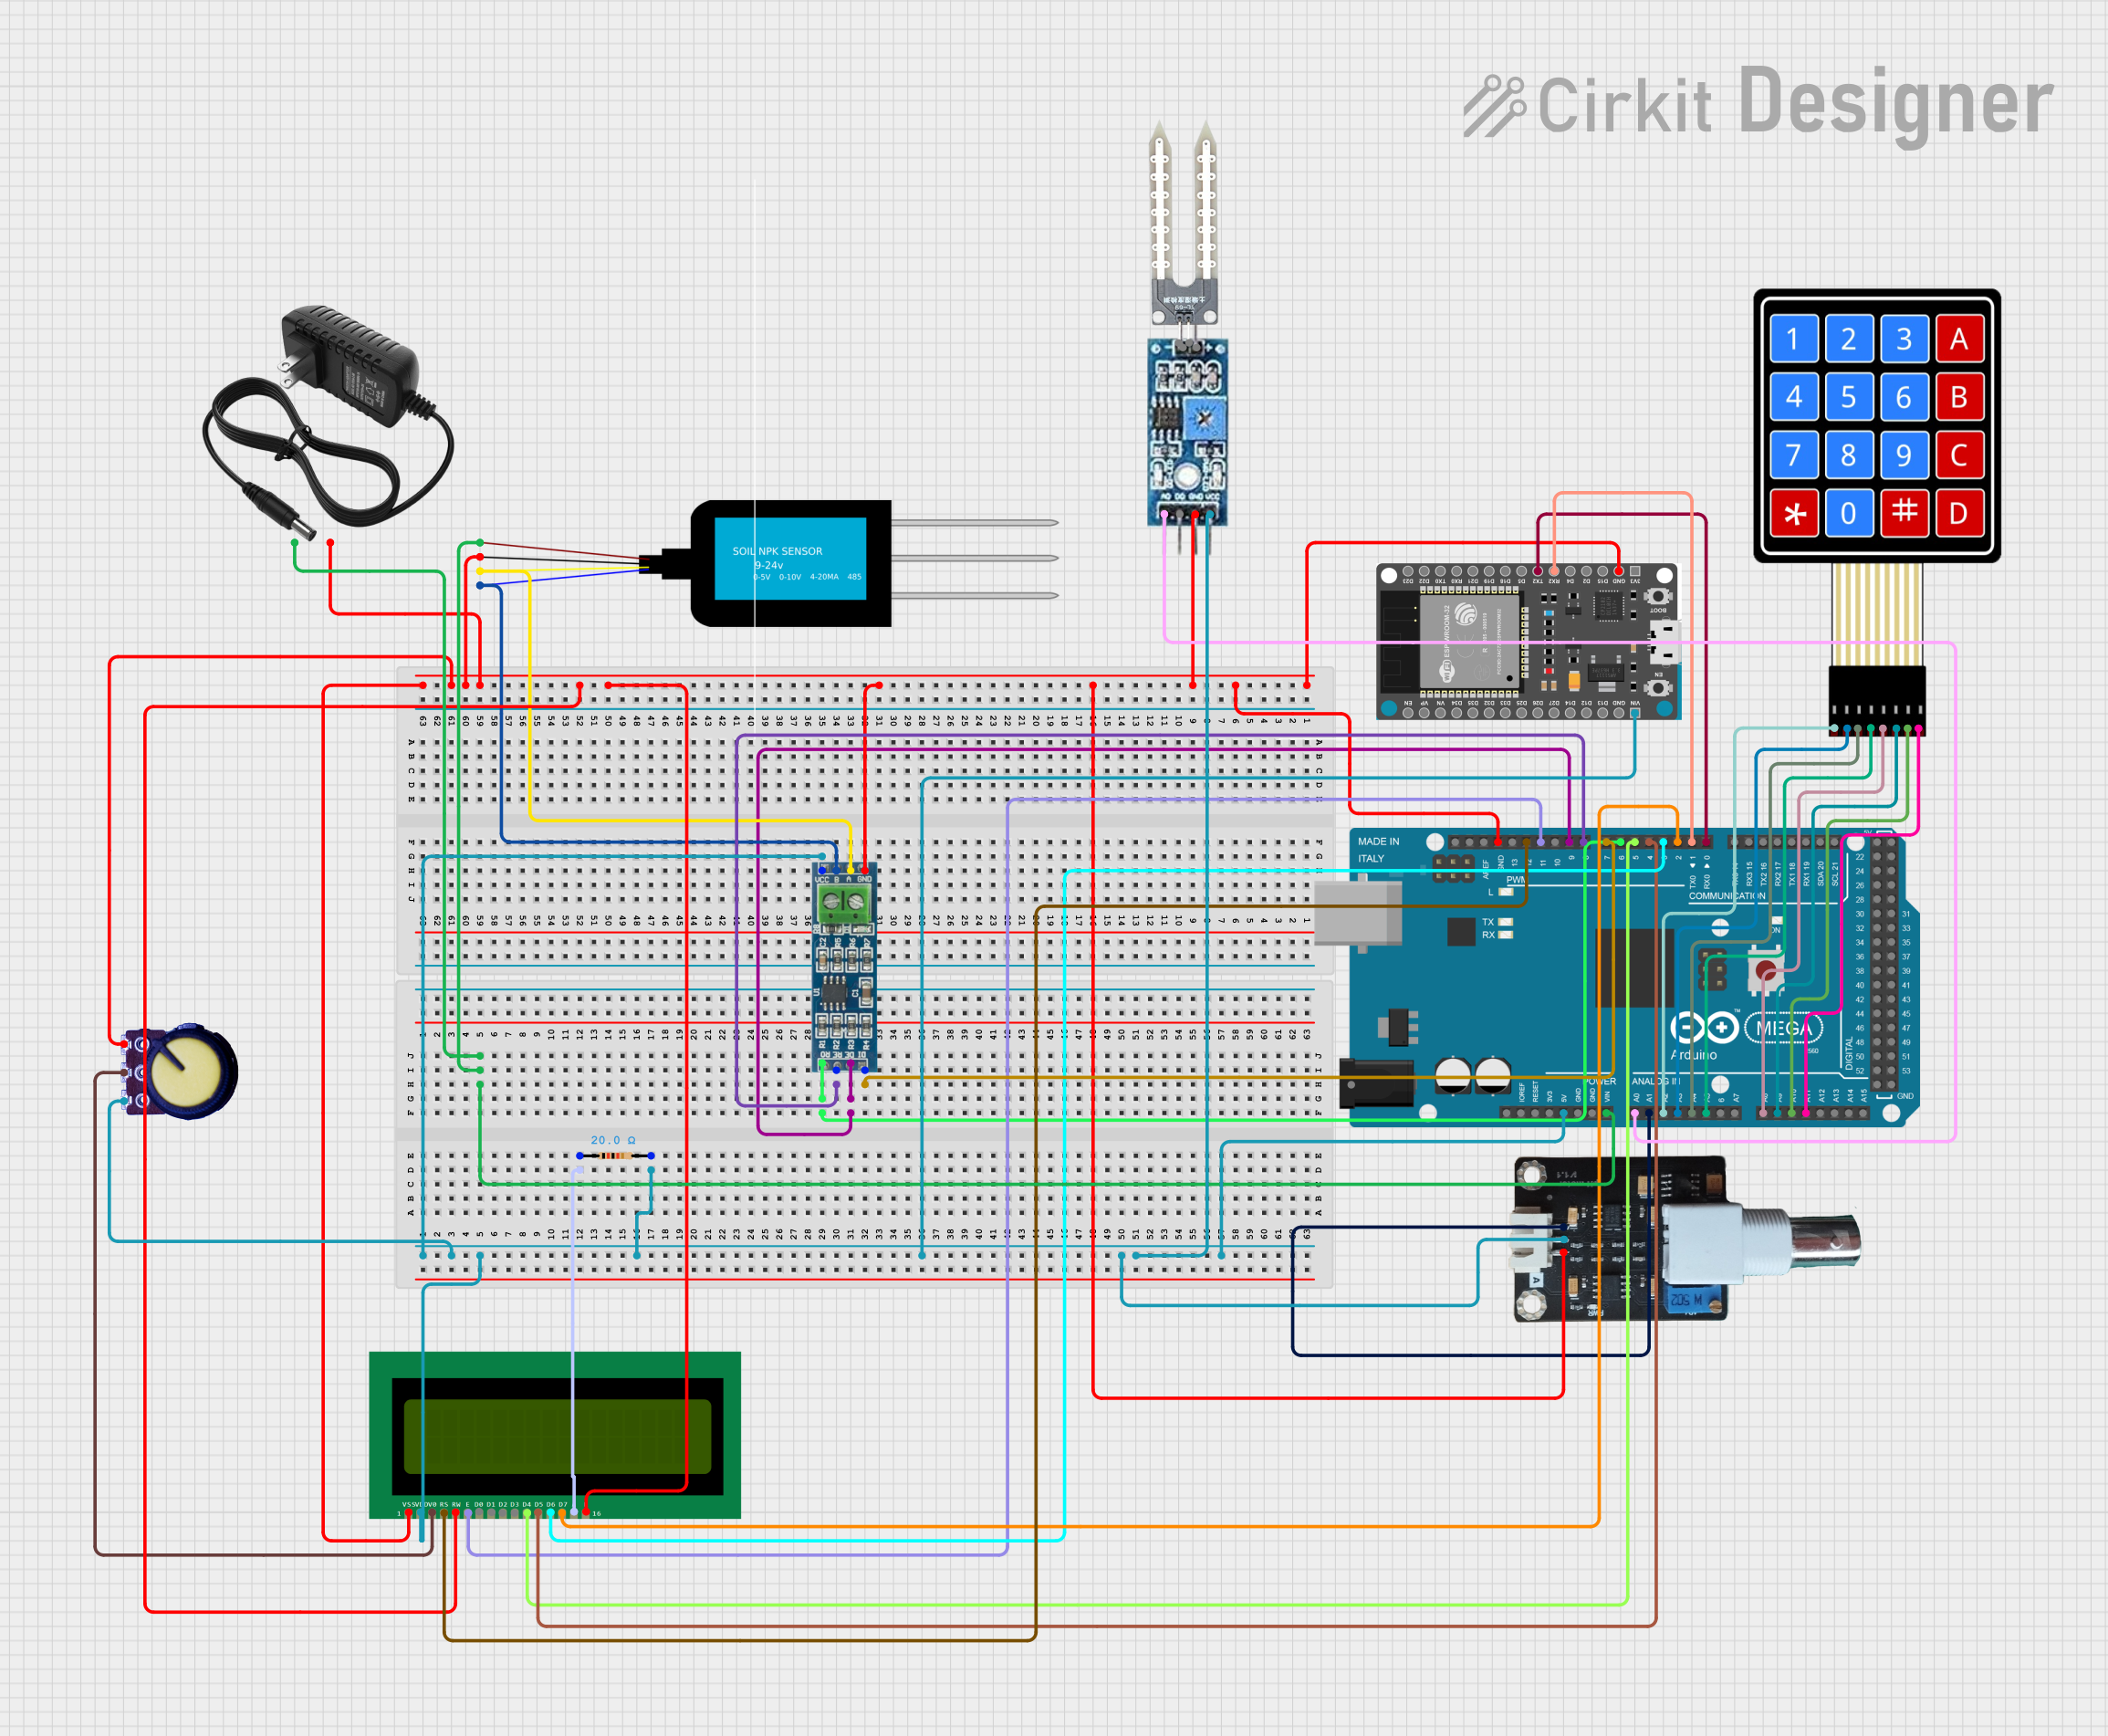
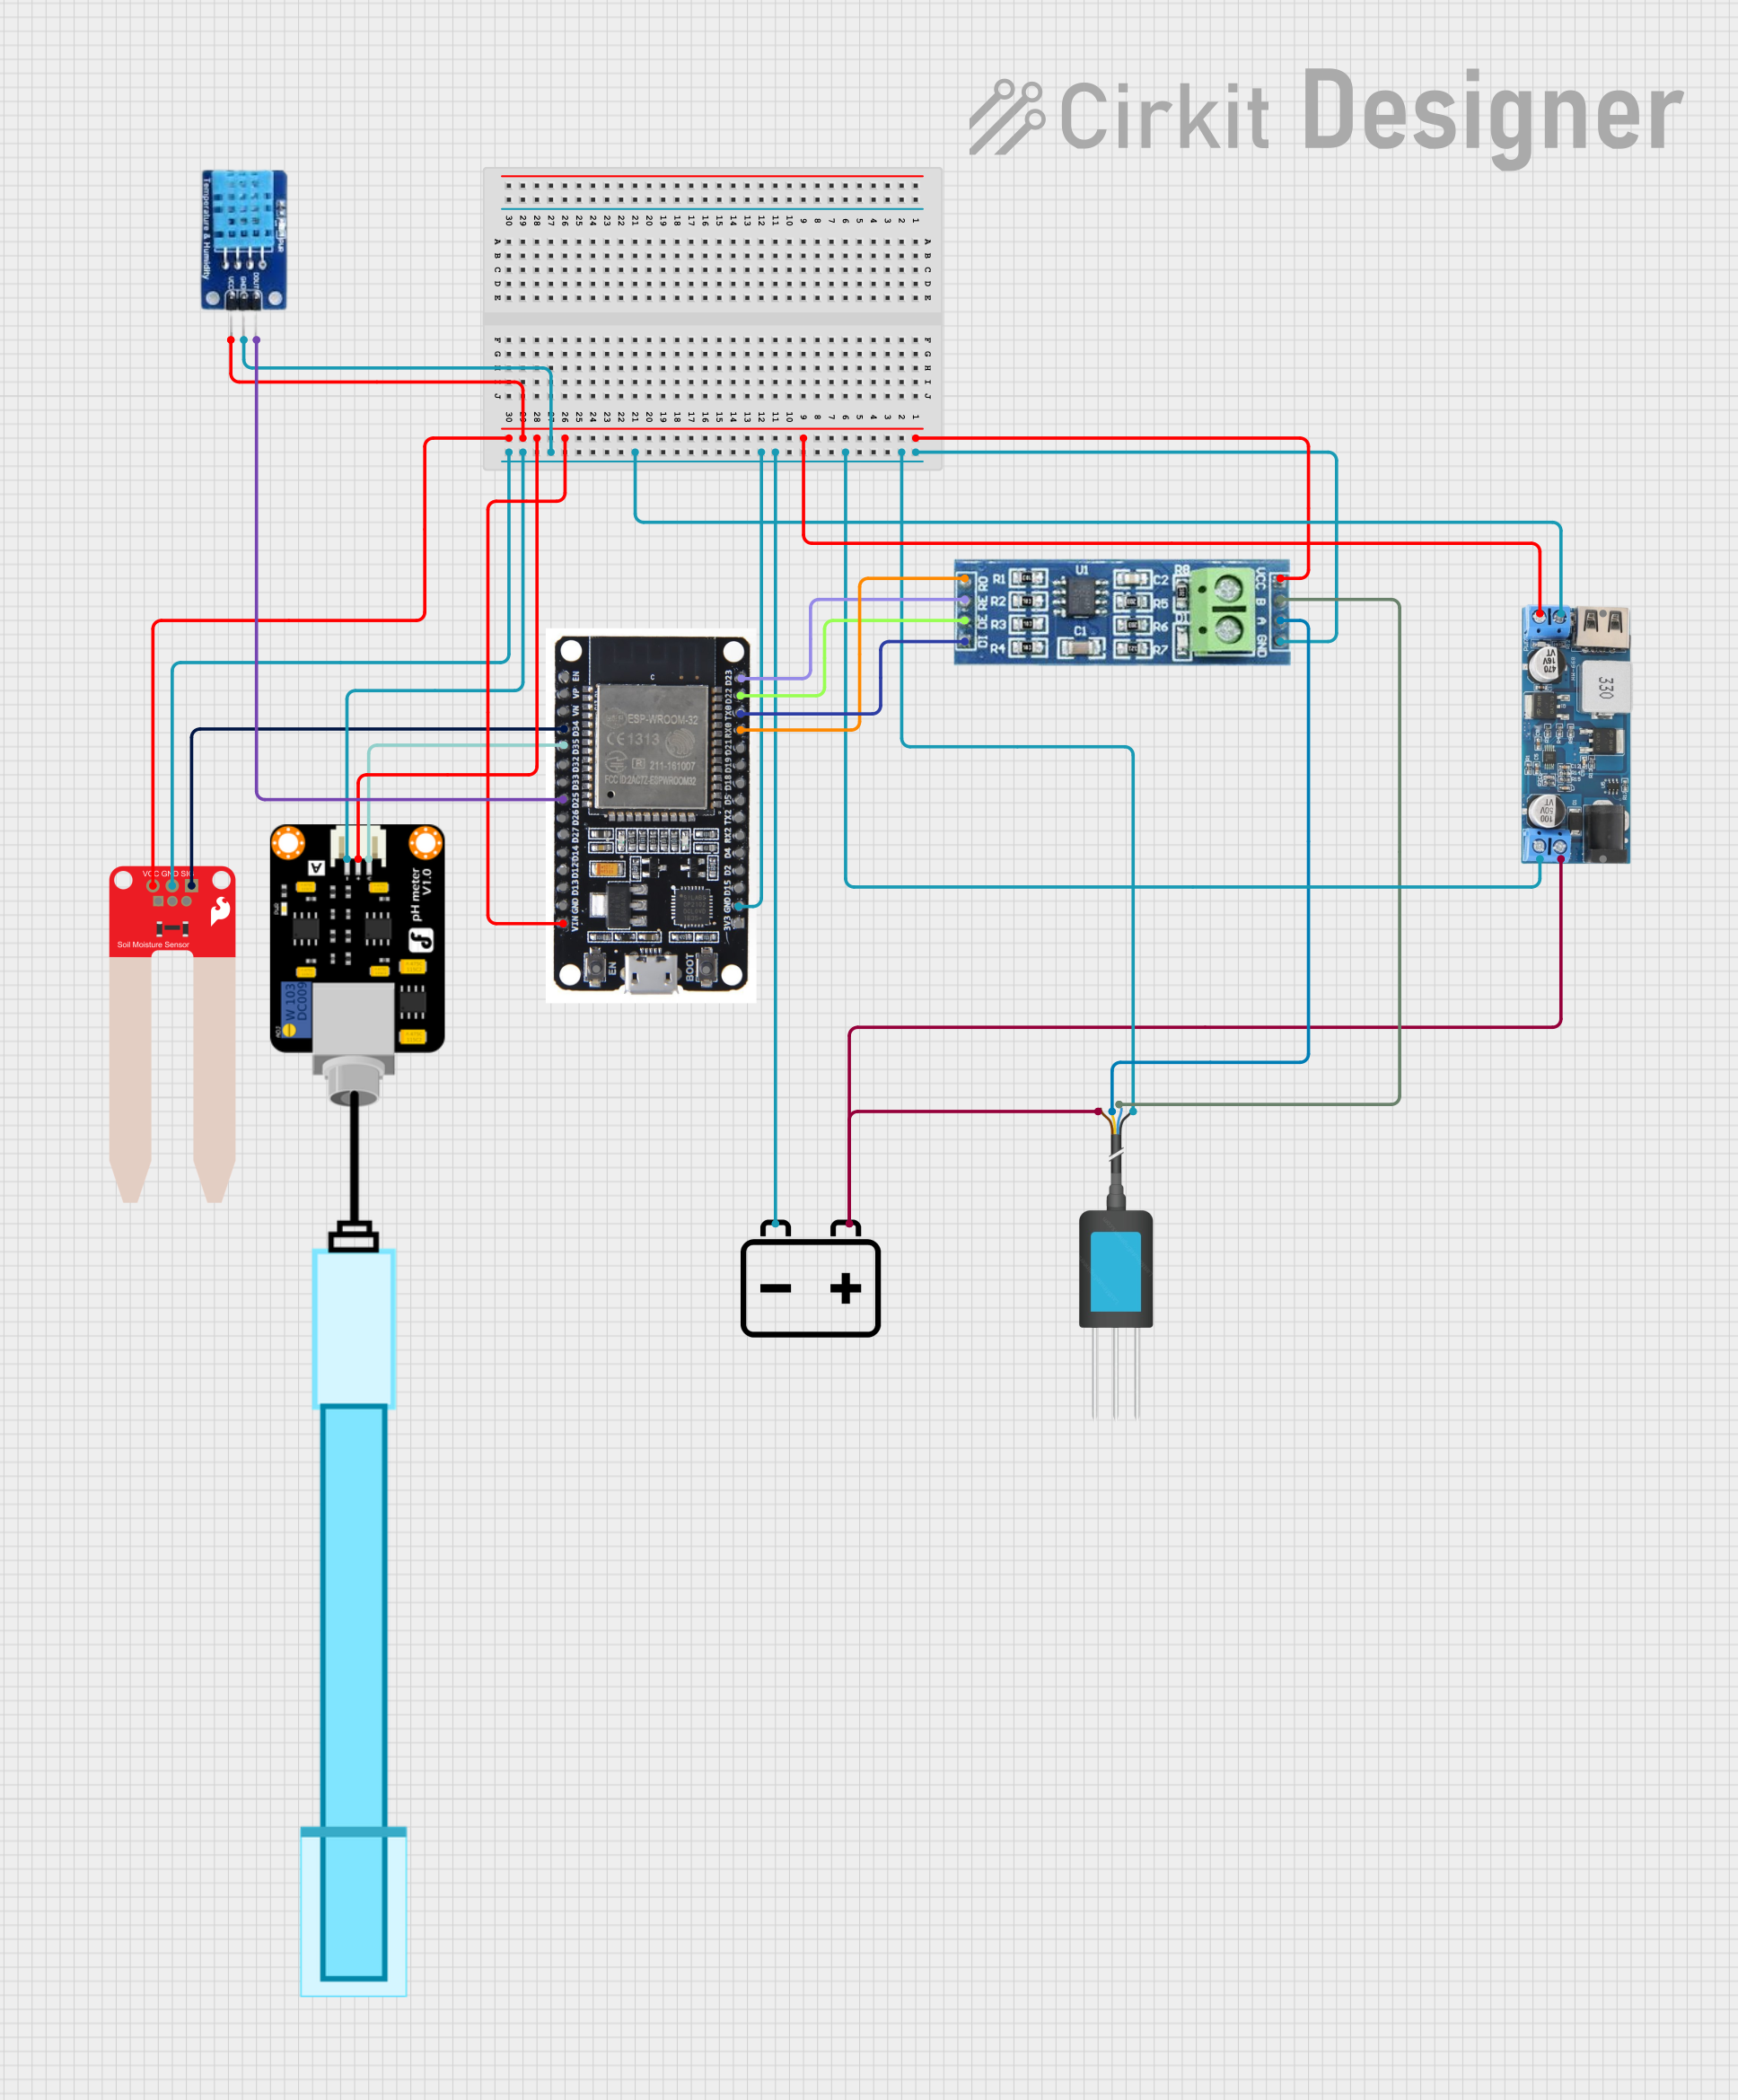
Explore Projects Built with Soil PH Sensor
Technical Specifications
Below are the key technical details of a typical Soil pH Sensor:
| Parameter | Value |
|---|---|
| Operating Voltage | 3.3V - 5V |
| Output Signal | Analog voltage (0-3V typical) |
| pH Measurement Range | 3.0 - 9.0 pH |
| Accuracy | ±0.1 pH |
| Response Time | ≤1 second |
| Operating Temperature | 0°C to 50°C |
| Probe Material | Glass electrode |
| Cable Length | Typically 1 meter |
Pin Configuration and Descriptions
The Soil pH Sensor typically has the following pin configuration:
| Pin Name | Description |
|---|---|
| VCC | Power supply input (3.3V - 5V) |
| GND | Ground connection |
| AO | Analog output signal (proportional to pH) |
Usage Instructions
How to Use the Soil pH Sensor in a Circuit
Connect the Sensor:
- Connect the
VCCpin of the sensor to the 5V pin of your microcontroller (e.g., Arduino UNO). - Connect the
GNDpin of the sensor to the GND pin of the microcontroller. - Connect the
AOpin of the sensor to an analog input pin (e.g., A0) on the microcontroller.
- Connect the
Calibrate the Sensor:
- Before using the sensor, calibrate it using standard pH buffer solutions (e.g., pH 4.0 and pH 7.0).
- Submerge the probe in the buffer solution and adjust the potentiometer on the sensor module until the output matches the expected pH value.
Measure Soil pH:
- Insert the probe into the soil sample. Ensure the soil is moist for accurate readings.
- Read the analog output signal from the sensor and convert it to a pH value using the appropriate formula or calibration data.
Important Considerations and Best Practices
- Always clean the probe with distilled water after each use to prevent contamination.
- Avoid using the sensor in dry soil, as it may lead to inaccurate readings.
- Store the probe in a protective cap with a small amount of storage solution to maintain its sensitivity.
- Periodically recalibrate the sensor to ensure accuracy over time.
Example Code for Arduino UNO
Below is an example code snippet to read and display the pH value using an Arduino UNO:
// Define the analog pin connected to the sensor
const int pH_Pin = A0;

// Calibration values (adjust based on your sensor's calibration)
const float voltageOffset = 0.0; // Adjust based on calibration
const float pH_Slope = 3.5;      // Voltage-to-pH conversion factor

void setup() {
  Serial.begin(9600); // Initialize serial communication
  Serial.println("Soil pH Sensor Test");
}

void loop() {
  // Read the analog value from the sensor
  int sensorValue = analogRead(pH_Pin);

  // Convert the analog value to voltage (assuming 5V reference)
  float voltage = sensorValue * (5.0 / 1023.0);

  // Calculate the pH value using the calibration formula
  float pH = (voltage - voltageOffset) * pH_Slope;

  // Print the pH value to the Serial Monitor
  Serial.print("pH Value: ");
  Serial.println(pH);

  delay(1000); // Wait for 1 second before the next reading
}
Troubleshooting and FAQs
Common Issues and Solutions
Inaccurate Readings:
- Cause: The sensor is not calibrated.
- Solution: Calibrate the sensor using standard pH buffer solutions.
No Output Signal:
- Cause: Incorrect wiring or loose connections.
- Solution: Double-check the wiring and ensure all connections are secure.
Slow Response Time:
- Cause: The probe is dirty or damaged.
- Solution: Clean the probe with distilled water and inspect for physical damage.
Sensor Not Working in Dry Soil:
- Cause: The sensor requires moisture for accurate readings.
- Solution: Moisten the soil before taking measurements.
FAQs
Q: How often should I calibrate the sensor?
A: It is recommended to calibrate the sensor before each use or at least once a week for consistent accuracy.
Q: Can the sensor be used in highly acidic or alkaline soils?
A: The sensor is designed for a pH range of 3.0 to 9.0. Using it outside this range may damage the probe or result in inaccurate readings.
Q: How should I store the sensor when not in use?
A: Store the probe in a protective cap with a small amount of storage solution to maintain its sensitivity and longevity.
Q: Can I use the sensor with a 3.3V microcontroller?
A: Yes, the sensor is compatible with both 3.3V and 5V systems. Ensure proper calibration for the voltage used.