How to Use SparkFun gator:particle: Examples, Pinouts, and Specs
Introduction
The SparkFun gator:particle is an innovative microcontroller board designed to integrate seamlessly with the gator:bit ecosystem. It is equipped with a Particle P1 module, enabling Wi-Fi and Bluetooth connectivity for a wide range of applications. This board is ideal for educational purposes, DIY projects, and IoT (Internet of Things) applications, allowing users to create interactive projects that can communicate wirelessly.
Explore Projects Built with SparkFun gator:particle

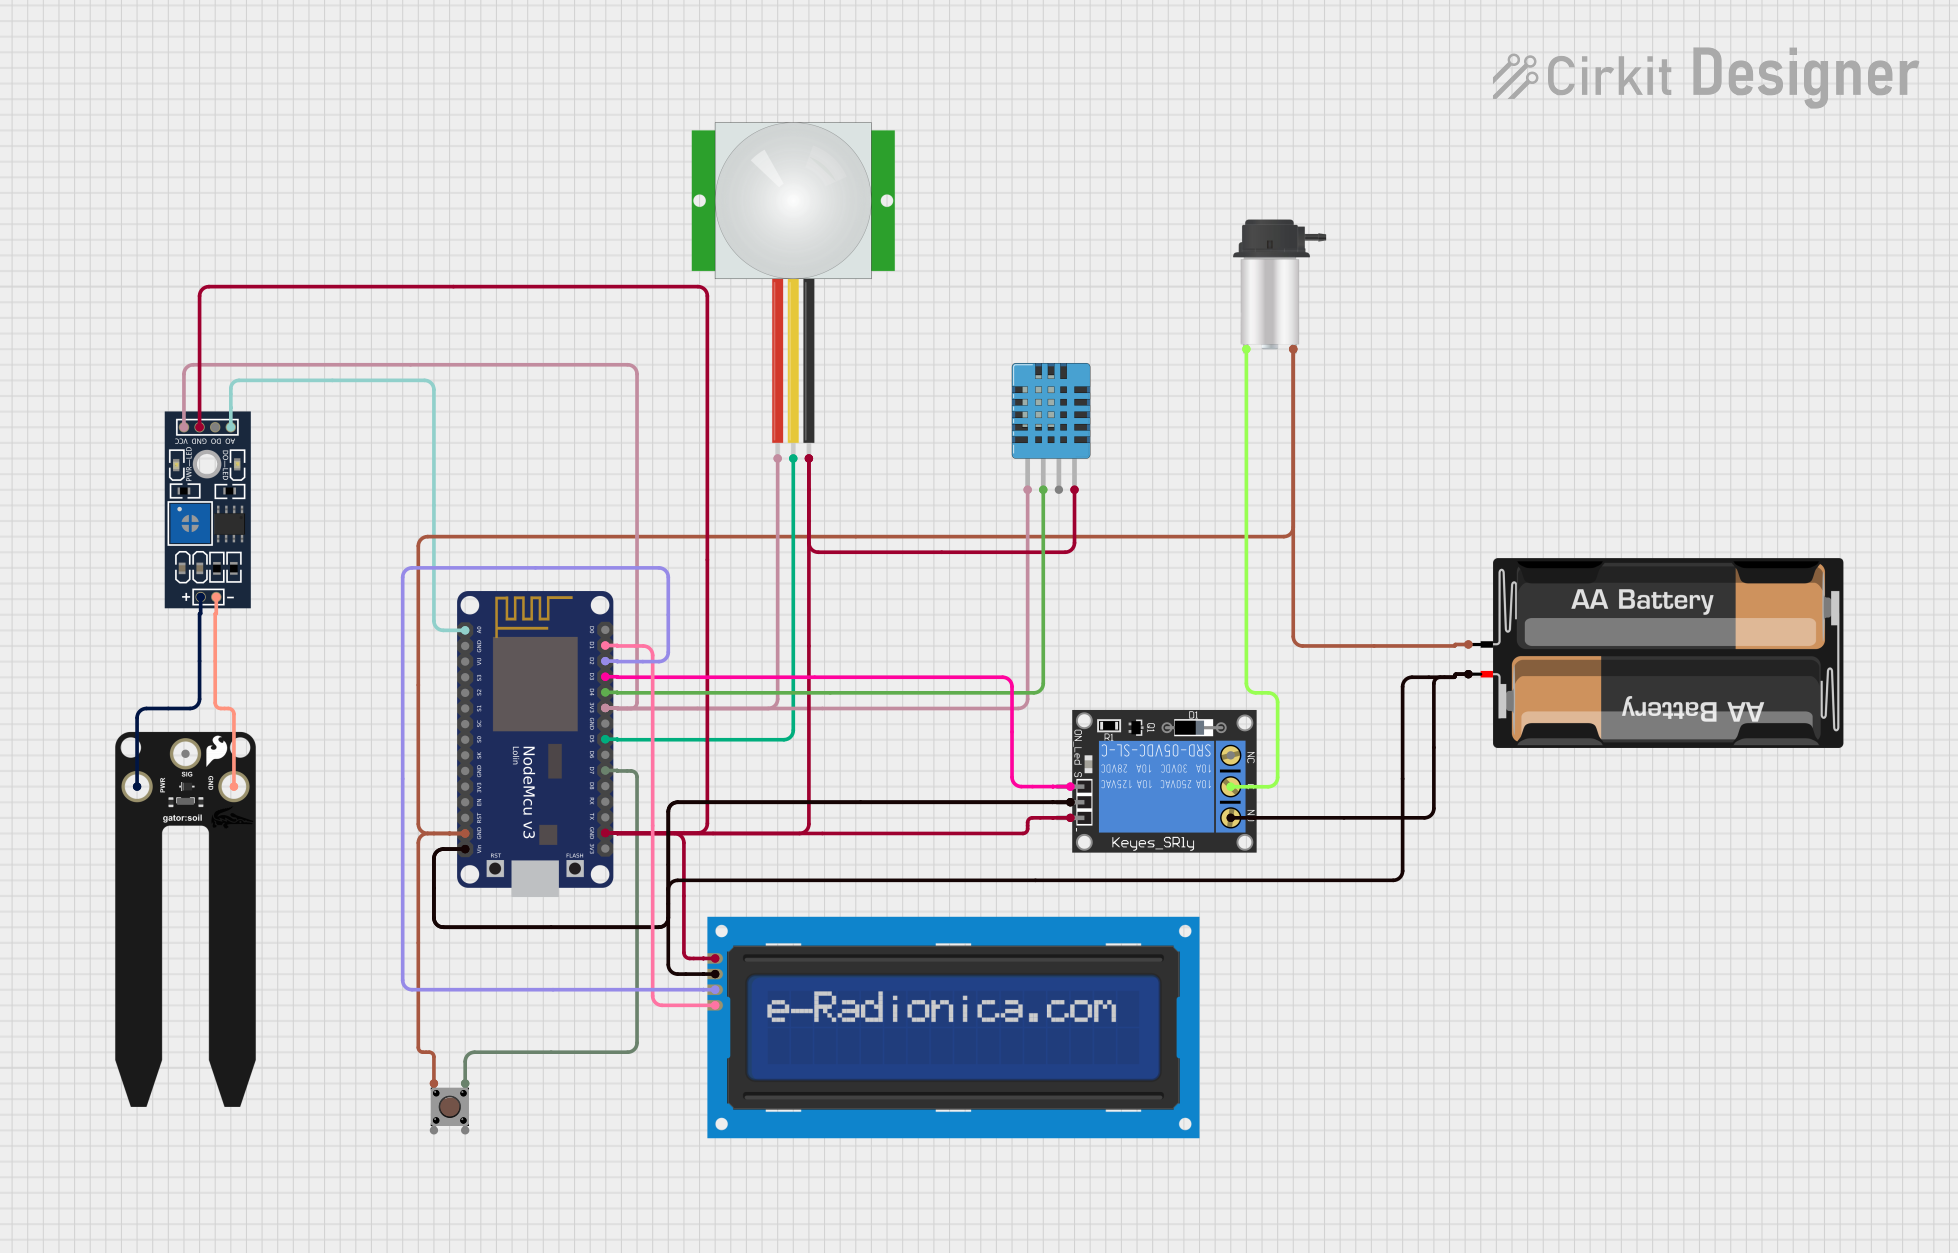
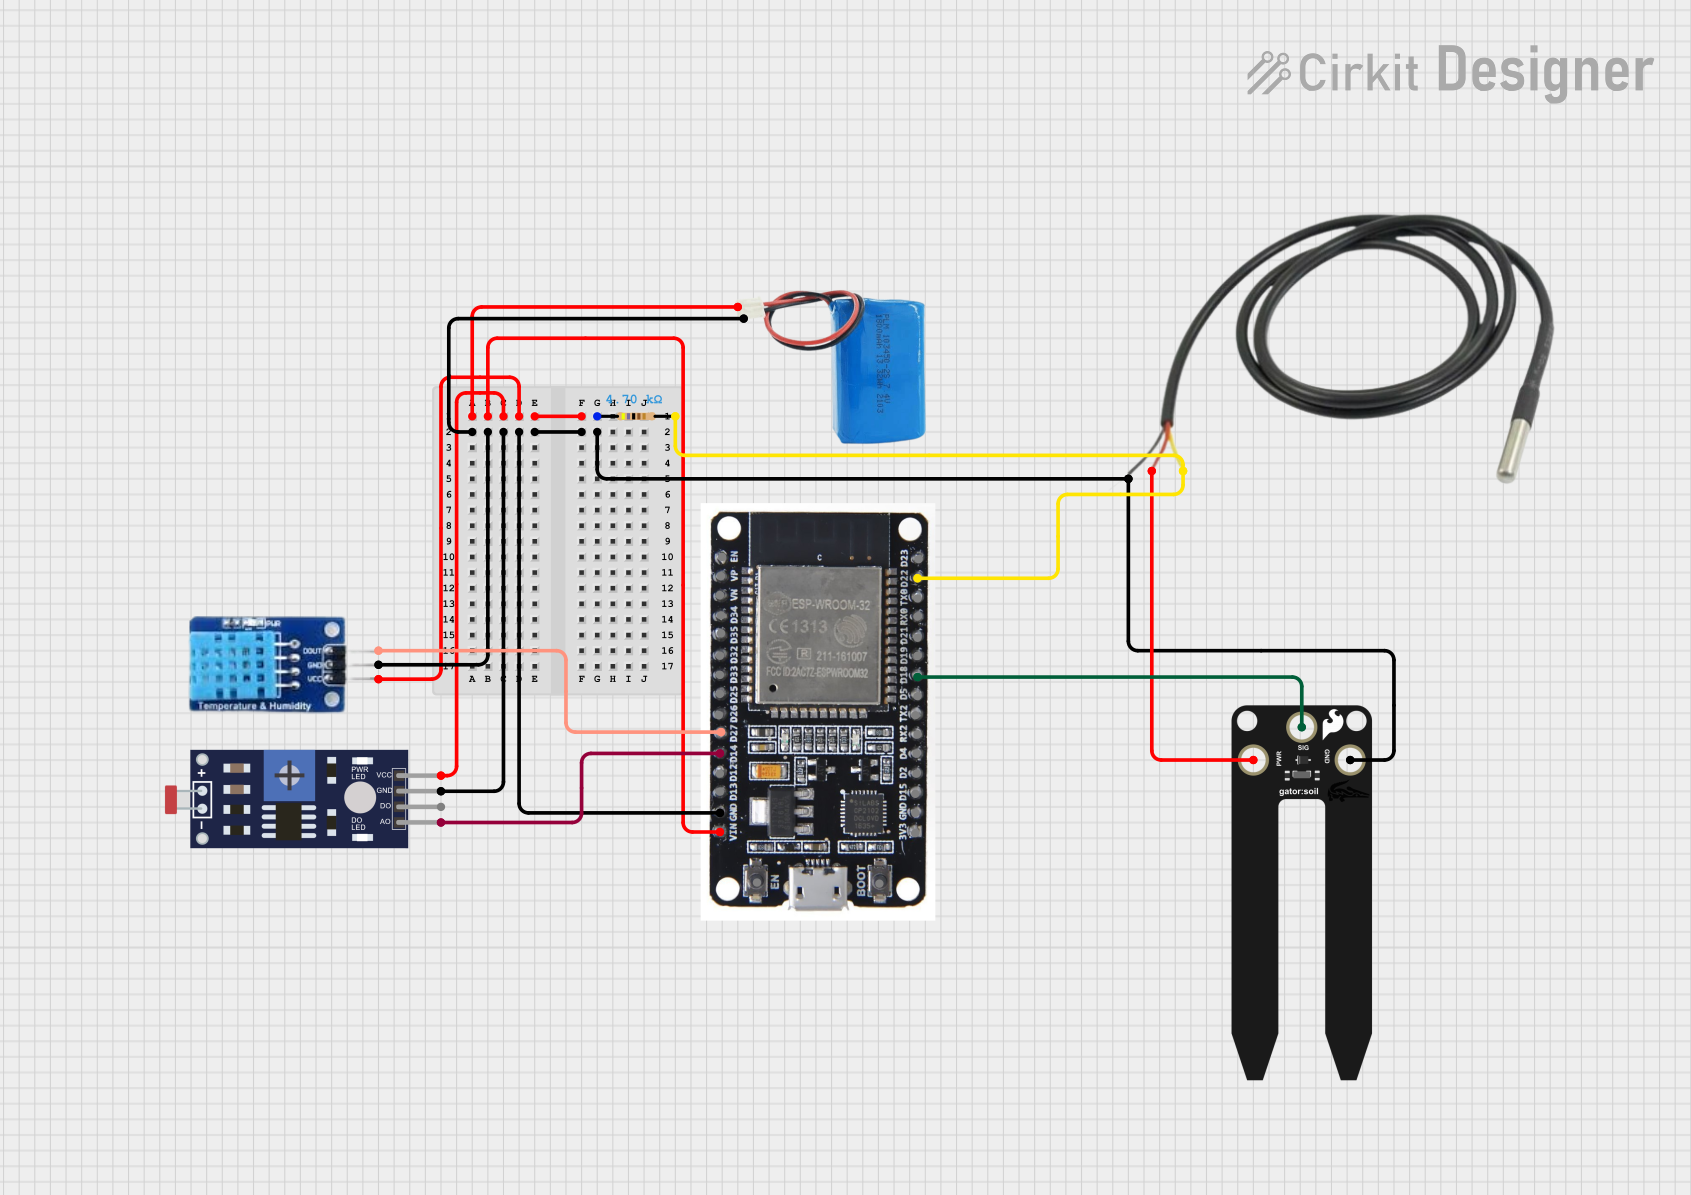
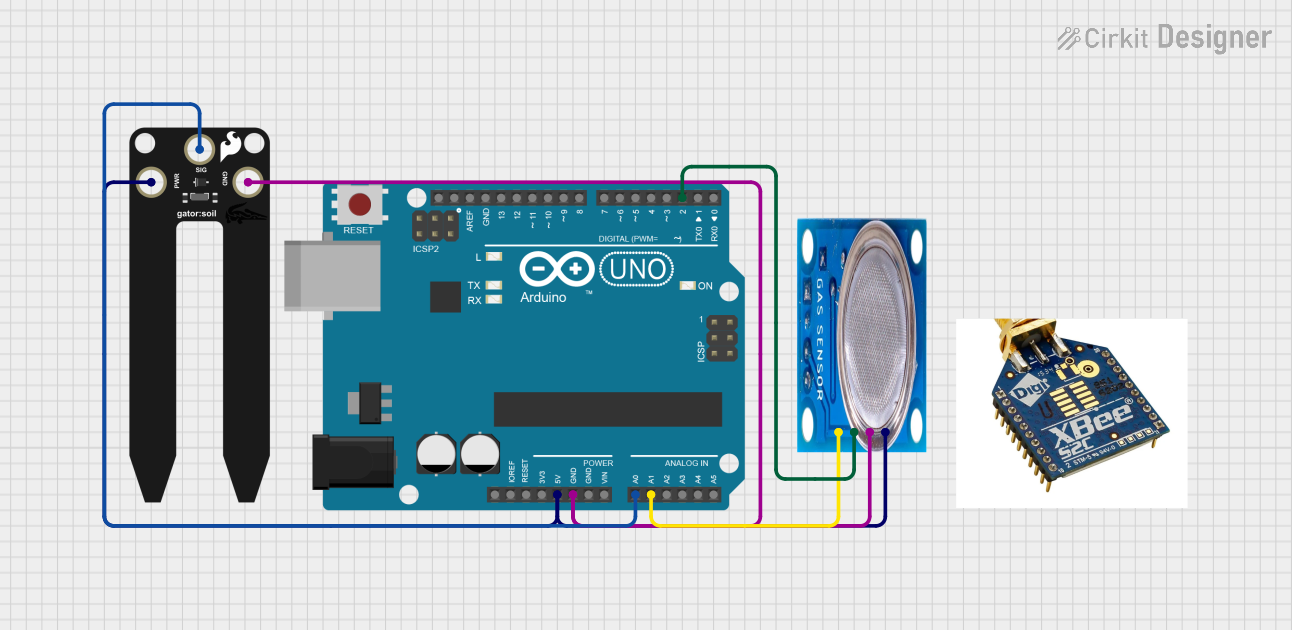
Explore Projects Built with SparkFun gator:particle
Common Applications and Use Cases
- Educational projects and learning environments
- IoT devices and smart home applications
- Wireless sensor networks
- Remote monitoring and control systems
- Prototyping for connected devices
Technical Specifications
Key Technical Details
- Microcontroller: Particle P1
- Wireless Connectivity: Wi-Fi (802.11b/g/n) and Bluetooth Smart (BLE)
- Input Voltage (VIN): 3.3V to 5.5V
- Operating Temperature: -20°C to 70°C
- Dimensions: 50.8mm x 17.8mm x 5.3mm
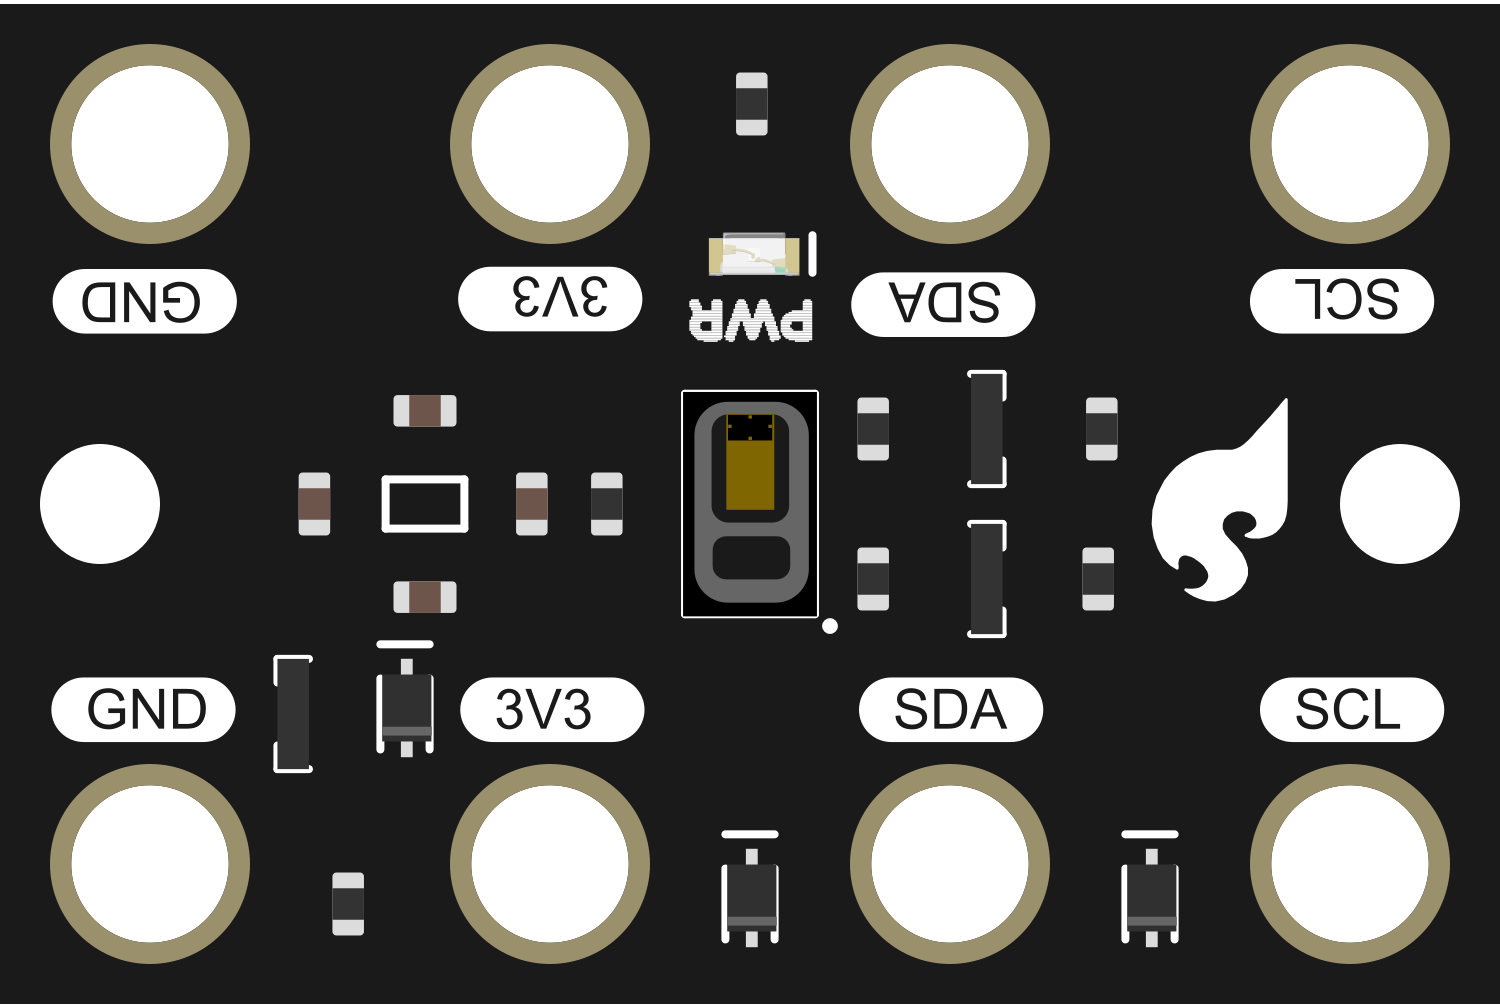
Pin Configuration and Descriptions
| Pin Number | Name | Description |
|---|---|---|
| 1 | VIN | Input voltage to the board (3.3V to 5.5V) |
| 2 | GND | Ground connection |
| 3 | RST | Reset pin, active low |
| 4 | TX | UART transmit pin |
| 5 | RX | UART receive pin |
| 6 | WKP | Wake-up pin, used to wake the P1 module |
| 7 | D0 | Digital I/O pin |
| 8 | D1 | Digital I/O pin |
| 9 | D2 | Digital I/O pin |
| 10 | D3 | Digital I/O pin |
| 11 | A0 | Analog input pin |
| 12 | A1 | Analog input pin |
| 13 | A2 | Analog input pin |
| 14 | A3 | Analog input pin |
| 15 | SCL | I2C clock pin |
| 16 | SDA | I2C data pin |
Usage Instructions
How to Use the Component in a Circuit
Powering the Board:
- Connect the VIN pin to a 3.3V to 5.5V power source.
- Connect the GND pin to the ground of the power source.
Establishing Connectivity:
- Utilize the onboard Particle P1 module to connect to Wi-Fi or Bluetooth networks.
- Follow the Particle setup process to register and configure the device.
Interfacing with Sensors and Actuators:
- Connect digital or analog sensors to the respective D0-D3 or A0-A3 pins.
- Use the TX and RX pins for UART communication with other devices.
Programming the Board:
- Use the Particle Web IDE, Particle Dev, or Particle CLI to write and upload code to the gator:particle.
Important Considerations and Best Practices
- Ensure that the input voltage does not exceed the recommended range to prevent damage.
- When connecting to Wi-Fi, ensure that the network is within range and that the correct credentials are used.
- Avoid placing the board in environments that exceed the operating temperature range.
- Use pull-up or pull-down resistors with digital inputs to ensure a stable state when no input is present.
Troubleshooting and FAQs
Common Issues
Device Not Connecting to Wi-Fi:
- Check the network credentials and signal strength.
- Ensure the antenna is properly connected if using an external one.
Failure to Communicate with Sensors:
- Verify the wiring and connections.
- Check if the sensor is compatible and functioning correctly.
Inconsistent Behavior or Crashes:
- Ensure the power supply is stable and within the specified voltage range.
- Check for any code that may be causing the processor to hang or reset.
Solutions and Tips for Troubleshooting
- Reset the board using the RST pin if the device is unresponsive.
- Use serial output to debug and monitor the status of the board.
- Consult the Particle community forums and documentation for additional support.
FAQs
Q: Can the gator:particle be powered via USB?
- A: No, the gator:particle requires an external power source connected to the VIN pin.
Q: How do I update the firmware on the gator:particle?
- A: Firmware updates can be done through the Particle Web IDE or Particle CLI.
Q: Is the gator:particle compatible with Arduino IDE?
- A: The gator:particle is not natively compatible with the Arduino IDE, but you can use Particle Workbench which is an extension for Visual Studio Code.
For further assistance, please refer to the SparkFun gator:particle official documentation and support forums.