How to Use IoT Button with NeoPixel BFF: Examples, Pinouts, and Specs
Introduction
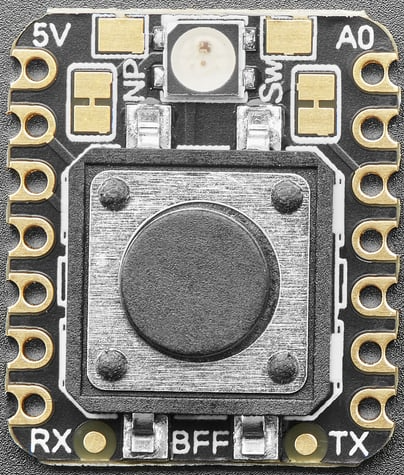
The Adafruit IoT Button with NeoPixel BFF (Part ID: 5297) is a compact, programmable button designed for Internet of Things (IoT) applications. It features a built-in NeoPixel RGB LED for customizable visual feedback, making it an excellent choice for interactive projects, smart home automation, and remote event triggering. This button can be integrated into various IoT platforms to perform tasks such as sending notifications, controlling devices, or logging events with a simple press.
Explore Projects Built with IoT Button with NeoPixel BFF
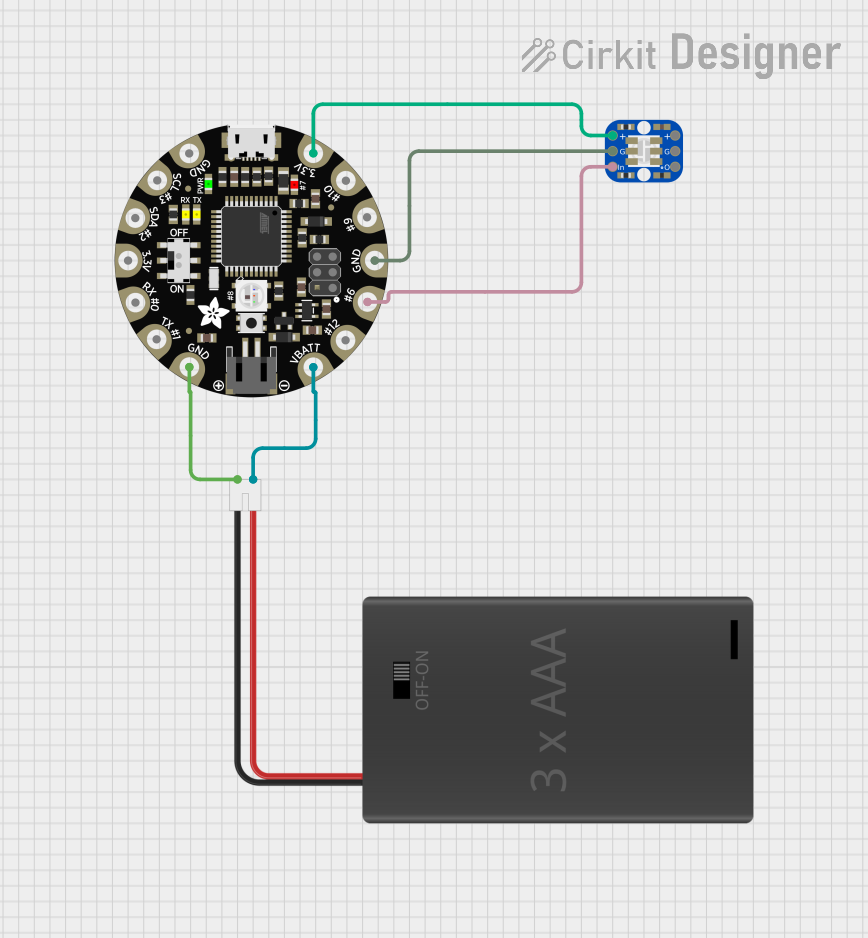
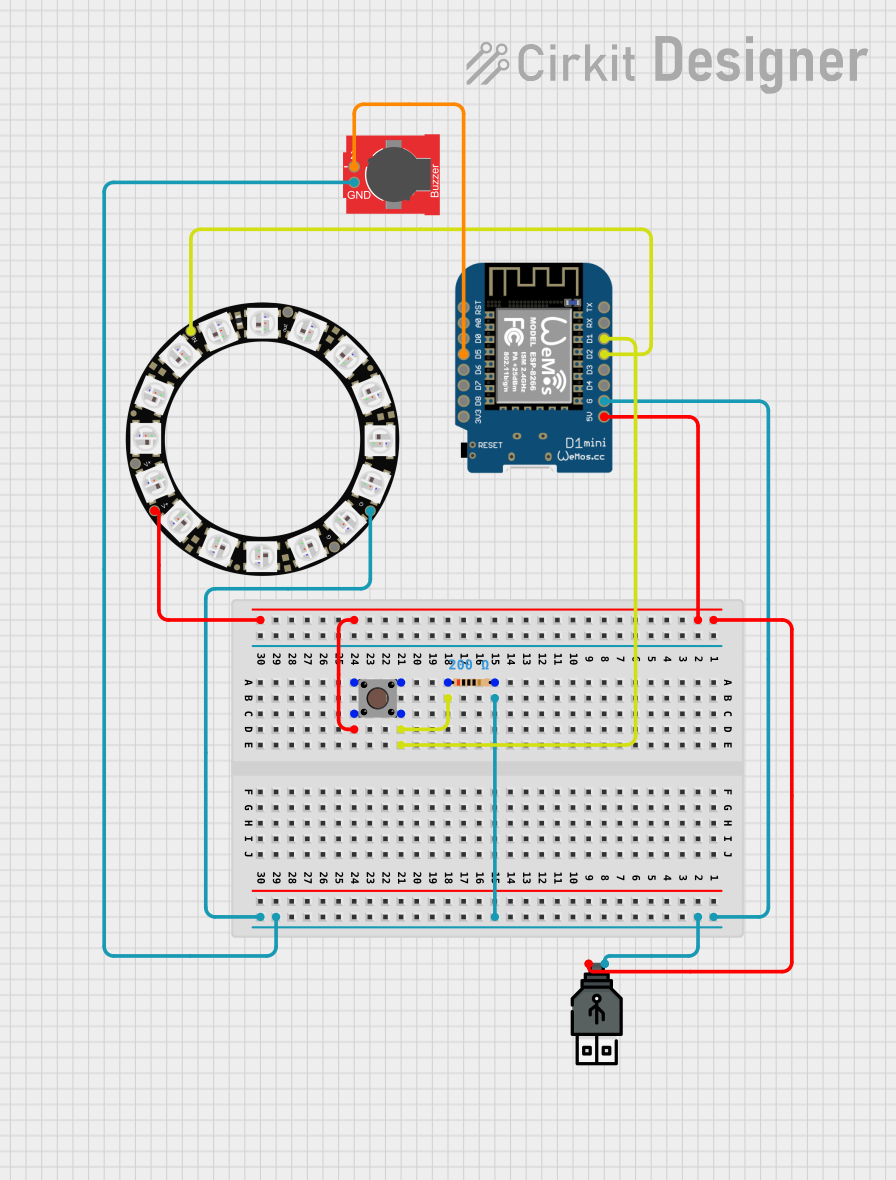
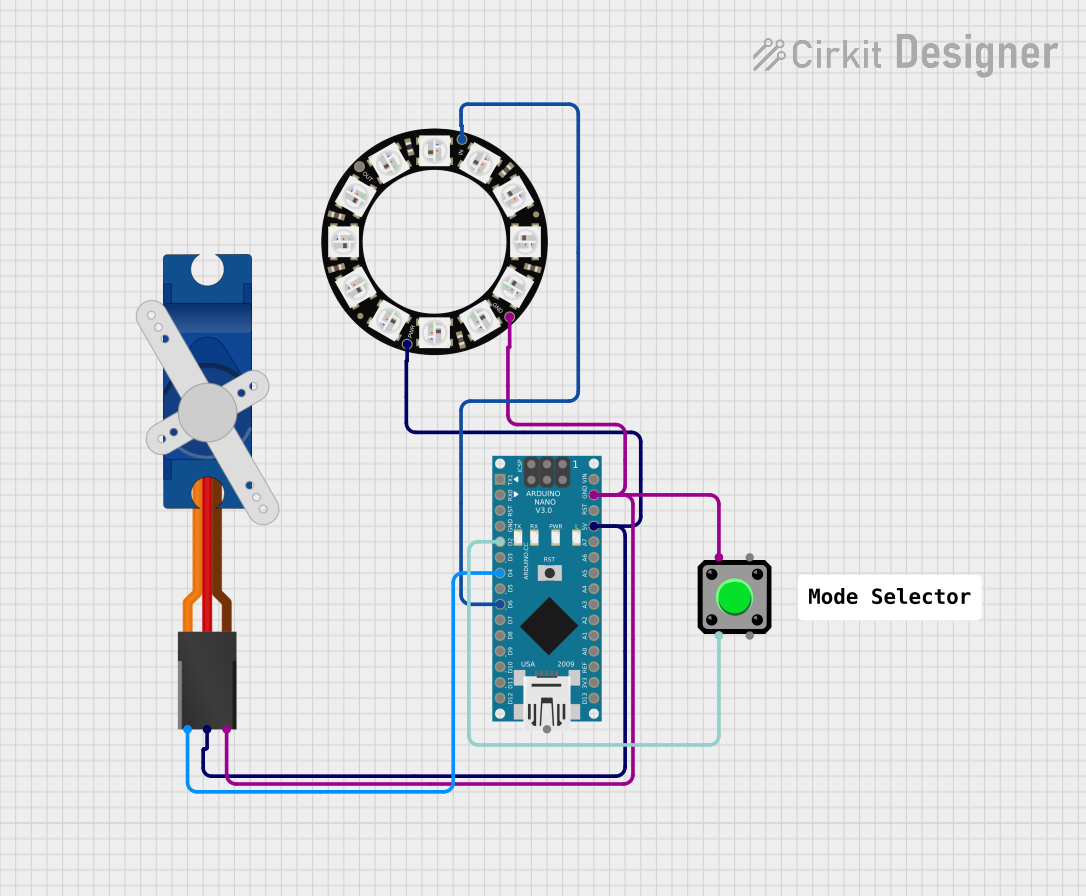
Explore Projects Built with IoT Button with NeoPixel BFF
Common Applications and Use Cases
- Smart home automation (e.g., turning on lights, activating appliances)
- IoT event triggers (e.g., sending HTTP requests or MQTT messages)
- Visual feedback for user interactions
- Remote control for connected devices
- Educational and prototyping projects
Technical Specifications
The IoT Button with NeoPixel BFF is designed to be compact and easy to integrate into IoT projects. Below are its key technical details:
Key Technical Details
| Parameter | Specification |
|---|---|
| Manufacturer | Adafruit |
| Part ID | 5297 |
| Operating Voltage | 3.3V to 5V |
| Current Consumption | ~20mA (idle), up to 60mA (with NeoPixel) |
| Communication Protocol | GPIO (button press) |
| LED Type | NeoPixel RGB LED |
| Dimensions | 20mm x 20mm x 5mm |
Pin Configuration and Descriptions
The IoT Button with NeoPixel BFF has the following pin configuration:
| Pin Name | Description |
|---|---|
| VIN | Power input (3.3V to 5V) |
| GND | Ground connection |
| BTN | Button output signal (active low, connects to GPIO pin on microcontroller) |
| DIN | Data input for NeoPixel (connect to microcontroller GPIO for control) |
| DOUT | Data output for NeoPixel (used for chaining additional NeoPixels) |
Usage Instructions
The IoT Button with NeoPixel BFF is straightforward to use in a circuit. Below are the steps to integrate and program the button:
How to Use the Component in a Circuit
- Power the Button: Connect the
VINpin to a 3.3V or 5V power source and theGNDpin to ground. - Connect the Button Signal: Connect the
BTNpin to a GPIO pin on your microcontroller. The button is active low, meaning it outputs a low signal when pressed. - Control the NeoPixel: Connect the
DINpin to a GPIO pin on your microcontroller for NeoPixel control. If chaining additional NeoPixels, connect theDOUTpin to theDINof the next NeoPixel. - Program the Microcontroller: Use a compatible library (e.g., Adafruit NeoPixel library) to control the LED and read button presses.
Important Considerations and Best Practices
- Debounce the Button: Use software or hardware debouncing to avoid false triggers when the button is pressed.
- Power Requirements: Ensure your power supply can handle the current draw of the NeoPixel, especially if using multiple LEDs.
- GPIO Voltage Levels: Verify that the GPIO voltage levels of your microcontroller are compatible with the button and NeoPixel.
- Heat Management: Avoid prolonged high-brightness settings on the NeoPixel to prevent overheating.
Example Code for Arduino UNO
Below is an example code snippet to read the button press and control the NeoPixel using an Arduino UNO:
#include <Adafruit_NeoPixel.h>

// Define pin connections
#define BUTTON_PIN 2  // GPIO pin connected to the button (BTN)
#define NEOPIXEL_PIN 6 // GPIO pin connected to the NeoPixel (DIN)

// Initialize NeoPixel (1 LED)
Adafruit_NeoPixel pixel = Adafruit_NeoPixel(1, NEOPIXEL_PIN, NEO_GRB + NEO_KHZ800);

void setup() {
  pinMode(BUTTON_PIN, INPUT_PULLUP); // Set button pin as input with pull-up resistor
  pixel.begin();                    // Initialize NeoPixel
  pixel.show();                     // Turn off all pixels initially
}

void loop() {
  // Check if the button is pressed
  if (digitalRead(BUTTON_PIN) == LOW) {
    // Button is pressed, turn NeoPixel green
    pixel.setPixelColor(0, pixel.Color(0, 255, 0)); // Green color
    pixel.show();
    delay(200); // Debounce delay
  } else {
    // Button is not pressed, turn NeoPixel off
    pixel.setPixelColor(0, pixel.Color(0, 0, 0)); // Turn off
    pixel.show();
  }
}
Troubleshooting and FAQs
Common Issues and Solutions
NeoPixel Not Lighting Up
- Cause: Incorrect wiring or insufficient power supply.
- Solution: Double-check the
DINconnection and ensure the power supply can handle the current draw.
Button Not Responding
- Cause: GPIO pin not configured correctly or no pull-up resistor.
- Solution: Ensure the button pin is set as
INPUT_PULLUPin your code.
Flickering NeoPixel
- Cause: Noise on the data line or insufficient power.
- Solution: Use a capacitor (e.g., 1000µF) across the power supply and a resistor (e.g., 330Ω) on the data line.
Button Press Registers Multiple Times
- Cause: Button bounce.
- Solution: Implement software debouncing using a delay or state machine.
FAQs
Q: Can I use multiple IoT Buttons in one project?
A: Yes, you can connect multiple buttons to different GPIO pins on your microcontroller. Ensure each button has a unique pin assignment.
Q: How many NeoPixels can I chain to this button?
A: The number of NeoPixels you can chain depends on your power supply and microcontroller's memory. Each NeoPixel requires ~60mA at full brightness.
Q: Is the button waterproof?
A: No, the IoT Button with NeoPixel BFF is not waterproof. Use it in dry environments or enclose it in a waterproof case for outdoor use.
Q: Can I use this button with platforms other than Arduino?
A: Yes, the button is compatible with any microcontroller that supports GPIO and NeoPixel control, such as Raspberry Pi, ESP32, or STM32.