How to Use 12V Solenoid Valve: Examples, Pinouts, and Specs
Introduction
The 12V Solenoid Valve is an electromechanical device designed to control the flow of fluids or gases. It operates by using an electromagnetic coil to open or close a valve, allowing or restricting the passage of the medium. This component is widely used in automation systems, irrigation setups, fluid control systems, and pneumatic or hydraulic applications. Its ability to be controlled electronically makes it a versatile and essential component in many industries.
Explore Projects Built with 12V Solenoid Valve

Explore Projects Built with 12V Solenoid Valve
Common Applications
- Automated irrigation systems
- Water or gas flow control in industrial processes
- Home appliances like washing machines and dishwashers
- Pneumatic and hydraulic systems
- Medical devices requiring fluid regulation
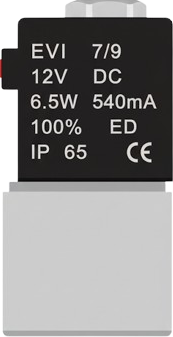
Technical Specifications
Below are the key technical details of the 12V Solenoid Valve:
| Parameter | Specification |
|---|---|
| Operating Voltage | 12V DC |
| Current Consumption | 0.2A to 0.5A (depending on the model) |
| Power Consumption | 2.4W to 6W |
| Operating Pressure | 0.02 MPa to 0.8 MPa |
| Fluid Temperature Range | 0°C to 80°C |
| Material | Brass, stainless steel, or plastic |
| Port Size | 1/2", 3/4", or 1" (varies by model) |
| Type | Normally Closed (NC) or Normally Open (NO) |
Pin Configuration and Descriptions
The 12V Solenoid Valve typically has two terminals for electrical connections:
| Pin | Description |
|---|---|
| Positive (+) | Connect to the positive terminal of the 12V DC power supply |
| Negative (-) | Connect to the ground (GND) of the power supply |
Usage Instructions
How to Use the 12V Solenoid Valve in a Circuit
- Power Supply: Ensure you have a stable 12V DC power source capable of supplying the required current (typically 0.2A to 0.5A).
- Connection: Connect the positive terminal of the power supply to the positive pin of the solenoid valve and the negative terminal to the ground pin.
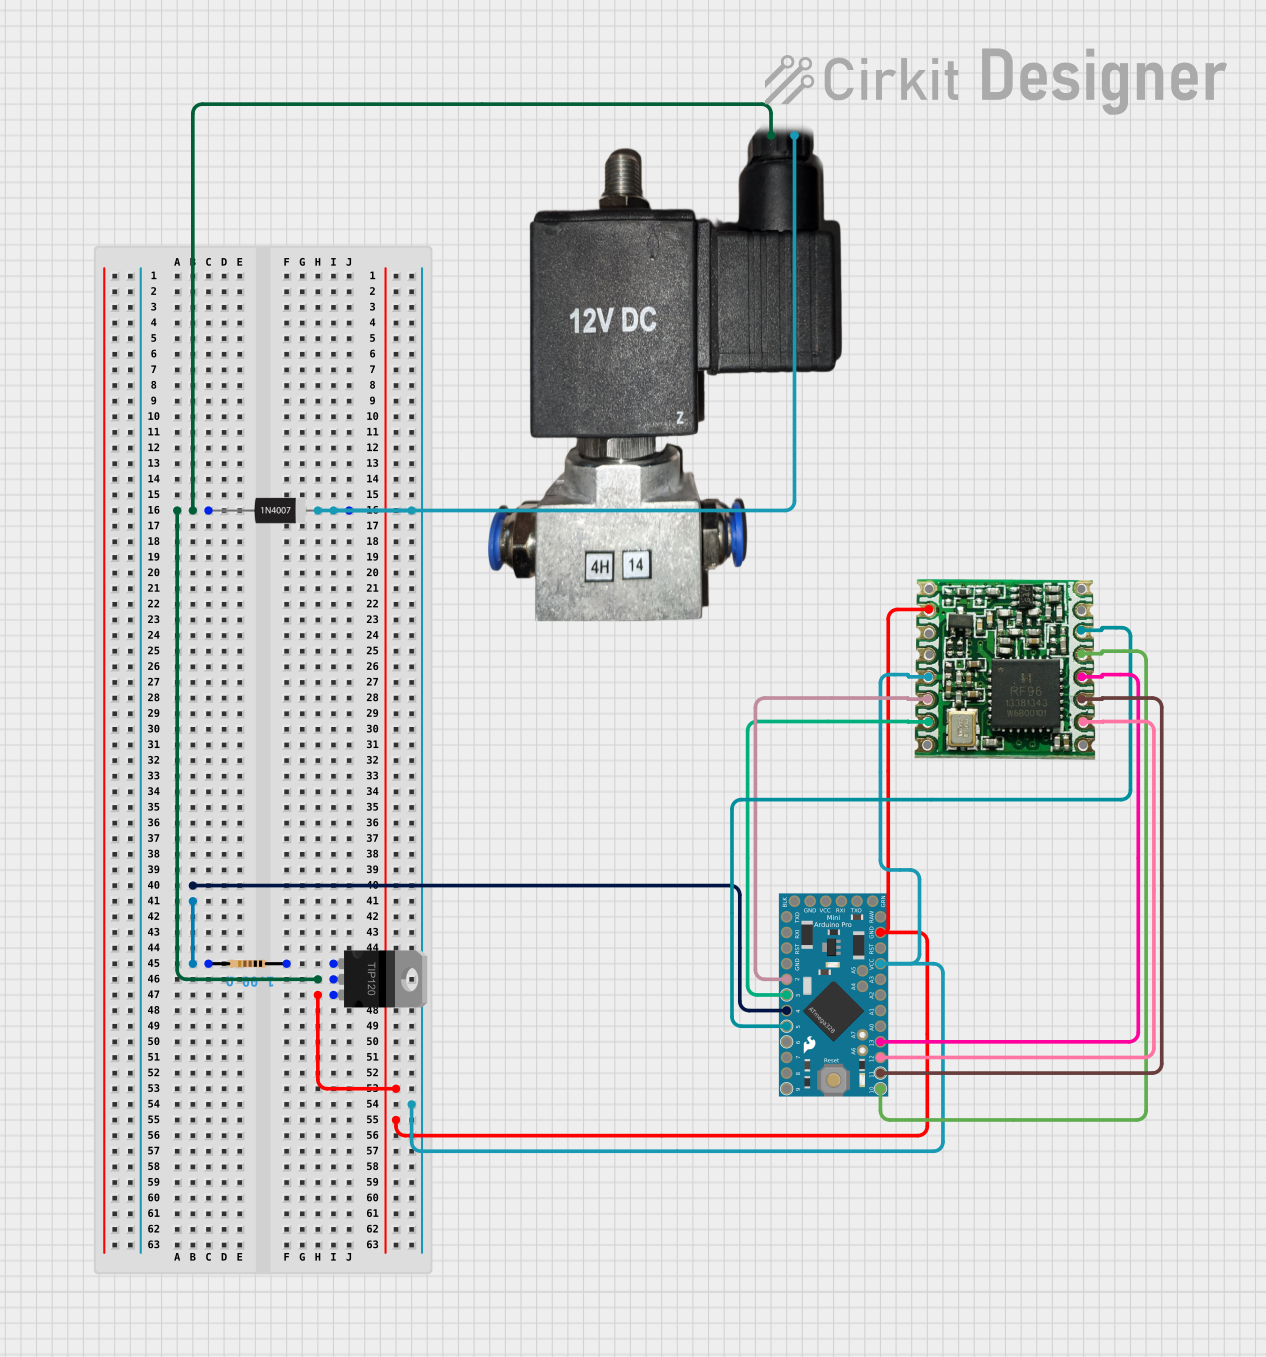
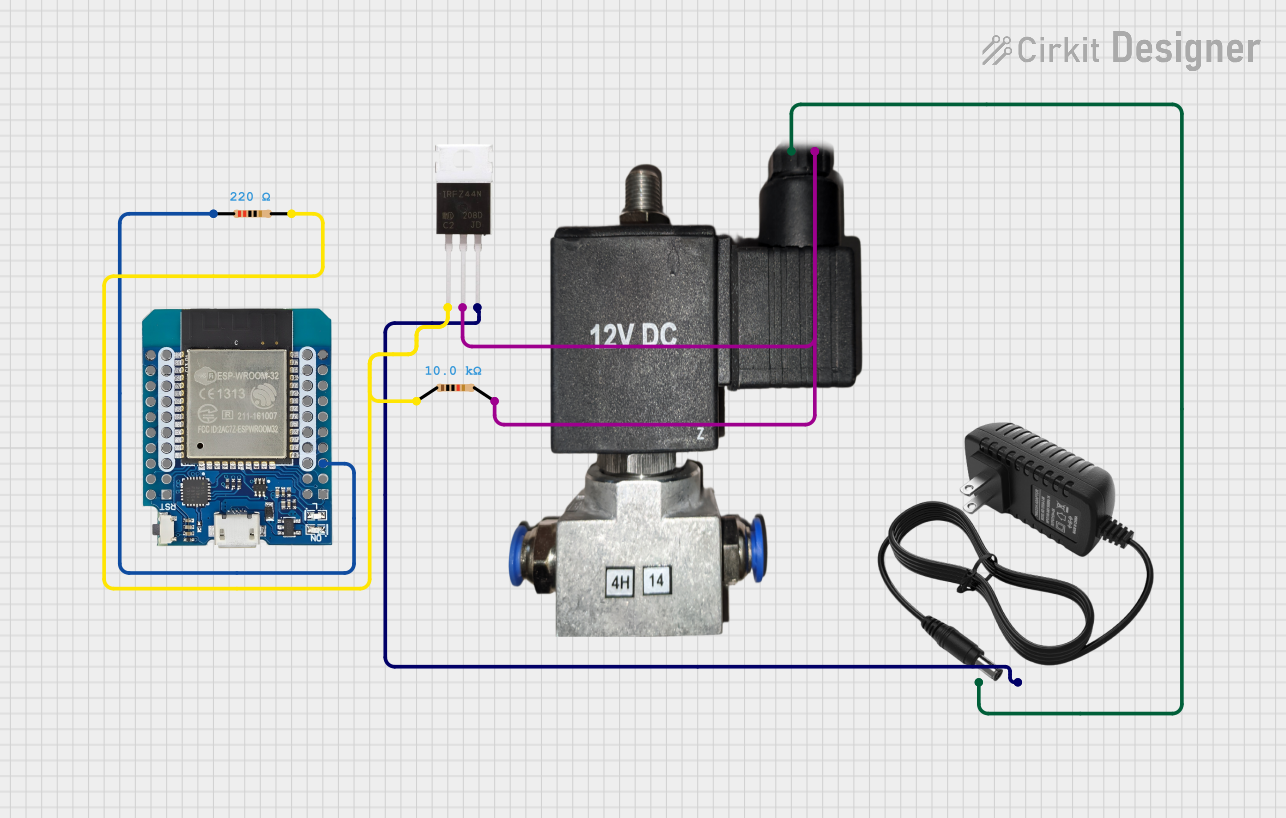
- Control: Use a relay module or a transistor circuit to control the solenoid valve from a microcontroller (e.g., Arduino UNO). Directly connecting the valve to a microcontroller is not recommended due to high current requirements.
- Fluid/Gas Flow: Attach the inlet and outlet ports of the valve to the appropriate pipes or hoses. Ensure the flow direction matches the arrow marked on the valve body.
Important Considerations
- Polarity: Always connect the positive and negative terminals correctly to avoid damage.
- Power Supply: Use a regulated 12V DC power supply to prevent voltage spikes.
- Heat Dissipation: The solenoid coil may heat up during prolonged operation. Ensure proper ventilation.
- Pressure Range: Operate the valve within its specified pressure range to avoid leaks or damage.
- Debris: Use a filter to prevent debris from clogging the valve.
Example: Controlling a 12V Solenoid Valve with Arduino UNO
Below is an example of how to control a 12V solenoid valve using an Arduino UNO and a relay module:
// Example: Controlling a 12V Solenoid Valve with Arduino UNO
// This code turns the solenoid valve ON for 5 seconds and OFF for 5 seconds.

const int relayPin = 7; // Pin connected to the relay module

void setup() {
  pinMode(relayPin, OUTPUT); // Set the relay pin as an output
  digitalWrite(relayPin, LOW); // Ensure the relay is OFF initially
}

void loop() {
  digitalWrite(relayPin, HIGH); // Turn the relay ON (activates solenoid valve)
  delay(5000); // Keep the valve open for 5 seconds
  digitalWrite(relayPin, LOW); // Turn the relay OFF (deactivates solenoid valve)
  delay(5000); // Wait for 5 seconds before repeating
}
Note: Ensure the relay module is rated for the current and voltage of the solenoid valve. Use an external power supply for the solenoid valve to avoid overloading the Arduino.
Troubleshooting and FAQs
Common Issues and Solutions
Valve Not Activating
- Cause: Insufficient power supply.
- Solution: Verify that the power supply provides 12V DC and sufficient current.
Valve Stuck in Open or Closed Position
- Cause: Debris or dirt inside the valve.
- Solution: Clean the valve and use a filter to prevent debris from entering.
Overheating
- Cause: Prolonged activation or insufficient ventilation.
- Solution: Limit the activation time and ensure proper ventilation around the valve.
No Fluid/Gas Flow
- Cause: Incorrect installation or blocked ports.
- Solution: Check the flow direction and ensure the ports are not obstructed.
FAQs
Can I use a 12V Solenoid Valve with an AC power supply?
- No, this valve is designed for DC power only. Using AC power may damage the coil.
What happens if I reverse the polarity of the connections?
- Reversing the polarity may damage the solenoid coil. Always connect the positive and negative terminals correctly.
Can I control the valve directly with an Arduino?
- No, the Arduino cannot supply the required current. Use a relay module or a transistor circuit for control.
Is the valve waterproof?
- The valve body is typically water-resistant, but the electrical connections must be protected from water exposure.
By following this documentation, you can effectively integrate and troubleshoot the 12V Solenoid Valve in your projects.