How to Use Sharp IR Sensor: Examples, Pinouts, and Specs
Introduction
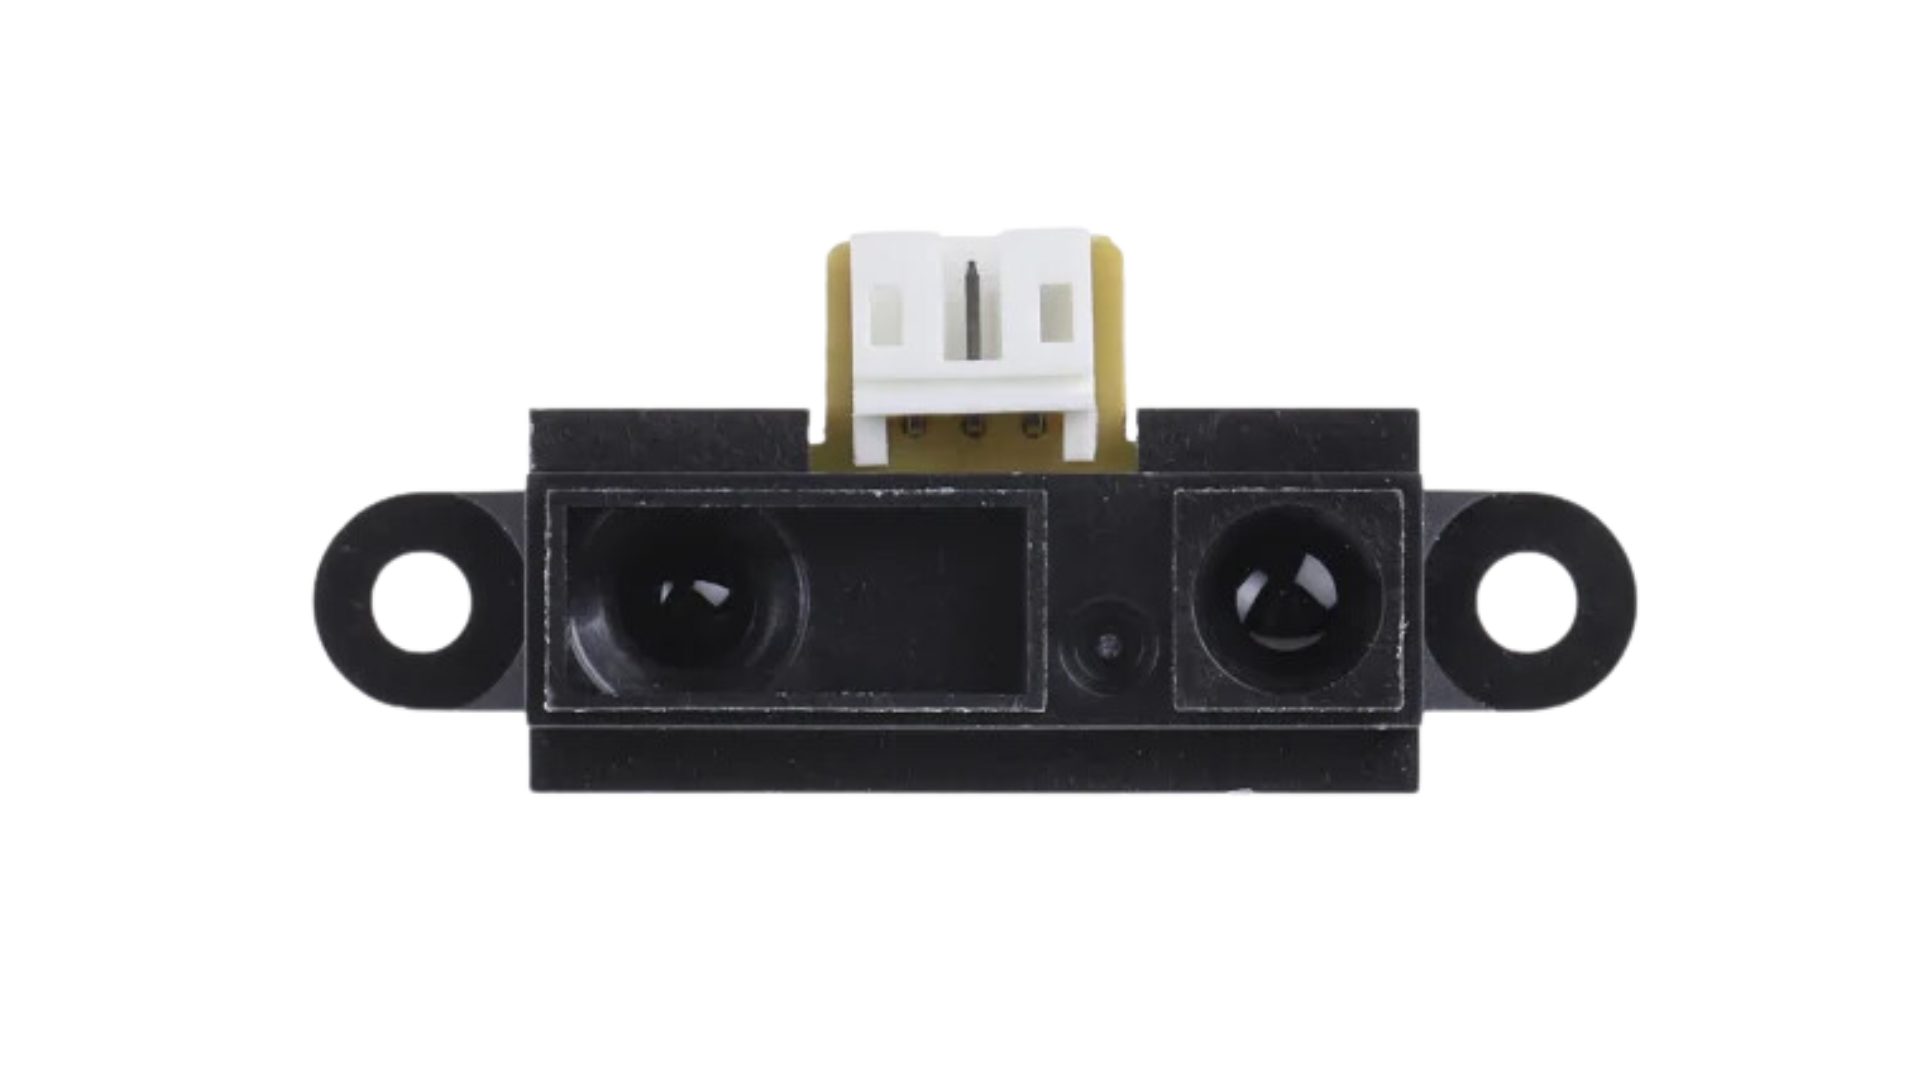
The Sharp IR Sensor is an infrared distance sensor designed to measure the distance to an object by emitting infrared light and detecting the reflected light. It provides an analog voltage output proportional to the distance of the detected object. This sensor is widely used in robotics, automation, and other applications requiring obstacle detection or distance measurement. Its compact size, reliability, and ease of use make it a popular choice for hobbyists and professionals alike.
Explore Projects Built with Sharp IR Sensor


Explore Projects Built with Sharp IR Sensor
Common Applications
- Obstacle detection in robotics
- Distance measurement in automation systems
- Object tracking in conveyor systems
- Proximity sensing in interactive devices
- Collision avoidance in drones and vehicles
Technical Specifications
Below are the key technical details of the Sharp IR Sensor (e.g., GP2Y0A21YK0F model, a common variant):
| Parameter | Value |
|---|---|
| Operating Voltage | 4.5V to 5.5V |
| Average Current Consumption | 30 mA (typical) |
| Output Voltage Range | 0.4V to 2.4V (analog output) |
| Measuring Range | 10 cm to 80 cm |
| Response Time | 38 ms |
| Output Type | Analog voltage |
| Dimensions | 29.5 mm × 13 mm × 21.6 mm |
| Weight | Approximately 3.5 g |
Pin Configuration and Descriptions
The Sharp IR Sensor typically has a 3-pin interface. The pinout is as follows:
| Pin | Name | Description |
|---|---|---|
| 1 | VCC | Power supply input (4.5V to 5.5V) |
| 2 | GND | Ground connection |
| 3 | OUT | Analog output voltage proportional to distance |
Usage Instructions
How to Use the Sharp IR Sensor in a Circuit
- Power the Sensor: Connect the VCC pin to a 5V power supply and the GND pin to the ground of your circuit.
- Read the Output: Connect the OUT pin to an analog input pin of a microcontroller (e.g., Arduino) to read the sensor's output voltage.
- Calibrate the Sensor: The output voltage corresponds to the distance of the object. Use the sensor's datasheet to map the voltage to distance values or create a custom calibration curve for your application.
Important Considerations and Best Practices
- Avoid Ambient Light Interference: The sensor's performance may degrade in environments with strong ambient infrared light. Use it in controlled lighting conditions for best results.
- Maintain Proper Orientation: Ensure the sensor is mounted such that the emitted infrared beam is perpendicular to the target surface for accurate readings.
- Observe the Measuring Range: The sensor is designed to work within a specific range (10 cm to 80 cm). Objects outside this range may result in inaccurate or no readings.
- Use Decoupling Capacitors: Place a 10 µF capacitor across the VCC and GND pins to reduce noise and stabilize the power supply.
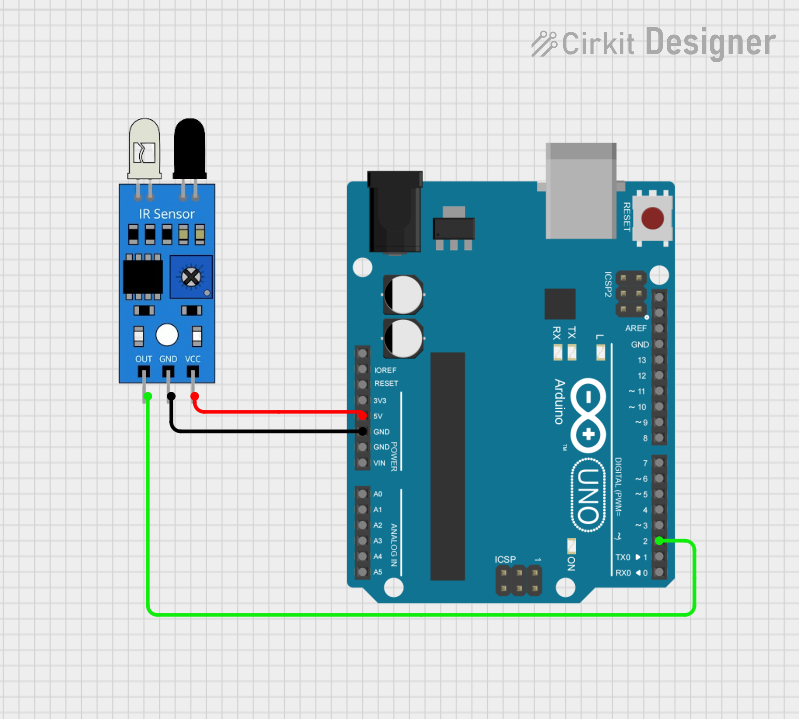
Example: Connecting to an Arduino UNO
Below is an example of how to connect and use the Sharp IR Sensor with an Arduino UNO:
Circuit Connections
- VCC: Connect to the Arduino's 5V pin.
- GND: Connect to the Arduino's GND pin.
- OUT: Connect to the Arduino's analog input pin (e.g., A0).
Arduino Code
// Sharp IR Sensor Example Code
// This code reads the analog output of the Sharp IR Sensor and prints the
// corresponding distance value to the Serial Monitor.

const int sensorPin = A0; // Analog pin connected to the sensor's OUT pin
int sensorValue = 0;      // Variable to store the sensor's analog value
float distance = 0.0;     // Variable to store the calculated distance

void setup() {
  Serial.begin(9600); // Initialize serial communication at 9600 baud
}

void loop() {
  // Read the analog value from the sensor
  sensorValue = analogRead(sensorPin);

  // Convert the analog value to a voltage (assuming 5V reference)
  float voltage = sensorValue * (5.0 / 1023.0);

  // Map the voltage to a distance value (custom calibration may be needed)
  // Example: Using a linear approximation for a specific sensor model
  if (voltage > 0.4 && voltage < 2.4) {
    distance = 27.86 / (voltage - 0.42); // Example formula for GP2Y0A21YK0F
  } else {
    distance = -1; // Invalid reading
  }

  // Print the distance to the Serial Monitor
  if (distance > 0) {
    Serial.print("Distance: ");
    Serial.print(distance);
    Serial.println(" cm");
  } else {
    Serial.println("Out of range");
  }

  delay(100); // Wait 100 ms before the next reading
}
Troubleshooting and FAQs
Common Issues and Solutions
No Output or Incorrect Readings:
- Cause: Incorrect wiring or loose connections.
- Solution: Double-check the wiring and ensure all connections are secure.
Fluctuating or Noisy Readings:
- Cause: Power supply noise or interference from ambient light.
- Solution: Add a decoupling capacitor (10 µF) across the VCC and GND pins. Avoid using the sensor in direct sunlight or near strong infrared sources.
Out-of-Range Readings:
- Cause: Object is too close (<10 cm) or too far (>80 cm).
- Solution: Ensure the object is within the sensor's specified measuring range.
Slow Response:
- Cause: Sensor's response time (38 ms) may not meet application requirements.
- Solution: Consider using a faster sensor if your application requires quicker updates.
FAQs
Q1: Can the Sharp IR Sensor detect transparent objects?
A1: No, the sensor may not reliably detect transparent or highly reflective objects due to the way infrared light interacts with such surfaces.
Q2: How do I improve the accuracy of distance measurements?
A2: Use a custom calibration curve specific to your sensor and application. Avoid using the sensor in environments with strong ambient infrared light.
Q3: Can I use the Sharp IR Sensor with a 3.3V microcontroller?
A3: The sensor requires a 4.5V to 5.5V power supply. Use a level shifter or voltage divider to safely interface the sensor's output with a 3.3V microcontroller.
Q4: What is the lifespan of the Sharp IR Sensor?
A4: The sensor is highly durable and can last for years under normal operating conditions. However, avoid exposing it to extreme temperatures or physical damage.