How to Use Adafruit Latching Mini Relay FeatherWing: Examples, Pinouts, and Specs

Introduction
The Adafruit Latching Mini Relay FeatherWing is a compact relay board designed to interface seamlessly with Adafruit Feather microcontrollers. It allows users to control high-power devices, such as lights, motors, or appliances, using low-power signals from a Feather board. The relay features latching functionality, meaning it retains its state (ON or OFF) even when power is removed. This makes it particularly suitable for battery-operated or low-power projects where energy efficiency is critical.
Explore Projects Built with Adafruit Latching Mini Relay FeatherWing


Explore Projects Built with Adafruit Latching Mini Relay FeatherWing
Common Applications and Use Cases
- Home automation systems (e.g., controlling lights or fans)
- Battery-powered IoT devices
- Robotics and motor control
- Energy-efficient switching for appliances
- Projects requiring state retention during power loss
Technical Specifications
The Adafruit Latching Mini Relay FeatherWing is designed for ease of use and compatibility with the Feather ecosystem. Below are its key technical details:
Key Specifications
| Parameter | Value |
|---|---|
| Operating Voltage | 3.3V or 5V (depending on Feather board) |
| Relay Type | Latching (bi-stable) |
| Max Switching Voltage | 120V AC / 60V DC |
| Max Switching Current | 2A |
| Control Signal | Low-power digital signal from Feather |
| Dimensions | 51mm x 23mm x 8mm |
| Weight | 5.5g |
Pin Configuration and Descriptions
The FeatherWing connects directly to the Feather microcontroller via its headers. Below is the pinout description:
| Pin Name | Description |
|---|---|
| GND | Ground connection |
| VIN | Power input (3.3V or 5V, depending on Feather board) |
| CTRL1 | Control pin for toggling the relay ON |
| CTRL2 | Control pin for toggling the relay OFF |
| COM (Common) | Common terminal for the relay switch |
| NO (Normally Open) | Terminal connected to COM when the relay is ON |
| NC (Normally Closed) | Terminal connected to COM when the relay is OFF |
Usage Instructions
How to Use the Component in a Circuit
- Connect the FeatherWing to a Feather Board: Align the FeatherWing with the Feather microcontroller and solder the headers for a secure connection.
- Power the FeatherWing: Ensure the Feather board is powered via USB or a battery. The FeatherWing will draw power from the Feather's VIN pin.
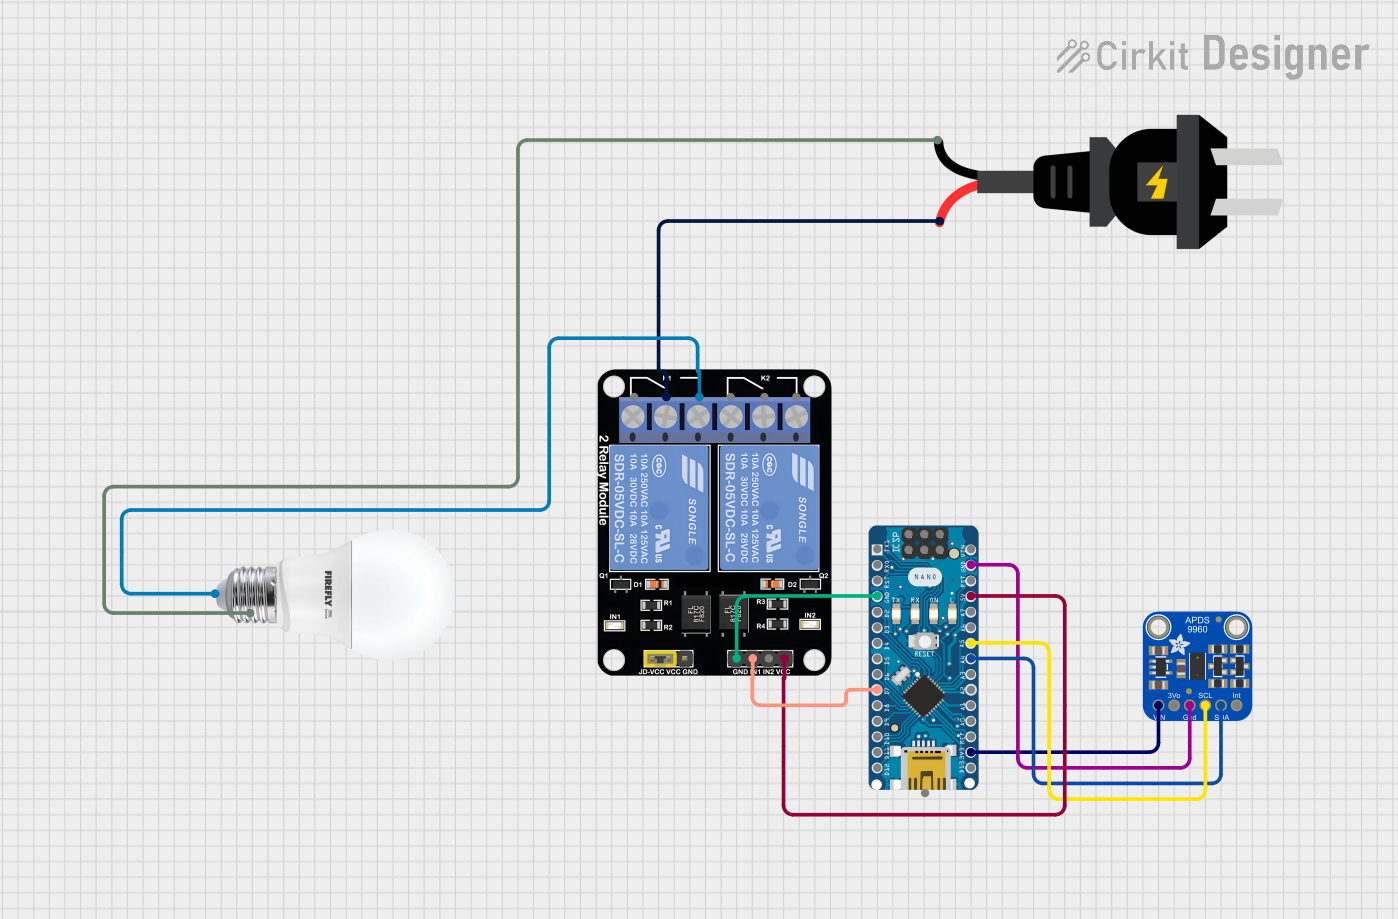
- Connect the Load:
- Connect one terminal of your load (e.g., a light bulb) to the relay's COM pin.
- Connect the other terminal of the load to either the NO (Normally Open) or NC (Normally Closed) pin, depending on your desired behavior:
- Use NO if the load should be OFF by default and turn ON when the relay is activated.
- Use NC if the load should be ON by default and turn OFF when the relay is activated.
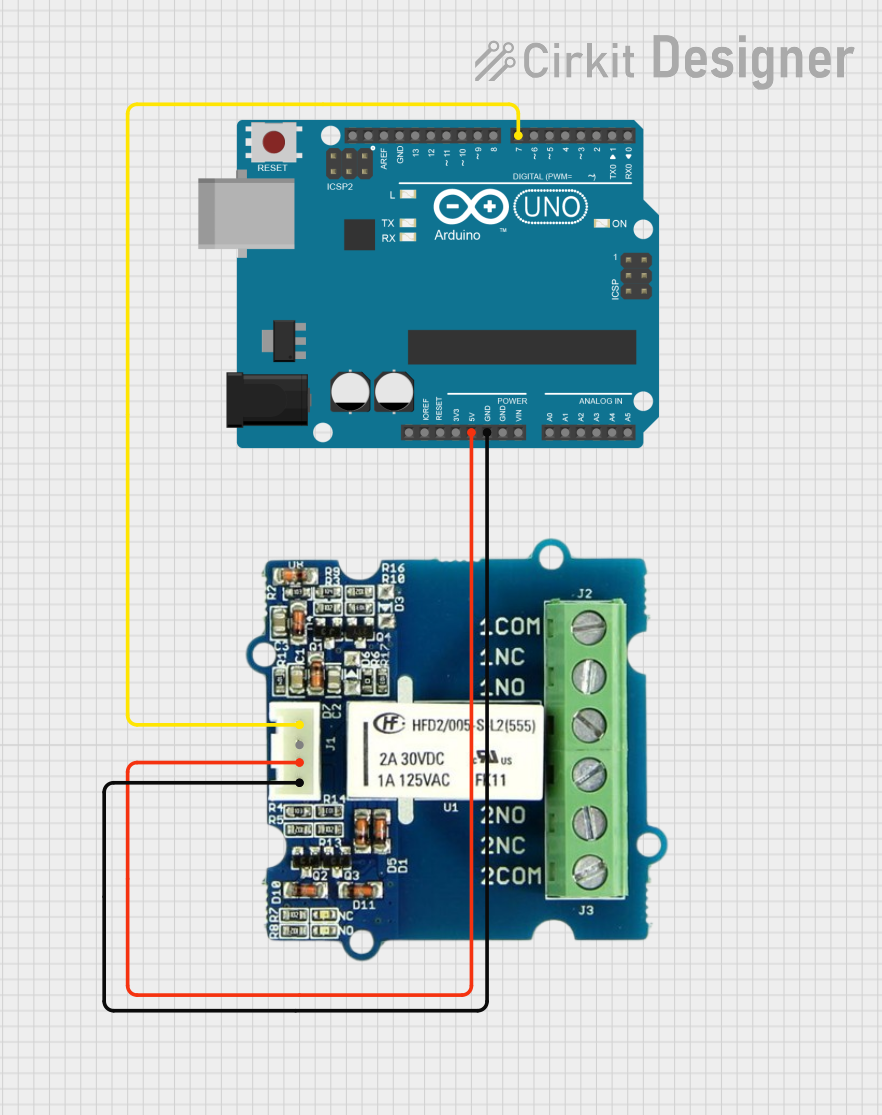
- Control the Relay: Use the Feather's GPIO pins to send signals to CTRL1 and CTRL2 to toggle the relay state.
Important Considerations and Best Practices
- Voltage and Current Ratings: Ensure the load connected to the relay does not exceed the maximum voltage (120V AC / 60V DC) or current (2A) ratings.
- Latching Behavior: Remember that the relay retains its state even when power is removed. To reset the relay, send a signal to the appropriate control pin (CTRL1 or CTRL2).
- Isolation: The relay provides electrical isolation between the Feather board and the high-power load, ensuring safety. However, always handle high-voltage connections with care.
- Debouncing: If you experience erratic relay behavior, consider adding software debouncing to your control signals.
Example Code for Arduino UNO-Compatible Feather Boards
Below is an example of how to control the Adafruit Latching Mini Relay FeatherWing using an Arduino-compatible Feather board:
// Define control pins for the relay
#define RELAY_ON_PIN  5  // Pin connected to CTRL1 (turns relay ON)
#define RELAY_OFF_PIN 6  // Pin connected to CTRL2 (turns relay OFF)

void setup() {
  // Set relay control pins as outputs
  pinMode(RELAY_ON_PIN, OUTPUT);
  pinMode(RELAY_OFF_PIN, OUTPUT);

  // Initialize relay to OFF state
  digitalWrite(RELAY_ON_PIN, LOW);
  digitalWrite(RELAY_OFF_PIN, HIGH);
  delay(100);  // Allow relay to settle
  digitalWrite(RELAY_OFF_PIN, LOW);
}

void loop() {
  // Example: Turn the relay ON for 5 seconds, then OFF for 5 seconds
  digitalWrite(RELAY_ON_PIN, HIGH);  // Activate relay ON
  delay(100);                        // Short pulse to toggle relay
  digitalWrite(RELAY_ON_PIN, LOW);   // Deactivate control pin
  delay(5000);                       // Wait 5 seconds

  digitalWrite(RELAY_OFF_PIN, HIGH); // Activate relay OFF
  delay(100);                        // Short pulse to toggle relay
  digitalWrite(RELAY_OFF_PIN, LOW);  // Deactivate control pin
  delay(5000);                       // Wait 5 seconds
}
Troubleshooting and FAQs
Common Issues and Solutions
Relay Does Not Toggle
- Cause: Incorrect wiring or control signal.
- Solution: Double-check the connections to CTRL1 and CTRL2. Ensure the Feather board is powered and the control pins are configured as outputs.
Load Does Not Turn ON/OFF
- Cause: Incorrect connection to the relay terminals.
- Solution: Verify that the load is connected to the correct relay terminals (COM, NO, or NC) based on the desired behavior.
Erratic Relay Behavior
- Cause: Noise or insufficient signal debouncing.
- Solution: Add a small delay (e.g., 100ms) after toggling the control pins to ensure stable operation.
Relay Stays in the Same State After Power Loss
- Cause: This is expected behavior due to the latching functionality.
- Solution: Send a signal to CTRL1 or CTRL2 to reset the relay to the desired state.
FAQs
Q: Can I use this relay with a non-Feather microcontroller?
A: Yes, but you will need to connect the relay's control pins (CTRL1 and CTRL2) to GPIO pins on your microcontroller and provide a compatible power source (3.3V or 5V).
Q: Is the relay safe for high-voltage applications?
A: The relay is rated for up to 120V AC or 60V DC at 2A. Always follow proper safety precautions when working with high voltages.
Q: How much power does the relay consume?
A: The relay consumes minimal power during operation, as it only requires a brief pulse to toggle its state. This makes it ideal for battery-powered projects.