How to Use oled: Examples, Pinouts, and Specs
Introduction
The Yuri OLED (Part ID: OOH) is a high-performance Organic Light Emitting Diode (OLED) display module designed for a wide range of applications. OLED technology utilizes organic compounds that emit light when an electric current is applied, eliminating the need for a backlight. This results in displays with exceptional contrast ratios, vibrant colors, and deep blacks. The Yuri OLED is compact, energy-efficient, and ideal for use in devices such as smartphones, wearables, industrial equipment, and DIY electronics projects.
Explore Projects Built with oled
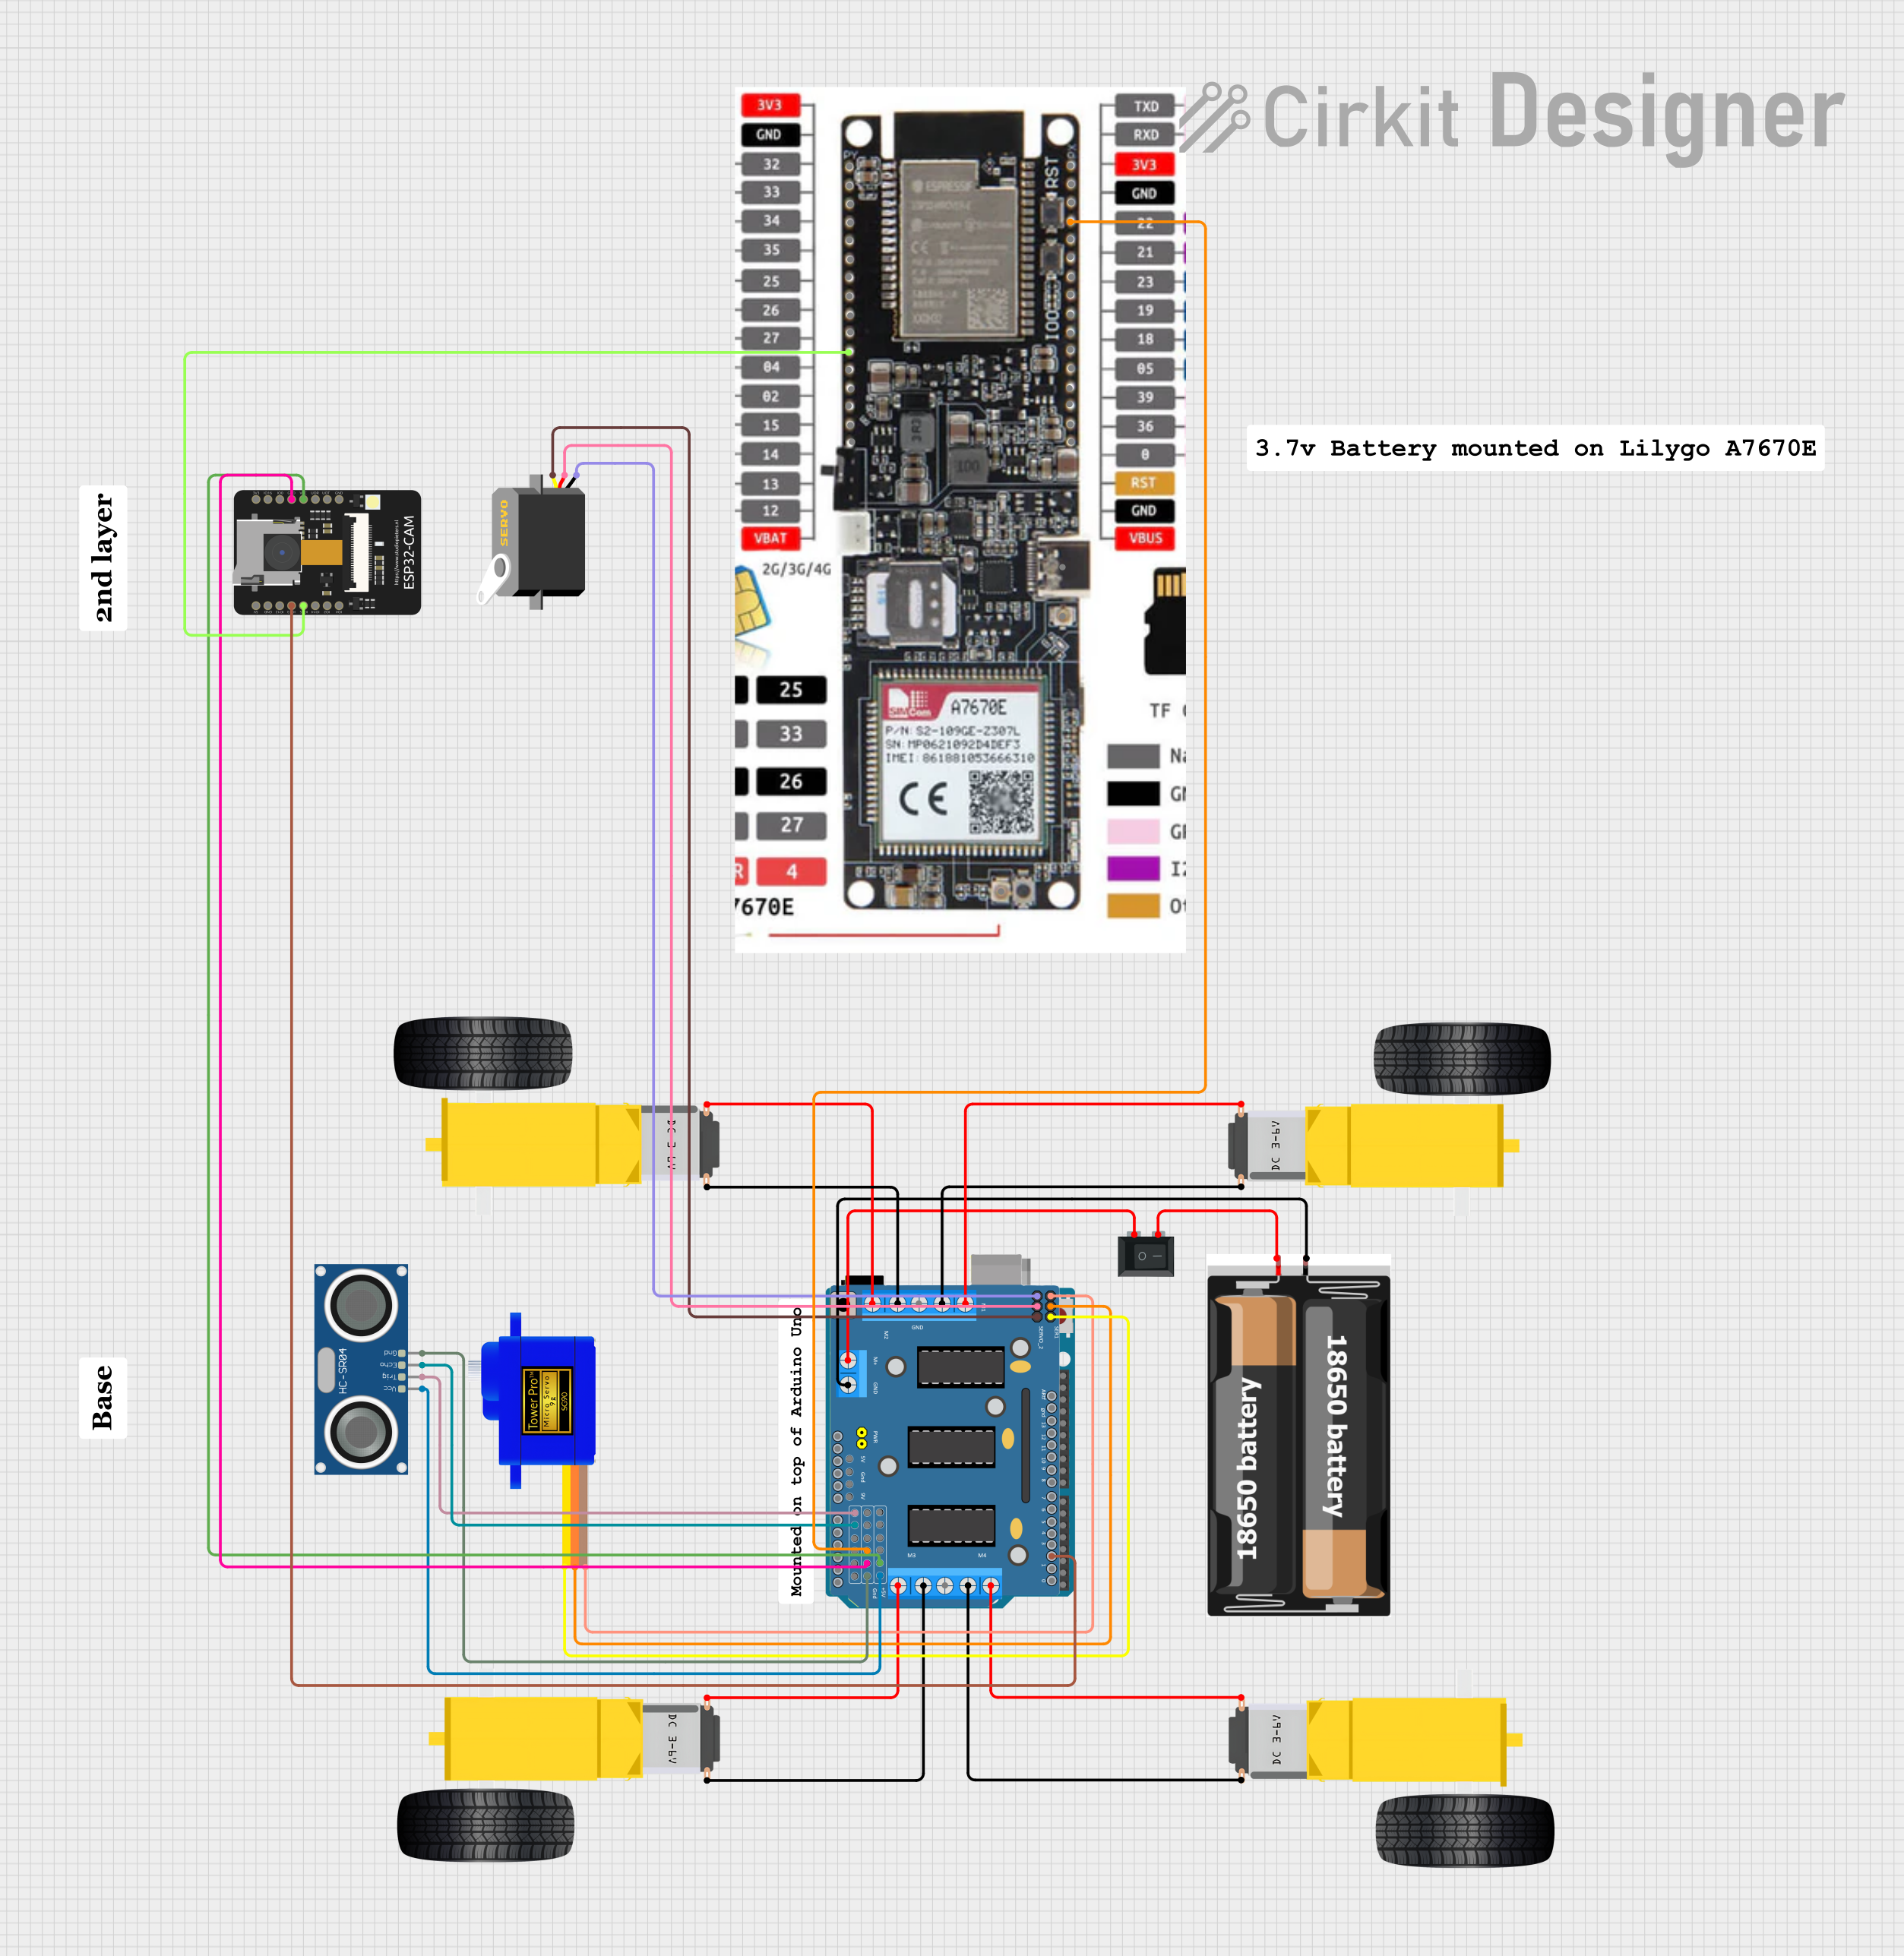
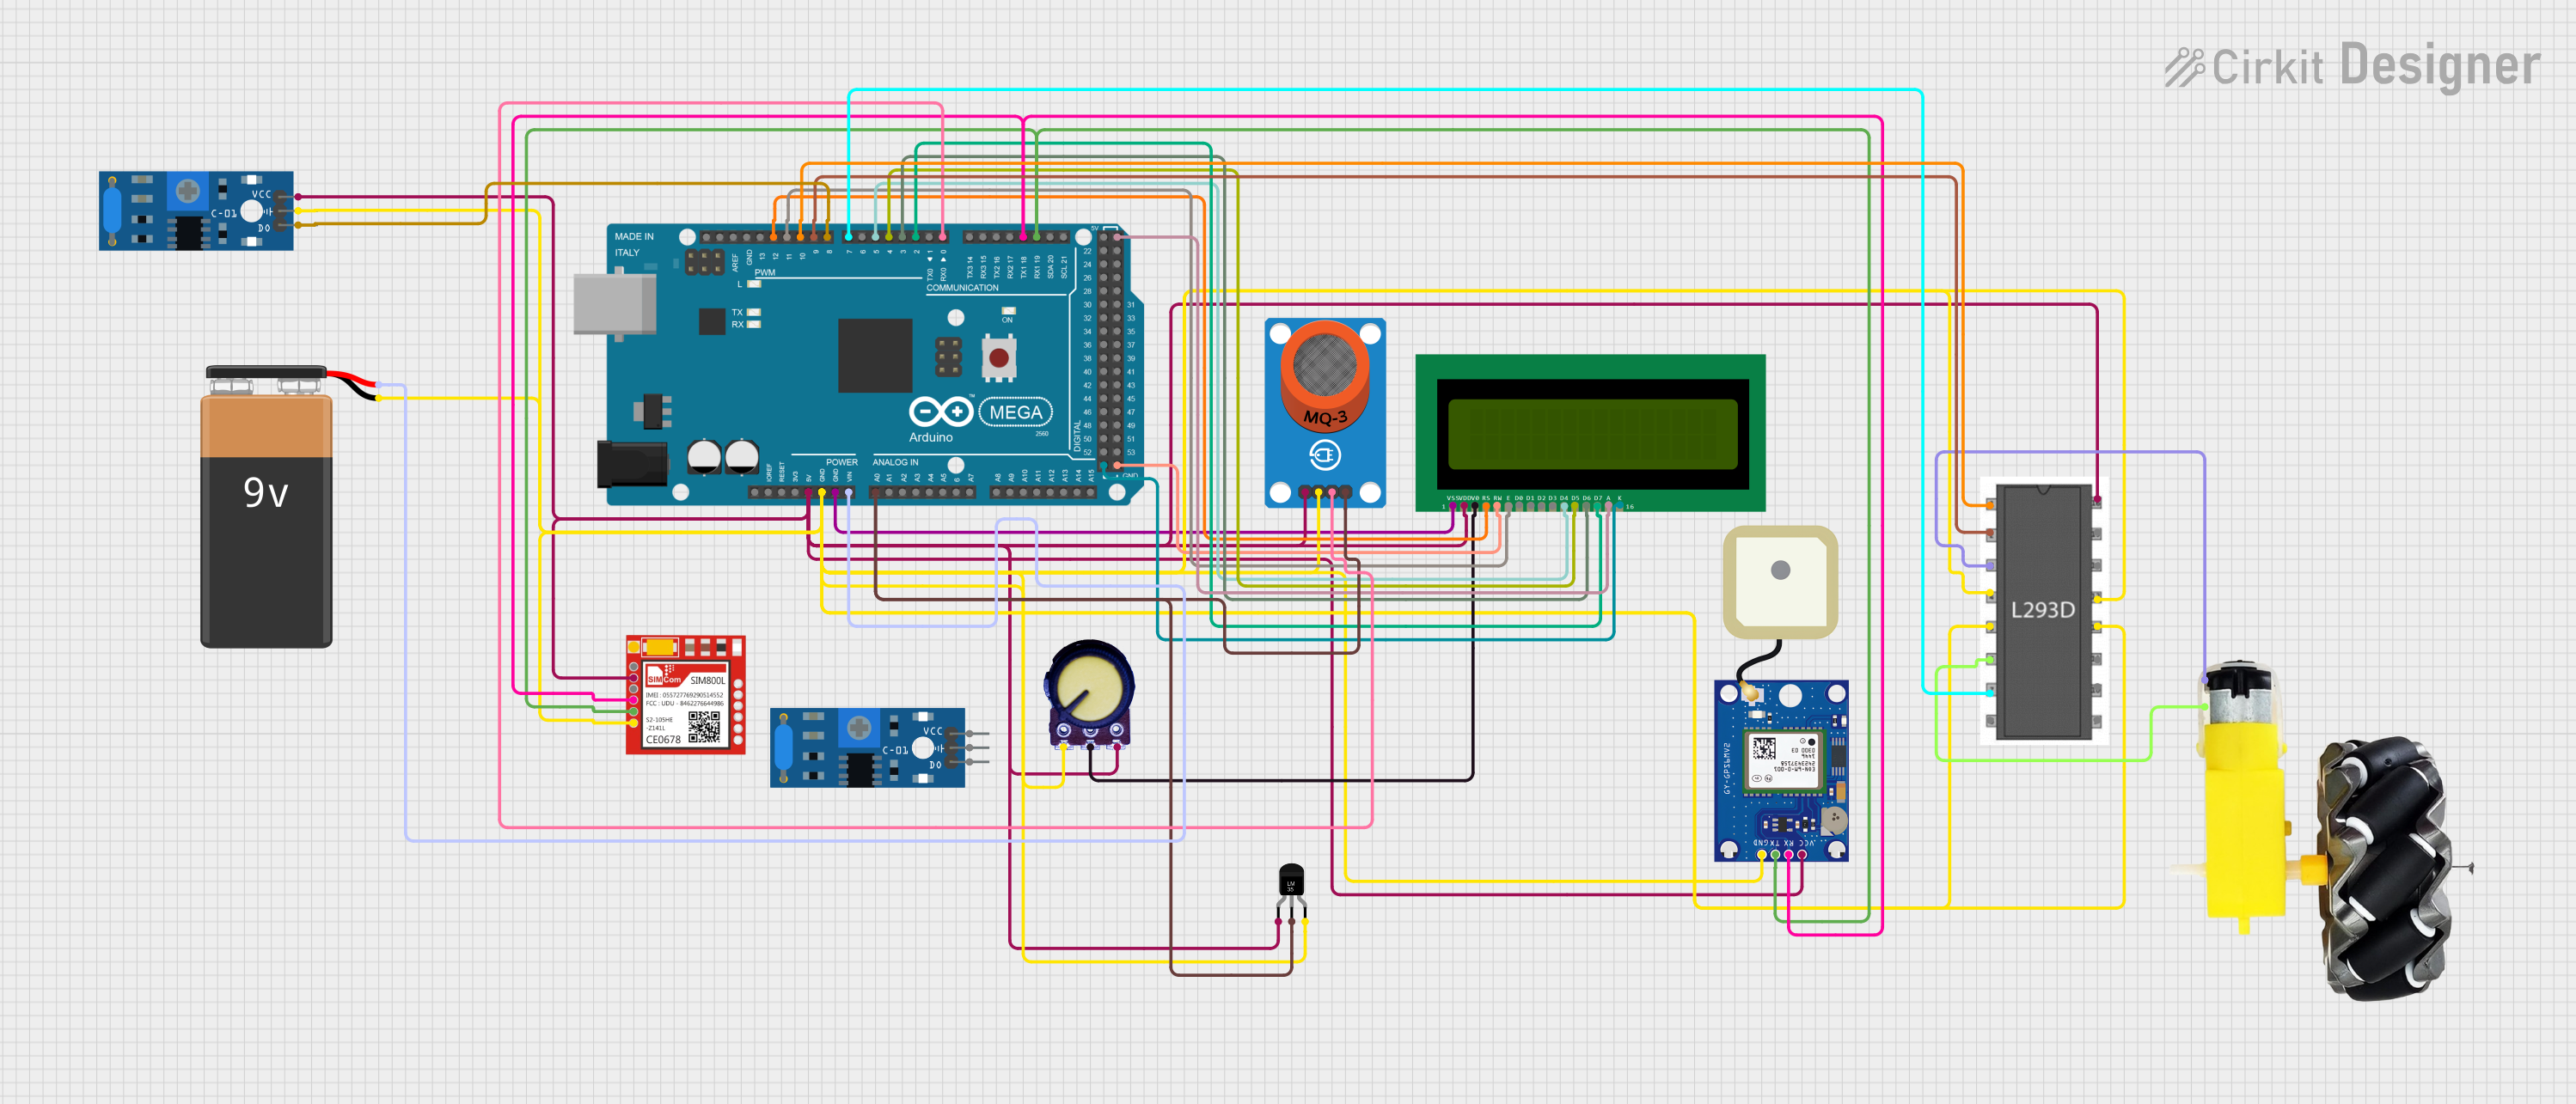

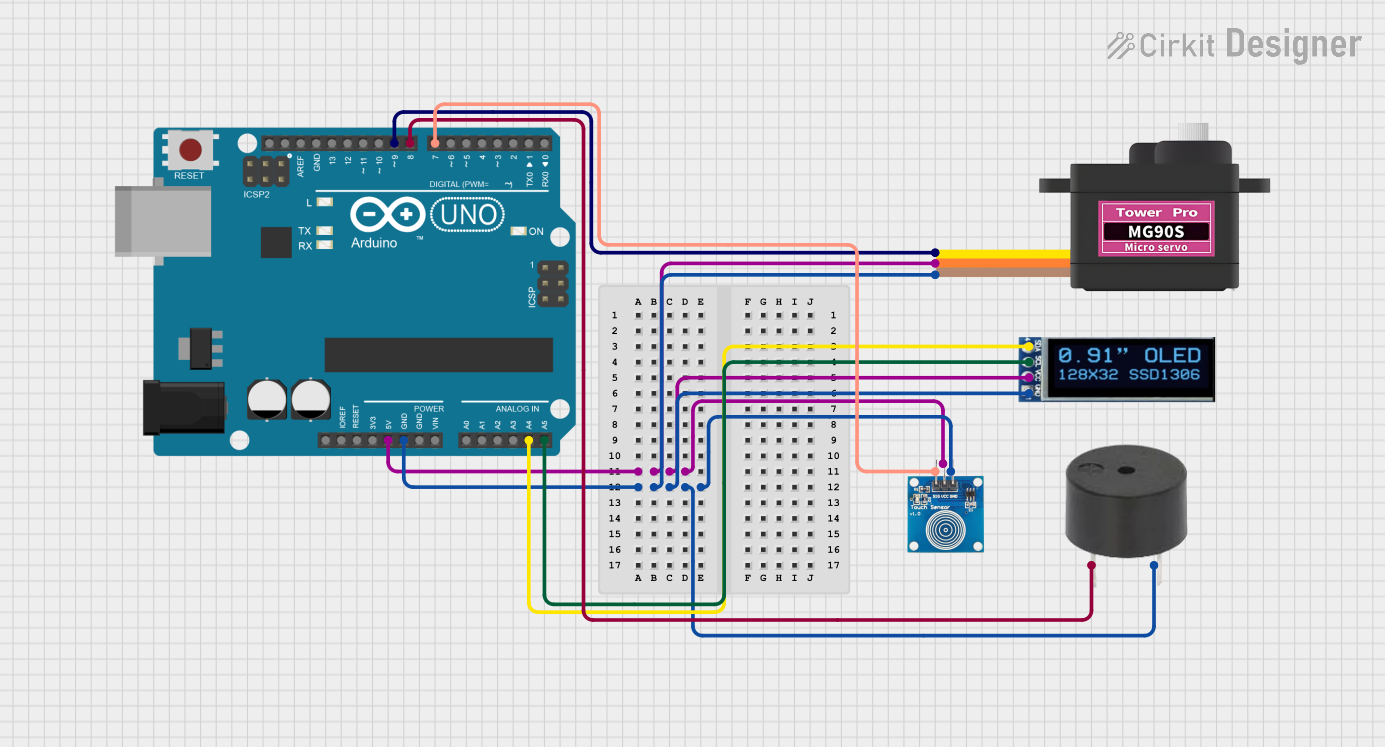
Explore Projects Built with oled
Common Applications
- Consumer electronics (smartphones, smartwatches, and televisions)
- Industrial control panels and instrumentation
- DIY electronics and prototyping (e.g., Arduino and Raspberry Pi projects)
- Portable medical devices
- Automotive displays
Technical Specifications
The Yuri OLED (Part ID: OOH) is available in various sizes and resolutions. Below are the key technical details for the most common configuration:
General Specifications
| Parameter | Value |
|---|---|
| Display Type | OLED (Organic Light Emitting Diode) |
| Manufacturer | Yuri |
| Part ID | OOH |
| Resolution | 128 x 64 pixels |
| Display Size | 0.96 inches (diagonal) |
| Interface | I2C (Inter-Integrated Circuit) |
| Operating Voltage | 3.3V to 5V |
| Operating Temperature | -40°C to 85°C |
| Power Consumption | ~20mA (typical) |
| Viewing Angle | >160° |
| Contrast Ratio | 10,000:1 |
| Color | Monochrome (white) |
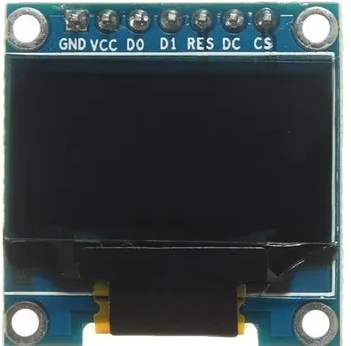
Pin Configuration
The Yuri OLED module features a 4-pin interface for I2C communication. Below is the pinout:
| Pin Number | Pin Name | Description |
|---|---|---|
| 1 | GND | Ground (0V reference) |
| 2 | VCC | Power supply (3.3V to 5V) |
| 3 | SCL | I2C Clock Line |
| 4 | SDA | I2C Data Line |
Usage Instructions
Connecting the OLED to an Arduino UNO
The Yuri OLED is compatible with Arduino boards and can be easily connected using the I2C interface. Follow these steps to set up the OLED with an Arduino UNO:
Wiring the OLED Module:
- Connect the
GNDpin of the OLED to theGNDpin on the Arduino. - Connect the
VCCpin of the OLED to the5Vpin on the Arduino. - Connect the
SCLpin of the OLED to theA5pin on the Arduino (I2C clock line). - Connect the
SDApin of the OLED to theA4pin on the Arduino (I2C data line).
- Connect the
Installing the Required Library:
- Open the Arduino IDE.
- Go to
Sketch>Include Library>Manage Libraries. - Search for the "Adafruit SSD1306" library and install it.
- Also, install the "Adafruit GFX" library, which is required for graphics rendering.
Uploading Example Code: Use the following example code to display text on the OLED:
// Include the necessary libraries
#include <Adafruit_GFX.h>  // Graphics library for rendering shapes and text
#include <Adafruit_SSD1306.h>  // Library for SSD1306 OLED displays

// Define the OLED display dimensions
#define SCREEN_WIDTH 128
#define SCREEN_HEIGHT 64

// Create an instance of the display object
Adafruit_SSD1306 display(SCREEN_WIDTH, SCREEN_HEIGHT, &Wire, -1);

void setup() {
  // Initialize the display
  if (!display.begin(SSD1306_I2C_ADDRESS, 0x3C)) {
    // If initialization fails, print an error message
    Serial.println(F("SSD1306 allocation failed"));
    for (;;);  // Halt the program
  }

  // Clear the display buffer
  display.clearDisplay();

  // Set text size and color
  display.setTextSize(1);  // Text size multiplier
  display.setTextColor(SSD1306_WHITE);  // White text

  // Display a message
  display.setCursor(0, 0);  // Set cursor position
  display.println(F("Hello, Yuri OLED!"));
  display.display();  // Render the text on the screen
}

void loop() {
  // No actions in the loop for this example
}
Important Considerations
- Power Supply: Ensure the OLED is powered within its operating voltage range (3.3V to 5V). Exceeding this range may damage the module.
- I2C Address: The default I2C address for the OLED is
0x3C. If multiple I2C devices are connected, ensure there are no address conflicts. - Contrast and Brightness: Prolonged use at maximum brightness may reduce the lifespan of the OLED.
Troubleshooting and FAQs
Common Issues
The OLED does not turn on:
- Verify the wiring connections, especially
GNDandVCC. - Ensure the power supply voltage is within the specified range (3.3V to 5V).
- Check if the I2C address in the code matches the OLED's default address (
0x3C).
- Verify the wiring connections, especially
The display shows random or garbled characters:
- Ensure the I2C connections (
SCLandSDA) are secure. - Verify that the correct libraries ("Adafruit SSD1306" and "Adafruit GFX") are installed.
- Check for loose or damaged wires.
- Ensure the I2C connections (
The text or graphics are not visible:
- Confirm that the
display.display()function is called after rendering text or graphics. - Adjust the contrast settings in the code if necessary.
- Confirm that the
FAQs
Q: Can the Yuri OLED be used with 3.3V microcontrollers like ESP32?
A: Yes, the OLED is compatible with 3.3V microcontrollers. Connect the VCC pin to the 3.3V output of the microcontroller.
Q: How can I display custom graphics on the OLED?
A: Use the "Adafruit GFX" library to draw shapes, lines, and bitmaps. Refer to the library documentation for detailed instructions.
Q: What is the lifespan of the Yuri OLED?
A: The typical lifespan of the OLED is around 30,000 to 50,000 hours, depending on usage and brightness settings.
Q: Can I use the OLED with SPI instead of I2C?
A: The Yuri OLED (Part ID: OOH) is designed specifically for I2C communication. For SPI support, consider other OLED models.
By following this documentation, users can effectively integrate the Yuri OLED into their projects and troubleshoot common issues with ease.