How to Use MP3 Panel: Examples, Pinouts, and Specs
Introduction
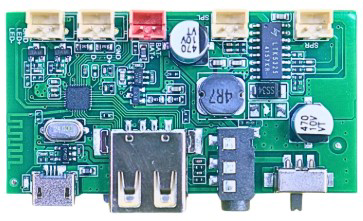
The MP3 Panel (Manufacturer: Zyrex Robotics, Part ID: MP3 Panel) is a versatile user interface component designed for controlling the playback of MP3 audio files. It integrates essential controls such as play, pause, stop, skip, and volume adjustment, making it ideal for audio playback systems. Many MP3 panels also feature a display for track information, enhancing the user experience.
Explore Projects Built with MP3 Panel


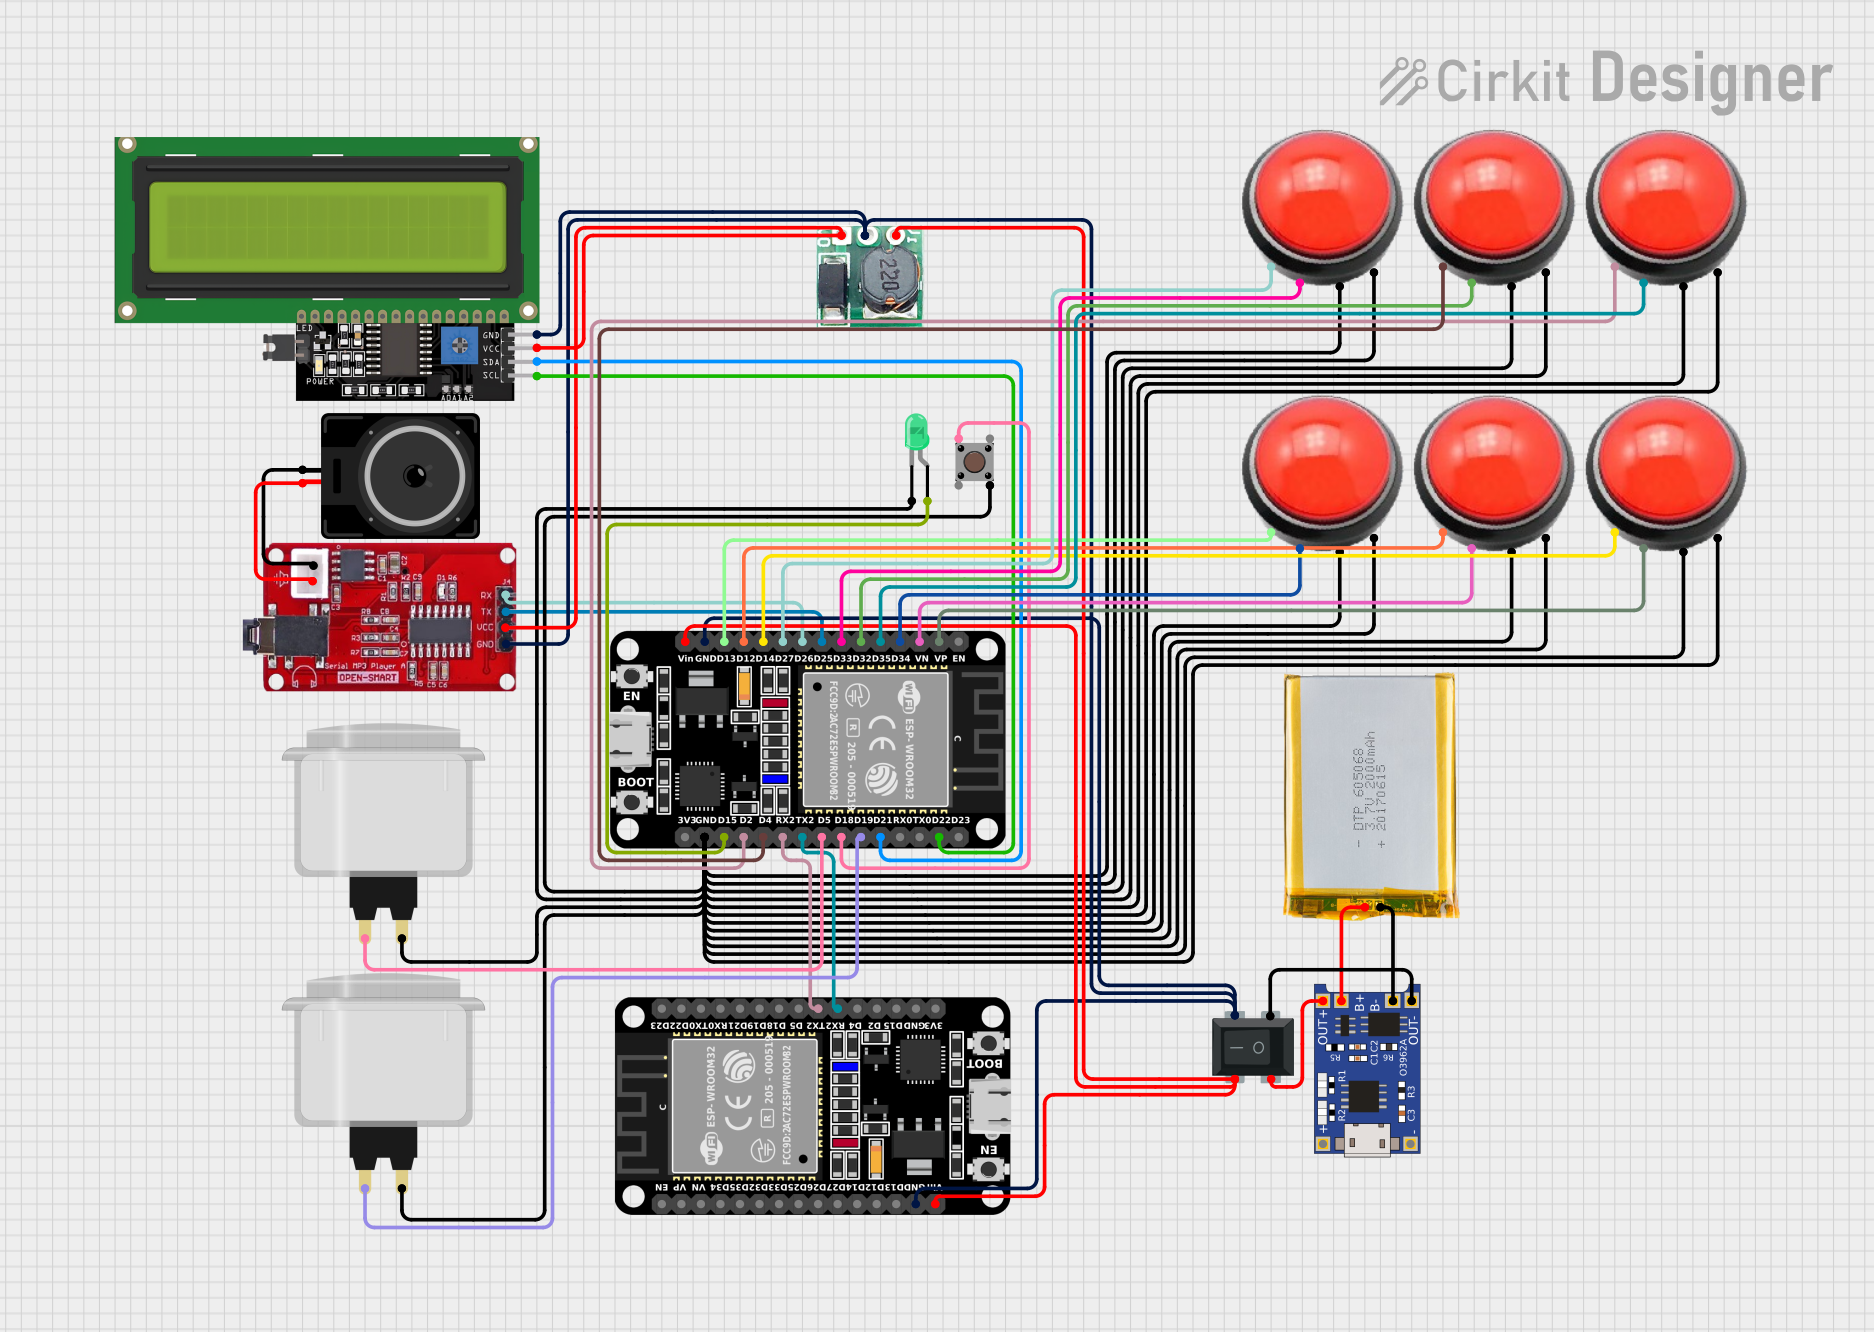
Explore Projects Built with MP3 Panel
Common Applications and Use Cases
- Home audio systems
- Portable music players
- Embedded systems with audio playback functionality
- DIY audio projects
- Educational projects involving sound and user interfaces
Technical Specifications
Key Technical Details
| Parameter | Value |
|---|---|
| Operating Voltage | 5V DC |
| Operating Current | 50-100 mA (depending on usage) |
| Communication Protocol | UART (Universal Asynchronous Receiver-Transmitter) |
| Audio Format Support | MP3 |
| Output Interface | 3.5mm audio jack or speaker terminals |
| Control Buttons | Play, Pause, Stop, Next, Previous, Volume Up, Volume Down |
| Display (if available) | 7-segment or LCD (varies by model) |
Pin Configuration and Descriptions
| Pin Number | Pin Name | Description |
|---|---|---|
| 1 | VCC | Power supply input (5V DC) |
| 2 | GND | Ground connection |
| 3 | TX | UART Transmit pin (for communication with microcontrollers) |
| 4 | RX | UART Receive pin (for communication with microcontrollers) |
| 5 | SPK+ | Positive terminal for speaker output |
| 6 | SPK- | Negative terminal for speaker output |
Usage Instructions
How to Use the MP3 Panel in a Circuit
- Power Connection: Connect the VCC pin to a 5V DC power source and the GND pin to the ground.
- Audio Output: Connect a speaker to the SPK+ and SPK- pins, or use the 3.5mm audio jack (if available).
- Microcontroller Interface: Use the TX and RX pins to communicate with a microcontroller (e.g., Arduino UNO) via UART.
- Control Buttons: Use the onboard buttons to control playback manually.
Important Considerations and Best Practices
- Ensure the power supply is stable and within the specified voltage range (5V DC).
- Use a decoupling capacitor (e.g., 100 µF) near the VCC pin to reduce noise.
- If connecting to an Arduino UNO, use a logic level converter if the Arduino operates at 3.3V logic levels.
- Avoid overloading the speaker output; use speakers with appropriate impedance (e.g., 4Ω or 8Ω).
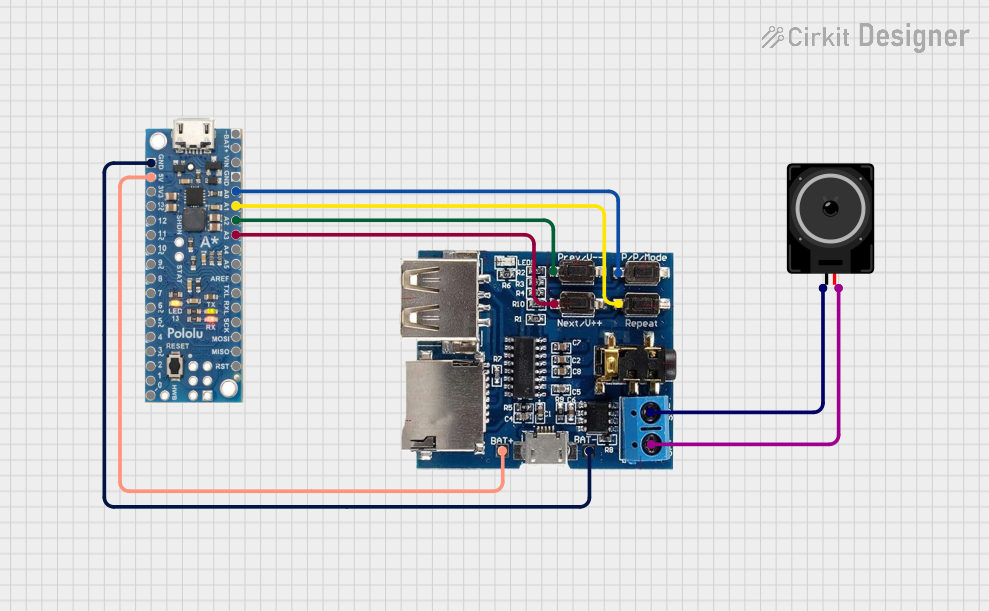
Example: Connecting the MP3 Panel to an Arduino UNO
Below is an example of how to control the MP3 Panel using an Arduino UNO. The code sends UART commands to play, pause, and skip tracks.
#include <SoftwareSerial.h>

// Define RX and TX pins for communication with the MP3 Panel
SoftwareSerial mp3Serial(10, 11); // RX = Pin 10, TX = Pin 11

void setup() {
  // Initialize serial communication with the MP3 Panel
  mp3Serial.begin(9600); // MP3 Panel typically uses 9600 baud rate
  Serial.begin(9600);    // For debugging via Serial Monitor

  Serial.println("MP3 Panel Initialized");
}

void loop() {
  // Example: Send commands to the MP3 Panel
  if (Serial.available()) {
    char command = Serial.read();

    switch (command) {
      case 'p': // Play
        mp3Serial.write(0x01); // Command to play
        Serial.println("Play command sent");
        break;

      case 's': // Stop
        mp3Serial.write(0x02); // Command to stop
        Serial.println("Stop command sent");
        break;

      case 'n': // Next track
        mp3Serial.write(0x03); // Command to skip to the next track
        Serial.println("Next track command sent");
        break;

      default:
        Serial.println("Invalid command. Use 'p', 's', or 'n'.");
        break;
    }
  }
}
Notes:
- Replace
0x01,0x02, and0x03with the actual command bytes for your specific MP3 Panel model, as defined in its datasheet. - Use the Serial Monitor to send commands (
pfor play,sfor stop,nfor next track).
Troubleshooting and FAQs
Common Issues and Solutions
No Sound Output
- Cause: Incorrect speaker connection or incompatible speaker impedance.
- Solution: Verify the speaker is connected to SPK+ and SPK- pins. Use a 4Ω or 8Ω speaker.
MP3 Panel Not Responding to Commands
- Cause: Incorrect UART connection or baud rate mismatch.
- Solution: Ensure the TX and RX pins are correctly connected to the microcontroller. Verify the baud rate matches the MP3 Panel's specifications (typically 9600 bps).
Distorted Audio
- Cause: Insufficient power supply or overloaded speaker output.
- Solution: Use a stable 5V DC power source and ensure the speaker's power rating matches the MP3 Panel's output.
Buttons Not Working
- Cause: Faulty buttons or improper grounding.
- Solution: Check the button connections and ensure the GND pin is properly connected.
FAQs
Q1: Can I use the MP3 Panel with a 3.3V microcontroller?
A1: Yes, but you will need a logic level converter to safely interface the 3.3V microcontroller with the 5V MP3 Panel.
Q2: What is the maximum speaker power supported?
A2: The MP3 Panel typically supports speakers up to 3W. Refer to the datasheet for exact specifications.
Q3: Can I play audio files from an SD card?
A3: Some MP3 Panels support SD card input. Check if your model includes an SD card slot and refer to the datasheet for usage instructions.
Q4: How do I adjust the volume programmatically?
A4: Use the appropriate UART command for volume control, as specified in the MP3 Panel's command set.
This concludes the documentation for the MP3 Panel. For further assistance, refer to the Zyrex Robotics datasheet or contact their support team.