Cirkit Designer Logo
Cirkit Designer
Your all-in-one circuit design IDE
Home / 
Component Documentation

How to Use Adafruit 7 Segment FeatherWing - Green: Examples, Pinouts, and Specs
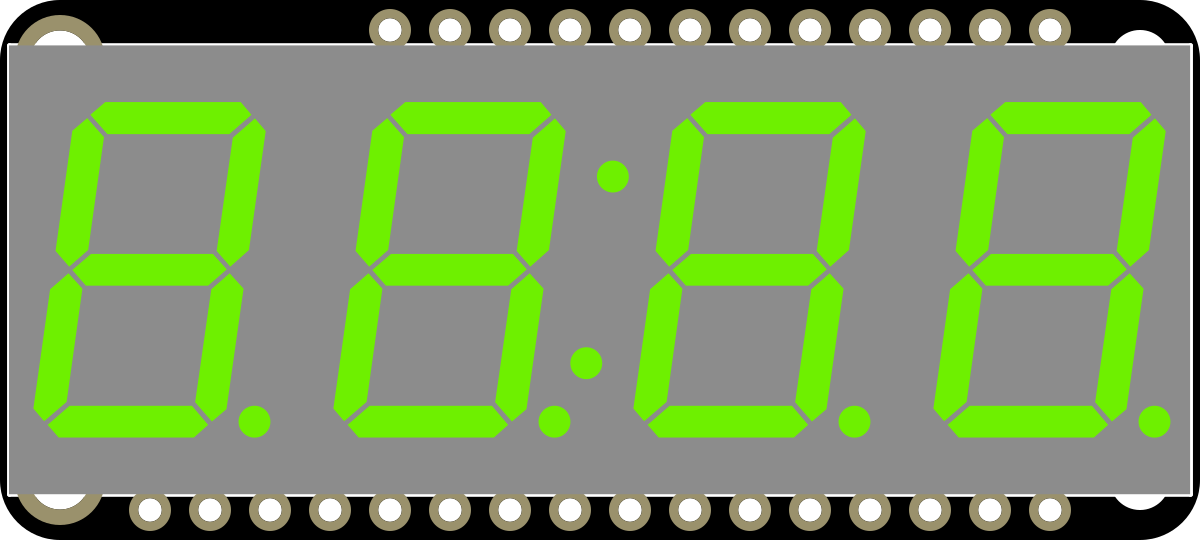

Image of Adafruit 7 Segment FeatherWing - Green
Cirkit Designer LogoDesign with Adafruit 7 Segment FeatherWing - Green in Cirkit Designer

Introduction

The Adafruit 7 Segment FeatherWing - Green (Manufacturer Part ID: 3107) is a compact display module featuring seven-segment LEDs. It is specifically designed to integrate seamlessly with Adafruit Feather boards, providing a simple and efficient way to display numerical data. This module is ideal for applications requiring visual output, such as counters, timers, clocks, and sensor data displays.

Explore Projects Built with Adafruit 7 Segment FeatherWing - Green
Use Cirkit Designer to design, explore, and prototype these projects online. Some projects support real-time simulation. Click "Open Project" to start designing instantly!
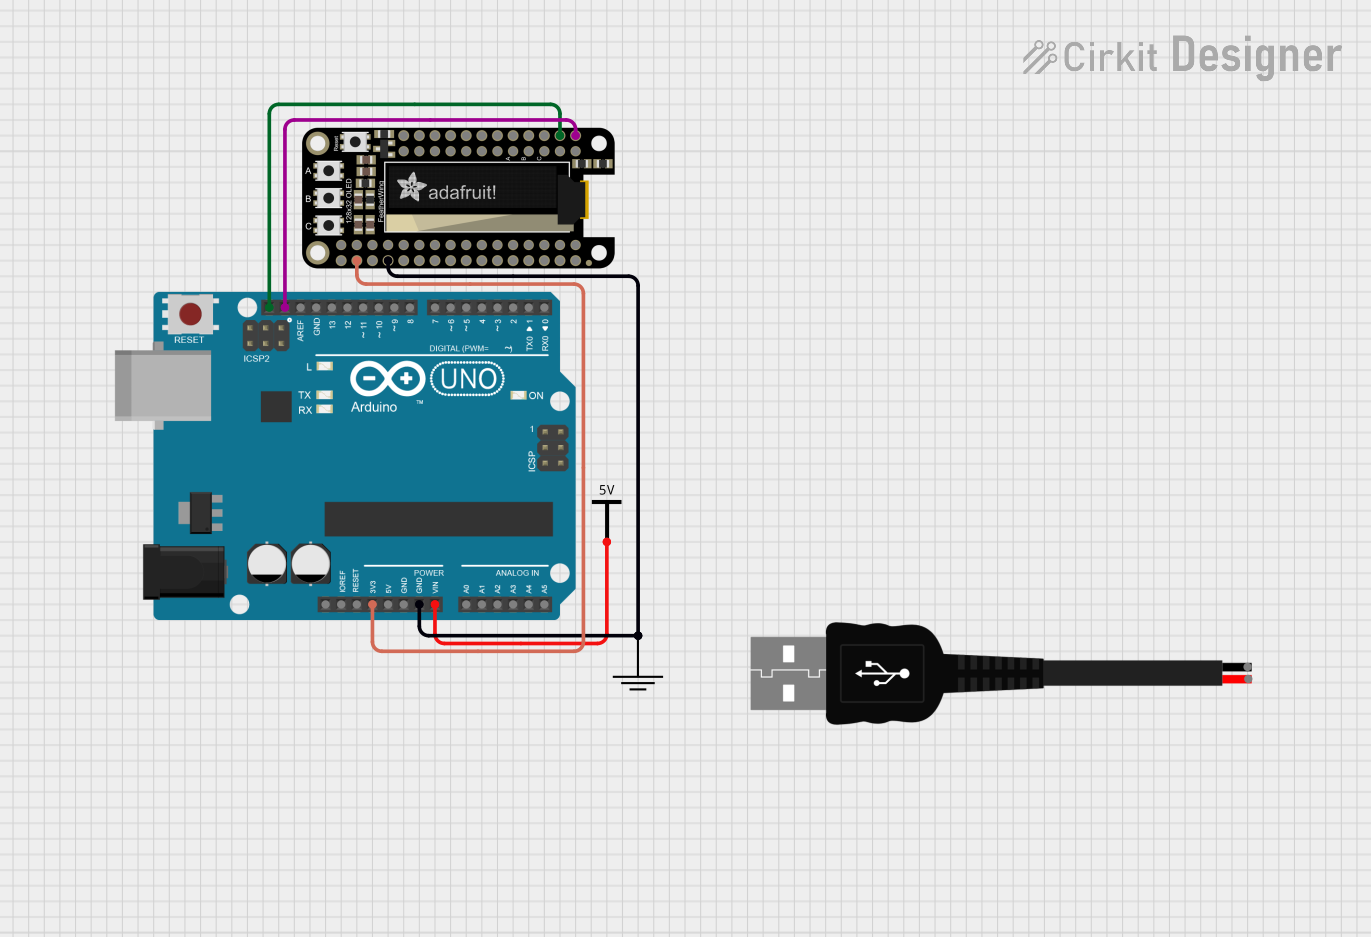
Arduino UNO and OLED FeatherWing Display: Battery-Powered Hello World Project
Image of ARDUINO_SSD1306: A project utilizing Adafruit 7 Segment FeatherWing - Green in a practical application
This circuit consists of an Arduino UNO connected to an Adafruit OLED FeatherWing display via I2C communication (SDA and SCL lines). The Arduino is powered through a Vcc source and provides 3.3V and GND connections to the OLED display. The Arduino runs a program to display 'Hello, World!' on the OLED screen.
Cirkit Designer LogoOpen Project in Cirkit Designer
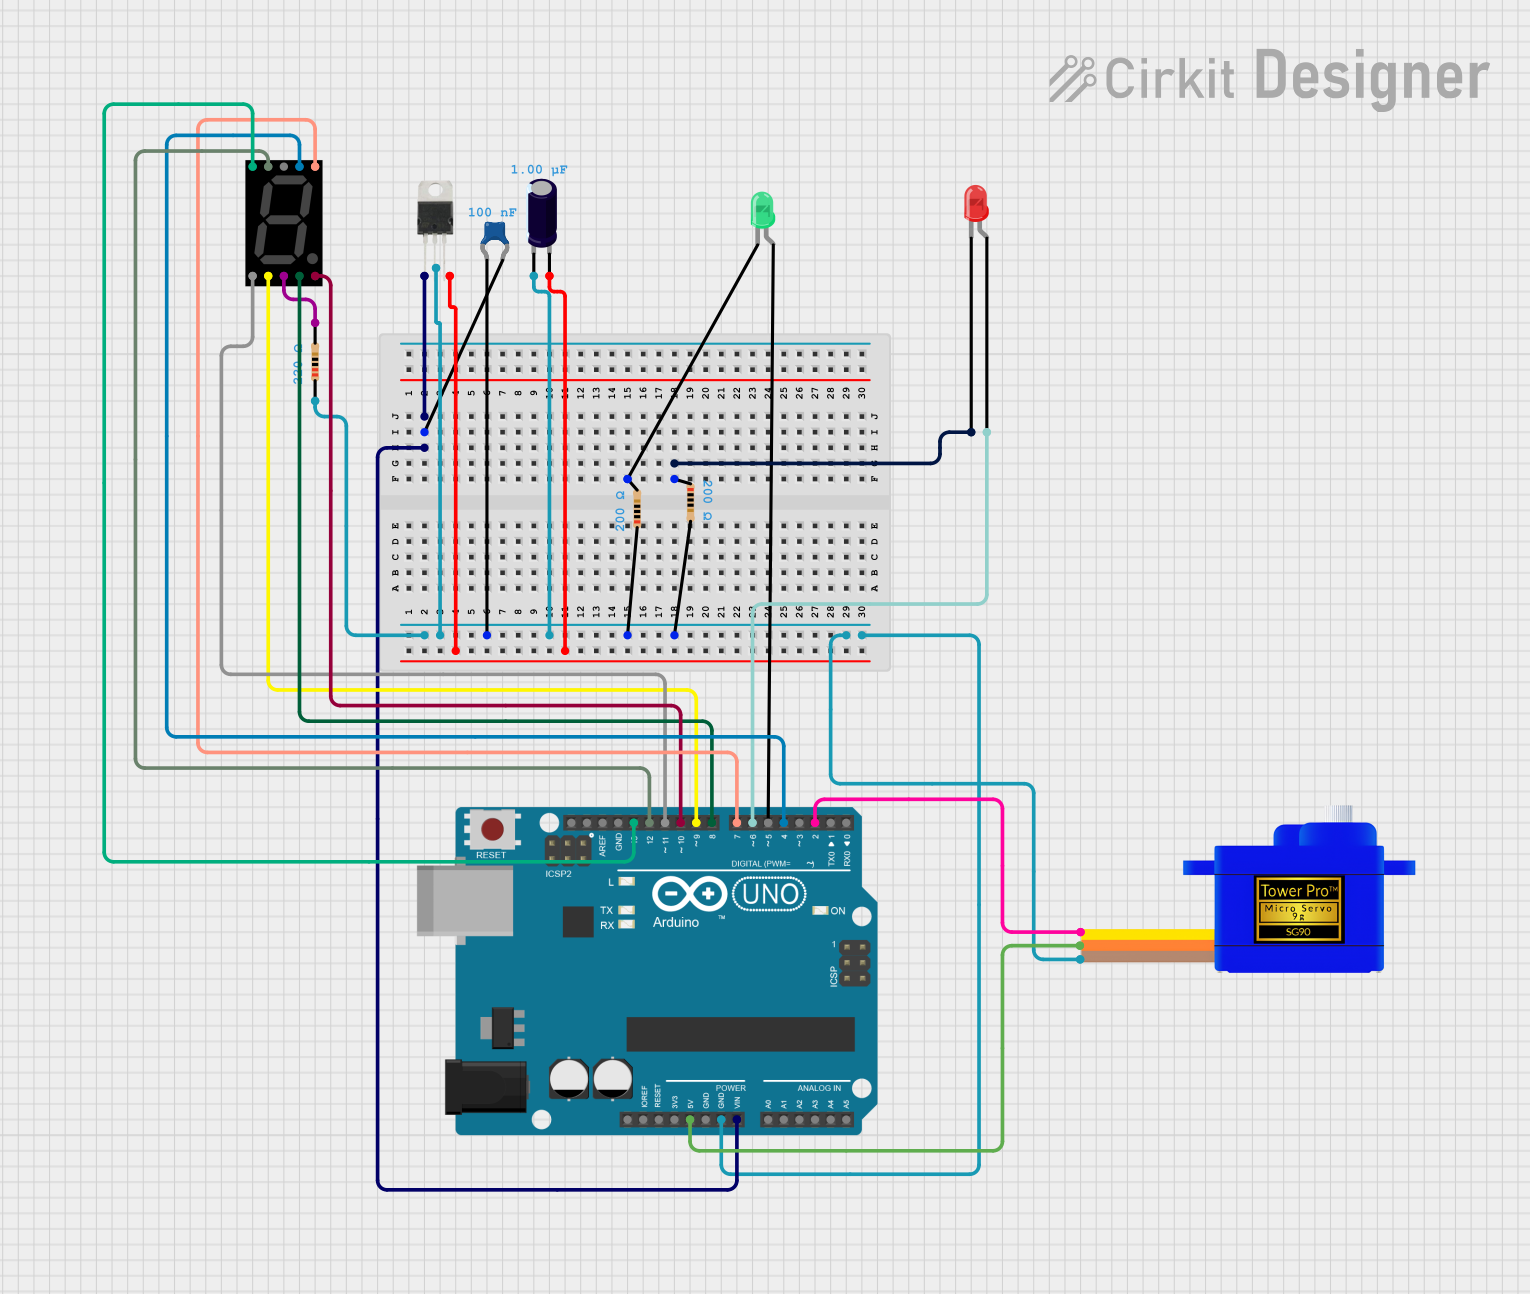
Arduino UNO Controlled Display and Servomotor System
Image of nim: A project utilizing Adafruit 7 Segment FeatherWing - Green in a practical application
This circuit features an Arduino UNO microcontroller that interfaces with a seven-segment display and controls a servomotor and two LEDs (red and green). A LM7805 voltage regulator with accompanying capacitors provides a stable 5V power supply. The circuit's functionality is determined by the embedded code, which is currently a placeholder for further development.
Cirkit Designer LogoOpen Project in Cirkit Designer
Arduino UNO Controlled Dual Seven Segment Display with Pushbutton Interaction and AHT10 Temperature Sensor
Image of enel290: A project utilizing Adafruit 7 Segment FeatherWing - Green in a practical application
This circuit features an Arduino UNO microcontroller connected to two seven-segment displays, a pushbutton, a red LED with a 330-ohm resistor, and an AHT10 temperature and humidity sensor. The Arduino controls the segments of the displays via its digital pins and reads the pushbutton state. The LED is used as an indicator, and the AHT10 sensor interfaces with the Arduino over I2C to provide environmental data.
Cirkit Designer LogoOpen Project in Cirkit Designer
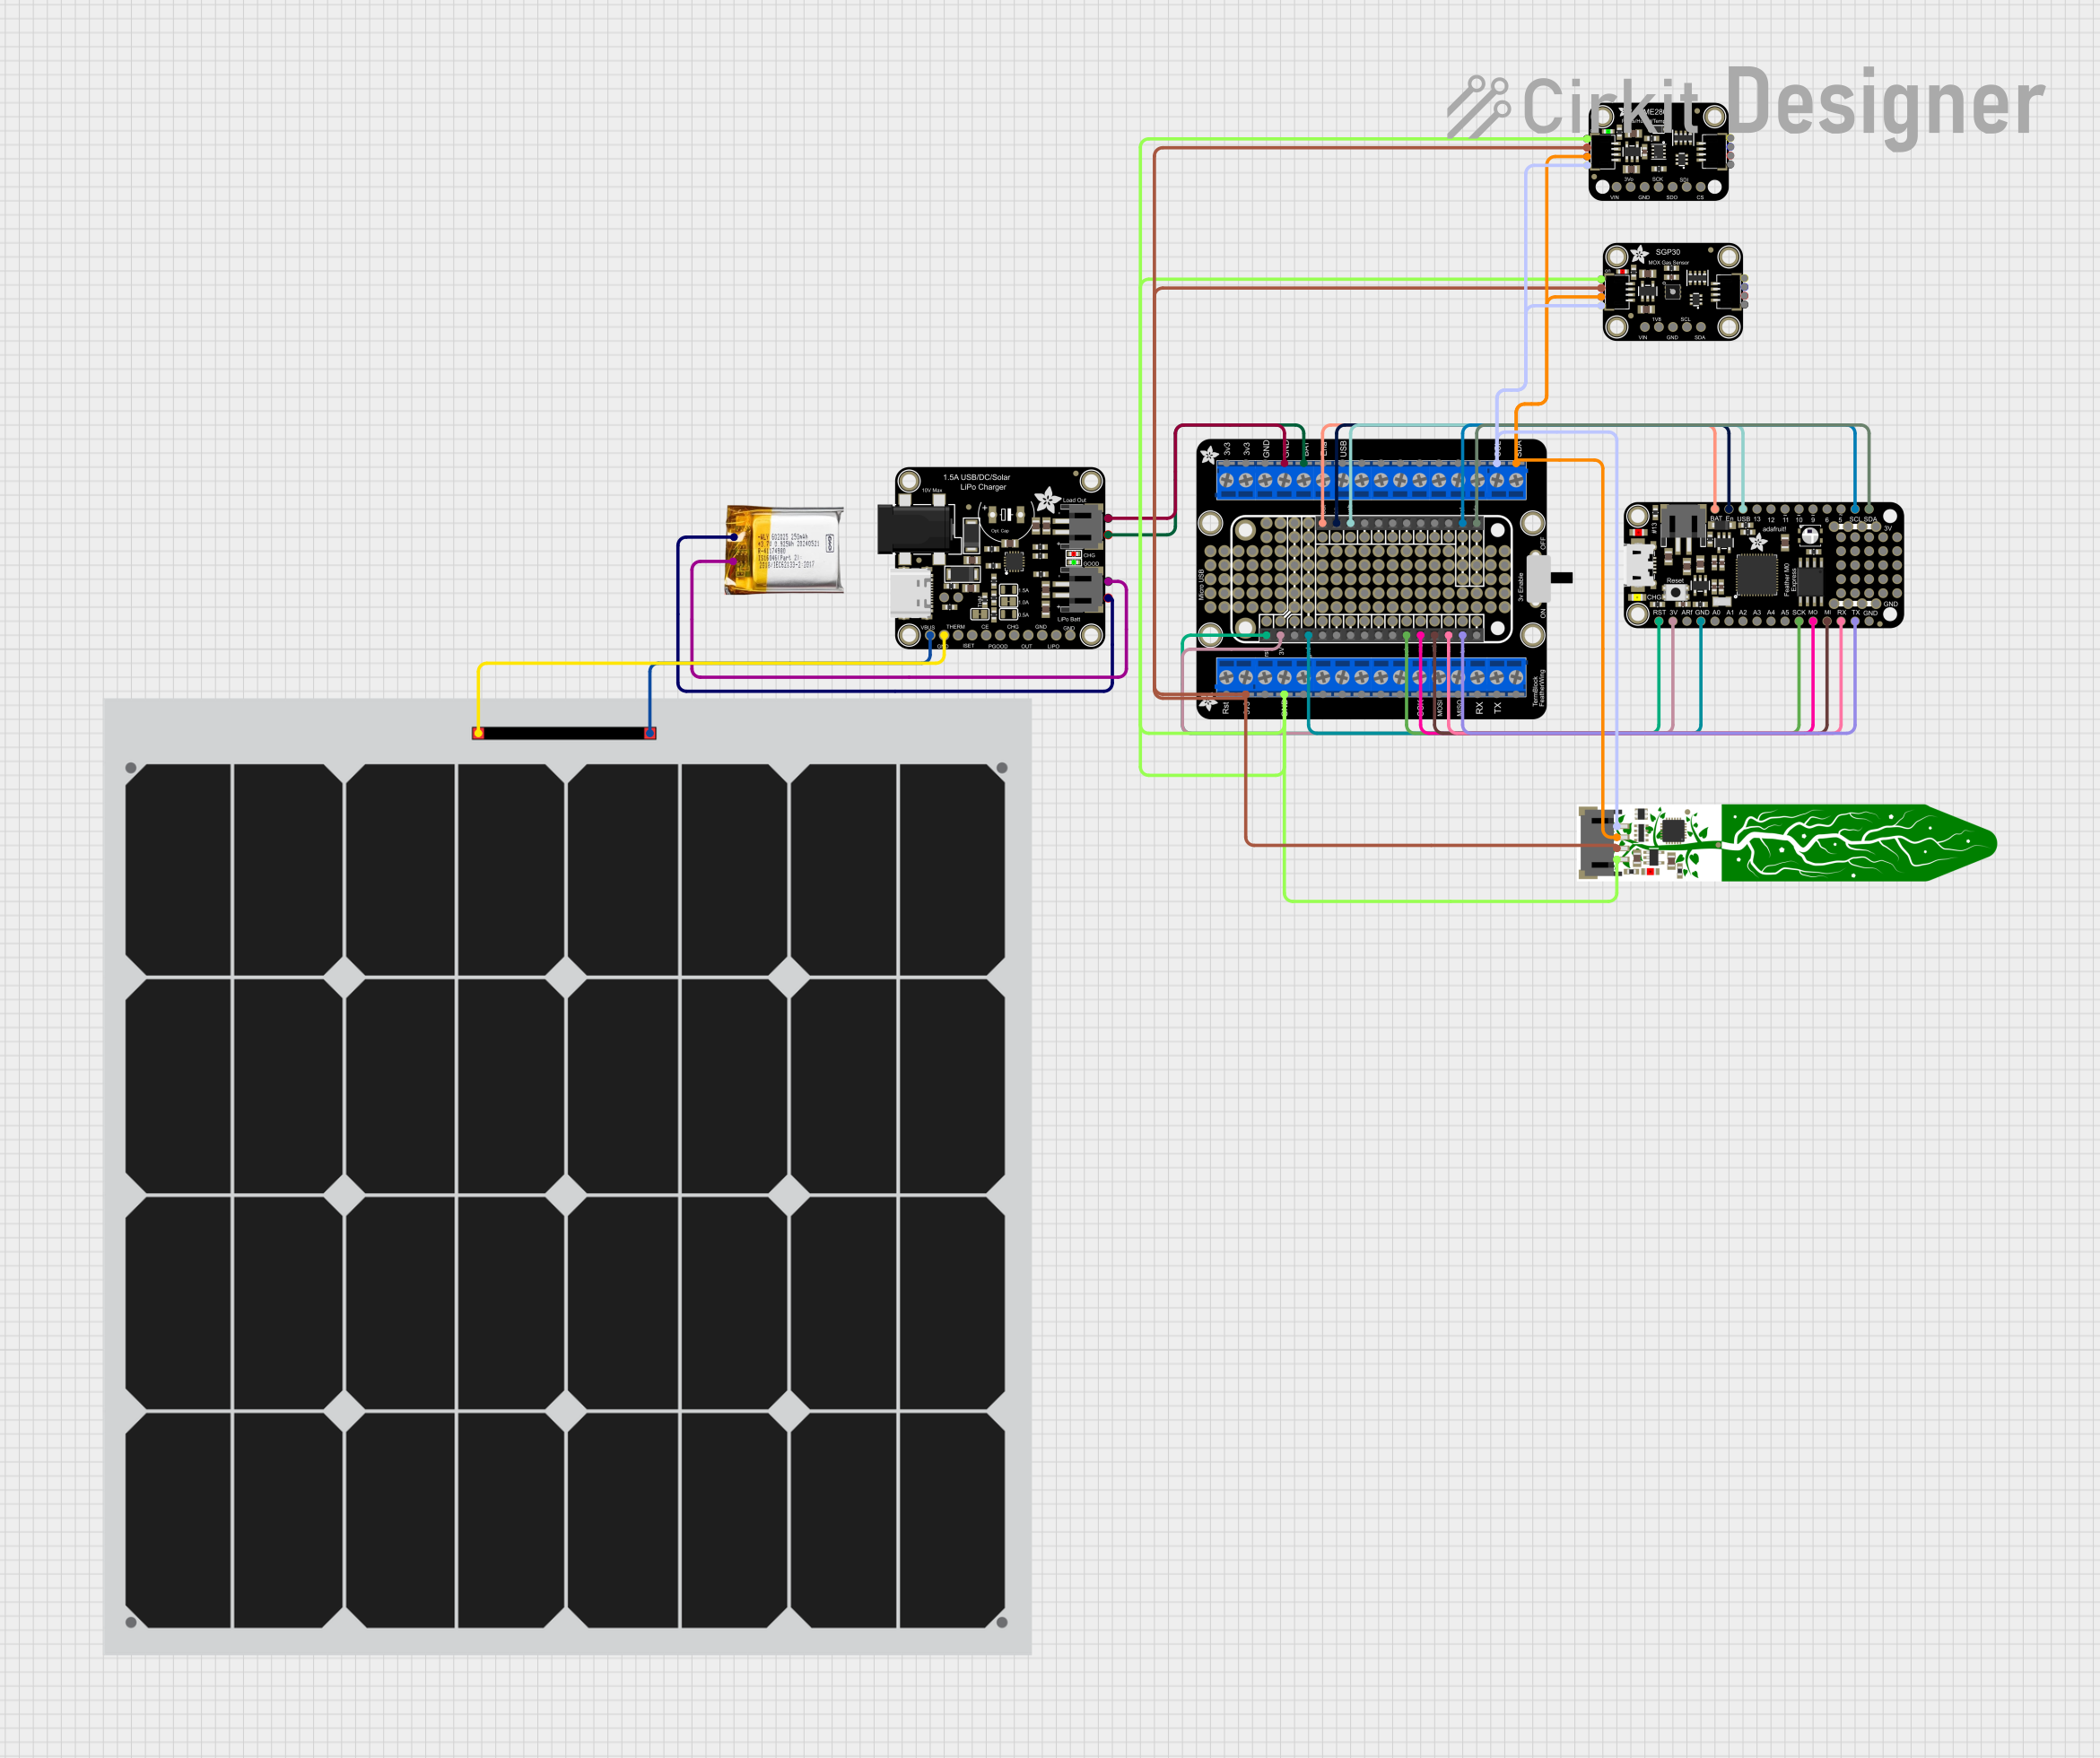
Solar-Powered Environmental Data Logger with Adafruit Feather M0 Express
Image of Lake Thoreau Monitoring Station: A project utilizing Adafruit 7 Segment FeatherWing - Green in a practical application
This circuit is designed for environmental data collection and logging, utilizing an Adafruit Feather M0 Express microcontroller as the central processing unit. It interfaces with a BME280 sensor for atmospheric temperature, humidity, and pressure measurements, an SGP30 sensor for monitoring air quality (eCO2 and TVOC), and a STEMMA soil sensor for detecting soil moisture and temperature. The system is powered by a solar panel and a 3.7v LiPo battery, managed by an Adafruit BQ24074 Solar-DC-USB Lipo Charger, and provides easy access to the microcontroller's connections through an Adafruit Terminal Breakout FeatherWing.
Cirkit Designer LogoOpen Project in Cirkit Designer

Explore Projects Built with Adafruit 7 Segment FeatherWing - Green

Use Cirkit Designer to design, explore, and prototype these projects online. Some projects support real-time simulation. Click "Open Project" to start designing instantly!
Image of ARDUINO_SSD1306: A project utilizing Adafruit 7 Segment FeatherWing - Green in a practical application
Arduino UNO and OLED FeatherWing Display: Battery-Powered Hello World Project
This circuit consists of an Arduino UNO connected to an Adafruit OLED FeatherWing display via I2C communication (SDA and SCL lines). The Arduino is powered through a Vcc source and provides 3.3V and GND connections to the OLED display. The Arduino runs a program to display 'Hello, World!' on the OLED screen.
Cirkit Designer LogoOpen Project in Cirkit Designer
Image of nim: A project utilizing Adafruit 7 Segment FeatherWing - Green in a practical application
Arduino UNO Controlled Display and Servomotor System
This circuit features an Arduino UNO microcontroller that interfaces with a seven-segment display and controls a servomotor and two LEDs (red and green). A LM7805 voltage regulator with accompanying capacitors provides a stable 5V power supply. The circuit's functionality is determined by the embedded code, which is currently a placeholder for further development.
Cirkit Designer LogoOpen Project in Cirkit Designer
Image of enel290: A project utilizing Adafruit 7 Segment FeatherWing - Green in a practical application
Arduino UNO Controlled Dual Seven Segment Display with Pushbutton Interaction and AHT10 Temperature Sensor
This circuit features an Arduino UNO microcontroller connected to two seven-segment displays, a pushbutton, a red LED with a 330-ohm resistor, and an AHT10 temperature and humidity sensor. The Arduino controls the segments of the displays via its digital pins and reads the pushbutton state. The LED is used as an indicator, and the AHT10 sensor interfaces with the Arduino over I2C to provide environmental data.
Cirkit Designer LogoOpen Project in Cirkit Designer
Image of Lake Thoreau Monitoring Station: A project utilizing Adafruit 7 Segment FeatherWing - Green in a practical application
Solar-Powered Environmental Data Logger with Adafruit Feather M0 Express
This circuit is designed for environmental data collection and logging, utilizing an Adafruit Feather M0 Express microcontroller as the central processing unit. It interfaces with a BME280 sensor for atmospheric temperature, humidity, and pressure measurements, an SGP30 sensor for monitoring air quality (eCO2 and TVOC), and a STEMMA soil sensor for detecting soil moisture and temperature. The system is powered by a solar panel and a 3.7v LiPo battery, managed by an Adafruit BQ24074 Solar-DC-USB Lipo Charger, and provides easy access to the microcontroller's connections through an Adafruit Terminal Breakout FeatherWing.
Cirkit Designer LogoOpen Project in Cirkit Designer

Common Applications

  • Digital clocks and timers
  • Sensor data visualization
  • Scoreboards and counters
  • Debugging and testing numerical outputs in embedded systems

Technical Specifications

Key Technical Details

  • Manufacturer: Adafruit
  • Part ID: 3107
  • Display Type: 7-segment LED
  • LED Color: Green
  • Interface: I2C (Inter-Integrated Circuit)
  • Operating Voltage: 3.3V or 5V (compatible with Feather boards)
  • Current Consumption: ~10mA per segment (varies with brightness settings)
  • Dimensions: 50mm x 23mm x 8mm (excluding headers)
  • Weight: 5g

Pin Configuration and Descriptions

The FeatherWing uses the I2C interface, which requires only two data pins (SCL and SDA) in addition to power and ground. Below is the pin configuration:

Pin Name Description
VIN Power input (3.3V or 5V)
GND Ground connection
SCL I2C clock line
SDA I2C data line

Usage Instructions

How to Use the Component in a Circuit

  1. Hardware Setup:

    • Solder the included header pins to the FeatherWing.
    • Attach the FeatherWing to an Adafruit Feather board using the headers.
    • Ensure the Feather board is powered via USB or a battery.
  2. I2C Address:

    • The default I2C address for the FeatherWing is 0x70. If you need to use multiple FeatherWings, you can change the address by soldering the address jumpers on the back of the board.
  3. Library Installation:

    • Install the Adafruit LED Backpack library and Adafruit GFX library in your Arduino IDE. These libraries provide functions to control the display.
  4. Basic Arduino Code: Below is an example code snippet to display numbers on the FeatherWing:

    // Include the required libraries
    #include <Wire.h>
    #include <Adafruit_GFX.h>
    #include <Adafruit_LEDBackpack.h>
    
    // Create an instance of the 7-segment display
    Adafruit_7segment display = Adafruit_7segment();
    
    void setup() {
      // Initialize the display
      display.begin(0x70); // Default I2C address is 0x70
    }
    
    void loop() {
      // Display a number (e.g., 1234)
      display.print(1234); // Print the number to the display
      display.writeDisplay(); // Update the display with the new data
      delay(1000); // Wait for 1 second
    
      // Clear the display
      display.clear();
      display.writeDisplay();
      delay(500); // Wait for 0.5 seconds
    }
    

    Note: Ensure the FeatherWing is properly connected to the Feather board before uploading the code.

Important Considerations and Best Practices

  • Power Supply: Use a stable power source to avoid flickering or dimming of the LEDs.
  • I2C Address Conflicts: If using multiple I2C devices, ensure each has a unique address.
  • Brightness Control: The brightness of the display can be adjusted using the setBrightness() function in the Adafruit LED Backpack library.
  • Avoid Overloading: Do not exceed the current limits of your Feather board when powering multiple devices.

Troubleshooting and FAQs

Common Issues and Solutions

  1. Display Not Turning On:

    • Verify that the FeatherWing is securely connected to the Feather board.
    • Check the power supply and ensure the correct voltage (3.3V or 5V) is provided.
    • Confirm that the I2C address in the code matches the FeatherWing's address.
  2. Incorrect or Garbled Output:

    • Ensure the SDA and SCL lines are properly connected.
    • Check for I2C address conflicts with other devices on the same bus.
    • Verify that the Adafruit LED Backpack library is correctly installed.
  3. Flickering or Dim LEDs:

    • Check the power source for stability.
    • Reduce the brightness using the setBrightness() function if the current draw is too high.
  4. Unable to Change I2C Address:

    • Ensure the address jumpers on the back of the FeatherWing are soldered correctly.
    • Double-check the new address in your code.

FAQs

Q: Can I use this FeatherWing with non-Adafruit boards?
A: Yes, as long as the board supports I2C communication and operates at 3.3V or 5V logic levels.

Q: How many FeatherWings can I chain together?
A: Up to 8 FeatherWings can be chained by assigning unique I2C addresses to each.

Q: Can I display letters or symbols?
A: The 7-segment display is primarily designed for numbers, but some letters and symbols (e.g., "A", "b", "C") can be displayed using the Adafruit GFX library.

Q: Is it possible to dim the display?
A: Yes, use the setBrightness() function to adjust the brightness level (0 to 15).

By following this documentation, you can effectively integrate and utilize the Adafruit 7 Segment FeatherWing - Green in your projects.