The DFRobot Air Quality sensor module is a versatile and reliable device designed to measure various air quality parameters, including carbon dioxide (CO2), volatile organic compounds (VOCs), and particulate matter (PM). This sensor provides real-time data, making it an excellent choice for environmental monitoring, indoor air quality assessment, and smart home applications. Its compact design and ease of integration make it suitable for both hobbyists and professional developers.
Explore Projects Built with DFRobot Air Quality
Use Cirkit Designer to design, explore, and prototype these projects online. Some projects support real-time simulation. Click "Open Project" to start designing instantly!
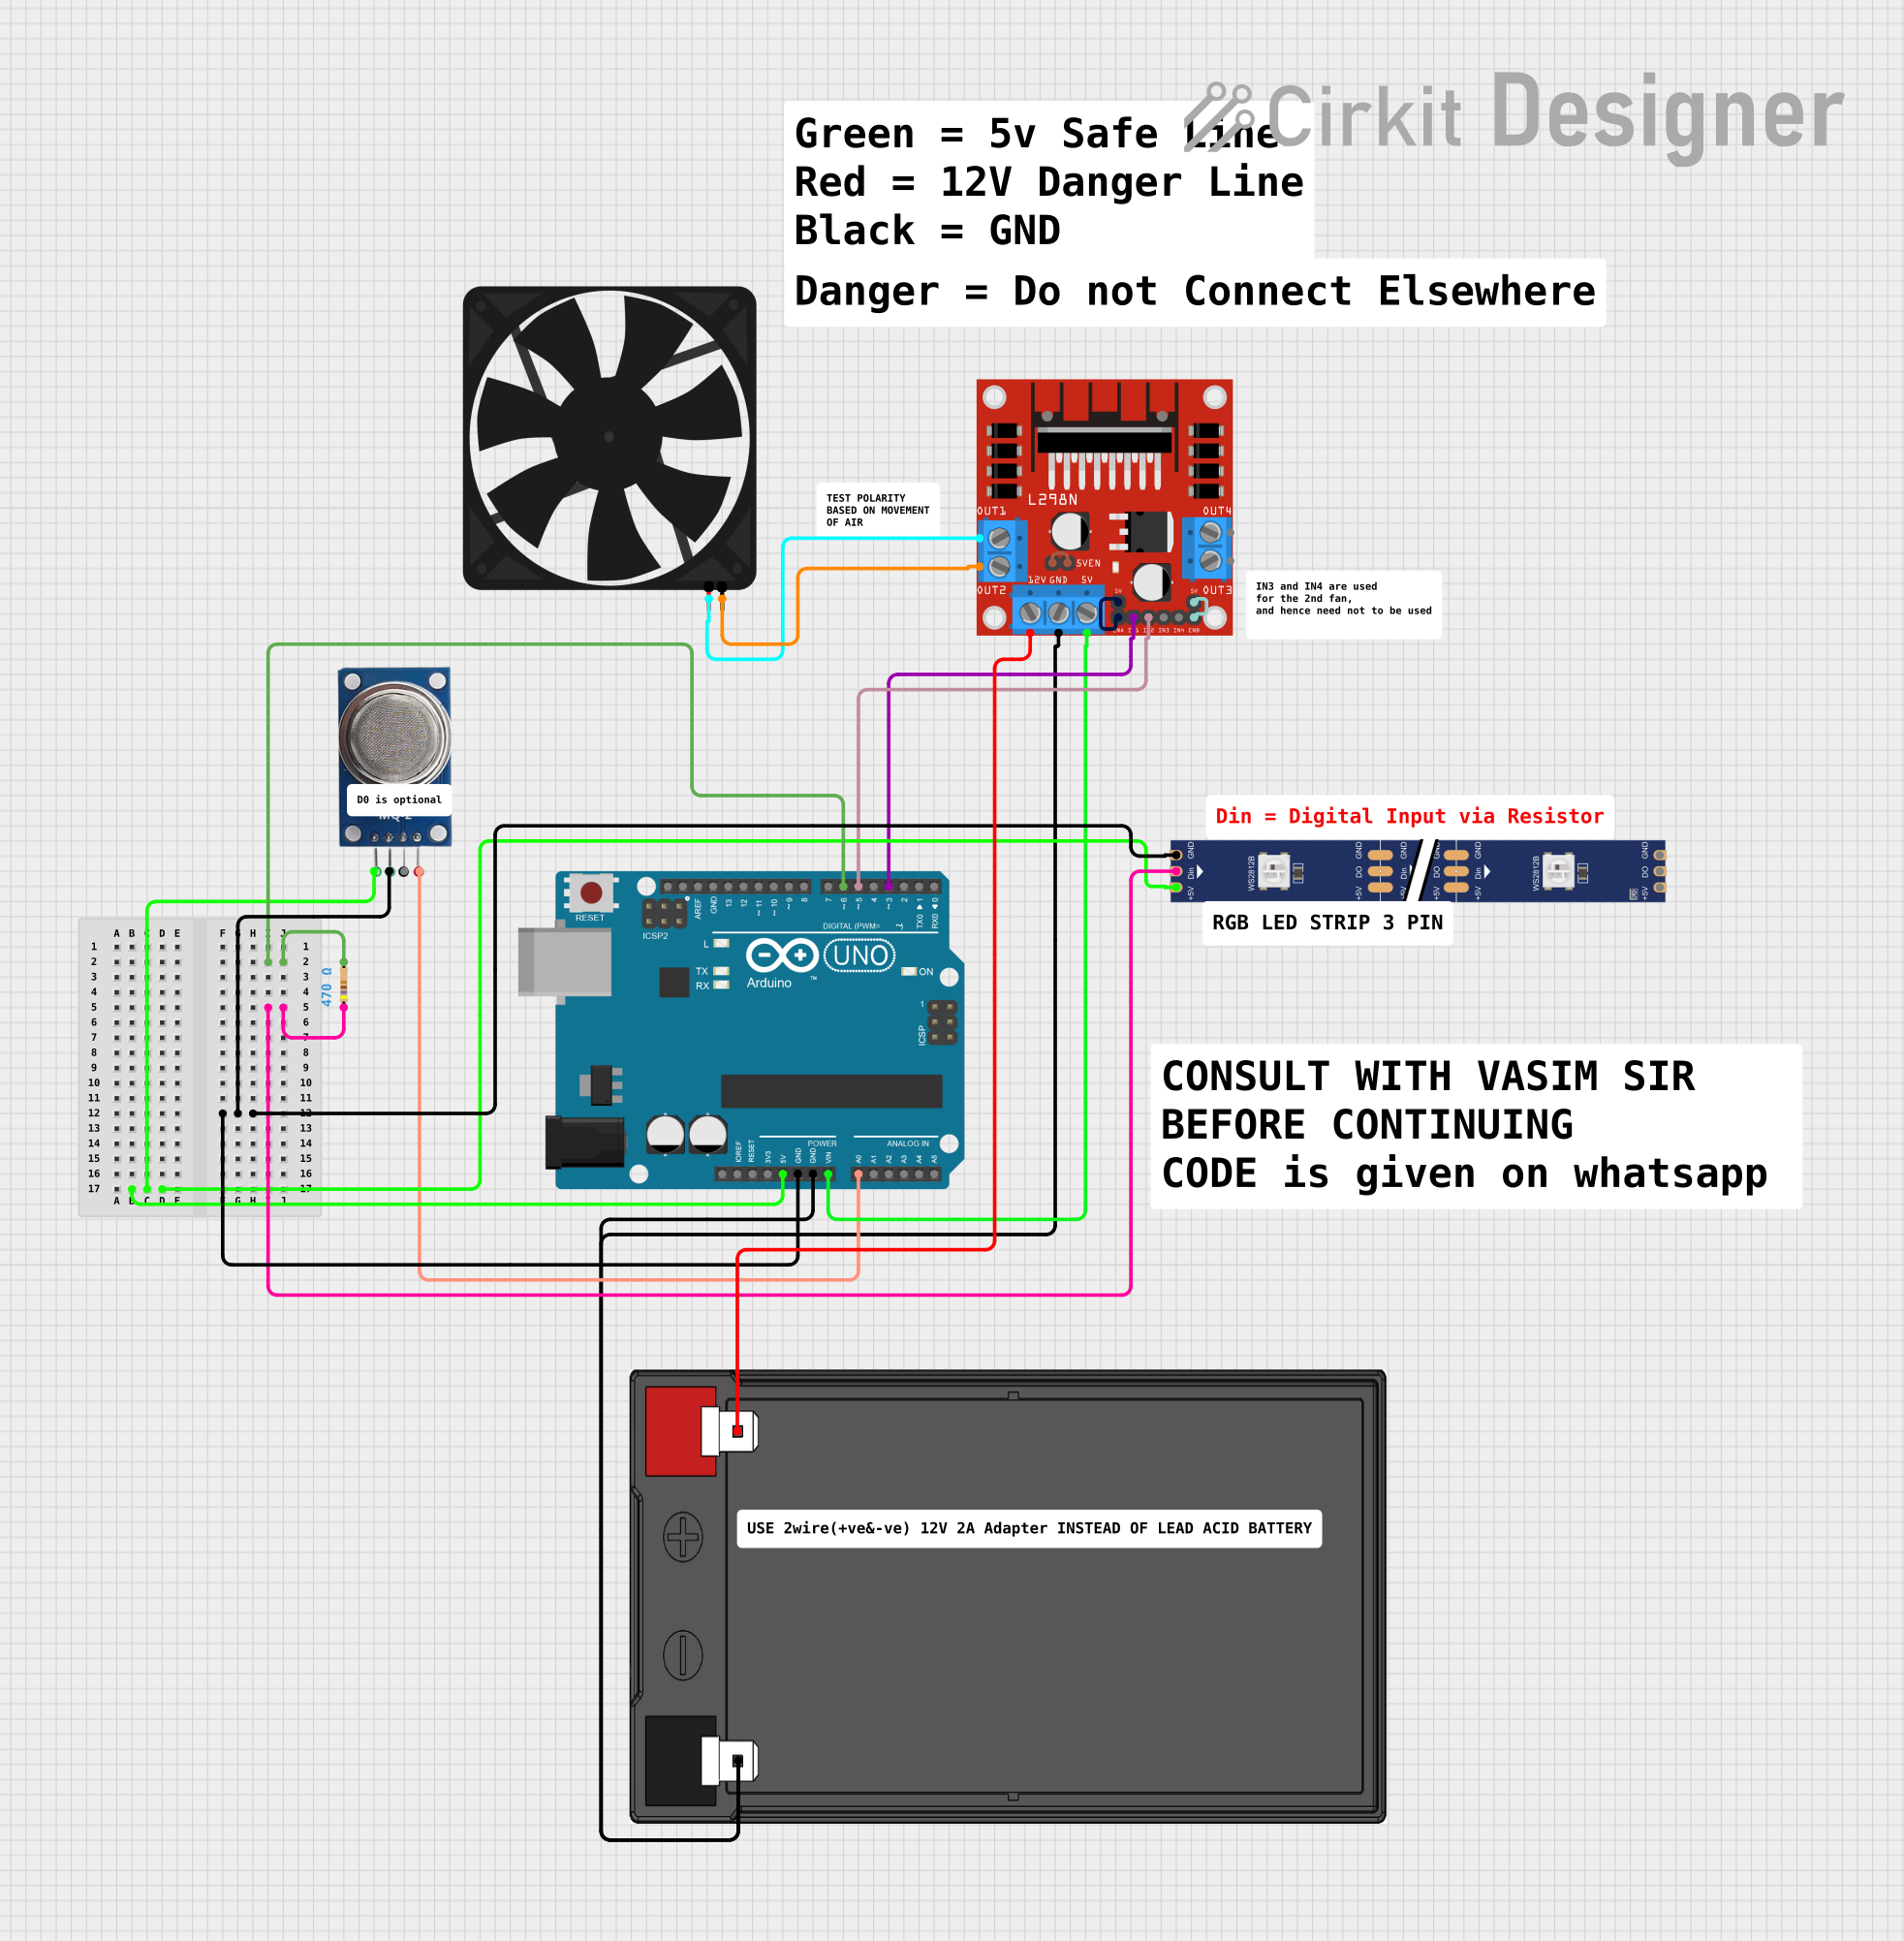
This circuit is designed to monitor air quality using an MQ-2 sensor and respond to poor air quality by activating a fan, controlled by an L298N DC motor driver. An Arduino UNO reads the sensor data and controls the fan and an RGB LED strip, which indicates air quality status by changing color. The LED strip's data line is protected by a series resistor, and the system is powered by a 12V battery.
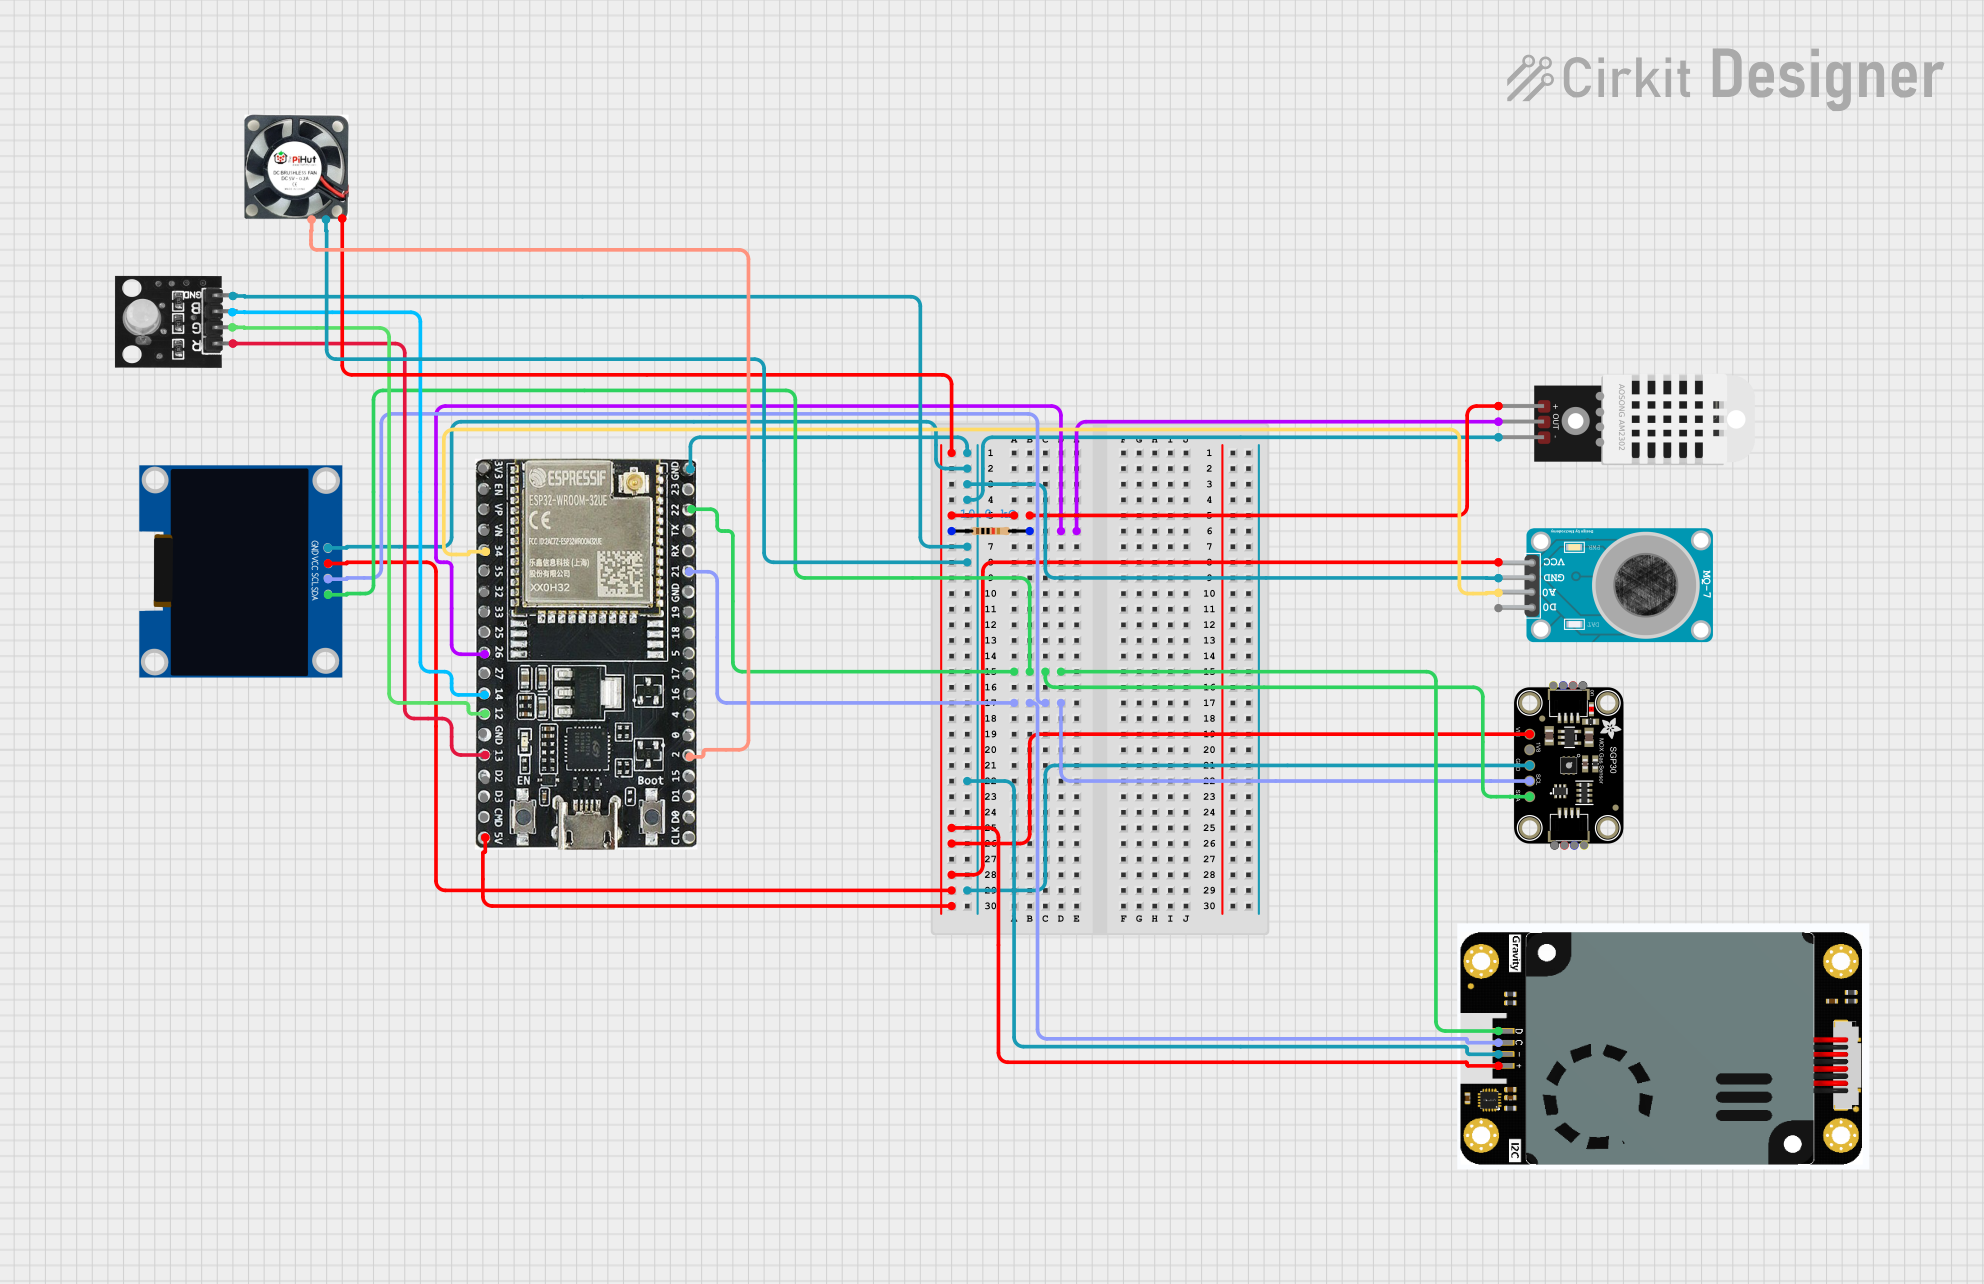
This IoT indoor air quality monitoring circuit uses an ESP32 microcontroller to read data from a DHT22 temperature and humidity sensor, an MQ-7 carbon monoxide sensor, and a PM2.5 air quality sensor. The collected data is displayed on a 128x64 OLED display, and an RGB LED and PWM fan are controlled based on the air quality readings to indicate and manage air quality levels.
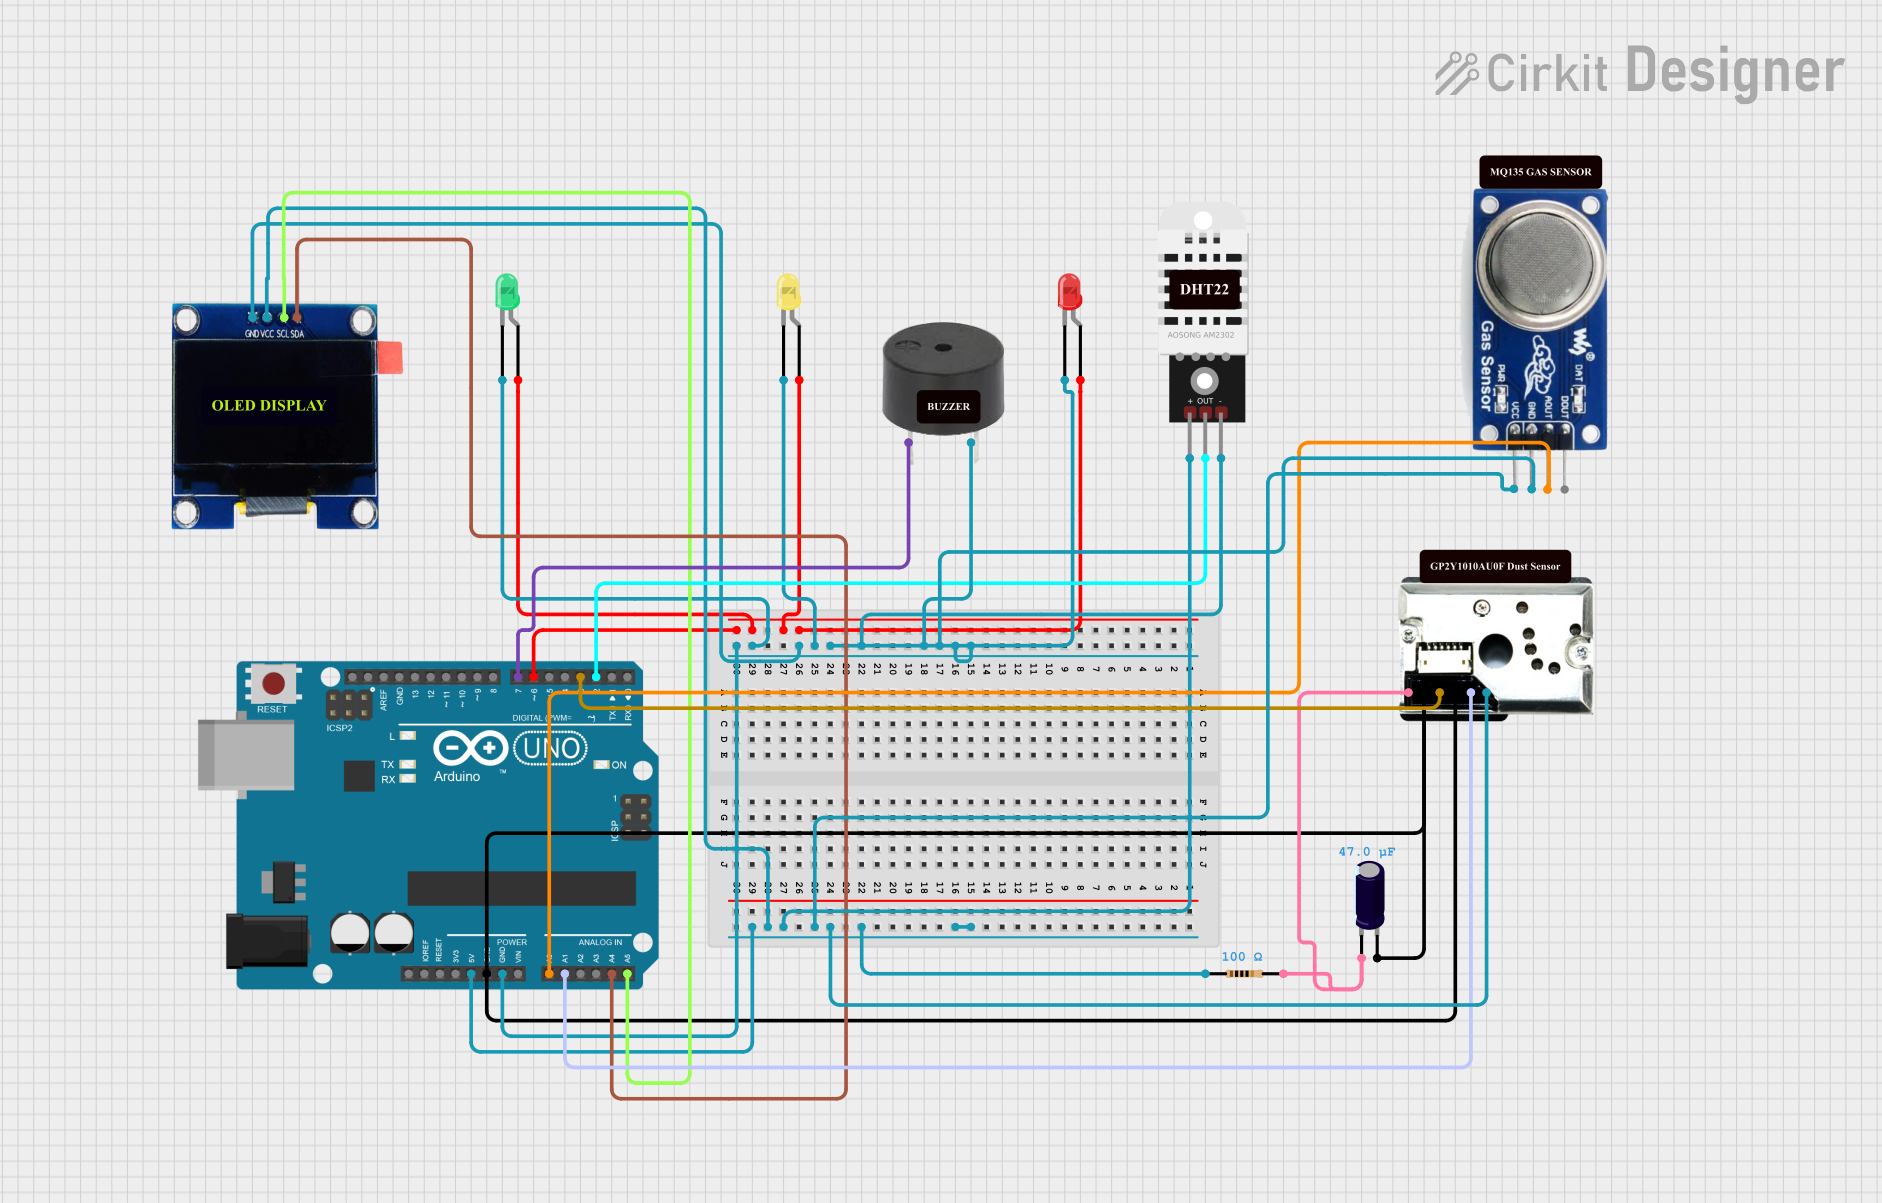
This circuit is an air quality monitoring system using an Arduino UNO, which integrates sensors for dust (GP2Y1010AU0F), gas (MQ135), and temperature/humidity (DHT22). The system displays real-time data on an OLED screen and uses LEDs and a buzzer to indicate air quality levels.
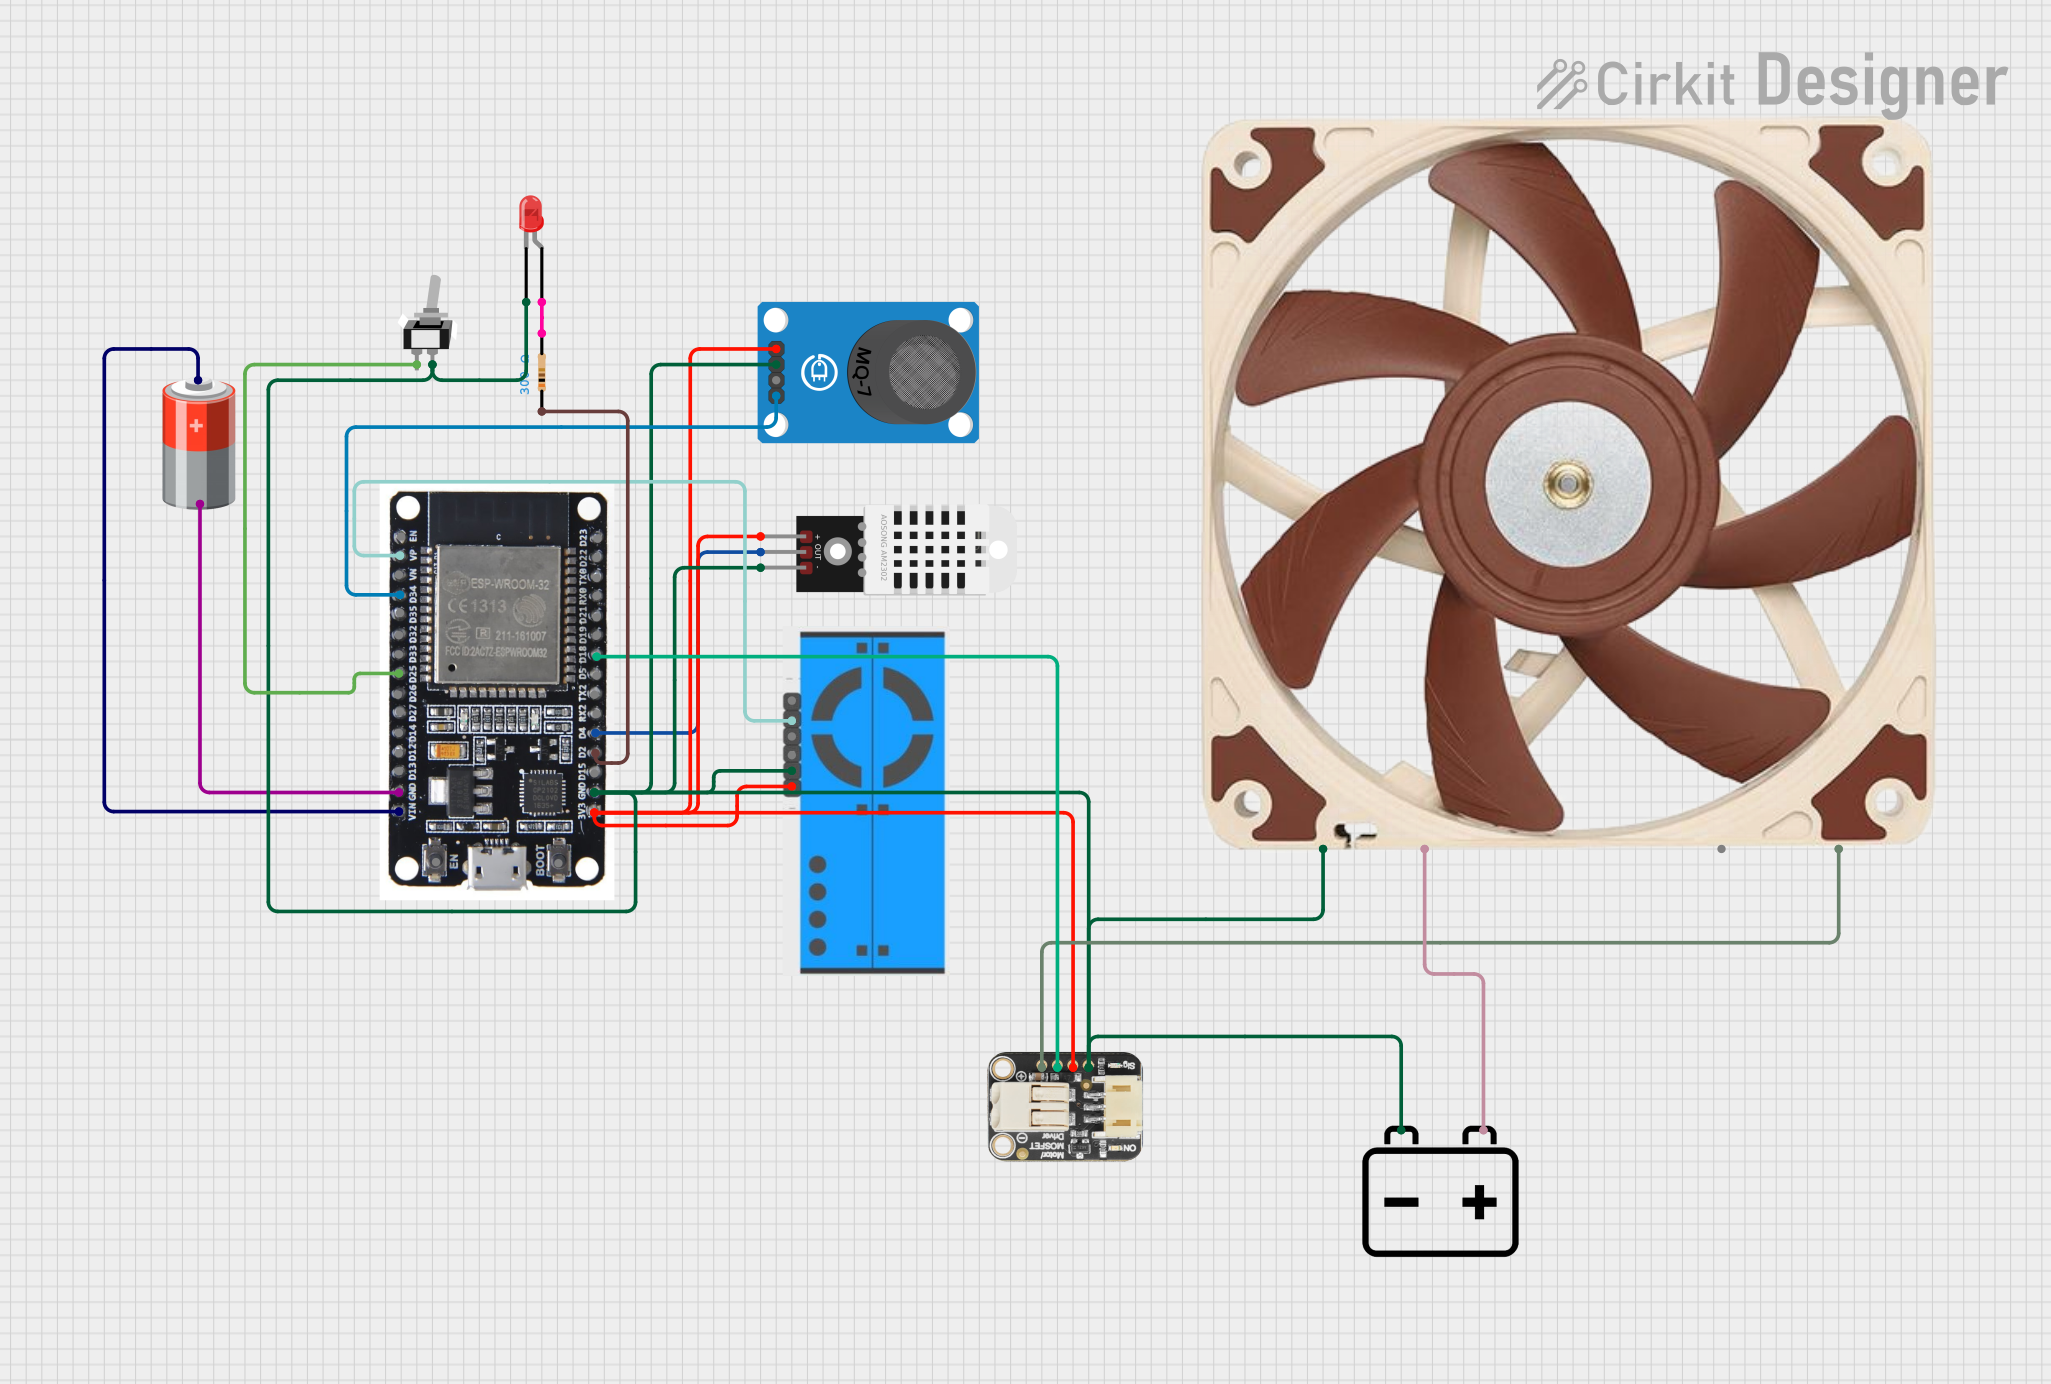
This circuit is a smart air purifier system that uses an ESP32 microcontroller to monitor indoor air quality through various sensors, including a DHT22 for temperature and humidity, an MQ-7 for CO levels, and a PMS5003 for particulate matter. The system adjusts a 12V PWM fan's speed based on air quality readings and integrates with the Blynk app for real-time monitoring and control, including a manual mode switch and an LED indicator.
Indoor air quality monitoring in homes, offices, and schools
Environmental monitoring stations
Smart home automation systems
HVAC (Heating, Ventilation, and Air Conditioning) optimization
Industrial air quality control
Technical Specifications
Below are the key technical details and pin configuration for the DFRobot Air Quality sensor module:
Key Technical Details
Parameter
Specification
Operating Voltage
3.3V - 5V
Operating Current
< 20mA
Measurement Parameters
CO2, VOCs, PM1.0, PM2.5, PM10
Communication Interface
UART (default), I2C
Operating Temperature
-10°C to 50°C
Operating Humidity
0% - 95% RH (non-condensing)
Dimensions
50mm x 36mm x 12mm
Pin Configuration and Descriptions
Pin Name
Type
Description
VCC
Power
Power supply input (3.3V - 5V)
GND
Ground
Ground connection
TX
Output
UART transmit pin for data output
RX
Input
UART receive pin for data input
SDA
Input/Output
I2C data line
SCL
Input
I2C clock line
Usage Instructions
How to Use the Component in a Circuit
Power the Sensor: Connect the VCC pin to a 3.3V or 5V power source and the GND pin to ground.
Choose Communication Protocol:
For UART communication, connect the TX and RX pins to the corresponding UART pins on your microcontroller.
For I2C communication, connect the SDA and SCL pins to the I2C bus of your microcontroller.
Read Data: Use the appropriate library or commands to read air quality data from the sensor. The sensor outputs data in real-time, which can be processed for display or further analysis.
Important Considerations and Best Practices
Power Supply: Ensure a stable power supply to avoid inaccurate readings.
Placement: Place the sensor in an open area for accurate air quality measurements. Avoid placing it near heat sources or in areas with high humidity.
Warm-Up Time: Allow the sensor to warm up for a few minutes after powering it on to stabilize readings.
Communication Protocol: Use pull-up resistors (typically 4.7kΩ) on the SDA and SCL lines if using I2C communication.
Example Code for Arduino UNO
Below is an example of how to interface the DFRobot Air Quality sensor with an Arduino UNO using UART communication:
#include <SoftwareSerial.h>

// Define RX and TX pins for SoftwareSerial
SoftwareSerial airQualitySerial(10, 11); // RX = pin 10, TX = pin 11

void setup() {
  Serial.begin(9600); // Initialize Serial Monitor
  airQualitySerial.begin(9600); // Initialize sensor communication

  Serial.println("DFRobot Air Quality Sensor Initialized");
}

void loop() {
  if (airQualitySerial.available()) {
    // Read data from the sensor
    String sensorData = airQualitySerial.readString();

    // Print the data to the Serial Monitor
    Serial.println("Air Quality Data: " + sensorData);
  }

  delay(1000); // Wait 1 second before reading again
}
Note: Replace 10 and 11 with the actual pins you are using for RX and TX on your Arduino UNO.
Troubleshooting and FAQs
Common Issues and Solutions
No Data Output:
Ensure the sensor is properly powered and connected to the correct pins.
Verify that the communication protocol (UART or I2C) matches your code configuration.
Inaccurate Readings:
Allow the sensor to warm up for at least 5 minutes after powering it on.
Ensure the sensor is placed in an open area, away from obstructions or contaminants.
I2C Communication Not Working:
Check if pull-up resistors are connected to the SDA and SCL lines.
Verify the I2C address of the sensor (consult the datasheet or library documentation).
FAQs
Q: Can this sensor measure outdoor air quality?
A: While the sensor is designed for indoor use, it can measure outdoor air quality if placed in a protected enclosure to avoid exposure to extreme weather conditions.
Q: How often should I calibrate the sensor?
A: The sensor is factory-calibrated, but periodic calibration (every 6-12 months) is recommended for optimal accuracy.
Q: Can I use this sensor with a Raspberry Pi?
A: Yes, the sensor can be interfaced with a Raspberry Pi using UART or I2C communication. Ensure you use the appropriate libraries for your programming language.
Q: What is the lifespan of the sensor?
A: The sensor has a typical lifespan of 5-7 years under normal operating conditions.


 Open Project in Cirkit Designer