How to Use Keyboard Switch: Examples, Pinouts, and Specs
Introduction
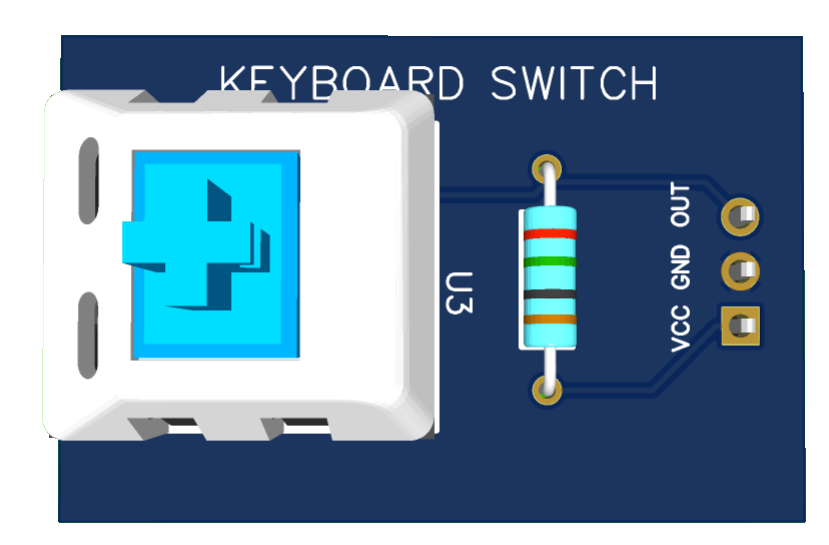
A keyboard switch is a mechanical or electronic device that allows a user to input commands or data into a computer or other electronic device by pressing keys. Keyboard switches are integral components of keyboards, determining the tactile feel, actuation force, and overall typing experience. They are commonly used in mechanical keyboards, gaming peripherals, and industrial control panels.
Explore Projects Built with Keyboard Switch
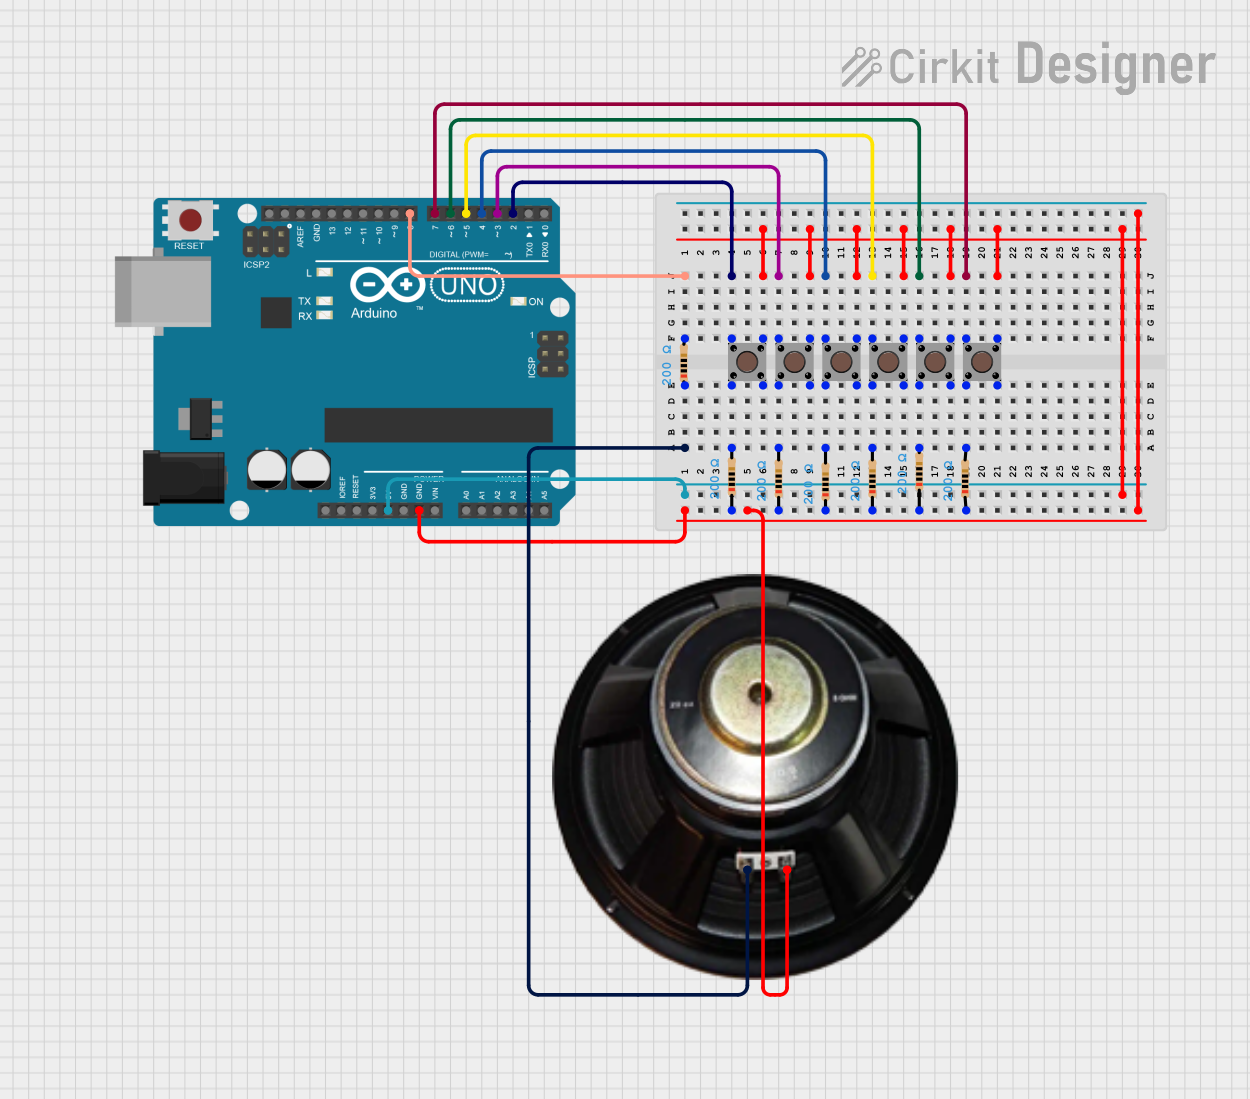

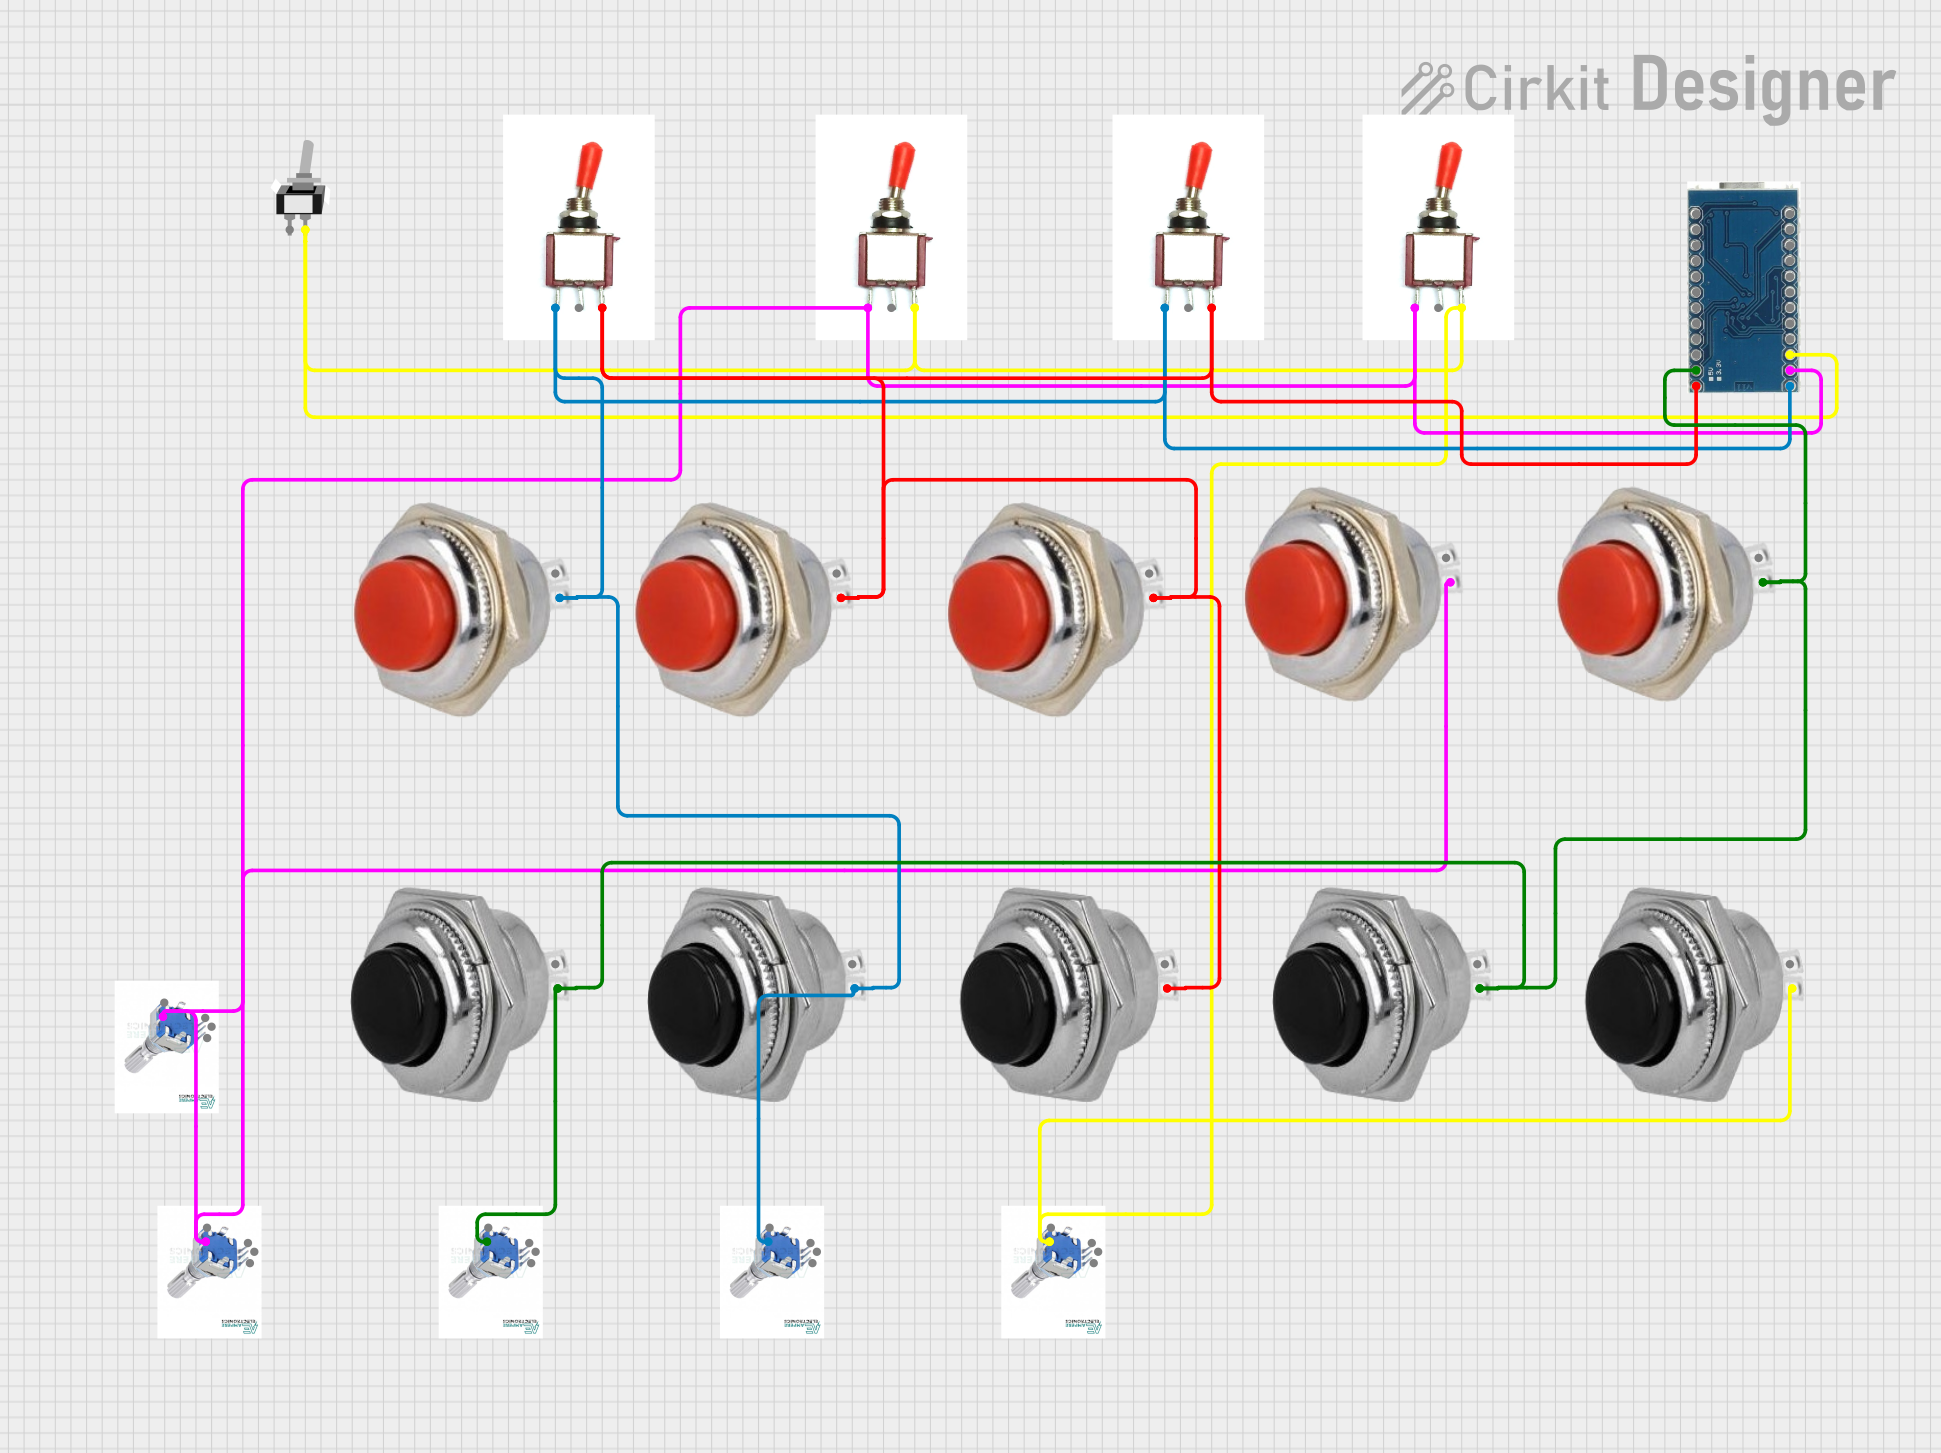
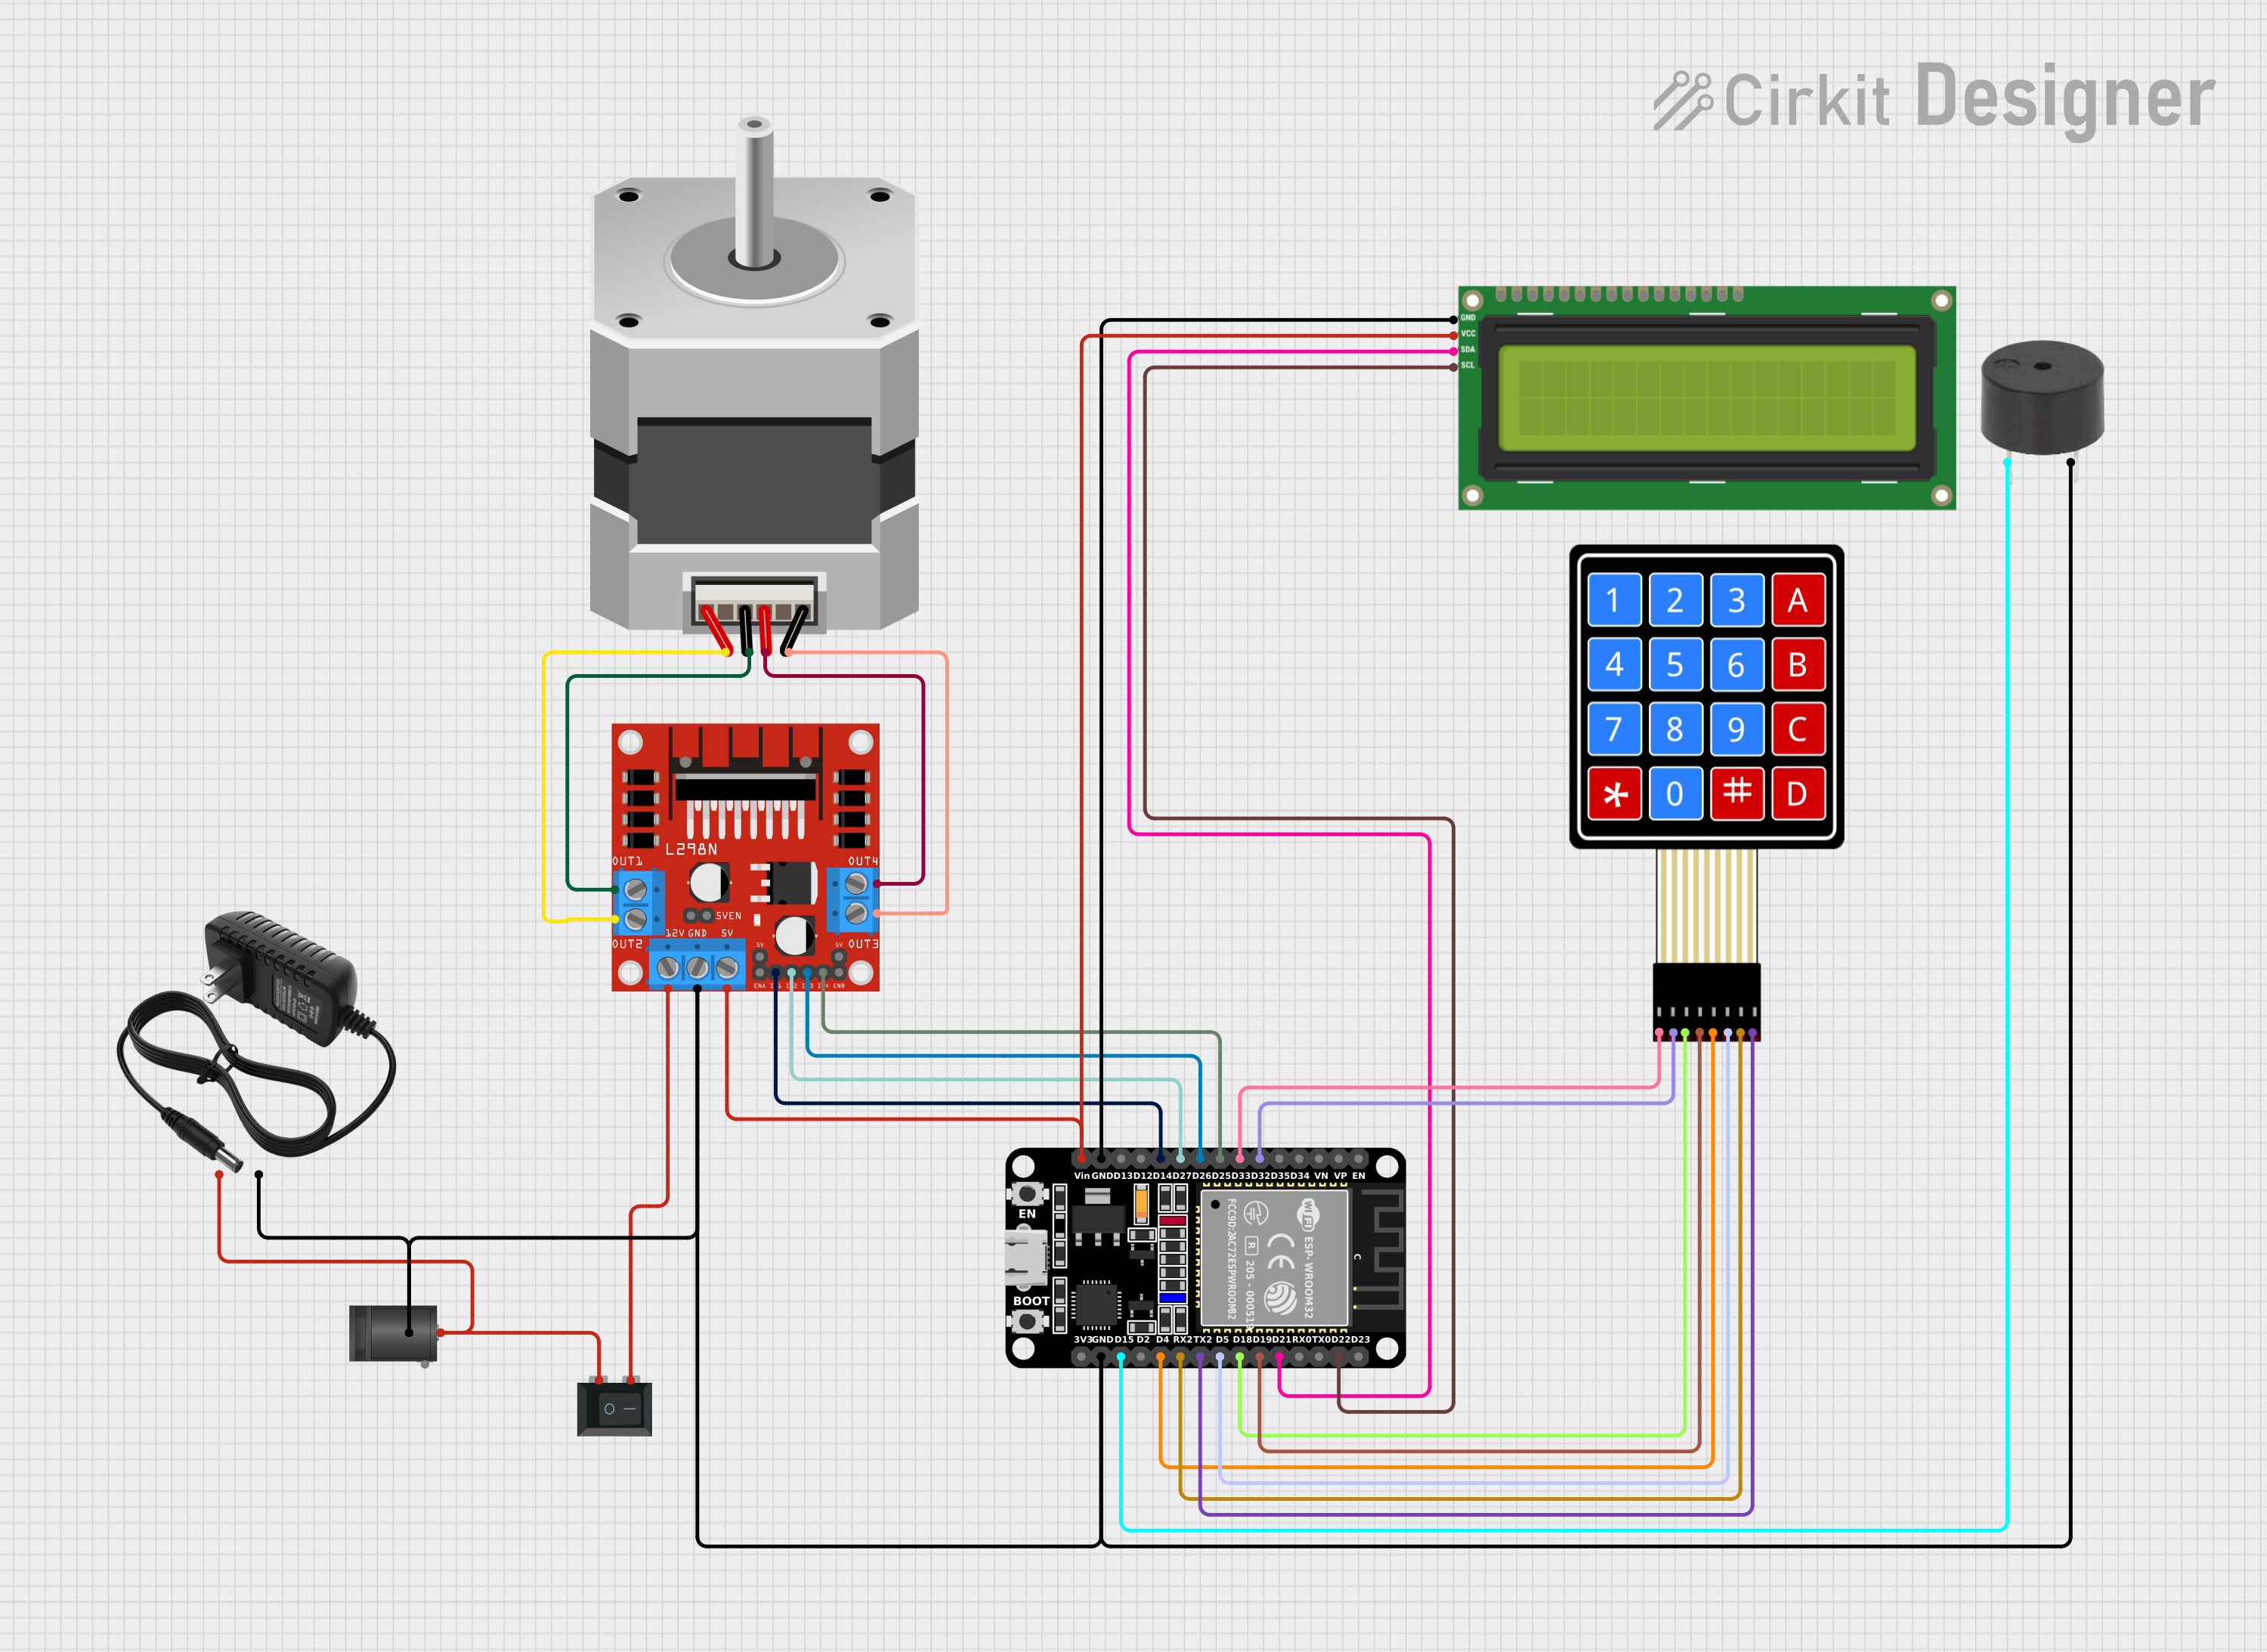
Explore Projects Built with Keyboard Switch
Common Applications and Use Cases
- Mechanical Keyboards: Used for gaming, typing, and professional workstations.
- Industrial Equipment: Control panels and machinery interfaces.
- Custom Keyboards: DIY keyboard projects and hobbyist builds.
- Point-of-Sale Systems: Keypads for retail and payment terminals.
Technical Specifications
Keyboard switches come in various types, such as tactile, linear, and clicky, each with unique characteristics. Below are the general technical specifications for a typical mechanical keyboard switch:
General Specifications
| Parameter | Value/Range |
|---|---|
| Actuation Force | 45g to 80g |
| Actuation Point | 1.5mm to 2.2mm |
| Total Travel Distance | 3.5mm to 4.0mm |
| Lifespan | 50 million to 100 million presses |
| Operating Voltage | 3.3V to 5V |
| Operating Temperature | -10°C to 70°C |
Pin Configuration and Descriptions
Most keyboard switches are simple two-pin devices. Below is the pin configuration:
| Pin Number | Description |
|---|---|
| 1 | Switch Terminal 1 (Signal Out) |
| 2 | Switch Terminal 2 (Ground) |
Usage Instructions
How to Use the Component in a Circuit
Wiring the Switch:
- Connect one terminal of the switch to a digital input pin on your microcontroller (e.g., Arduino UNO).
- Connect the other terminal to the ground (GND).
- Optionally, use a pull-up resistor (10kΩ) to ensure a stable signal when the switch is not pressed.
Debouncing:
- Mechanical switches may produce noise or "bouncing" when pressed. Use software debouncing or a capacitor to filter out these unwanted signals.
Testing the Switch:
- Use a multimeter to check continuity between the two terminals. When the switch is pressed, the circuit should close.
Arduino UNO Example Code
Below is an example of how to use a keyboard switch with an Arduino UNO:
// Define the pin connected to the keyboard switch
const int switchPin = 2; // Digital pin 2
int switchState = 0;     // Variable to store the switch state

void setup() {
  pinMode(switchPin, INPUT_PULLUP); // Set the pin as input with pull-up resistor
  Serial.begin(9600);              // Initialize serial communication
}

void loop() {
  switchState = digitalRead(switchPin); // Read the state of the switch

  if (switchState == LOW) {
    // Switch is pressed (LOW because of pull-up resistor)
    Serial.println("Switch Pressed");
  } else {
    // Switch is not pressed
    Serial.println("Switch Released");
  }

  delay(50); // Small delay for debouncing
}
Important Considerations and Best Practices
- Debouncing: Always account for switch bounce in your circuit or code.
- Voltage Levels: Ensure the switch operates within the voltage range of your microcontroller.
- Durability: Choose switches with a high lifespan for frequent use applications.
- Mounting: Ensure proper alignment and secure mounting to avoid mispresses.
Troubleshooting and FAQs
Common Issues and Solutions
Switch Not Responding:
- Cause: Poor connection or broken switch.
- Solution: Check wiring and test the switch with a multimeter.
Unstable or Erratic Behavior:
- Cause: Switch bouncing or noise.
- Solution: Implement software or hardware debouncing.
Switch Feels Stiff or Unresponsive:
- Cause: Dirt or debris inside the switch.
- Solution: Clean the switch with compressed air or isopropyl alcohol.
Incorrect Readings on Microcontroller:
- Cause: Missing pull-up or pull-down resistor.
- Solution: Add a pull-up resistor to stabilize the signal.
FAQs
Q: Can I use a keyboard switch for high-current applications?
A: No, keyboard switches are designed for low-current signals and should not be used for high-power circuits.Q: How do I choose between tactile, linear, and clicky switches?
A: Tactile switches provide feedback, linear switches are smooth, and clicky switches produce an audible click. Choose based on your preference and application.Q: Do I need to solder the switches?
A: It depends on the keyboard design. Some switches are hot-swappable, while others require soldering.Q: Can I use a keyboard switch with a Raspberry Pi?
A: Yes, connect the switch to a GPIO pin and use a pull-up resistor. Use Python or other programming languages to read the switch state.
By following this documentation, you can effectively integrate and troubleshoot keyboard switches in your projects.