Cirkit Designer Logo
Cirkit Designer
Your all-in-one circuit design IDE
Home / 
Component Documentation

How to Use Analog pH sensor kit: Examples, Pinouts, and Specs

Image of Analog pH sensor kit
Cirkit Designer LogoDesign with Analog pH sensor kit in Cirkit Designer

Introduction

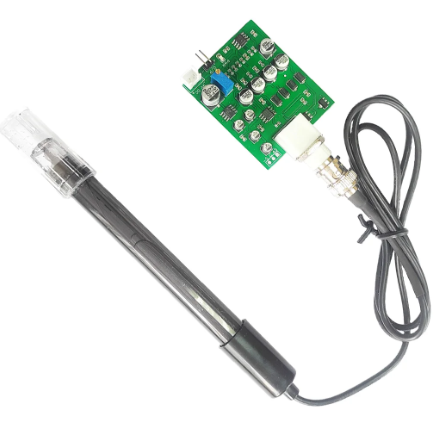
The Analog pH Sensor Kit is a device used to measure the pH level of a solution, providing an analog voltage output that corresponds to the pH value. This sensor is commonly used in applications such as water quality monitoring, aquariums, hydroponics, and laboratory experiments. It offers a simple and effective way to measure the acidity or alkalinity of a solution, making it a valuable tool for both hobbyists and professionals.

Explore Projects Built with Analog pH sensor kit

Use Cirkit Designer to design, explore, and prototype these projects online. Some projects support real-time simulation. Click "Open Project" to start designing instantly!
Arduino UNO Based pH Meter with LCD Display and Indicator LEDs
Image of pH meter arduino: A project utilizing Analog pH sensor kit in a practical application
This circuit is designed to measure the pH level of a solution and display the value on an LCD screen. It uses an Arduino UNO microcontroller to read the pH sensor's signal and control three LEDs (yellow, green, blue) to indicate the pH level: yellow for acidic (pH < 5), green for neutral (pH 5-8), and blue for basic (pH > 8). The LCD displays a welcome message on startup and then continuously updates with the current pH value.
Cirkit Designer LogoOpen Project in Cirkit Designer
Arduino Leonardo-Based pH and TDS Sensor with OLED Display
Image of Exhibition Arduino- 2: A project utilizing Analog pH sensor kit in a practical application
This circuit is designed to measure pH and TDS (Total Dissolved Solids) levels in a solution using a pH sensor and a TDS sensor, respectively, interfaced with an Arduino Leonardo. The measured data is then displayed on a 0.96" OLED screen.
Cirkit Designer LogoOpen Project in Cirkit Designer
Arduino UNO Based pH Monitoring System with Bluetooth Connectivity
Image of BOMBOCLATT URAZ BARAN YATAKHANE YATAK FOOTAGE SS: A project utilizing Analog pH sensor kit in a practical application
This circuit is designed to measure pH levels using a pH meter connected to an Arduino UNO, which processes the sensor data and controls a servomotor based on the readings. The Arduino also interfaces with a Bluetooth HC-06 module for wireless communication, potentially to send pH data to a remote device. Two pushbuttons are included in the circuit, likely for user input, and the servomotor's operation is presumably linked to the pH readings, although the specific functionality is not detailed in the provided code.
Cirkit Designer LogoOpen Project in Cirkit Designer
Arduino UNO pH Meter with LCD Display
Image of ph: A project utilizing Analog pH sensor kit in a practical application
This circuit is designed to measure pH levels using a pH meter and display the readings on an LCD screen. An Arduino UNO microcontroller reads the pH sensor data through its analog input pin A1 and controls the LCD display via its digital pins to show the pH value.
Cirkit Designer LogoOpen Project in Cirkit Designer

Explore Projects Built with Analog pH sensor kit

Use Cirkit Designer to design, explore, and prototype these projects online. Some projects support real-time simulation. Click "Open Project" to start designing instantly!
Image of pH meter arduino: A project utilizing Analog pH sensor kit in a practical application
Arduino UNO Based pH Meter with LCD Display and Indicator LEDs
This circuit is designed to measure the pH level of a solution and display the value on an LCD screen. It uses an Arduino UNO microcontroller to read the pH sensor's signal and control three LEDs (yellow, green, blue) to indicate the pH level: yellow for acidic (pH < 5), green for neutral (pH 5-8), and blue for basic (pH > 8). The LCD displays a welcome message on startup and then continuously updates with the current pH value.
Cirkit Designer LogoOpen Project in Cirkit Designer
Image of Exhibition Arduino- 2: A project utilizing Analog pH sensor kit in a practical application
Arduino Leonardo-Based pH and TDS Sensor with OLED Display
This circuit is designed to measure pH and TDS (Total Dissolved Solids) levels in a solution using a pH sensor and a TDS sensor, respectively, interfaced with an Arduino Leonardo. The measured data is then displayed on a 0.96" OLED screen.
Cirkit Designer LogoOpen Project in Cirkit Designer
Image of BOMBOCLATT URAZ BARAN YATAKHANE YATAK FOOTAGE SS: A project utilizing Analog pH sensor kit in a practical application
Arduino UNO Based pH Monitoring System with Bluetooth Connectivity
This circuit is designed to measure pH levels using a pH meter connected to an Arduino UNO, which processes the sensor data and controls a servomotor based on the readings. The Arduino also interfaces with a Bluetooth HC-06 module for wireless communication, potentially to send pH data to a remote device. Two pushbuttons are included in the circuit, likely for user input, and the servomotor's operation is presumably linked to the pH readings, although the specific functionality is not detailed in the provided code.
Cirkit Designer LogoOpen Project in Cirkit Designer
Image of ph: A project utilizing Analog pH sensor kit in a practical application
Arduino UNO pH Meter with LCD Display
This circuit is designed to measure pH levels using a pH meter and display the readings on an LCD screen. An Arduino UNO microcontroller reads the pH sensor data through its analog input pin A1 and controls the LCD display via its digital pins to show the pH value.
Cirkit Designer LogoOpen Project in Cirkit Designer

Technical Specifications

Key Technical Details

Parameter Value
Operating Voltage 5V DC
Output Voltage 0-3V (analog)
Measurement Range 0-14 pH
Accuracy ±0.1 pH (at 25°C)
Response Time ≤ 1 minute
Operating Temperature 0-60°C
Storage Temperature -10-80°C

Pin Configuration and Descriptions

Pin Name Description
VCC Power supply (5V)
GND Ground
AO Analog output (0-3V)

Usage Instructions

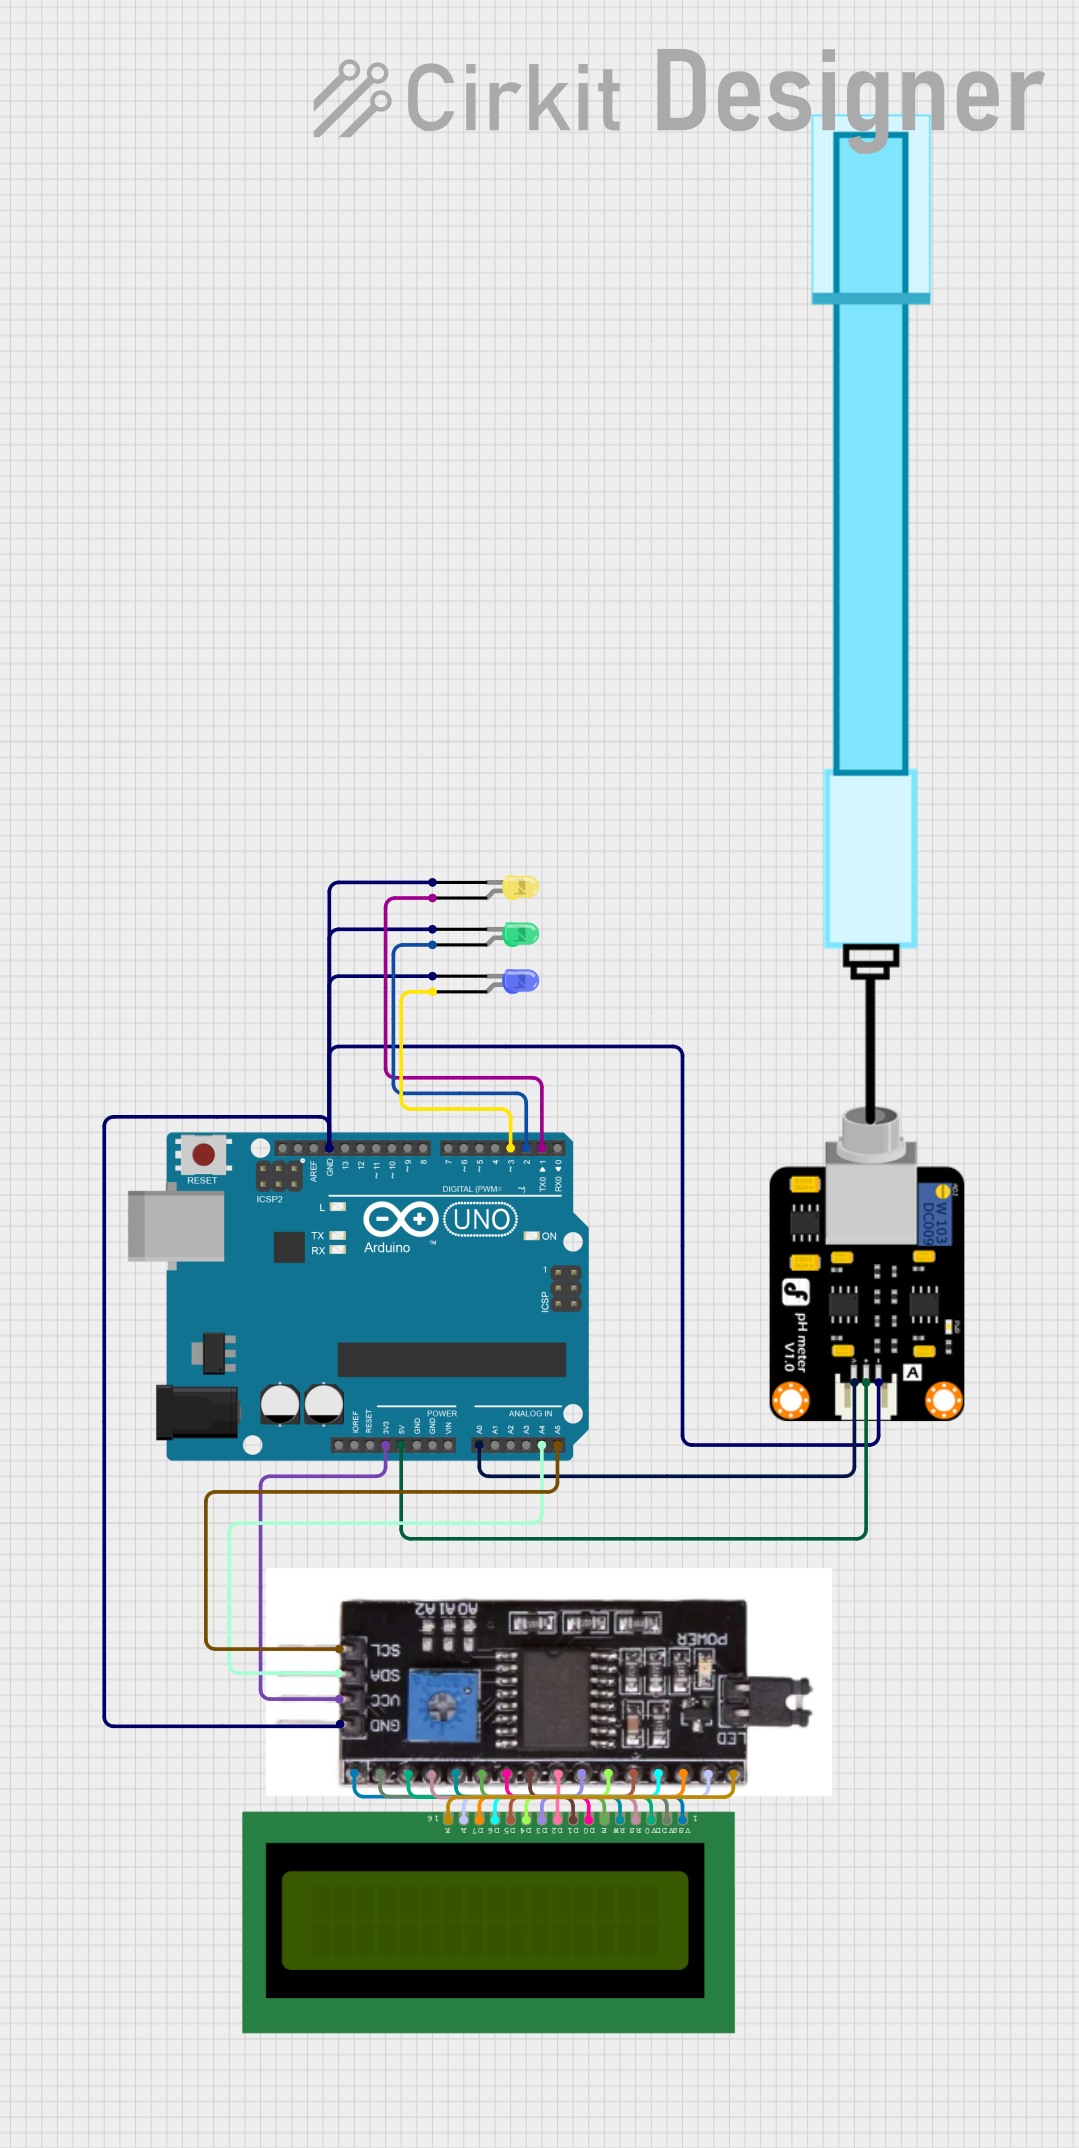
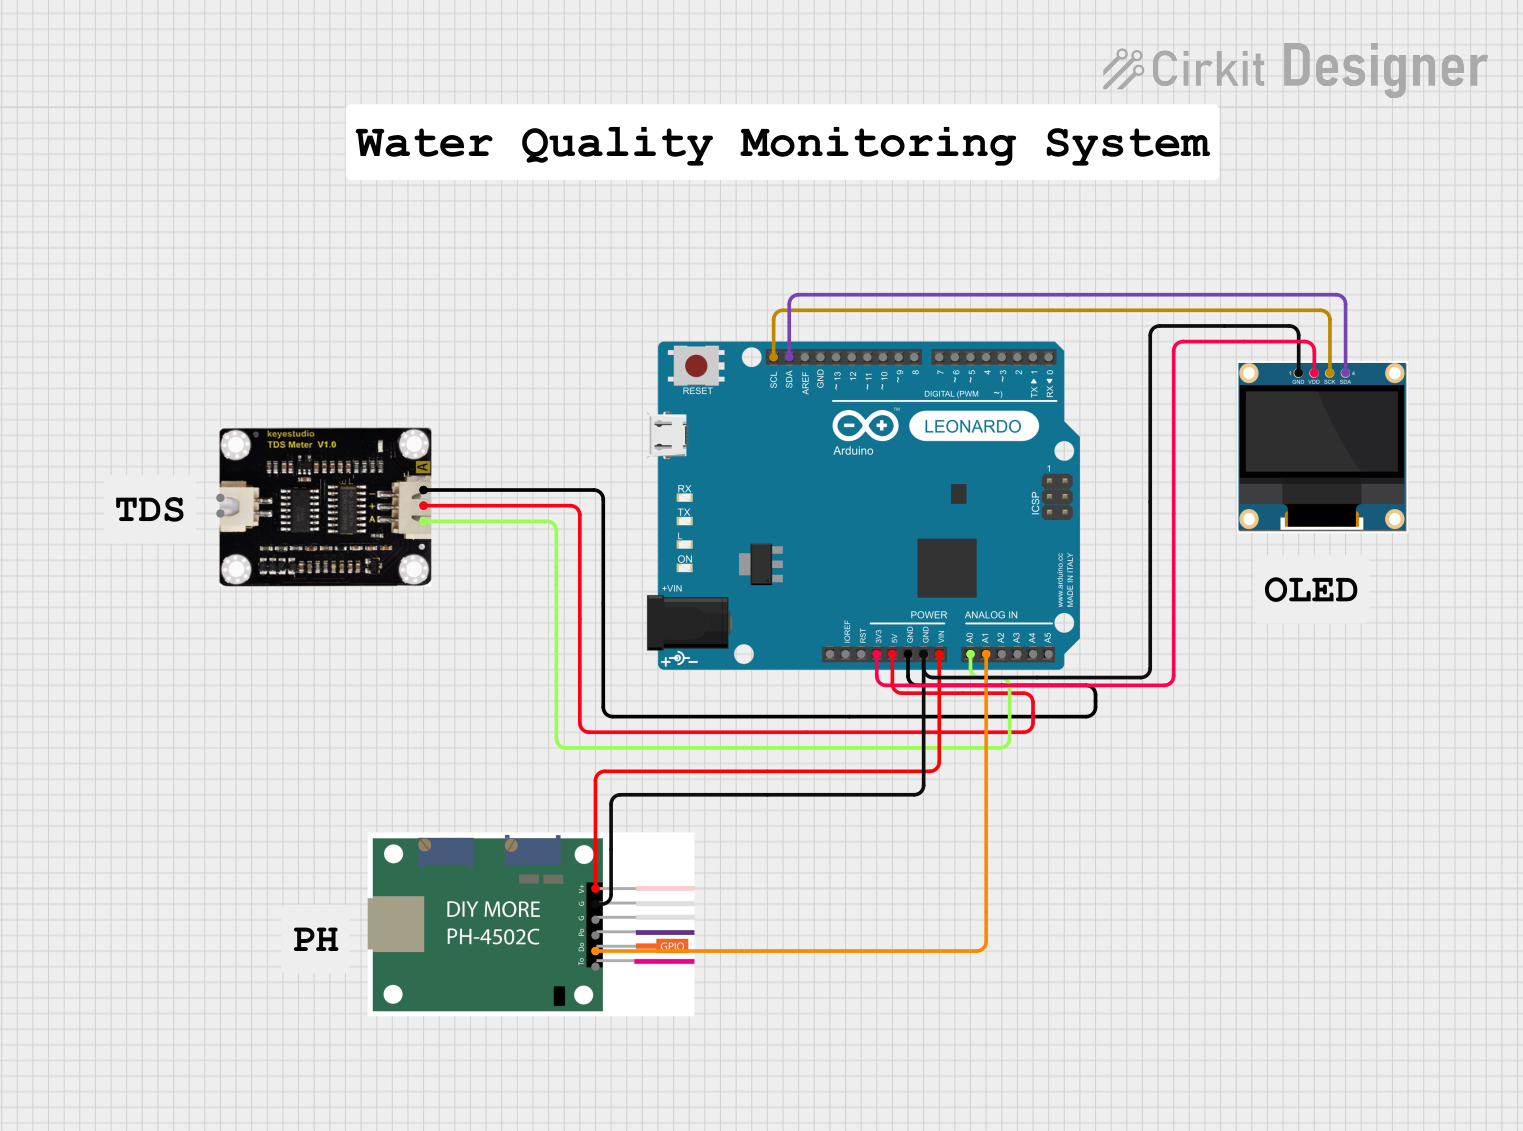
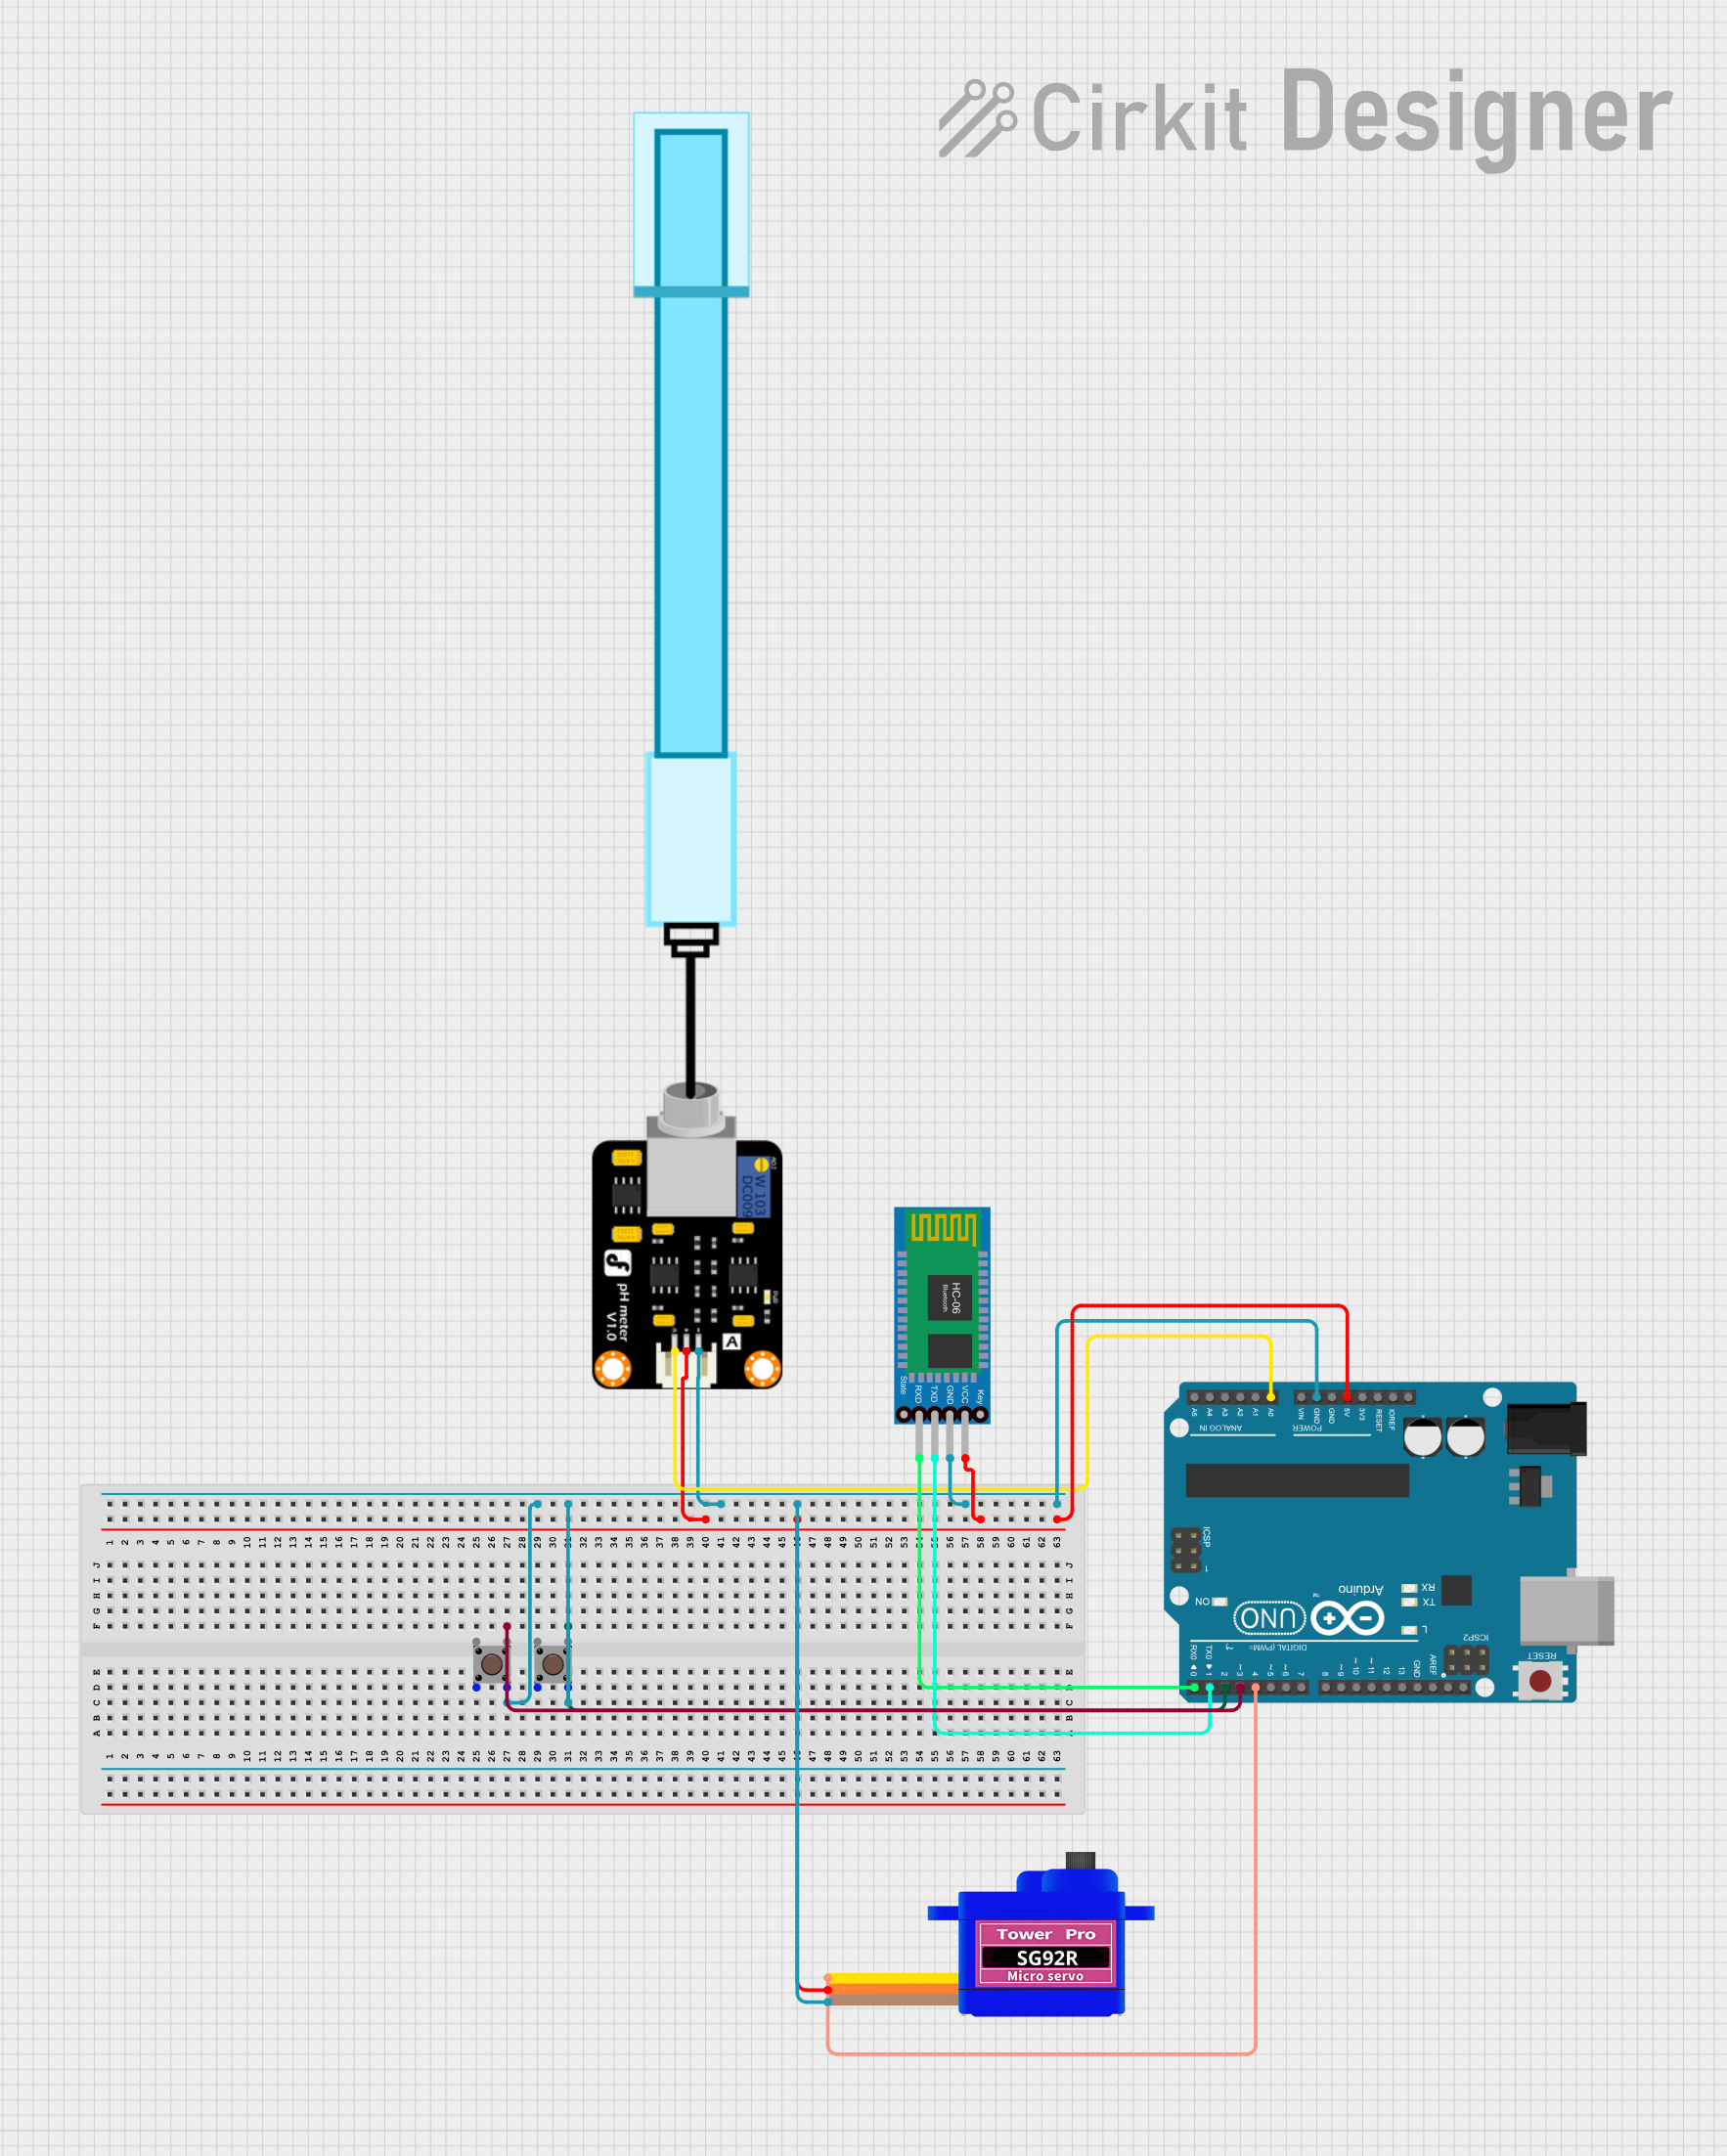
How to Use the Component in a Circuit

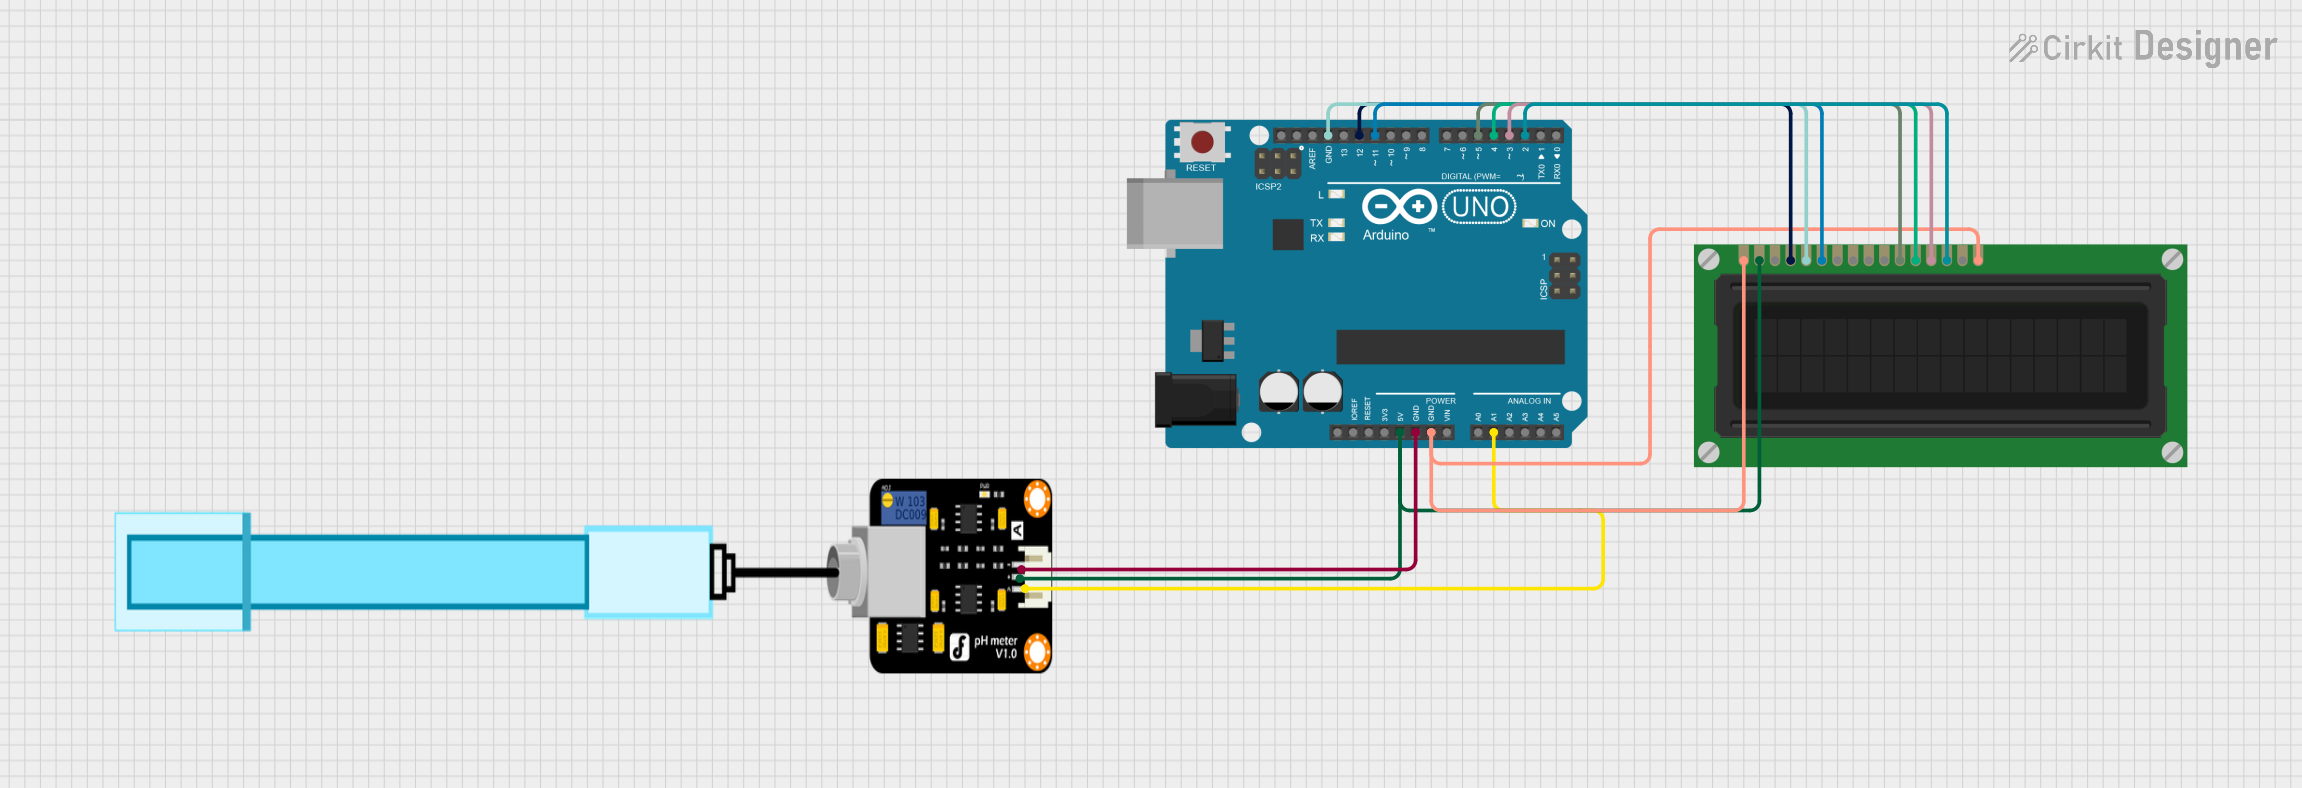
  1. Connect the Sensor to the Arduino UNO:

    • Connect the VCC pin of the pH sensor to the 5V pin on the Arduino.
    • Connect the GND pin of the pH sensor to the GND pin on the Arduino.
    • Connect the AO pin of the pH sensor to an analog input pin (e.g., A0) on the Arduino.
  2. Calibrate the Sensor:

    • Immerse the pH sensor probe in a standard buffer solution (e.g., pH 7.0).
    • Adjust the potentiometer on the sensor module until the output voltage corresponds to the pH value of the buffer solution.
  3. Write and Upload the Code:

    • Use the following sample code to read the pH value from the sensor and display it on the Serial Monitor.
// Sample code to read pH value from the Analog pH Sensor Kit

const int pHpin = A0; // Analog input pin that the pH sensor is attached to
float voltage, pHValue;

void setup() {
  Serial.begin(9600); // Initialize serial communication at 9600 baud
}

void loop() {
  int sensorValue = analogRead(pHpin); // Read the analog value from the sensor
  voltage = sensorValue * (5.0 / 1023.0); // Convert the analog value to voltage
  pHValue = 3.5 * voltage; // Convert the voltage to pH value (calibration factor)
  
  Serial.print("Voltage: ");
  Serial.print(voltage);
  Serial.print(" V, pH Value: ");
  Serial.println(pHValue);
  
  delay(1000); // Wait for 1 second before taking another reading
}

Important Considerations and Best Practices

  • Calibration: Regularly calibrate the sensor using standard buffer solutions to ensure accurate readings.
  • Cleaning: Rinse the pH probe with distilled water after each use to prevent contamination.
  • Storage: Store the pH probe in a storage solution or buffer solution to maintain its sensitivity and accuracy.
  • Temperature: Be aware of the operating temperature range (0-60°C) to avoid damaging the sensor.

Troubleshooting and FAQs

Common Issues Users Might Face

  1. Inaccurate Readings:

    • Solution: Ensure the sensor is properly calibrated using standard buffer solutions. Check for any contamination on the probe and clean it if necessary.
  2. No Output or Fluctuating Readings:

    • Solution: Verify all connections are secure and correct. Ensure the power supply is stable and within the specified range (5V DC).
  3. Slow Response Time:

    • Solution: Allow the sensor to stabilize in the solution for at least 1 minute before taking readings. Ensure the probe is fully immersed in the solution.

Solutions and Tips for Troubleshooting

  • Check Connections: Ensure all connections are secure and correctly aligned with the pin configuration.
  • Calibrate Regularly: Regular calibration with standard buffer solutions is essential for maintaining accuracy.
  • Clean the Probe: Rinse the probe with distilled water after each use to prevent contamination and ensure accurate readings.
  • Use Fresh Solutions: Use fresh buffer solutions for calibration and avoid using expired or contaminated solutions.

By following these guidelines and best practices, users can effectively utilize the Analog pH Sensor Kit for accurate and reliable pH measurements in various applications.