Cirkit Designer Logo
Cirkit Designer
Your all-in-one circuit design IDE
Home / 
Component Documentation

How to Use 2x 18650: Examples, Pinouts, and Specs

Image of 2x 18650
Cirkit Designer LogoDesign with 2x 18650 in Cirkit Designer

Introduction

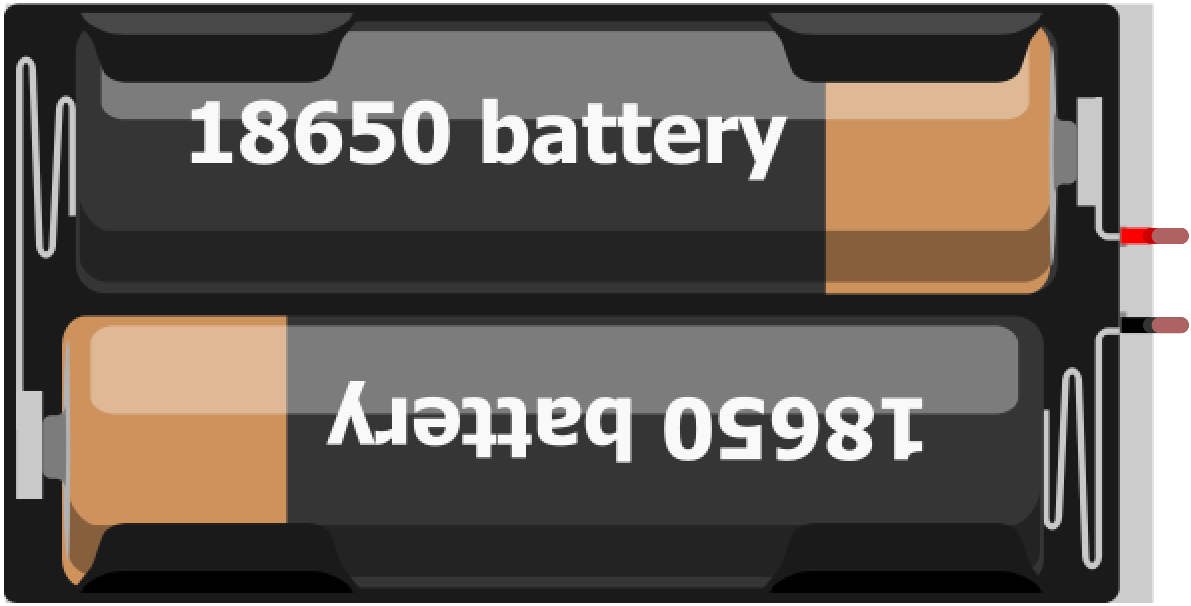
The 2x 18650 battery module is a compact and convenient way to incorporate portable power into your electronics projects. This module typically holds two 18650 lithium-ion rechargeable batteries, which are cylindrical cells known for their high energy density and long life. Common applications include portable power banks, laptop batteries, flashlights, and as a power source for various DIY electronics projects, including those involving microcontrollers like the Arduino UNO.

Explore Projects Built with 2x 18650

Use Cirkit Designer to design, explore, and prototype these projects online. Some projects support real-time simulation. Click "Open Project" to start designing instantly!
Battery-Powered Adjustable Voltage Regulator with Li-ion 18650 Batteries and BMS
Image of mini ups: A project utilizing 2x 18650 in a practical application
This circuit is a power management system that uses four Li-ion 18650 batteries connected to a 2S 30A BMS for battery management and protection. The system includes step-up and step-down voltage regulators to provide adjustable output voltages, controlled by a rocker switch, and multiple DC jacks for power input and output.
Cirkit Designer LogoOpen Project in Cirkit Designer
18650 Li-ion Battery Pack with 4S40A BMS and XL4016 Voltage Regulator for Battery-Powered Applications
Image of Power Bank: A project utilizing 2x 18650 in a practical application
This circuit is a battery management and charging system for a 4S Li-ion battery pack. It includes multiple 18650 Li-ion batteries connected to a 4S40A BMS for balancing and protection, a battery indicator for monitoring charge status, and an XL4016 module for voltage regulation. The system is designed to be charged via a 20V input from a charger.
Cirkit Designer LogoOpen Project in Cirkit Designer
Battery-Powered Audio Playback and Amplification System
Image of recorder: A project utilizing 2x 18650 in a practical application
This circuit is designed to charge 18650 lithium-ion batteries using a TP4056 charger module, and then boost the voltage using an XL 6009 Boost Module. The boosted voltage is regulated by a 7805 voltage regulator to provide a stable 5V output, which powers an ISD1820 voice recording and playback module. The audio signal from the ISD1820 is then amplified by an LM386 audio amplifier module and output through a loudspeaker.
Cirkit Designer LogoOpen Project in Cirkit Designer
Battery-Powered ESP32 Devkit V1 with Buck Converter and Switch Control
Image of Autonomus Car: A project utilizing 2x 18650 in a practical application
This circuit is a power management system that uses two 18650 Li-ion batteries to supply power through a toggle switch and a rocker switch to an LM2956 Buck Converter. The buck converter steps down the voltage to a suitable level for a connected device via a Micro USB cable.
Cirkit Designer LogoOpen Project in Cirkit Designer

Explore Projects Built with 2x 18650

Use Cirkit Designer to design, explore, and prototype these projects online. Some projects support real-time simulation. Click "Open Project" to start designing instantly!
Image of mini ups: A project utilizing 2x 18650 in a practical application
Battery-Powered Adjustable Voltage Regulator with Li-ion 18650 Batteries and BMS
This circuit is a power management system that uses four Li-ion 18650 batteries connected to a 2S 30A BMS for battery management and protection. The system includes step-up and step-down voltage regulators to provide adjustable output voltages, controlled by a rocker switch, and multiple DC jacks for power input and output.
Cirkit Designer LogoOpen Project in Cirkit Designer
Image of Power Bank: A project utilizing 2x 18650 in a practical application
18650 Li-ion Battery Pack with 4S40A BMS and XL4016 Voltage Regulator for Battery-Powered Applications
This circuit is a battery management and charging system for a 4S Li-ion battery pack. It includes multiple 18650 Li-ion batteries connected to a 4S40A BMS for balancing and protection, a battery indicator for monitoring charge status, and an XL4016 module for voltage regulation. The system is designed to be charged via a 20V input from a charger.
Cirkit Designer LogoOpen Project in Cirkit Designer
Image of recorder: A project utilizing 2x 18650 in a practical application
Battery-Powered Audio Playback and Amplification System
This circuit is designed to charge 18650 lithium-ion batteries using a TP4056 charger module, and then boost the voltage using an XL 6009 Boost Module. The boosted voltage is regulated by a 7805 voltage regulator to provide a stable 5V output, which powers an ISD1820 voice recording and playback module. The audio signal from the ISD1820 is then amplified by an LM386 audio amplifier module and output through a loudspeaker.
Cirkit Designer LogoOpen Project in Cirkit Designer
Image of Autonomus Car: A project utilizing 2x 18650 in a practical application
Battery-Powered ESP32 Devkit V1 with Buck Converter and Switch Control
This circuit is a power management system that uses two 18650 Li-ion batteries to supply power through a toggle switch and a rocker switch to an LM2956 Buck Converter. The buck converter steps down the voltage to a suitable level for a connected device via a Micro USB cable.
Cirkit Designer LogoOpen Project in Cirkit Designer

Technical Specifications

General Characteristics

  • Battery Type: Lithium-Ion
  • Nominal Voltage: 3.7V per cell
  • Capacity: Typically 1800mAh to 3500mAh per cell (varies by manufacturer)
  • Max Charging Voltage: 4.2V per cell
  • Discharge Cut-off Voltage: 2.75V per cell
  • Standard Charge Current: 0.2C to 0.5C
  • Max Continuous Discharge Current: Varies by manufacturer (usually around 1C to 2C)

Pin Configuration and Descriptions

Pin Number Description Notes
1 Positive (+) Connect to V+ of the load circuit
2 Negative (-) Connect to GND of the load circuit

Note: The actual pin configuration may vary depending on the specific battery holder or protection circuit included with the module.

Usage Instructions

Installing the Batteries

  1. Ensure the 18650 batteries are correctly oriented with the positive and negative terminals matching the module's labeled contacts.
  2. Insert the batteries into the module, applying even pressure to avoid damaging the terminals.

Connecting to a Circuit

  1. Connect the positive pin of the module to the positive terminal of your load circuit.
  2. Connect the negative pin of the module to the ground (GND) of your load circuit.

Charging the Batteries

  • Use a dedicated lithium-ion battery charger that is compatible with 18650 cells.
  • Do not exceed the recommended charging voltage or current to prevent damage.

Best Practices

  • Always use batteries from the same manufacturer and with the same capacity to ensure balanced discharge.
  • Do not mix new and old batteries, as this can lead to uneven charging and potential hazards.
  • Use a protection circuit to prevent overcharging, deep discharge, and short circuits.
  • Store batteries in a cool, dry place and avoid exposing them to high temperatures.

Troubleshooting and FAQs

Common Issues

  • Battery not charging: Ensure the charger is functioning and compatible with lithium-ion batteries. Check the connections and the integrity of the batteries.
  • Reduced capacity: Over time, the capacity of lithium-ion batteries diminishes. If the batteries do not hold a charge as they used to, they may need to be replaced.
  • No power output: Verify that the batteries are correctly installed and charged. Check for any loose connections or breaks in the circuit.

FAQs

Q: Can I charge the batteries while they are in the module? A: This depends on whether the module includes a built-in charging circuit. If not, you will need to remove the batteries and charge them in a dedicated charger.

Q: How do I know when the batteries are fully charged? A: Use a charger with an indicator light or display that shows the charging status. Charging is typically complete when the voltage per cell reaches 4.2V.

Q: Is it safe to leave the batteries in the charger overnight? A: Only if the charger is designed to prevent overcharging. Otherwise, it's best to remove the batteries once they are fully charged to prevent potential hazards.

Q: Can I use different types of batteries in the module? A: No, the module is designed specifically for 18650 lithium-ion batteries. Using other types of batteries can be dangerous and is not recommended.

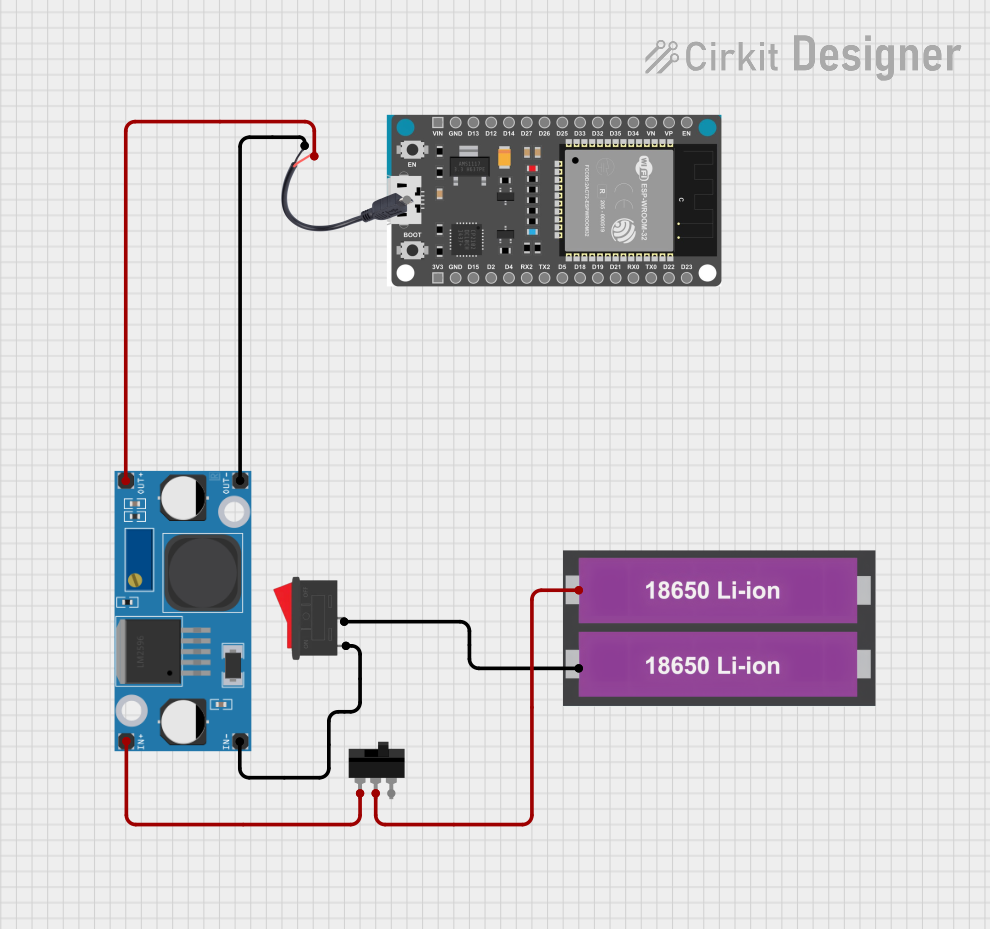
Example Code for Arduino UNO

The following is an example of how to connect the 2x 18650 battery module to an Arduino UNO to power it. Note that the Arduino UNO requires a voltage of 7-12V to operate safely when powered through the VIN pin.

// No specific code is required for battery power supply.
// Simply connect the positive terminal of the battery module to the VIN pin of the Arduino,
// and the negative terminal to one of the GND pins.

void setup() {
  // Initialize digital pin LED_BUILTIN as an output.
  pinMode(LED_BUILTIN, OUTPUT);
}

void loop() {
  // Turn the LED on (HIGH is the voltage level)
  digitalWrite(LED_BUILTIN, HIGH);
  // Wait for a second
  delay(1000);
  // Turn the LED off by making the voltage LOW
  digitalWrite(LED_BUILTIN, LOW);
   // Wait for a second
  delay(1000);
}

// This simple blink code will run as long as the Arduino is powered by the batteries.

Note: When using the 2x 18650 battery module to power an Arduino UNO, ensure that the combined voltage of the two batteries does not exceed the maximum input voltage of the Arduino (12V). It is recommended to use a voltage regulator or a step-down converter if necessary.