How to Use AC Bulb: Examples, Pinouts, and Specs

Introduction
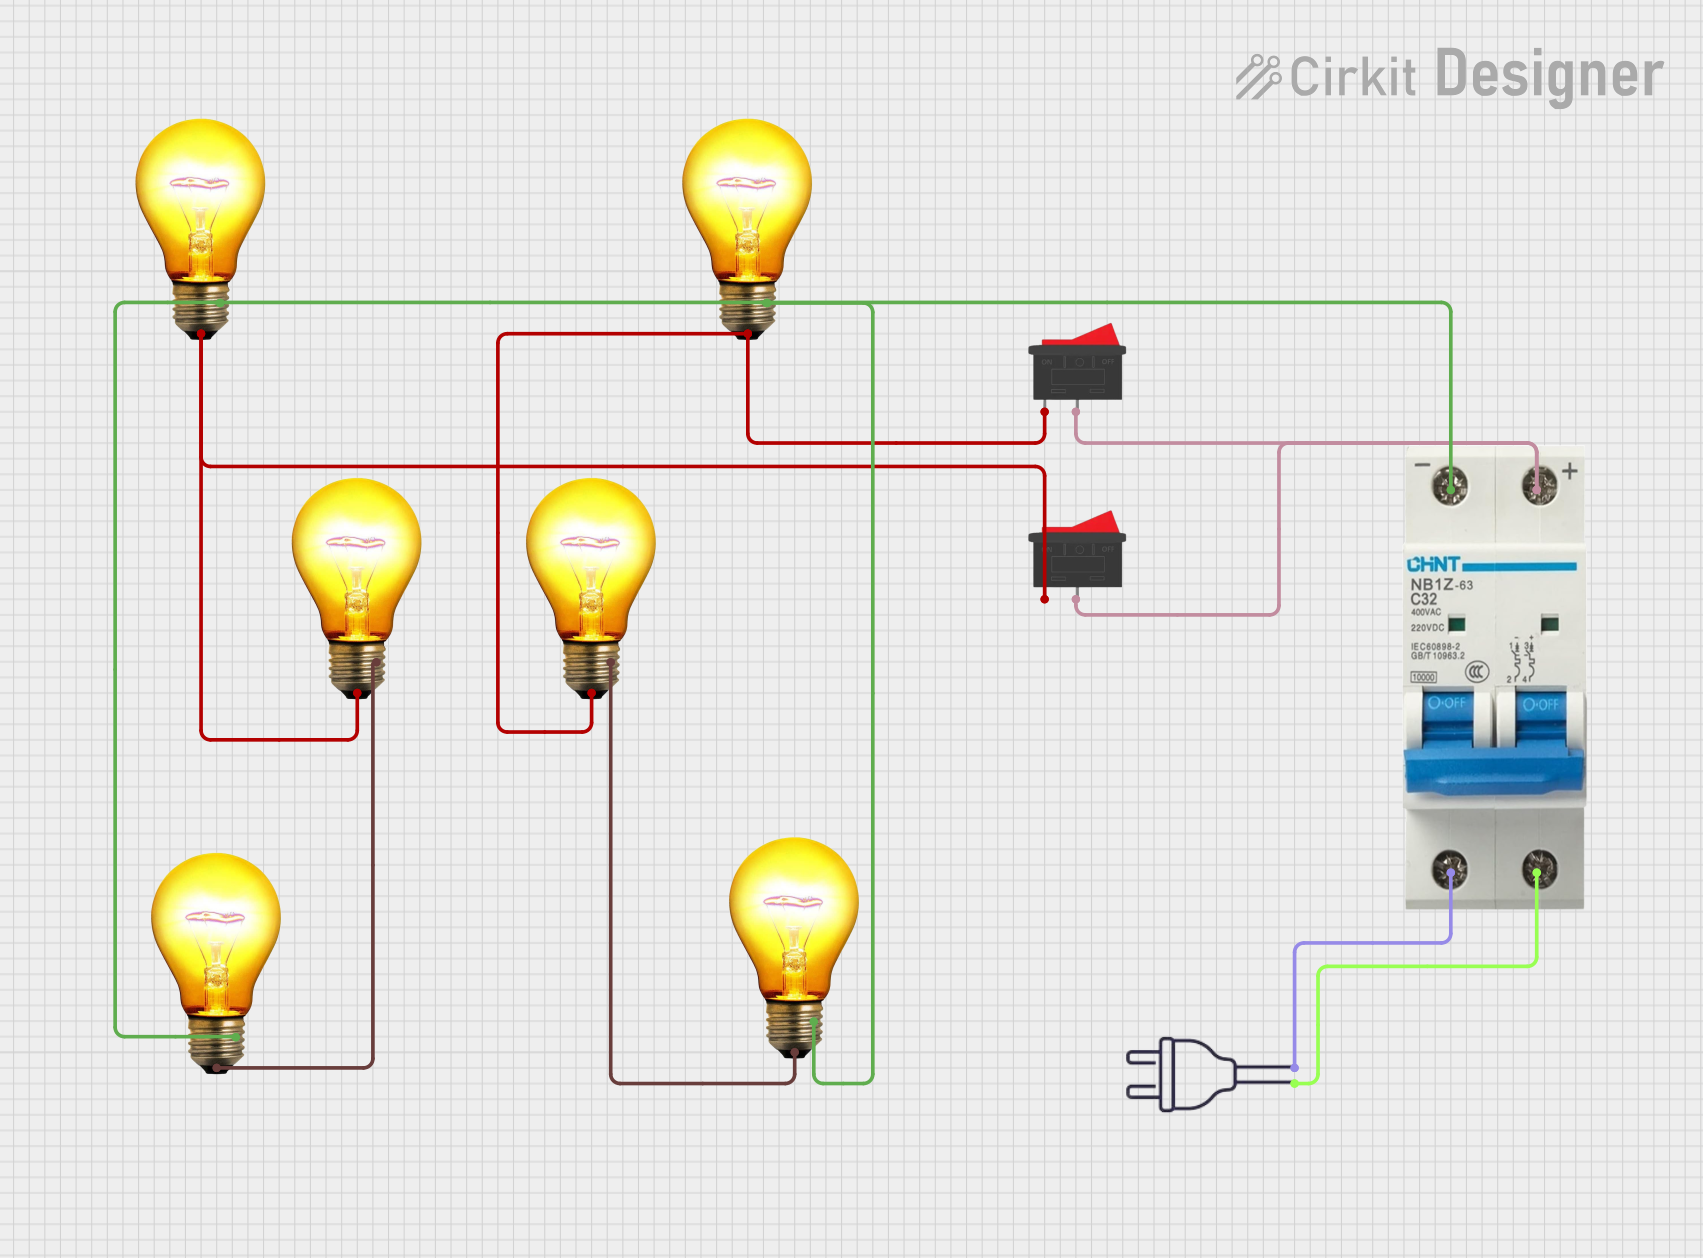
An AC bulb is a type of light bulb designed to operate on alternating current (AC) electricity, which is the standard form of electrical power supplied to homes and businesses. These bulbs are widely used for general-purpose lighting in residential, commercial, and industrial environments. AC bulbs come in various types, including incandescent, compact fluorescent (CFL), and LED, each offering different levels of energy efficiency and brightness.
Explore Projects Built with AC Bulb
Explore Projects Built with AC Bulb
Common Applications and Use Cases
- General lighting in homes, offices, and commercial spaces
- Outdoor lighting (e.g., streetlights, garden lights)
- Decorative lighting for events and holidays
- Task lighting for workspaces and study areas
Technical Specifications
The technical specifications of an AC bulb can vary depending on the type and model. Below are general specifications for a standard AC LED bulb:
| Parameter | Value |
|---|---|
| Operating Voltage | 110V - 240V AC |
| Power Rating | 5W - 100W (depending on the model) |
| Frequency | 50Hz - 60Hz |
| Luminous Flux | 400 - 1600 lumens |
| Color Temperature | 2700K (warm white) to 6500K (cool white) |
| Base Type | E27, B22, or GU10 |
| Lifespan | 15,000 - 50,000 hours (LED models) |
| Dimmable | Optional (depending on the model) |
Pin Configuration and Descriptions
AC bulbs typically have a base with two electrical contacts. The configuration depends on the base type:
E27 Base (Screw Type)
| Pin | Description |
|---|---|
| Center Contact | Live (L) terminal for AC input |
| Screw Thread | Neutral (N) terminal for AC input |
B22 Base (Bayonet Type)
| Pin | Description |
|---|---|
| Pin 1 | Live (L) terminal for AC input |
| Pin 2 | Neutral (N) terminal for AC input |
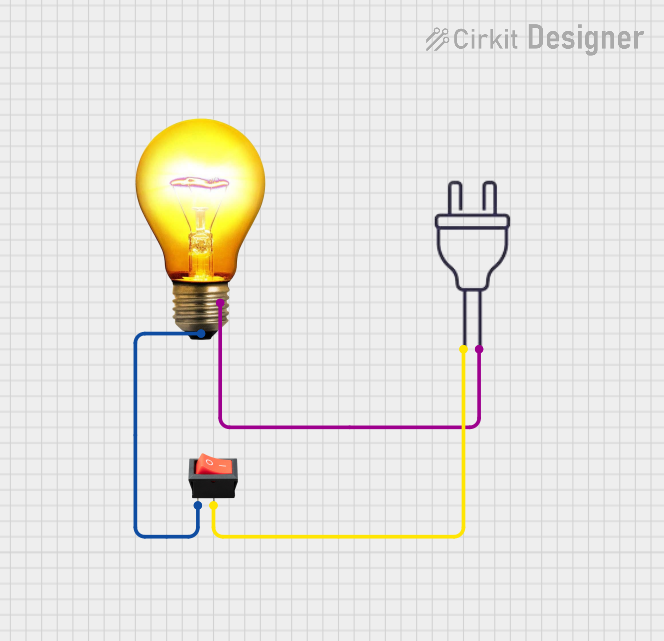
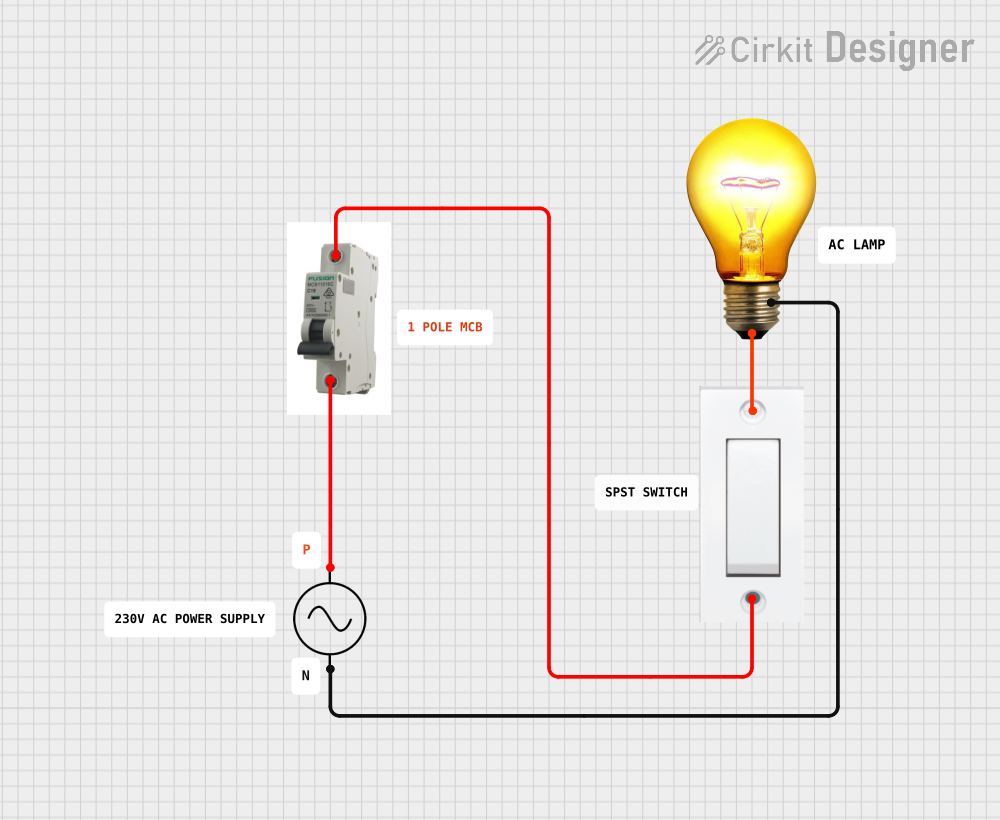
Usage Instructions
How to Use the Component in a Circuit
- Ensure Compatibility: Verify that the AC bulb's voltage and power rating match the electrical supply in your location (e.g., 110V or 220V AC).
- Install the Bulb: Insert the bulb into a compatible socket (e.g., E27 or B22). Ensure the power is turned off before installation.
- Connect to Power: Turn on the power supply to illuminate the bulb.
- Optional Dimming: If the bulb is dimmable, use a compatible dimmer switch to adjust brightness.
Important Considerations and Best Practices
- Safety First: Always turn off the power supply before installing or replacing the bulb to avoid electric shock.
- Avoid Overloading: Ensure the bulb's power rating does not exceed the socket's maximum load capacity.
- Ventilation: Use the bulb in a well-ventilated fixture to prevent overheating, especially for high-power models.
- Dimming Compatibility: If using a dimmable bulb, ensure the dimmer switch is compatible with the bulb type (e.g., LED dimmers for LED bulbs).
- Environment: Avoid using the bulb in damp or wet locations unless it is specifically rated for such conditions (e.g., IP65-rated bulbs).
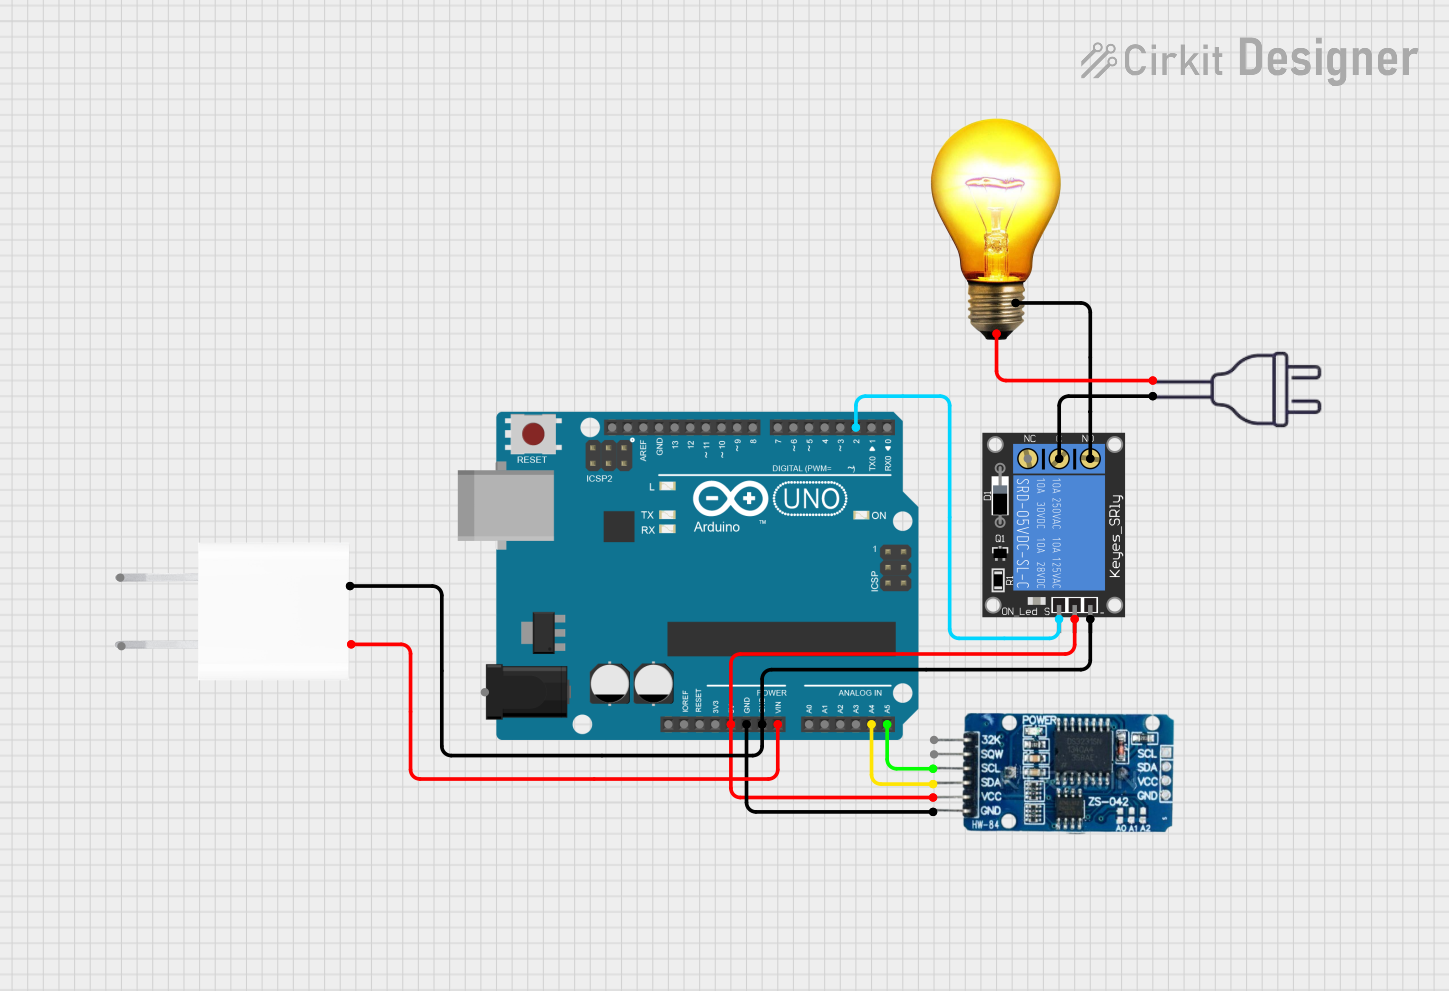
Example: Connecting an AC Bulb to an Arduino UNO
While AC bulbs cannot be directly controlled by an Arduino due to high voltage, you can use a relay module to control the bulb. Below is an example:
Circuit Components
- Arduino UNO
- 5V Relay Module
- AC Bulb (e.g., 220V, 10W)
- Jumper Wires
- Power Supply
Code Example
// This code demonstrates how to control an AC bulb using a relay module
// connected to an Arduino UNO. The bulb will turn on for 5 seconds, then off.

const int relayPin = 7; // Pin connected to the relay module

void setup() {
  pinMode(relayPin, OUTPUT); // Set relay pin as output
  digitalWrite(relayPin, LOW); // Ensure relay is off at startup
}

void loop() {
  digitalWrite(relayPin, HIGH); // Turn on the relay (bulb ON)
  delay(5000); // Wait for 5 seconds
  digitalWrite(relayPin, LOW); // Turn off the relay (bulb OFF)
  delay(5000); // Wait for 5 seconds
}
Warning: Working with AC electricity is dangerous. Ensure proper insulation and safety precautions when handling high-voltage components.
Troubleshooting and FAQs
Common Issues Users Might Face
Bulb Does Not Light Up
- Cause: Loose connection or faulty socket.
- Solution: Check the socket and ensure the bulb is securely installed. Test the bulb in a different socket.
Flickering Light
- Cause: Voltage fluctuations or incompatible dimmer switch.
- Solution: Use a voltage stabilizer or replace the dimmer with a compatible one.
Bulb Overheats
- Cause: Poor ventilation or high ambient temperature.
- Solution: Ensure the fixture allows proper airflow. Avoid using the bulb in enclosed fixtures unless rated for such use.
Short Lifespan
- Cause: Frequent on/off cycles or power surges.
- Solution: Use surge protectors and avoid excessive switching.
FAQs
Can I use an AC bulb with a DC power source?
- No, AC bulbs are designed specifically for alternating current. Using a DC source may damage the bulb.
Are all AC bulbs dimmable?
- No, only bulbs labeled as "dimmable" can be used with a dimmer switch.
What is the difference between warm white and cool white?
- Warm white (2700K-3000K) has a yellowish tone, ideal for cozy environments. Cool white (5000K-6500K) has a bluish tone, suitable for task lighting.
Can I use an AC bulb outdoors?
- Yes, but only if the bulb is rated for outdoor use (e.g., weatherproof or IP-rated).