Cirkit Designer
Your all-in-one circuit design IDE
Home /
Component Documentation
How to Use Grove Speech Recognizer: Examples, Pinouts, and Specs
Introduction
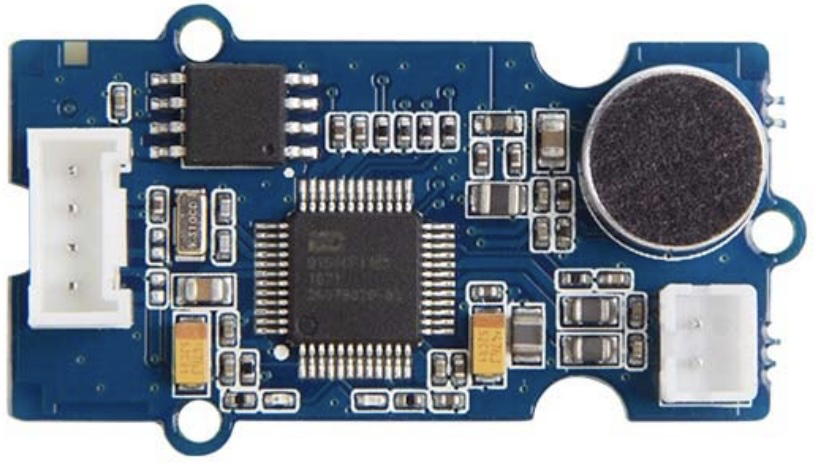
The Grove Speech Recognizer, manufactured by Seeed Technology Co., Ltd, is a versatile module designed to enable voice command recognition. This component allows users to control devices through spoken words, making it ideal for applications in home automation, robotics, and interactive projects. The module is easy to integrate with microcontrollers such as the Arduino UNO, providing a seamless way to add voice control to your projects.
Explore Projects Built with Grove Speech Recognizer
Arduino UNO Based Voice-Controlled Bluetooth Interface with OLED Display
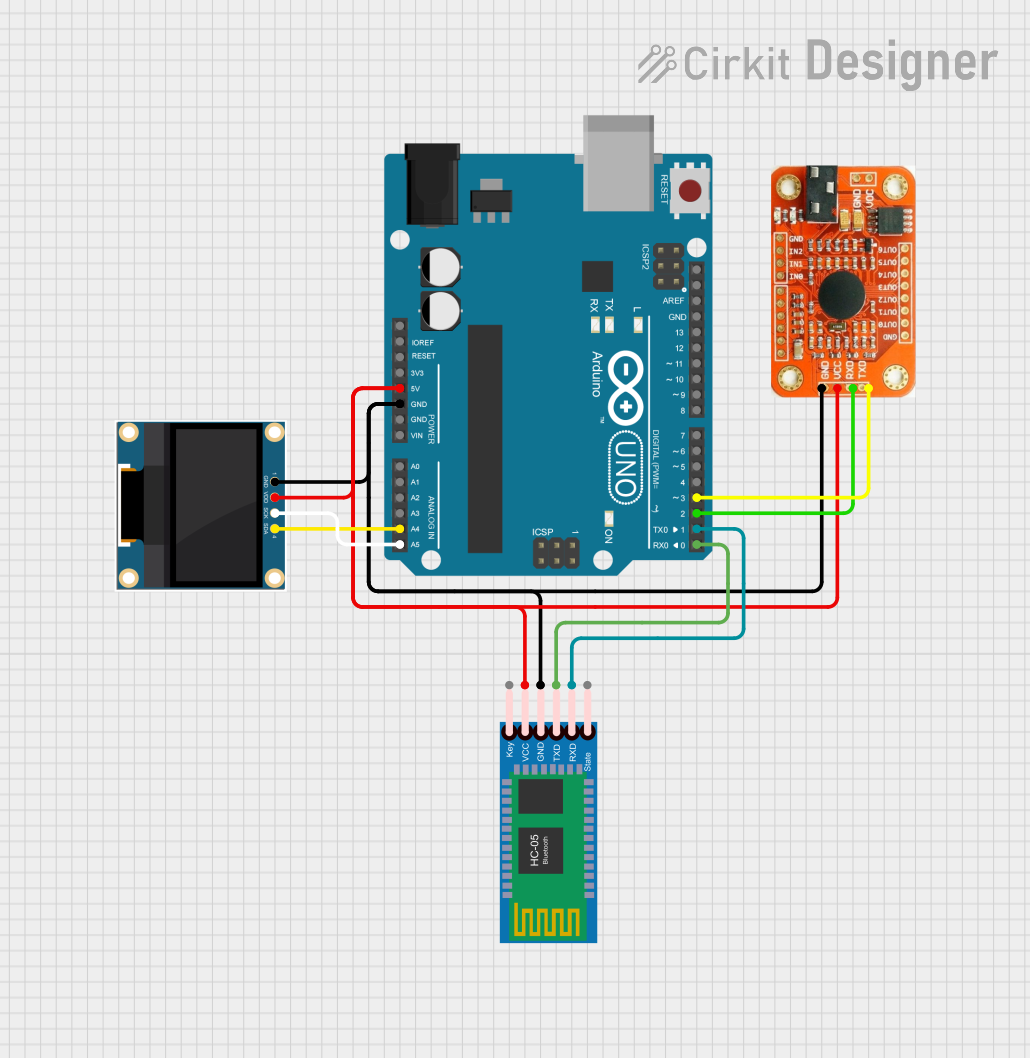
This circuit features an Arduino UNO microcontroller interfaced with a voice recognition module for audio input commands, an HC-05 Bluetooth module for wireless communication, and a 0.96" OLED display for visual output. The Arduino is programmed to handle inputs and outputs, with the voice recognition module connected to digital pins for serial communication, and the OLED display connected via I2C to the analog pins A4 (SDA) and A5 (SCL). The Bluetooth module is also connected to the Arduino's serial pins for remote data exchange.
Arduino UNO Voice Recognition Interface

This circuit connects an Arduino UNO to a voice recognition module. The Arduino provides power to the module via the 5V and GND pins and communicates with it using digital pins D2 and D3 for serial data transmission. The purpose of this circuit is to enable voice recognition capabilities, which can be programmed and utilized through the Arduino's microcontroller.
Arduino UNO Voice Assistant with KY-037 Microphone and Speaker
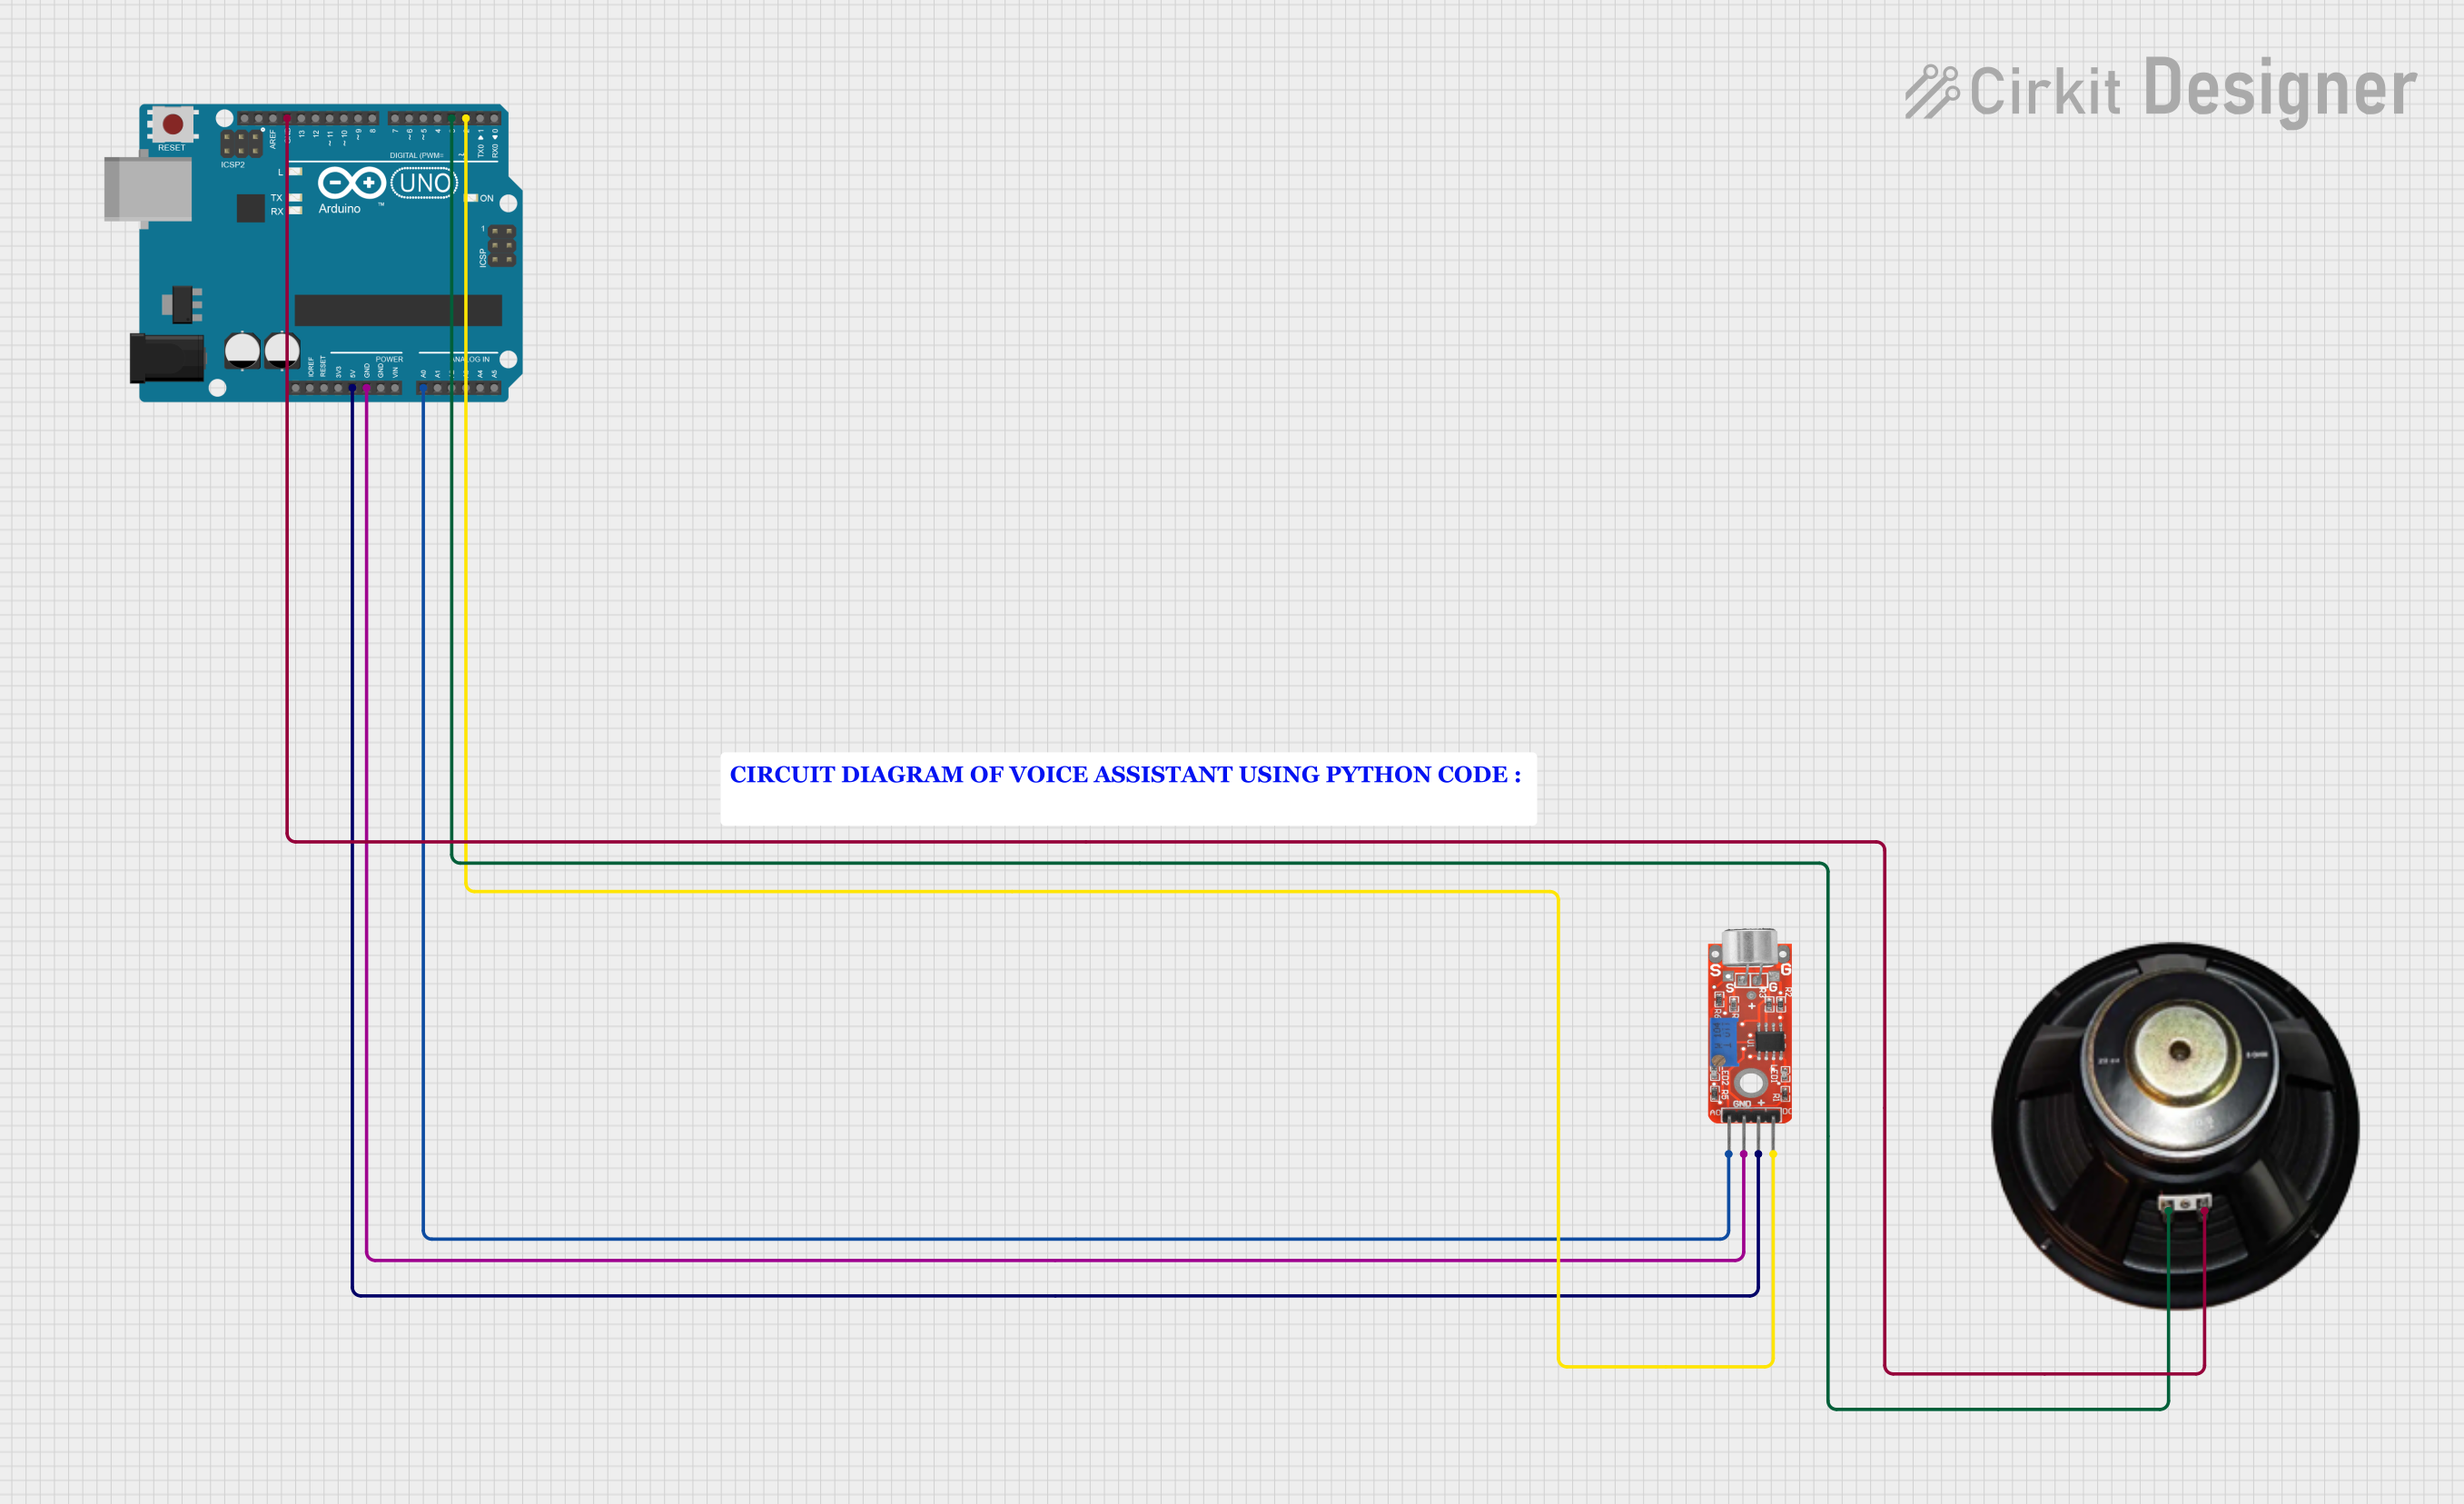
This circuit is a voice assistant project that uses an Arduino UNO to interface with a KY-037 microphone and a speaker. The microphone detects voice commands, which are processed by the Arduino, and the speaker provides audio feedback based on the detected commands.
Arduino UNO and DFPlayer Mini-Based Smart Glove with LCD Display and Flex Sensors
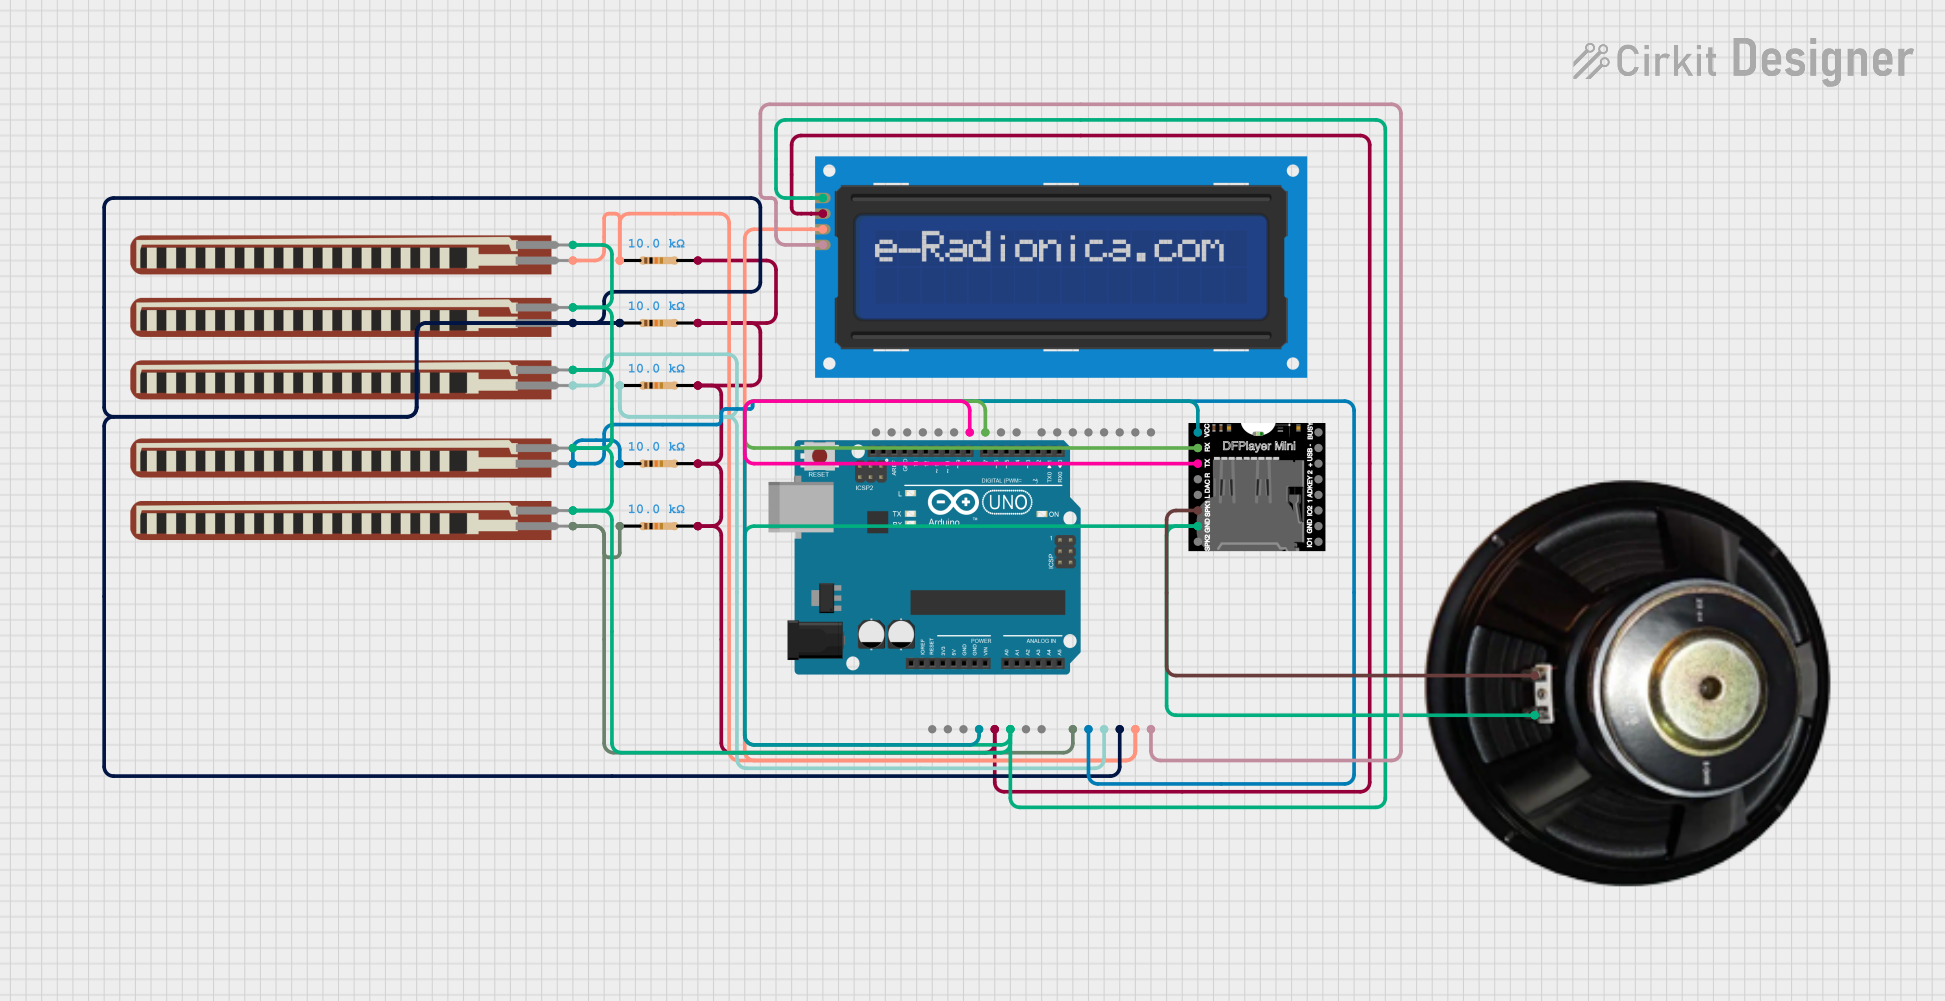
This circuit is a smart glove system that uses flex sensors to detect finger movements and trigger corresponding audio messages via a DFPlayer Mini module. An Arduino UNO reads the sensor values, displays messages on an LCD screen, and plays audio tracks through a connected speaker based on the detected gestures.
Explore Projects Built with Grove Speech Recognizer
Arduino UNO Based Voice-Controlled Bluetooth Interface with OLED Display
This circuit features an Arduino UNO microcontroller interfaced with a voice recognition module for audio input commands, an HC-05 Bluetooth module for wireless communication, and a 0.96" OLED display for visual output. The Arduino is programmed to handle inputs and outputs, with the voice recognition module connected to digital pins for serial communication, and the OLED display connected via I2C to the analog pins A4 (SDA) and A5 (SCL). The Bluetooth module is also connected to the Arduino's serial pins for remote data exchange.
Arduino UNO Voice Recognition Interface
This circuit connects an Arduino UNO to a voice recognition module. The Arduino provides power to the module via the 5V and GND pins and communicates with it using digital pins D2 and D3 for serial data transmission. The purpose of this circuit is to enable voice recognition capabilities, which can be programmed and utilized through the Arduino's microcontroller.
Arduino UNO Voice Assistant with KY-037 Microphone and Speaker
This circuit is a voice assistant project that uses an Arduino UNO to interface with a KY-037 microphone and a speaker. The microphone detects voice commands, which are processed by the Arduino, and the speaker provides audio feedback based on the detected commands.
Arduino UNO and DFPlayer Mini-Based Smart Glove with LCD Display and Flex Sensors
This circuit is a smart glove system that uses flex sensors to detect finger movements and trigger corresponding audio messages via a DFPlayer Mini module. An Arduino UNO reads the sensor values, displays messages on an LCD screen, and plays audio tracks through a connected speaker based on the detected gestures.
Technical Specifications
Key Technical Details
| Specification | Value |
|---|---|
| Manufacturer | Seeed Technology Co., Ltd |
| Part ID | 101020232/Speech Recognizer |
| Operating Voltage | 3.3V / 5V |
| Operating Current | < 40mA |
| Recognition Time | < 1 second |
| Recognition Distance | 1 meter |
| Recognition Angle | 30 degrees |
| Number of Commands | 22 pre-defined commands |
| Interface | UART |
Pin Configuration and Descriptions
| Pin Number | Pin Name | Description |
|---|---|---|
| 1 | VCC | Power supply (3.3V / 5V) |
| 2 | GND | Ground |
| 3 | RX | UART Receive (connect to TX of MCU) |
| 4 | TX | UART Transmit (connect to RX of MCU) |
Usage Instructions
How to Use the Component in a Circuit
- Power Supply: Connect the VCC pin to a 3.3V or 5V power supply and the GND pin to the ground.
- UART Connection: Connect the RX pin of the module to the TX pin of the microcontroller and the TX pin of the module to the RX pin of the microcontroller.
- Initialization: Initialize the UART communication in your microcontroller code to communicate with the module.
- Command Recognition: Use the pre-defined commands to control your devices. The module can recognize up to 22 different commands.
Important Considerations and Best Practices
- Power Supply: Ensure that the power supply is stable and within the specified range (3.3V to 5V).
- Distance and Angle: For optimal performance, maintain a recognition distance of around 1 meter and a recognition angle of 30 degrees.
- Noise Environment: Use the module in a relatively quiet environment to avoid false recognitions.
- Command Training: The module comes with pre-defined commands. Custom commands are not supported.
Example Code for Arduino UNO
#include <SoftwareSerial.h>

// Define the pins for the SoftwareSerial
SoftwareSerial mySerial(10, 11); // RX, TX

void setup() {
  // Start the hardware serial communication
  Serial.begin(9600);
  // Start the software serial communication
  mySerial.begin(9600);
  Serial.println("Grove Speech Recognizer Test");
}

void loop() {
  // Check if data is available from the speech recognizer
  if (mySerial.available()) {
    // Read the data from the speech recognizer
    int command = mySerial.read();
    // Print the received command to the serial monitor
    Serial.print("Command Received: ");
    Serial.println(command);

    // Perform actions based on the received command
    switch (command) {
      case 0x11:
        Serial.println("Turn on the light");
        // Add code to turn on the light
        break;
      case 0x12:
        Serial.println("Turn off the light");
        // Add code to turn off the light
        break;
      // Add more cases for other commands
      default:
        Serial.println("Unknown command");
        break;
    }
  }
}
Troubleshooting and FAQs
Common Issues Users Might Face
No Response from the Module:
- Solution: Check the power connections and ensure the module is properly powered. Verify the UART connections (RX and TX) between the module and the microcontroller.
Incorrect Command Recognition:
- Solution: Ensure you are speaking clearly and within the optimal distance and angle. Reduce background noise and try again.
Module Not Recognizing Commands:
- Solution: Verify that the module is initialized correctly in the code. Check the baud rate settings and ensure they match between the module and the microcontroller.
Solutions and Tips for Troubleshooting
- Check Connections: Ensure all connections are secure and correct.
- Verify Power Supply: Use a stable power supply within the specified voltage range.
- Use Serial Monitor: Utilize the serial monitor to debug and check the data received from the module.
- Consult Documentation: Refer to the manufacturer's datasheet and user manual for detailed information and troubleshooting tips.
By following this documentation, users can effectively integrate and utilize the Grove Speech Recognizer in their projects, enabling voice command control with ease.