How to Use 2.8 Inch Capacitive Touch LCD Display: Examples, Pinouts, and Specs
Introduction
The 2.8 Inch Capacitive Touch LCD Display (Manufacturer Part ID: W27579) by Waveshare is a high-quality display module designed for embedded systems and portable devices. It features capacitive touch technology, enabling smooth and responsive touch input. With its compact size and high-resolution visuals, this display is ideal for applications requiring an intuitive user interface, such as handheld devices, IoT projects, and industrial control systems.
Explore Projects Built with 2.8 Inch Capacitive Touch LCD Display

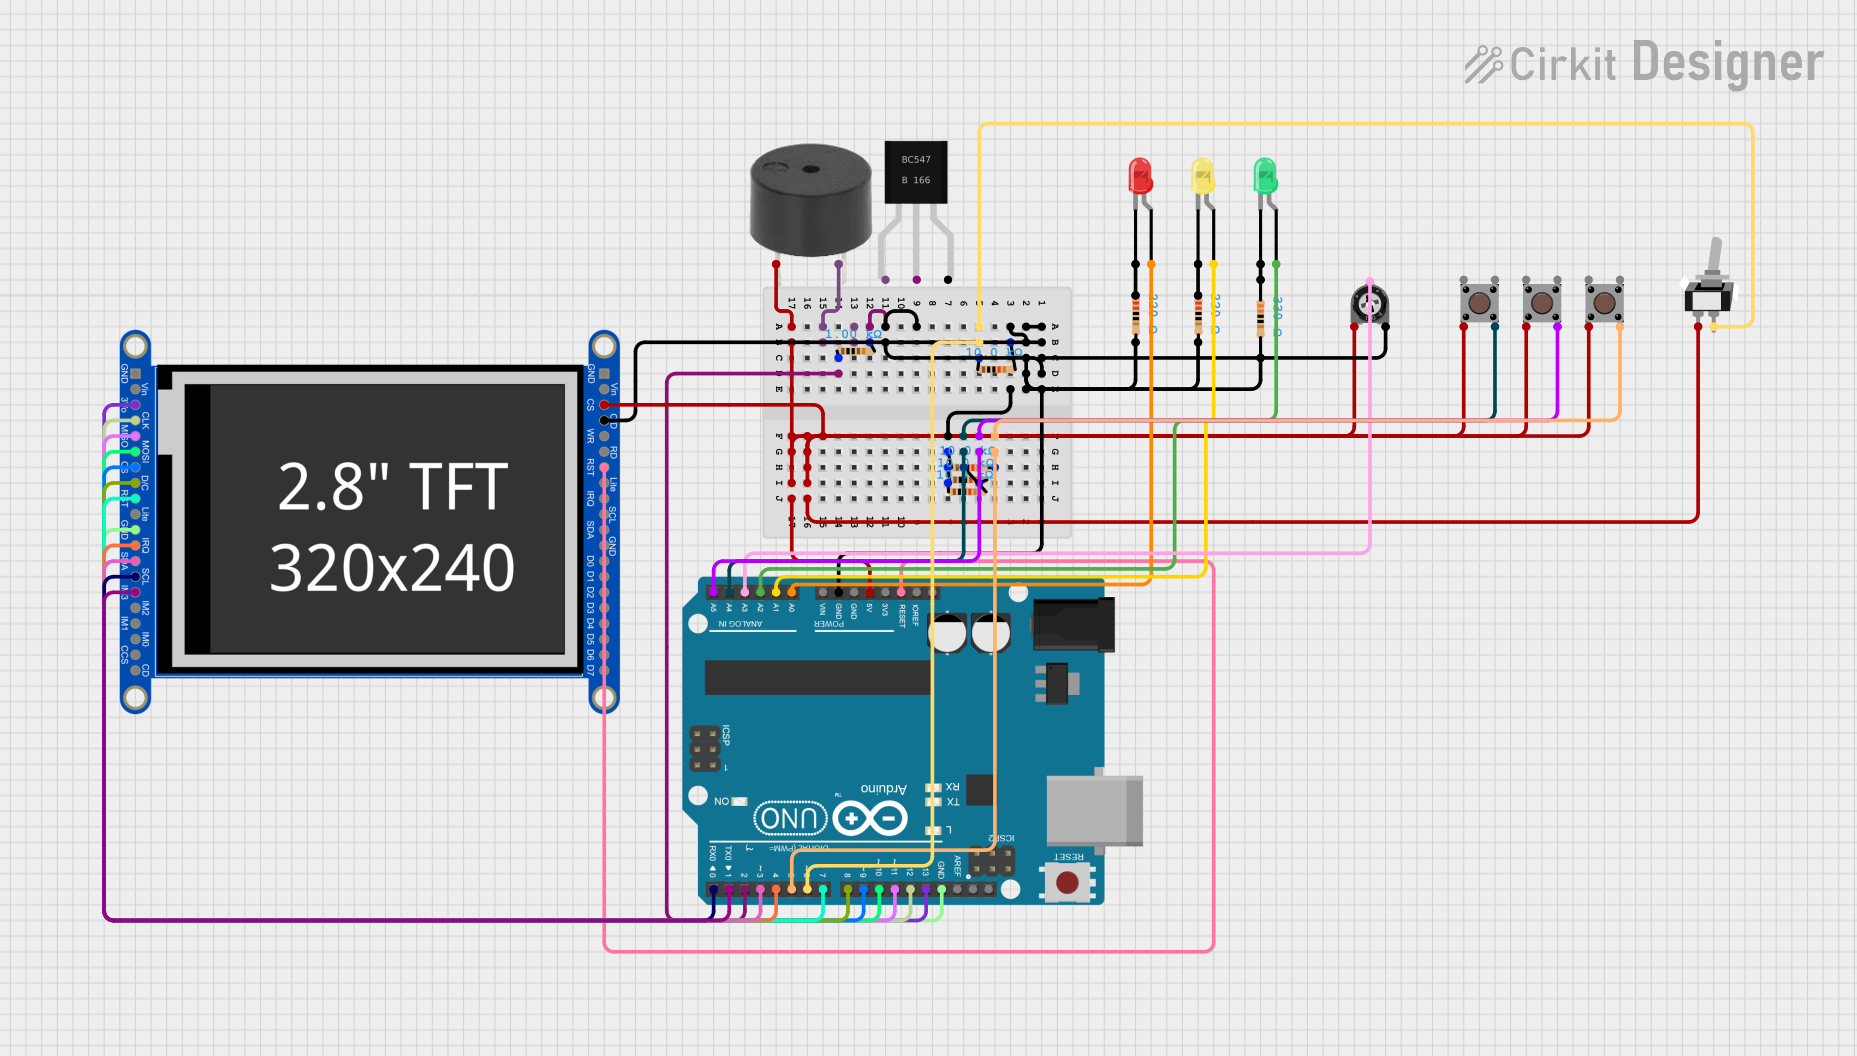
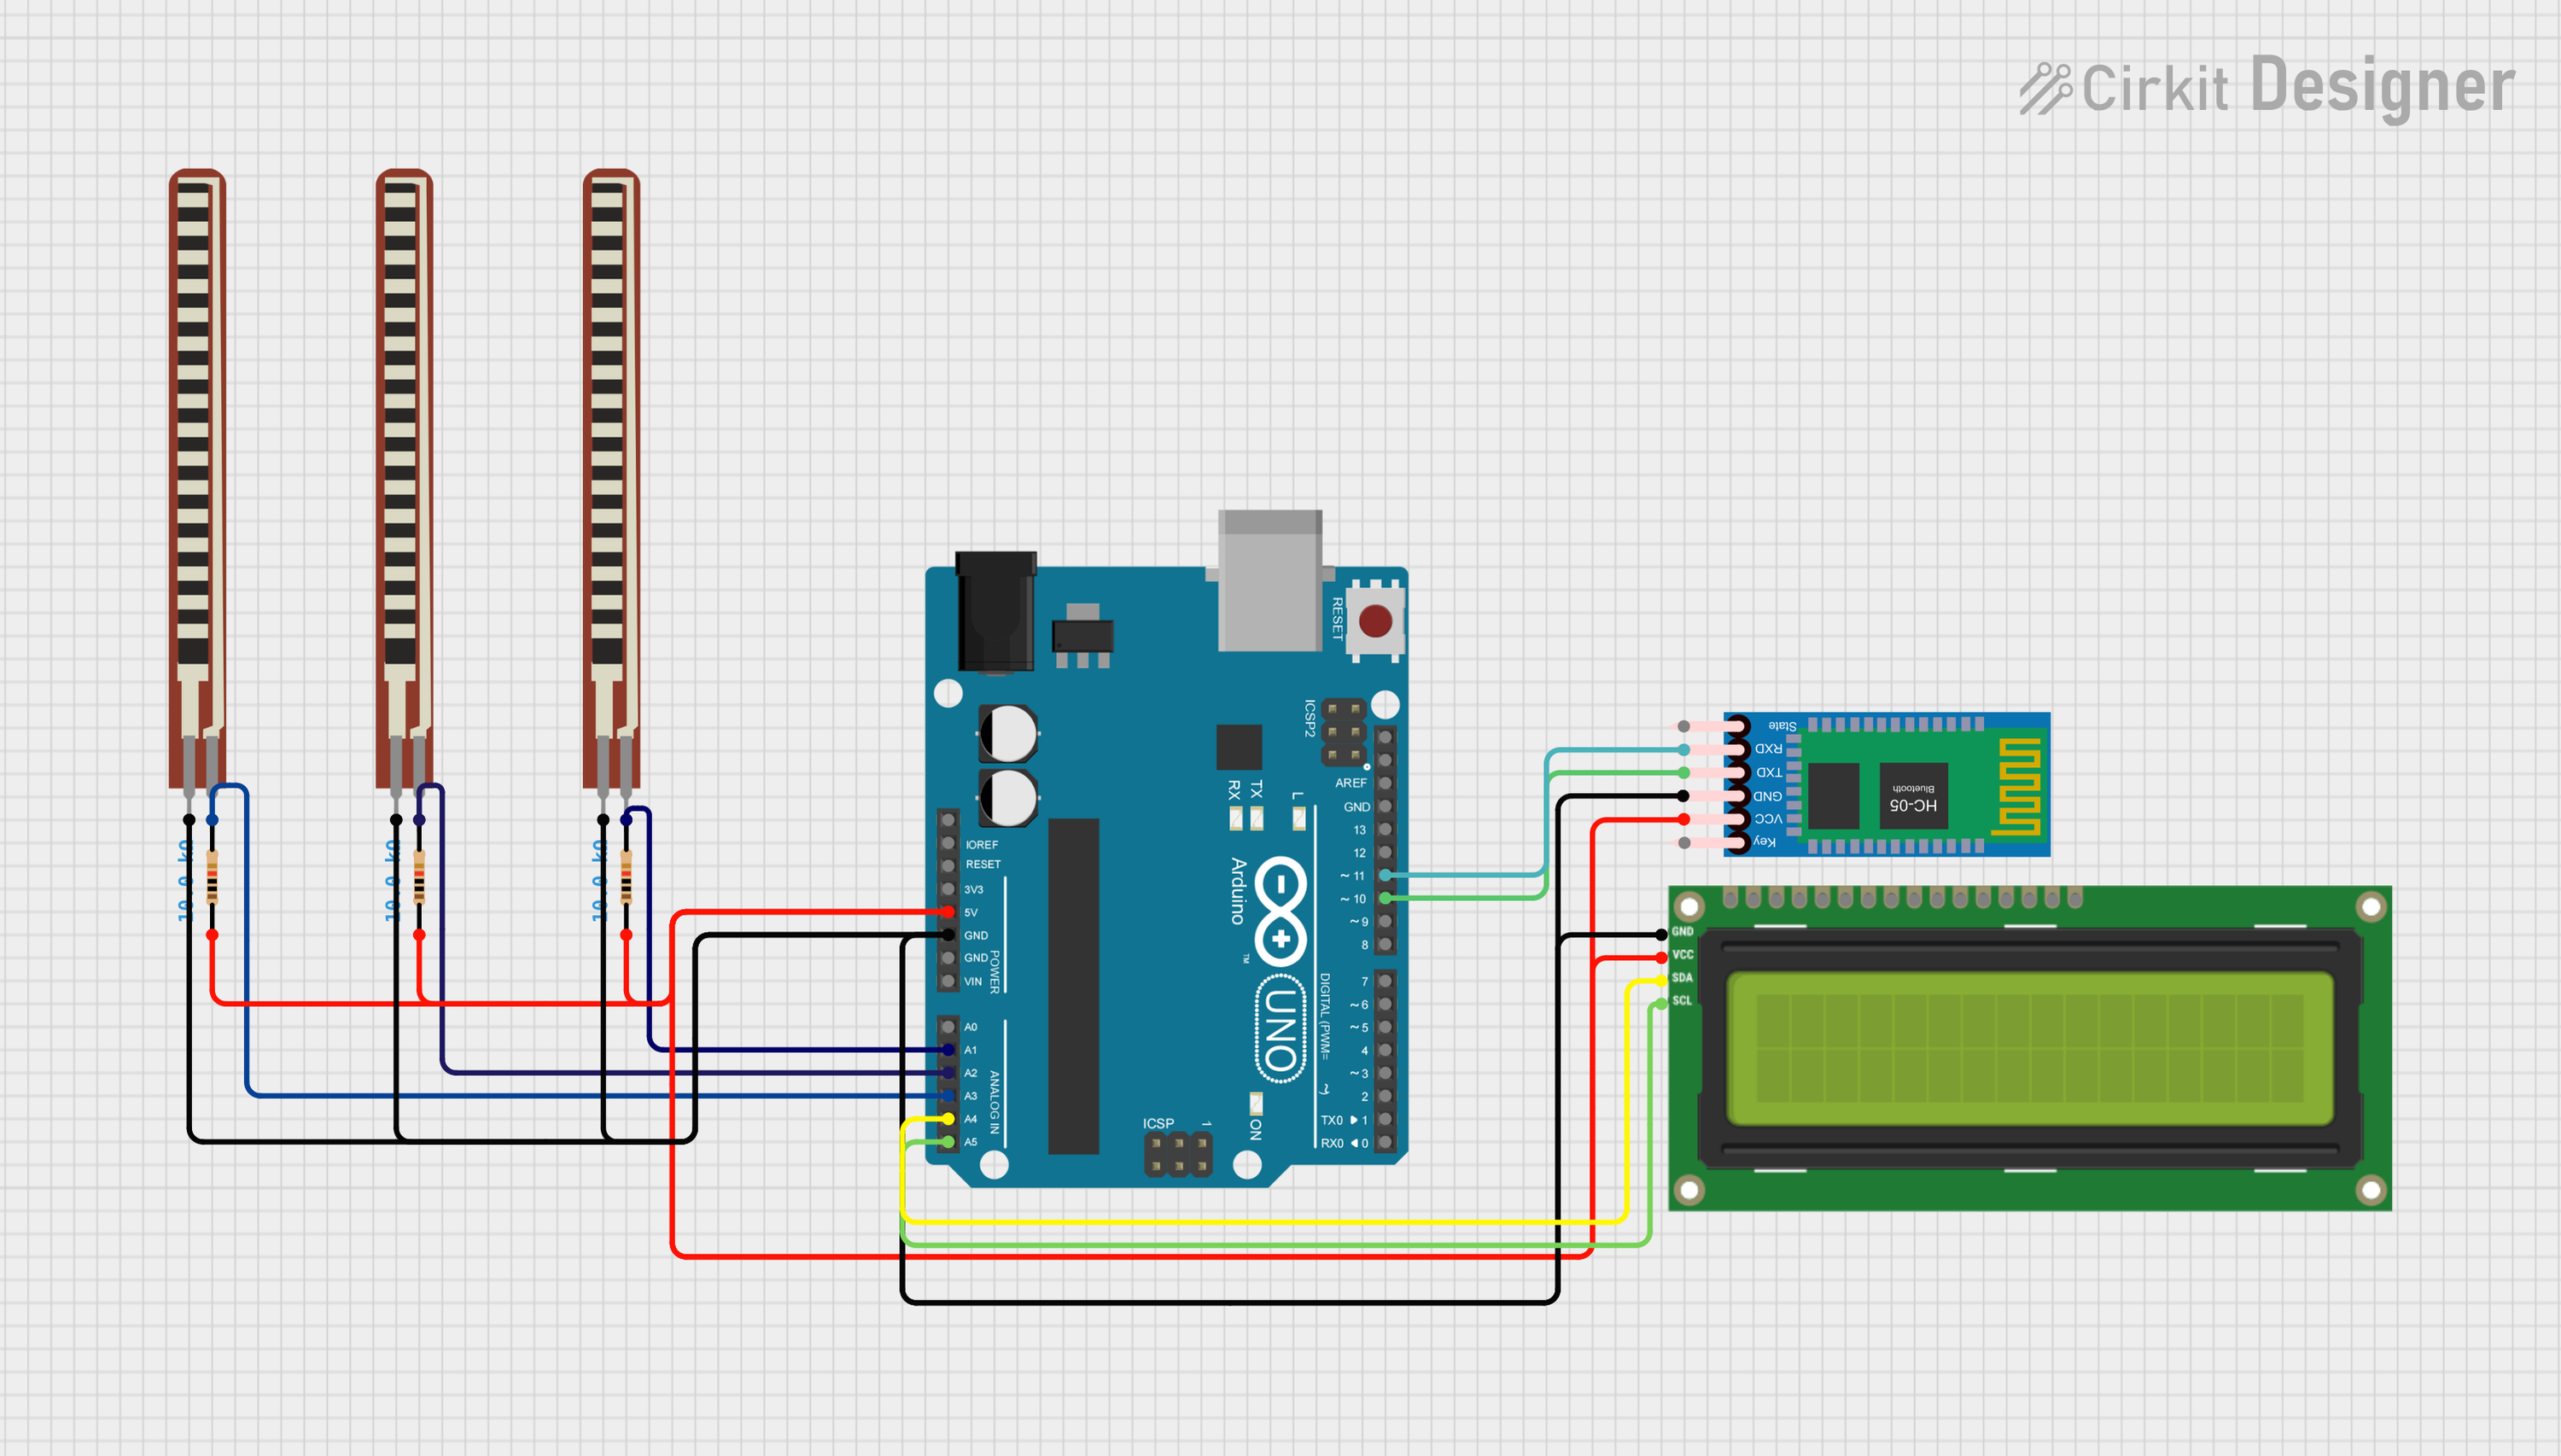

Explore Projects Built with 2.8 Inch Capacitive Touch LCD Display
Common Applications
- Portable devices with graphical user interfaces
- IoT dashboards and control panels
- Embedded systems requiring touch input
- Educational and prototyping projects
- Industrial automation and monitoring systems
Technical Specifications
Below are the key technical details of the 2.8 Inch Capacitive Touch LCD Display:
| Specification | Details |
|---|---|
| Display Type | Capacitive Touch LCD |
| Screen Size | 2.8 inches |
| Resolution | 320 x 240 pixels (QVGA) |
| Touch Technology | Capacitive |
| Interface | SPI |
| Operating Voltage | 3.3V / 5V |
| Backlight | LED |
| Dimensions | 85.5mm x 55.8mm |
| Touch Controller | XPT2046 |
| Display Controller | ILI9341 |
| Operating Temperature | -20°C to 70°C |
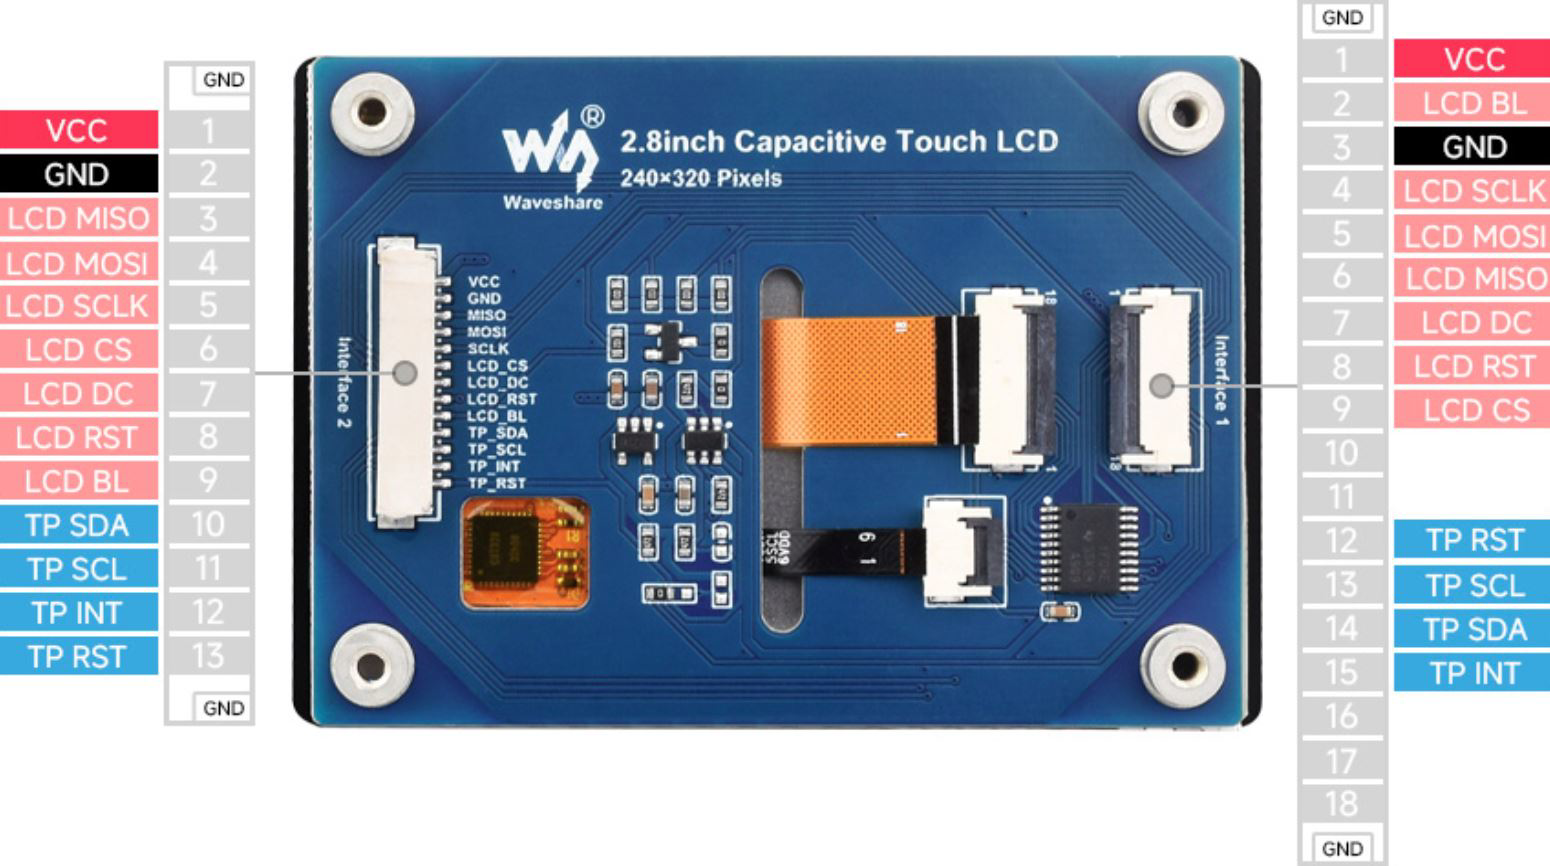
Pin Configuration
The display module has a standard pin header for interfacing. Below is the pin configuration:
| Pin | Name | Description |
|---|---|---|
| 1 | GND | Ground |
| 2 | VCC | Power supply (3.3V or 5V) |
| 3 | SCL | SPI Clock |
| 4 | SDA | SPI Data |
| 5 | CS | Chip Select for the display |
| 6 | DC | Data/Command control |
| 7 | RST | Reset signal |
| 8 | T_IRQ | Touch interrupt signal |
Usage Instructions
Connecting the Display to an Arduino UNO
To use the 2.8 Inch Capacitive Touch LCD Display with an Arduino UNO, follow these steps:
Wiring: Connect the display module to the Arduino UNO as shown below:
- GND → GND
- VCC → 5V
- SCL → Pin 13
- SDA → Pin 11
- CS → Pin 10
- DC → Pin 9
- RST → Pin 8
- T_IRQ → Pin 2 (optional, for touch interrupt)
Install Libraries: Download and install the following libraries in the Arduino IDE:
Adafruit_GFX(for graphics rendering)Adafruit_ILI9341(for the ILI9341 display controller)Adafruit_STMPE610(for touch functionality, if required)
Upload Example Code: Use the following example code to test the display and touch functionality:
#include <Adafruit_GFX.h>       // Graphics library
#include <Adafruit_ILI9341.h>   // Display driver library
#include <Adafruit_STMPE610.h>  // Touch controller library

// Pin definitions for the display
#define TFT_CS 10   // Chip Select
#define TFT_DC 9    // Data/Command
#define TFT_RST 8   // Reset

// Pin definition for touch interrupt (optional)
#define TOUCH_IRQ 2

// Initialize display and touch objects
Adafruit_ILI9341 tft = Adafruit_ILI9341(TFT_CS, TFT_DC, TFT_RST);
Adafruit_STMPE610 touch = Adafruit_STMPE610();

void setup() {
  Serial.begin(9600);

  // Initialize the display
  tft.begin();
  tft.setRotation(1); // Set orientation (1 = landscape)
  tft.fillScreen(ILI9341_BLACK); // Clear screen with black color

  // Display a test message
  tft.setTextColor(ILI9341_WHITE);
  tft.setTextSize(2);
  tft.setCursor(10, 10);
  tft.println("Hello, World!");

  // Initialize the touch controller
  if (!touch.begin()) {
    Serial.println("Touch controller not found!");
    while (1);
  }
  Serial.println("Touch controller initialized.");
}

void loop() {
  // Check for touch input
  if (touch.touched()) {
    TS_Point p = touch.getPoint(); // Get touch coordinates

    // Map touch coordinates to screen dimensions
    int x = map(p.x, 0, 240, 0, tft.width());
    int y = map(p.y, 0, 320, 0, tft.height());

    // Draw a circle at the touch point
    tft.fillCircle(x, y, 5, ILI9341_RED);

    // Print touch coordinates to Serial Monitor
    Serial.print("Touch at: ");
    Serial.print(x);
    Serial.print(", ");
    Serial.println(y);
  }
}
Important Considerations
- Ensure the power supply voltage matches the display's requirements (3.3V or 5V).
- Use level shifters if interfacing with a 5V microcontroller to avoid damaging the display.
- Avoid touching the display with sharp objects to prevent damage to the capacitive touch layer.
- Use the appropriate libraries for the display and touch controller to ensure compatibility.
Troubleshooting and FAQs
Common Issues
The display does not turn on:
- Verify the power connections (VCC and GND).
- Ensure the SPI pins are correctly connected to the microcontroller.
Touch input is not responsive:
- Check the connection of the T_IRQ pin.
- Ensure the
Adafruit_STMPE610library is installed and initialized correctly.
Graphics appear distorted or inverted:
- Adjust the screen rotation using
tft.setRotation()in the code. - Verify the SPI communication speed and settings.
- Adjust the screen rotation using
The display flickers or resets frequently:
- Check the power supply for stability.
- Ensure the RST pin is properly connected.
Tips for Troubleshooting
- Use a multimeter to verify voltage levels at the display pins.
- Test the display with example sketches from the
Adafruit_ILI9341library to rule out software issues. - Double-check the wiring and pin assignments in the code.
By following this documentation, you can successfully integrate and use the 2.8 Inch Capacitive Touch LCD Display in your projects.