How to Use 3D DEPTH CAMERA: Examples, Pinouts, and Specs

Introduction
The Raspberry Pi 3D Depth Camera is an advanced imaging device capable of capturing depth information from its surroundings, allowing for the creation of three-dimensional models and images with depth perception. This technology is commonly used in robotics, augmented reality, gesture recognition, and environmental scanning.
Explore Projects Built with 3D DEPTH CAMERA
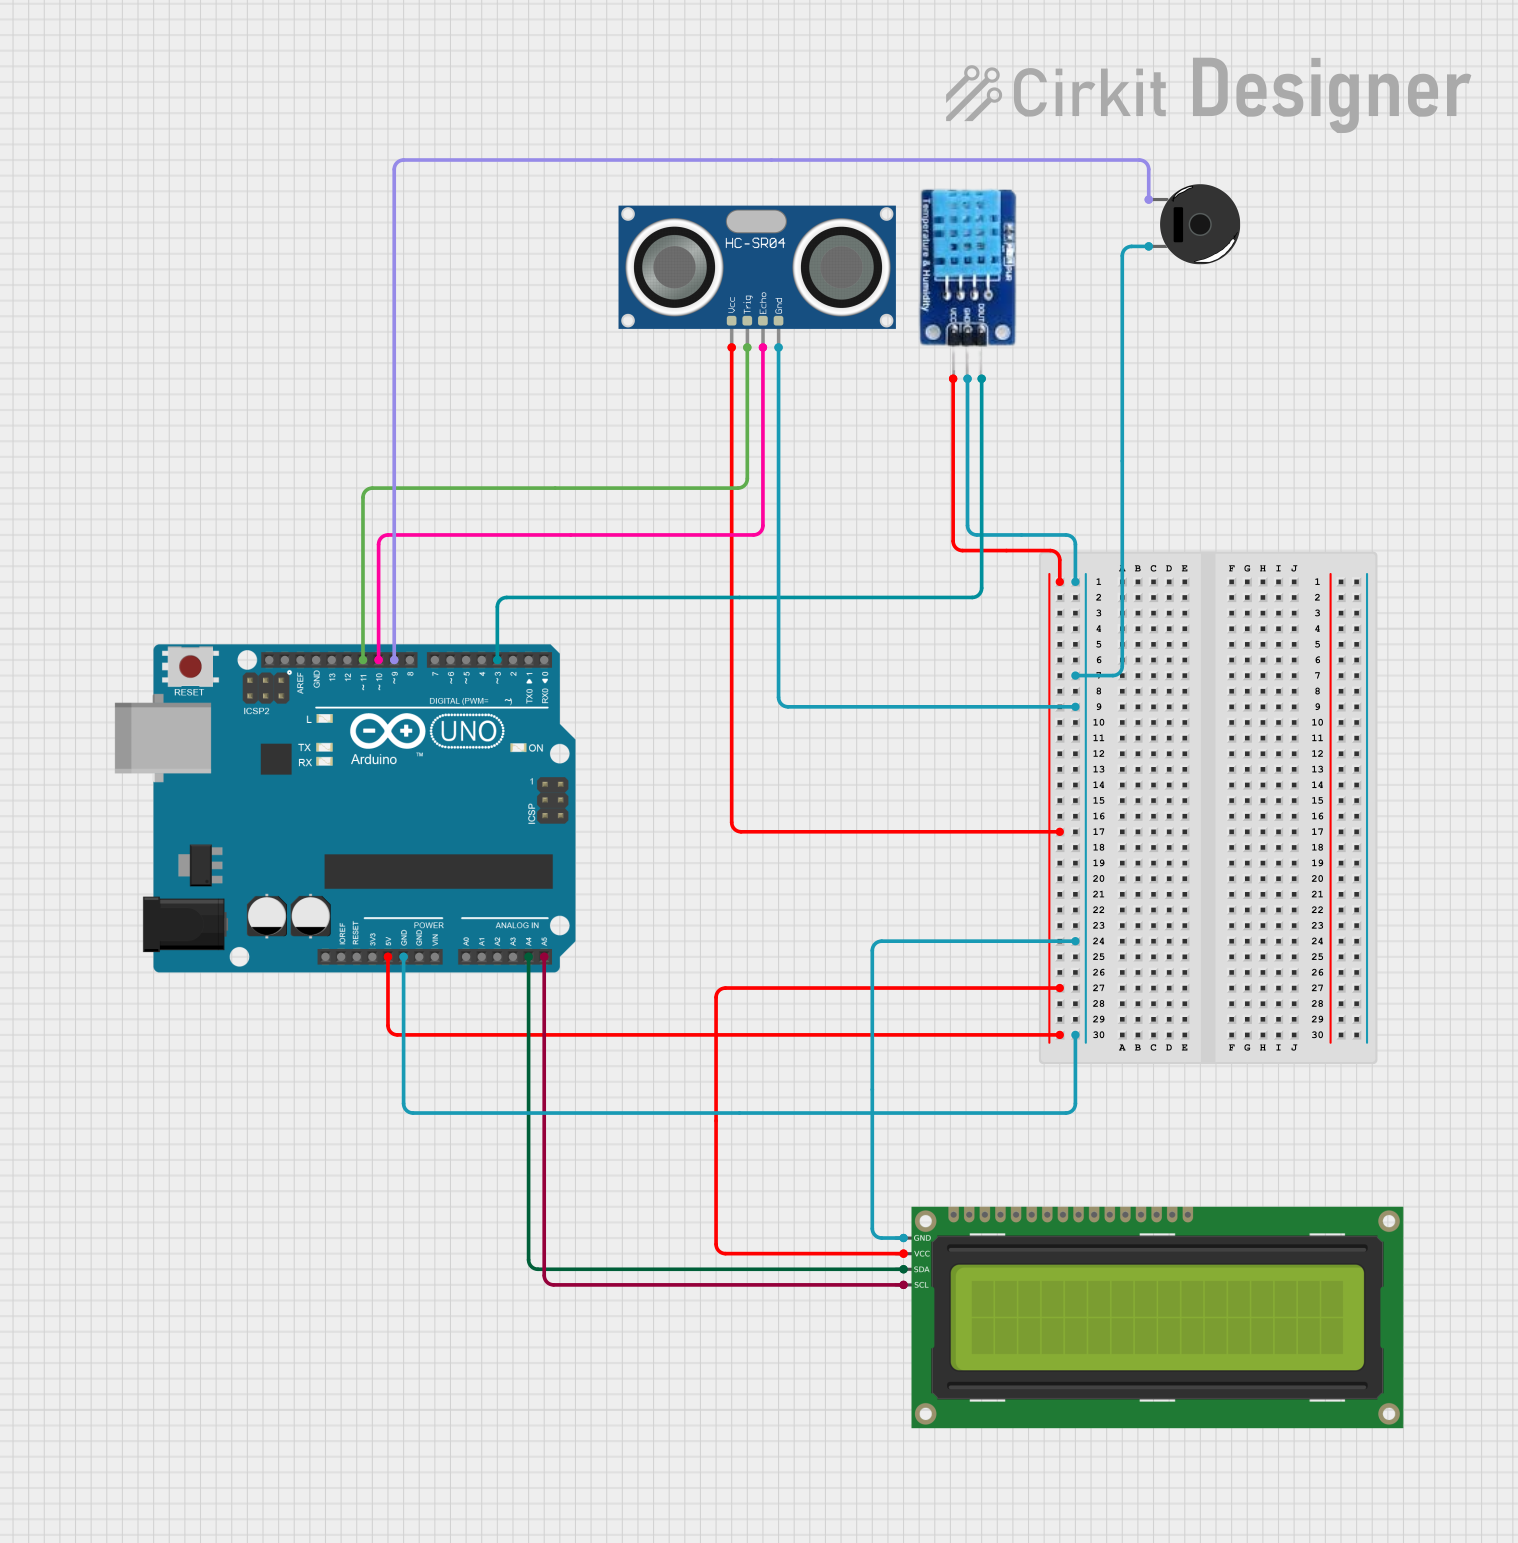

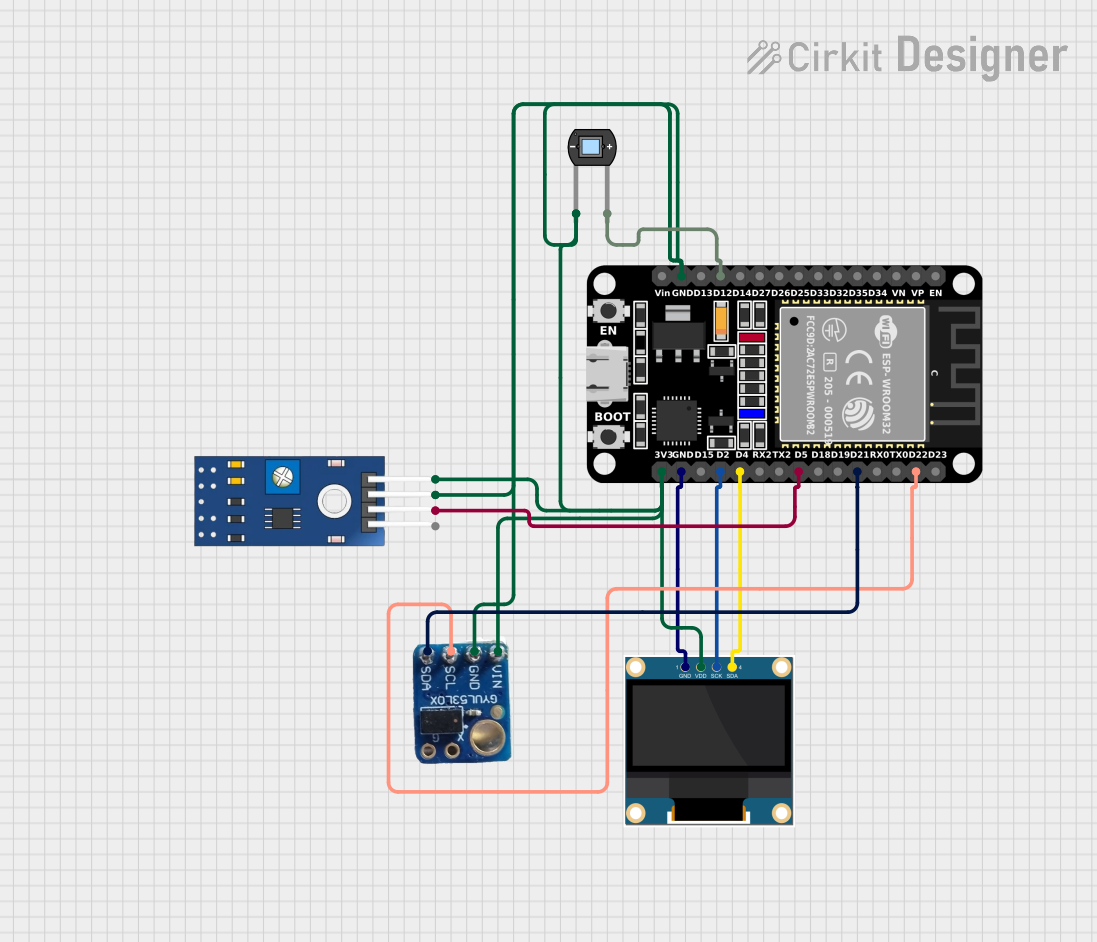

Explore Projects Built with 3D DEPTH CAMERA
Common Applications and Use Cases
- Robotics for object detection and avoidance
- Augmented and virtual reality for immersive experiences
- Gesture recognition for interactive systems
- 3D scanning for modeling and design
- Environmental mapping for navigation
Technical Specifications
Key Technical Details
- Resolution: Up to 1280x720
- Depth Range: 0.2m to several meters (depending on model)
- Field of View: Horizontal and vertical field of view varies by model
- Frame Rate: Up to 60 frames per second
- Interface: USB 3.0 / USB 2.0 compatible
- Operating Voltage: 5V DC from USB port
- Power Consumption: Typically under 2.5W
Pin Configuration and Descriptions
Since the Raspberry Pi 3D Depth Camera typically connects via USB, there is no traditional pin configuration as with simpler electronic components. However, it interfaces with the Raspberry Pi through the USB port, using the standard USB pinout.
Usage Instructions
Connecting to a Raspberry Pi
- Ensure your Raspberry Pi is powered off.
- Connect the 3D Depth Camera to an available USB port on the Raspberry Pi.
- Power on your Raspberry Pi.
Software Setup
- Install the necessary drivers and libraries for the 3D Depth Camera.
- Use provided or third-party software to interface with the camera.
Important Considerations and Best Practices
- Ensure proper lighting conditions for optimal depth sensing.
- Avoid direct sunlight on the camera sensors as it may interfere with depth perception.
- Keep the camera lens clean and unobstructed.
- Calibrate the camera as required for precise measurements.
Troubleshooting and FAQs
Common Issues
- Camera not detected: Ensure the camera is properly connected to the USB port and that the Raspberry Pi is powered on.
- Poor depth quality: Check for adequate lighting and avoid reflective surfaces in the camera's field of view.
- Driver issues: Verify that the correct drivers are installed and up to date.
Solutions and Tips for Troubleshooting
- Reboot the Raspberry Pi after installing new drivers or software.
- Test the camera with different USB ports if detection issues persist.
- Consult the manufacturer's documentation for calibration procedures.
FAQs
Q: Can the 3D Depth Camera work in complete darkness? A: Some models may have infrared capabilities, allowing for depth sensing in low or no light conditions.
Q: Is the camera compatible with all versions of the Raspberry Pi? A: The camera should be compatible with Raspberry Pi models that have USB ports, but performance may vary depending on the processing power of the Pi model.
Q: How can I process the depth data captured by the camera? A: Depth data can be processed using various software tools and libraries designed for 3D data analysis, such as PCL (Point Cloud Library) or Open3D.
Q: Can I use the 3D Depth Camera for facial recognition? A: Yes, the camera can be used for facial recognition applications, but additional software capable of processing depth data for facial recognition will be required.
Note: This documentation is a general guide and may not cover all aspects or models of the Raspberry Pi 3D Depth Camera. For model-specific information, refer to the manufacturer's official documentation.